How to set up an inbound route
What is an inbound route?
Inbound email routing accepts and parses the contents and attachments of any emails sent to a unique email address that is provided to you by MailerSend, or any incoming email for a connected domain or subdomain. It then sends the parsed results to your chosen application's URL.
How does it work?
Once an inbound route has been added to one of your verified domains, all emails sent to that domain will be logged in the Inbound activity section of your inbound route page. If configured to do so, the inbound email will be forwarded to a specified email address or posted to an endpoint URL.
You can choose the dedicated email address provided by MailerSend or your own subdomain email address to receive and process incoming emails.
When to use an inbound route
You can set up an inbound route to allow users to converse within your application or website.
For example: If your web app has a messaging feature where users can reply to comments or messages via email, you can set up an inbound route to post the reply to an endpoint of your web app.
How to set up an inbound route
You can set up multiple inbound routes per domain in your MailerSend account. To set up an inbound route:
1. Navigate to the Domains page.
2. Select the domain for which you want to add an inbound route by clicking on Manage.
3. Scroll down to the Inbound route section and click Add an inbound route.
4. In the Name field, add a name for your inbound route. This is simply for internal reference purposes.
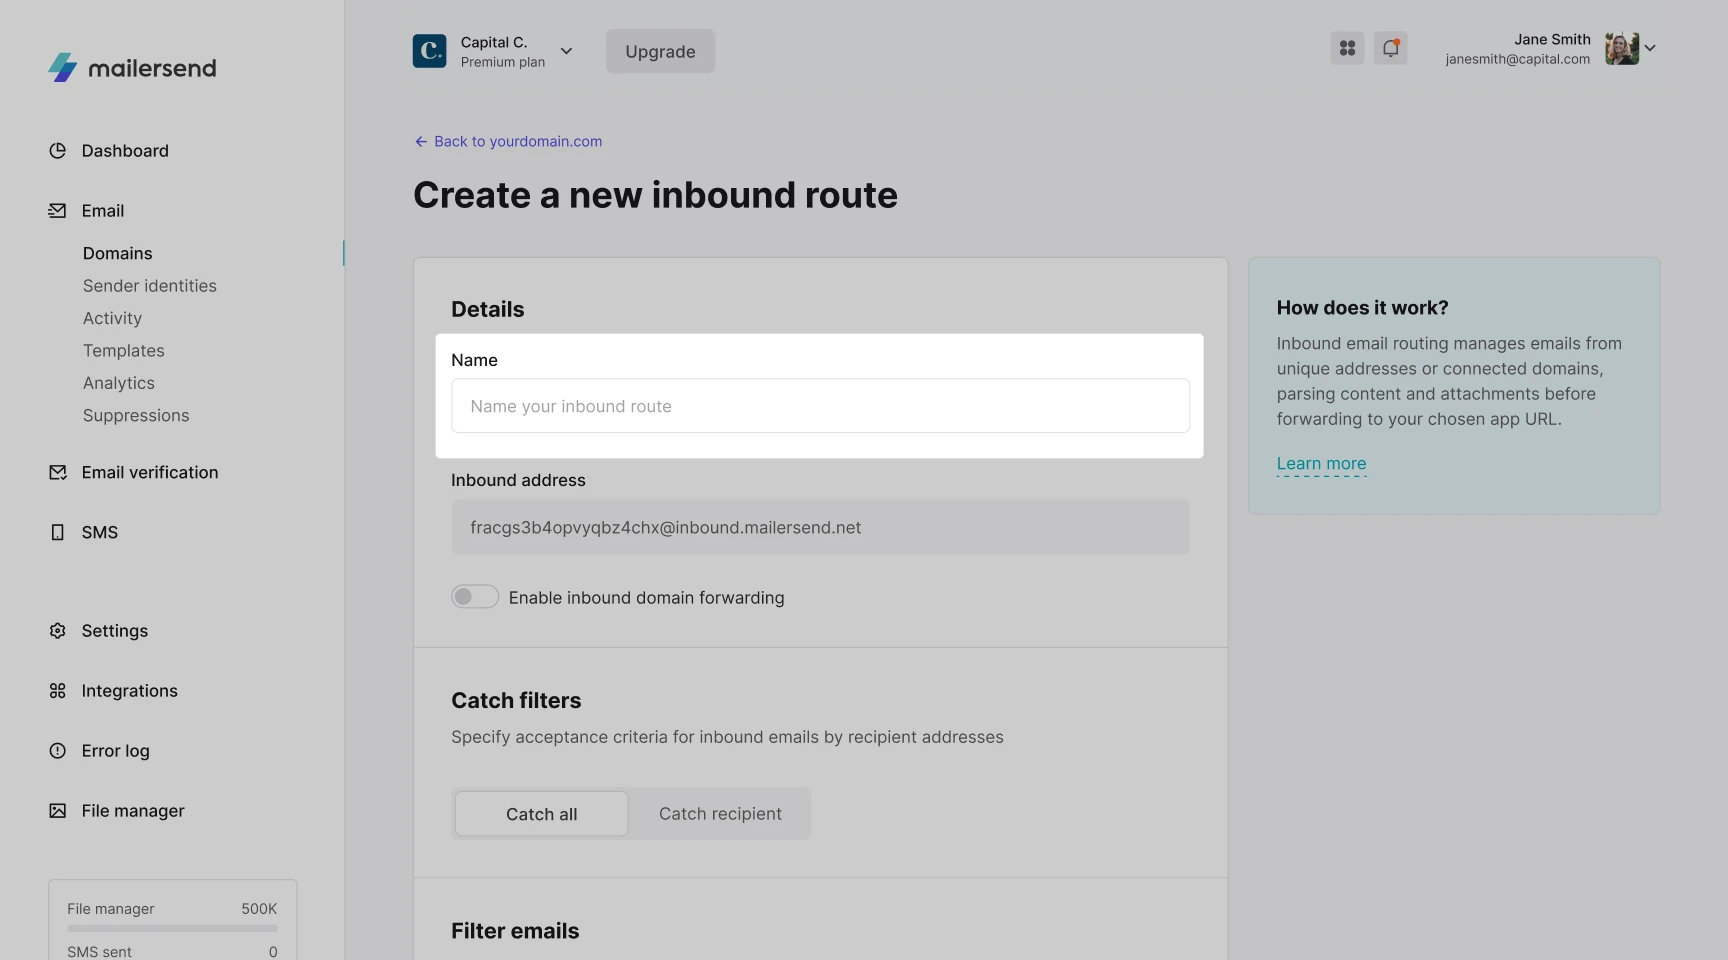
5. In the Inbound address field, you will find an inbound email address generated by MailerSend. You can use this default email address, or enter your own domain by enabling Inbound domain forwarding (optional).
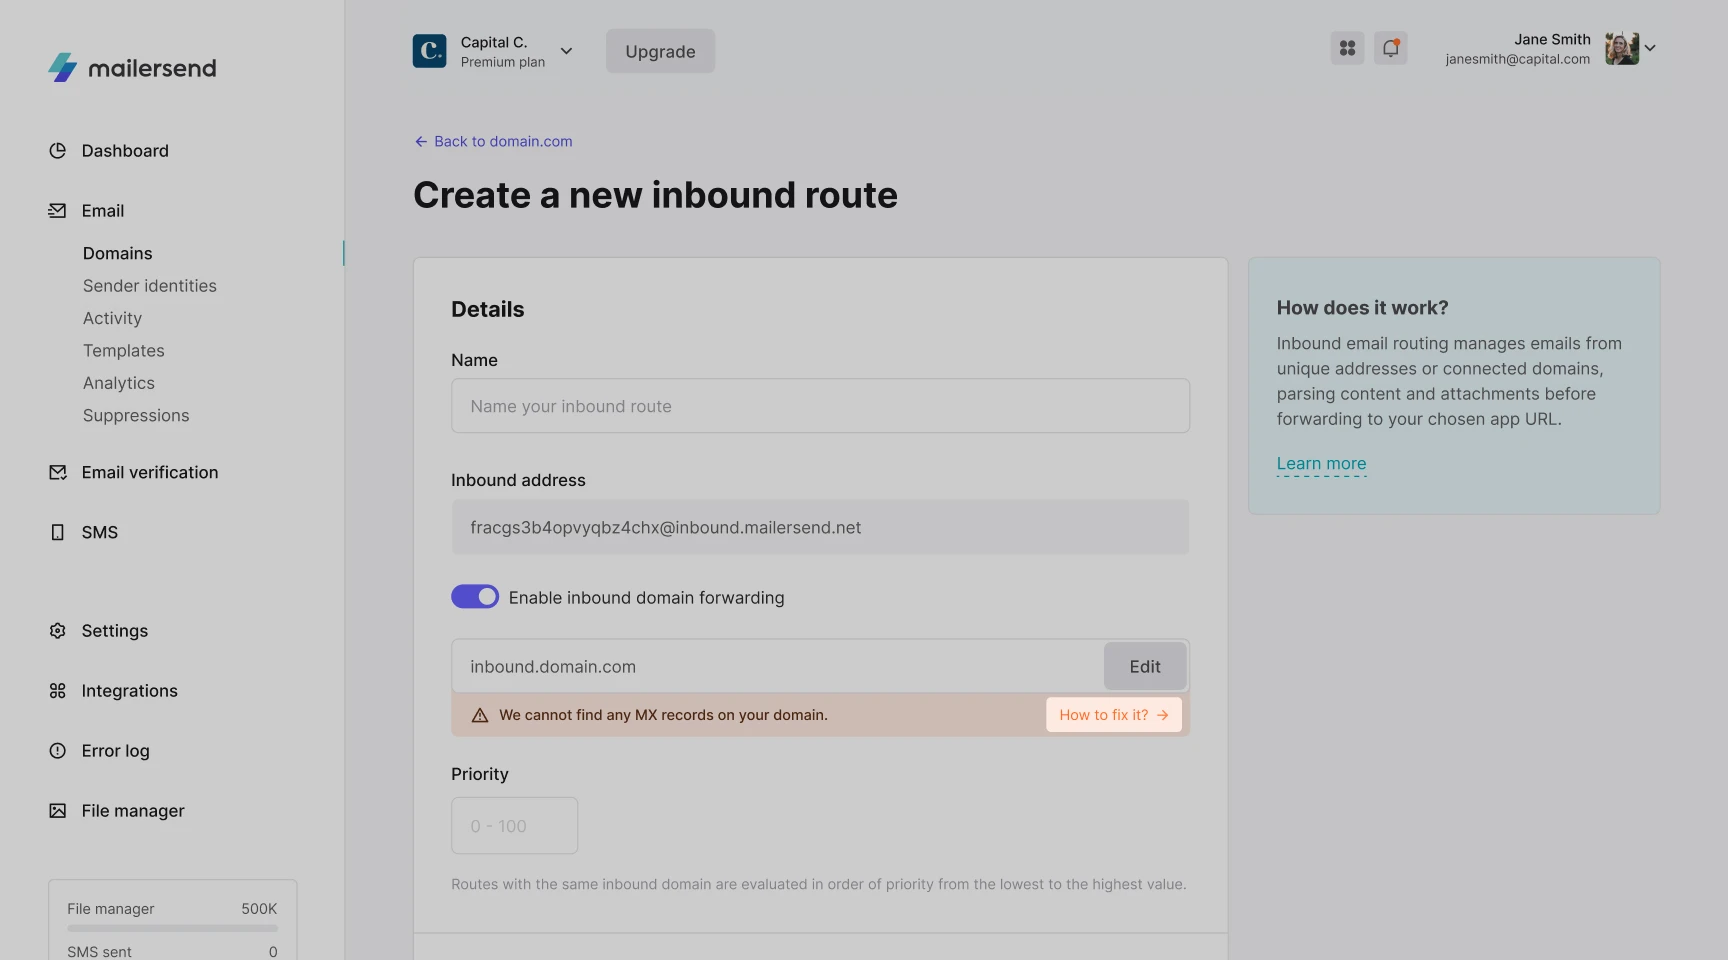
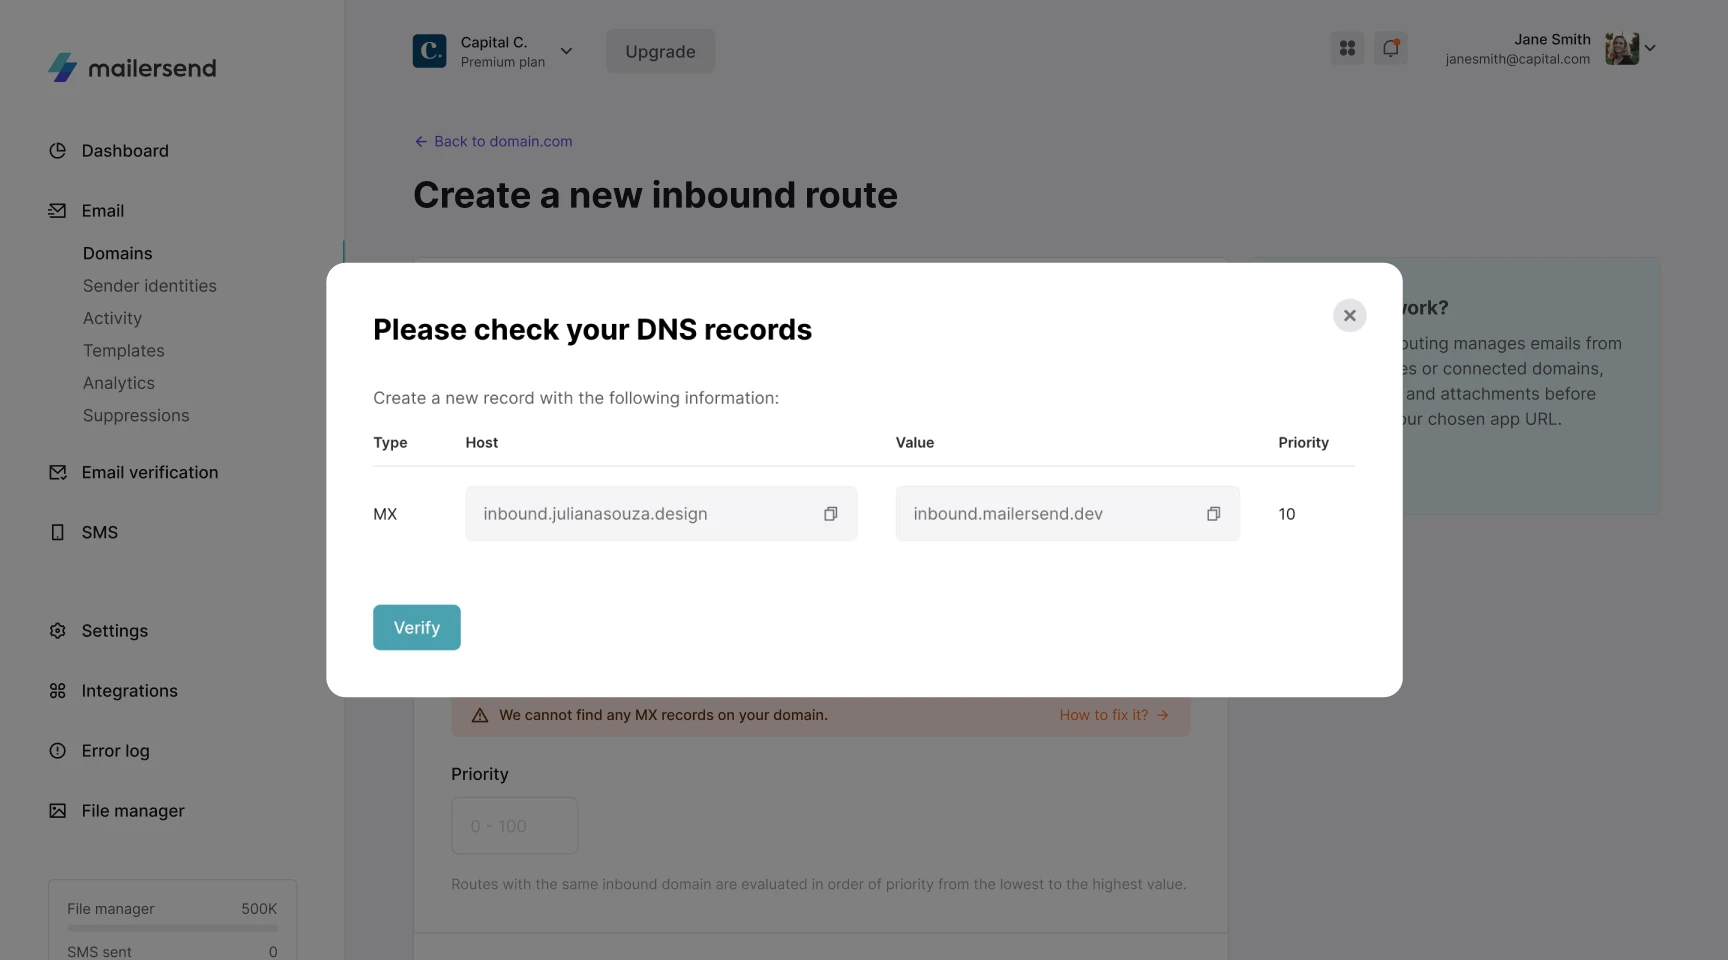
If you enable Inbound domain forwarding, you can edit your custom subdomain by clicking Edit. You will then need to add an MX record to your DNS management platform with the value matching your custom inbound address.
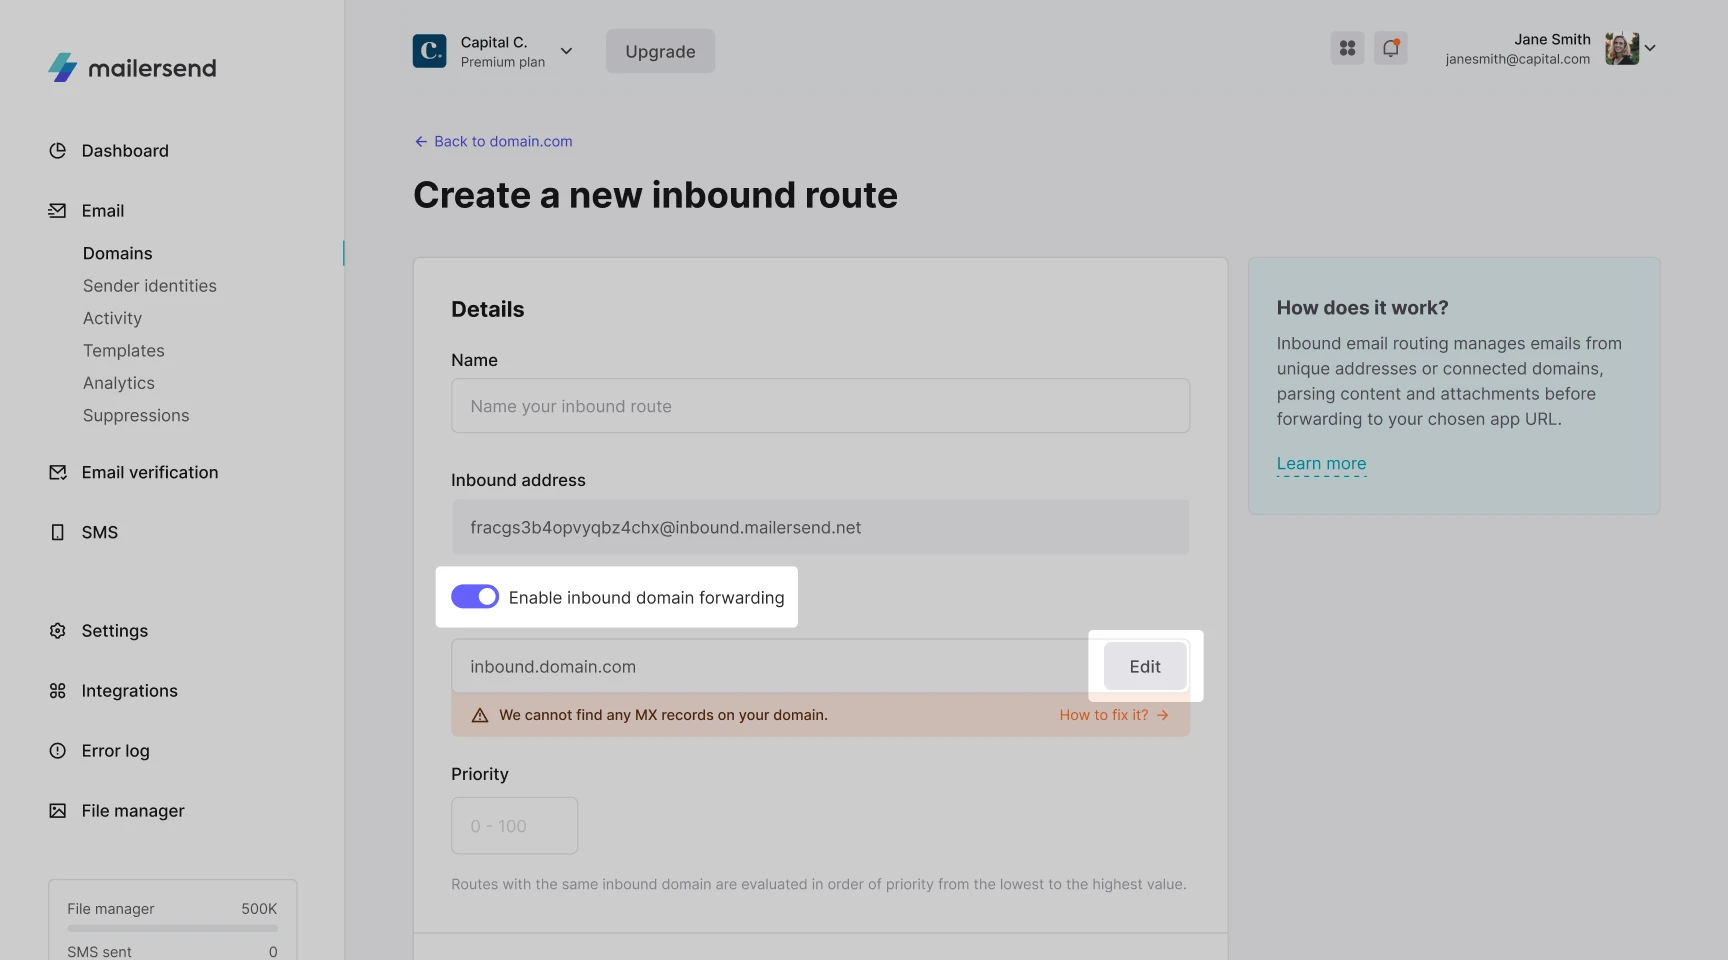
To find instructions for adding the MX record to your DNS zone, or check if your custom inbound address has been accepted, click "How to fix it?" followed by Verify.
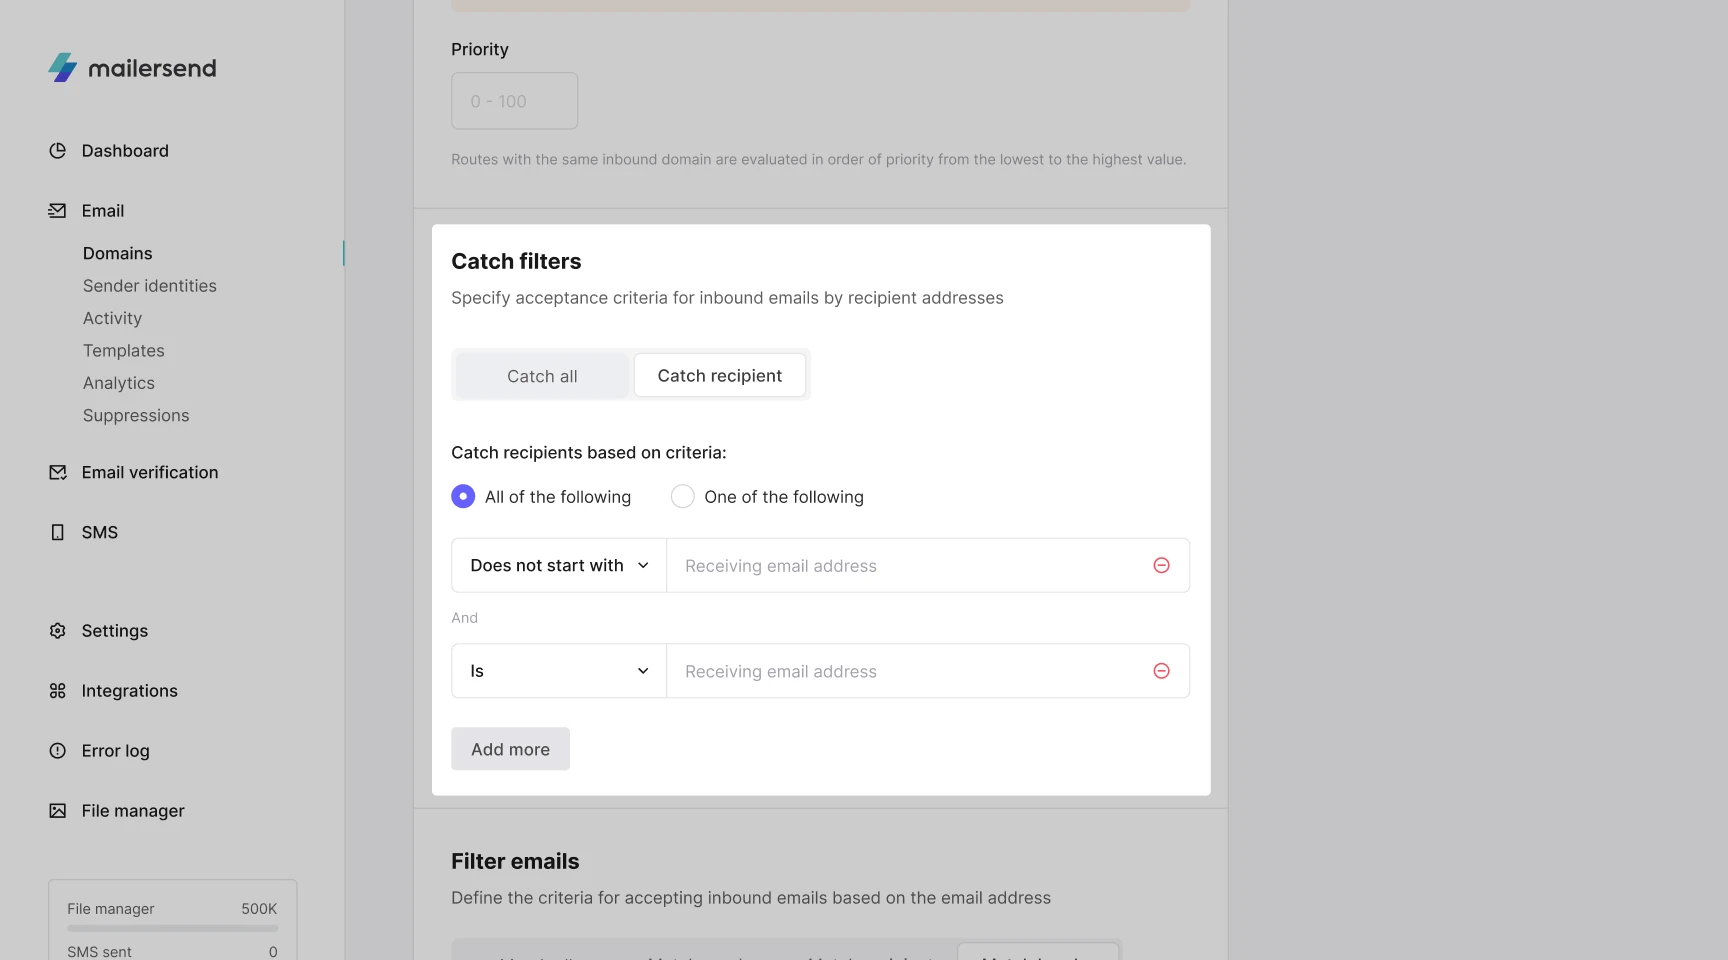
6. If you have Inbound domain forwarding enabled, you have the option to apply Catch filters to your inbound route.
These filters allow you to specify which inbound emails are accepted based on the email address recipients are sending to. You can choose from the following options:
Catch all - This option will not filter out any inbound emails sent to any email address on the account's inbound domain.
For example: If your inbound domain is inbound.yourdomain.com, all inbound emails sent to any address using the domain @inbound.yourdomain.com will be detected, logged in MailerSend, and forwarded to any endpoint URLs/specified email addresses.Catch recipient - This option allows you to exclusively capture replies sent to specific email addresses attached to the inbound domain.
For example: If you select Catch recipient and enter the email address hello@inbound.yourdomain.com using the Is filter, only emails sent to hello@inbound.yourdomain.com will be detected, logged in MailerSend and forwarded to any endpoint URLs/specified email addresses.
You can apply up to 5 email addresses/filters under Catch recipient.
7. Now it’s time to Filter emails. The Filter emails step allows you to specify which inbound emails are accepted based on the email address recipients are sending from. You can choose from the following options:
Match all - All emails sent to the inbound route email address will be logged in MailerSend and forwarded to any endpoint URLs/specified email addresses.
Match Sender - This filter can be used to catch replies only from specific sender email addresses. For example, if you only want to see responses from the sender john@mailersend.com, this could be configured here. You can apply up to 5 filters.
Match domain - This can be applied if you only want to catch inbound emails from email addresses on specific domains, for example, mailersend.com. This can also be achieved using the Contains filter under Match sender. You can apply up to 5 filters.
Match header - The Match header option can be used if you only want to catch inbound emails that match specific email headers, for example, subject line. You can apply up to 5 filters.
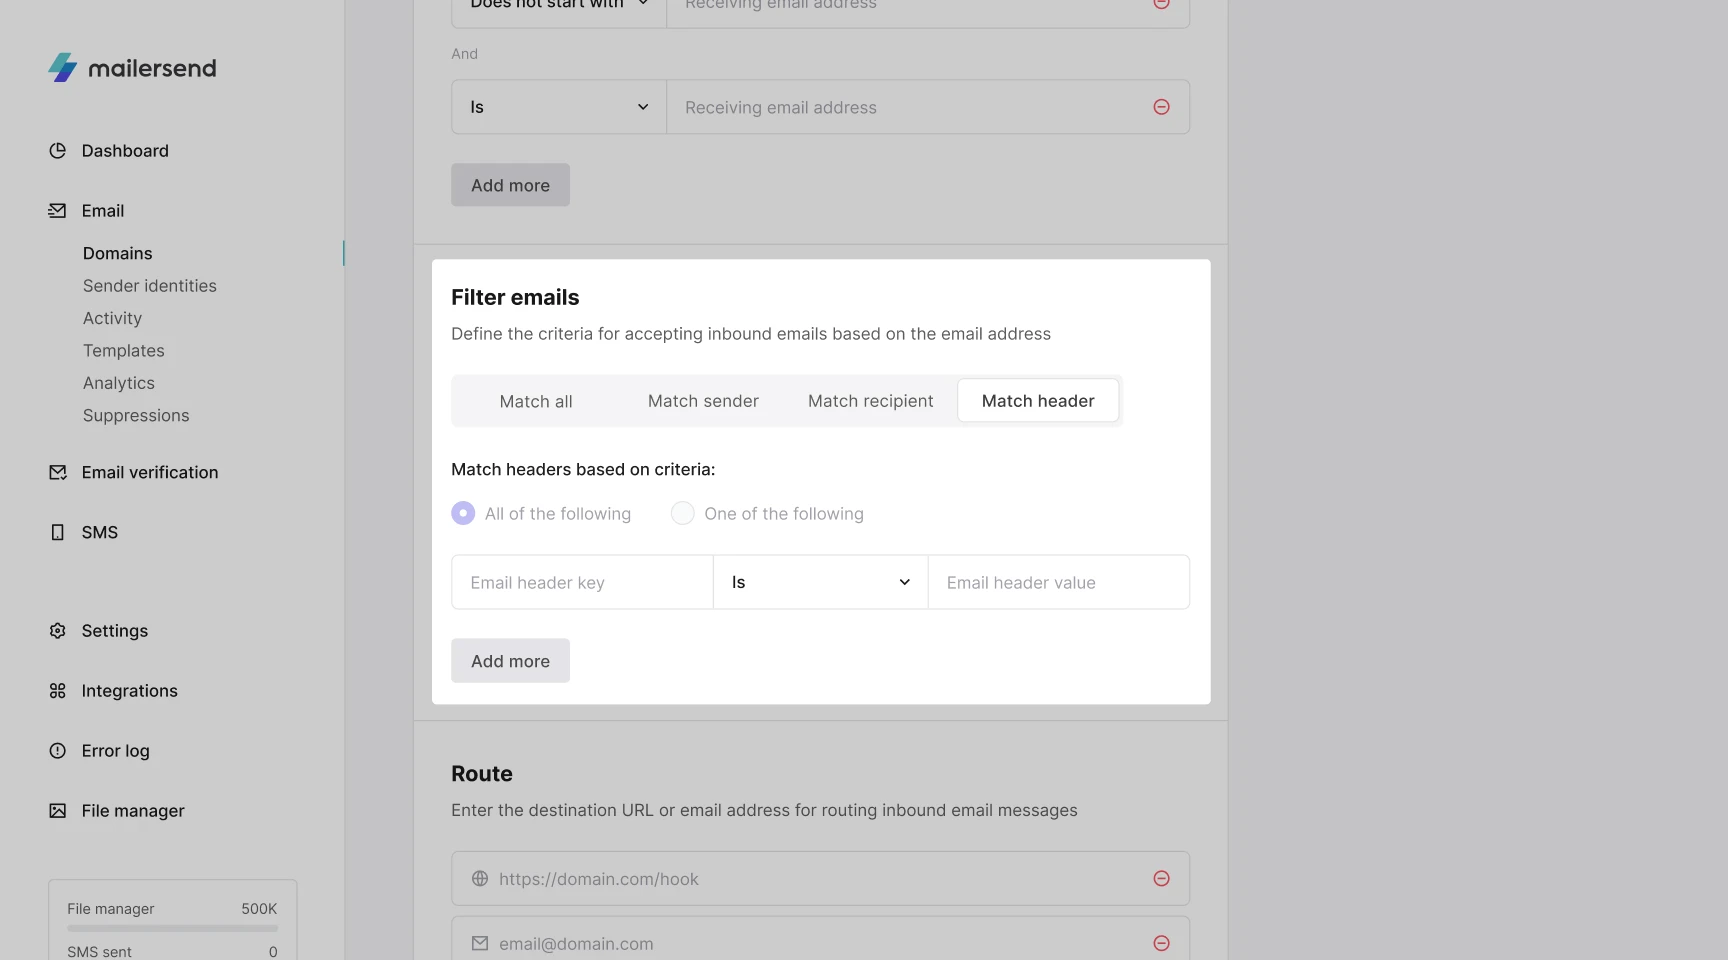
8. Under Route to you can enter the endpoint URL or email address* to which you want to route inbound email messages. You can route to up to 5 destinations.
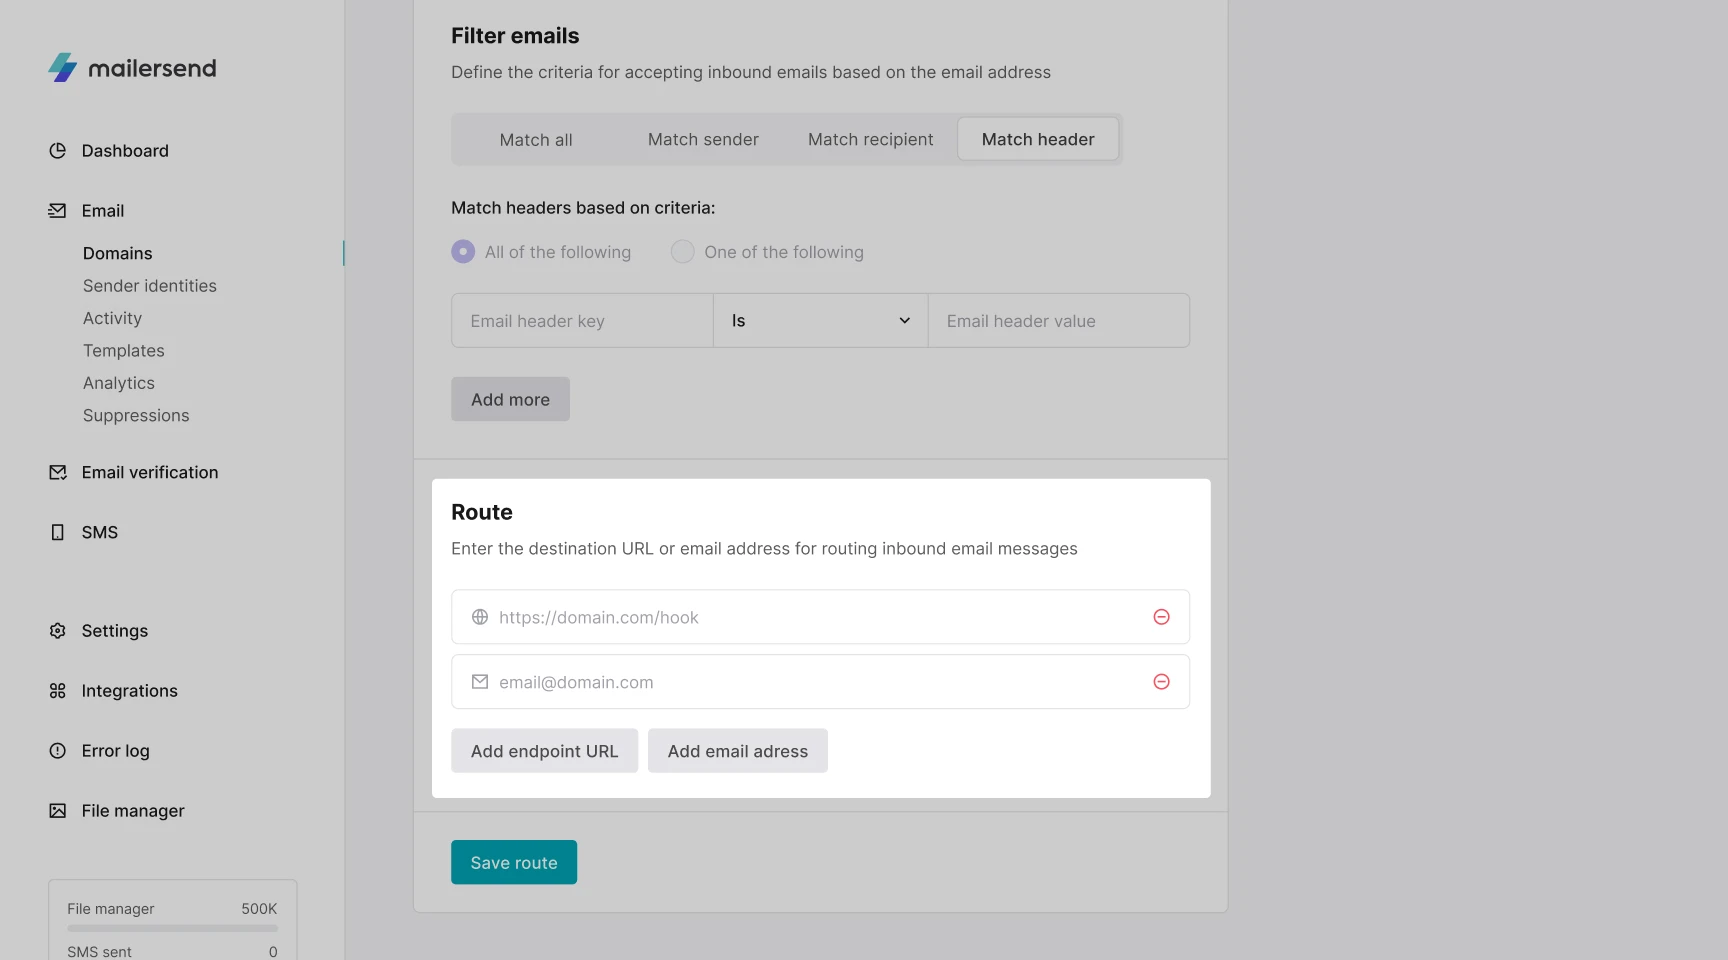
That’s it! Once satisfied with your settings, click Save route to create your inbound route.
Managing the routes with priorities
You can create multiple routes for a single sub-domain. The routes will be evaluated in the order of priority, with lower numbers having a higher priority, so you can create your custom flow to manage incoming emails and route them to the correct place.

Where to find inbound emails
To find inbound emails:
1. Navigate to the Domains page.
2. Select the domain with the inbound route you wish to check by clicking Manage.
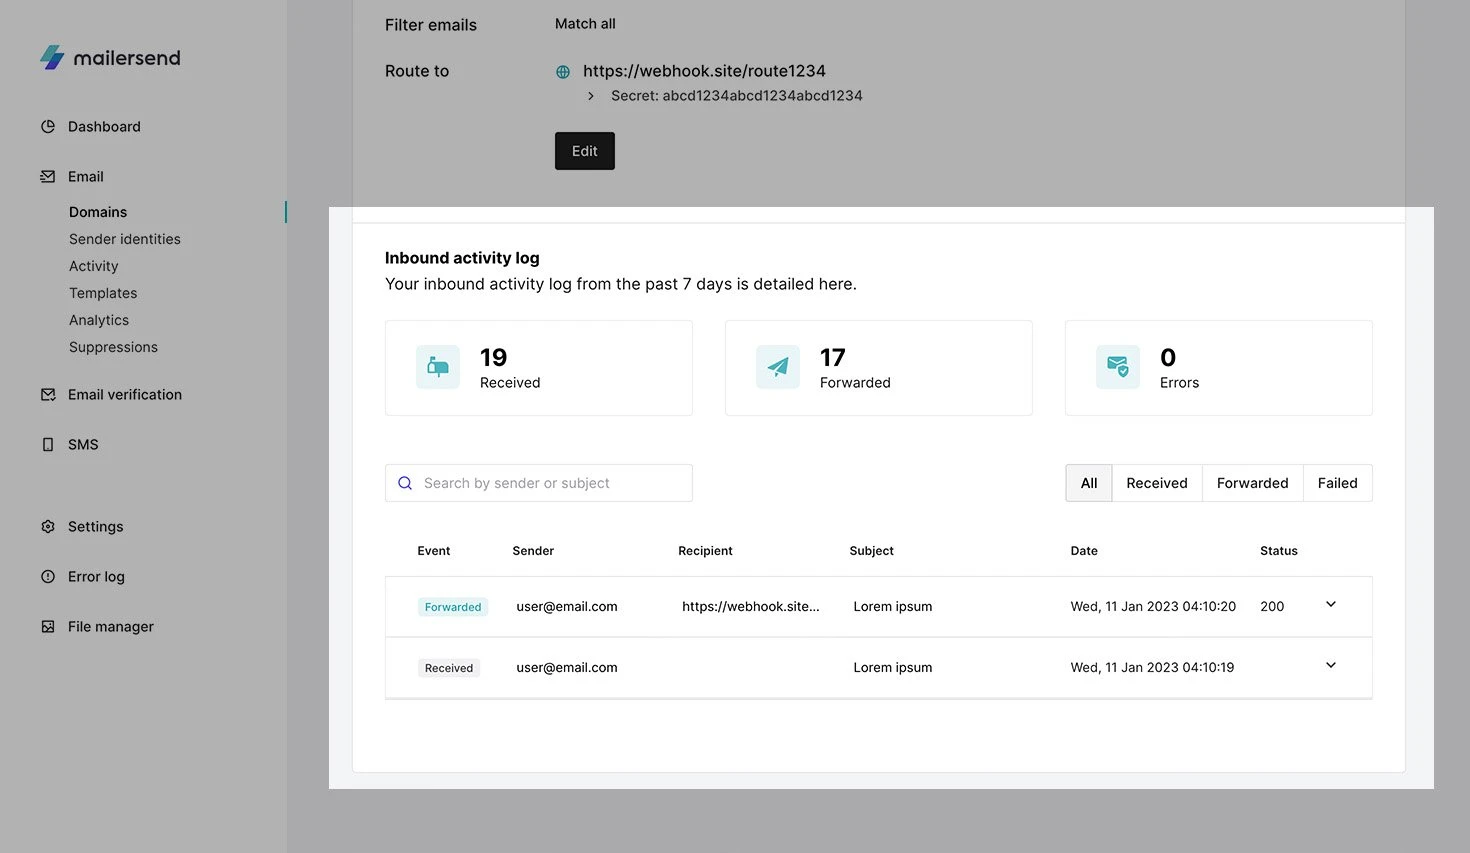
3. Click on the inbound route you wish to monitor and scroll down to Inbound activity.
Under Inbound activity, you will first find the following 3 metrics:
Received - Displays the number of inbound emails that have been received but not yet processed
Forwarded - Displays the number of inbound emails that have been received and successfully processed
Errors - Displays the number of inbound emails that could not be processed due to an unforeseen error(s)
Below you will find a table containing all inbound activity, including the following information:
Event - Indicates whether the inbound email has been received, email forwarded, webhook forwarded, or contains an error
Sender - Displays the email address from which the inbound email was sent
Subject - Displays the inbound email subject line. Click the email subject to reveal the email header
Date - Displays the date and time the inbound email was sent
You can filter all incoming emails based on their activity or check all inbound emails sent to your inbound email address.
Inbound emails are free to receive but are counted towards your monthly usage when forwarded or posted to your endpoint URL. One forward is equivalent to one sent email. So you have a combination of 4 endpoint URLs and forwarding addresses, it will count as 4 emails towards your monthly usage.
Need more info?
Feel free to reach out to support@mailersend.com. A member of our support team will gladly assist you.