Surveys
Adding surveys to your emails enables you to gather valuable feedback from your recipients. Effortlessly add an NPS (Net Promoter Score) or create a multi-choice questionnaire with drag and drop.
Rules and steps for sending an email with a survey include:
You must enable content_tracking on your domain by selecting your domain and enabling the setting under tracking details. Content tracking is a premium feature.
Add a webhook with the activity.survey_submitted event to receive the survey answers.
You can also include the activity.survey_opened event in your webhook to know when a recipient has opened an email containing a survey at least once
Adding webhooks
To receive the answers from your survey, you have to create a webhook on the domain of the API token you’ll send it with. To do this:
Navigate to the Email > Domains page.
Click Manage for the domain you are using to send your survey email.
Scroll down to Webhooks.
Click Add webhook.
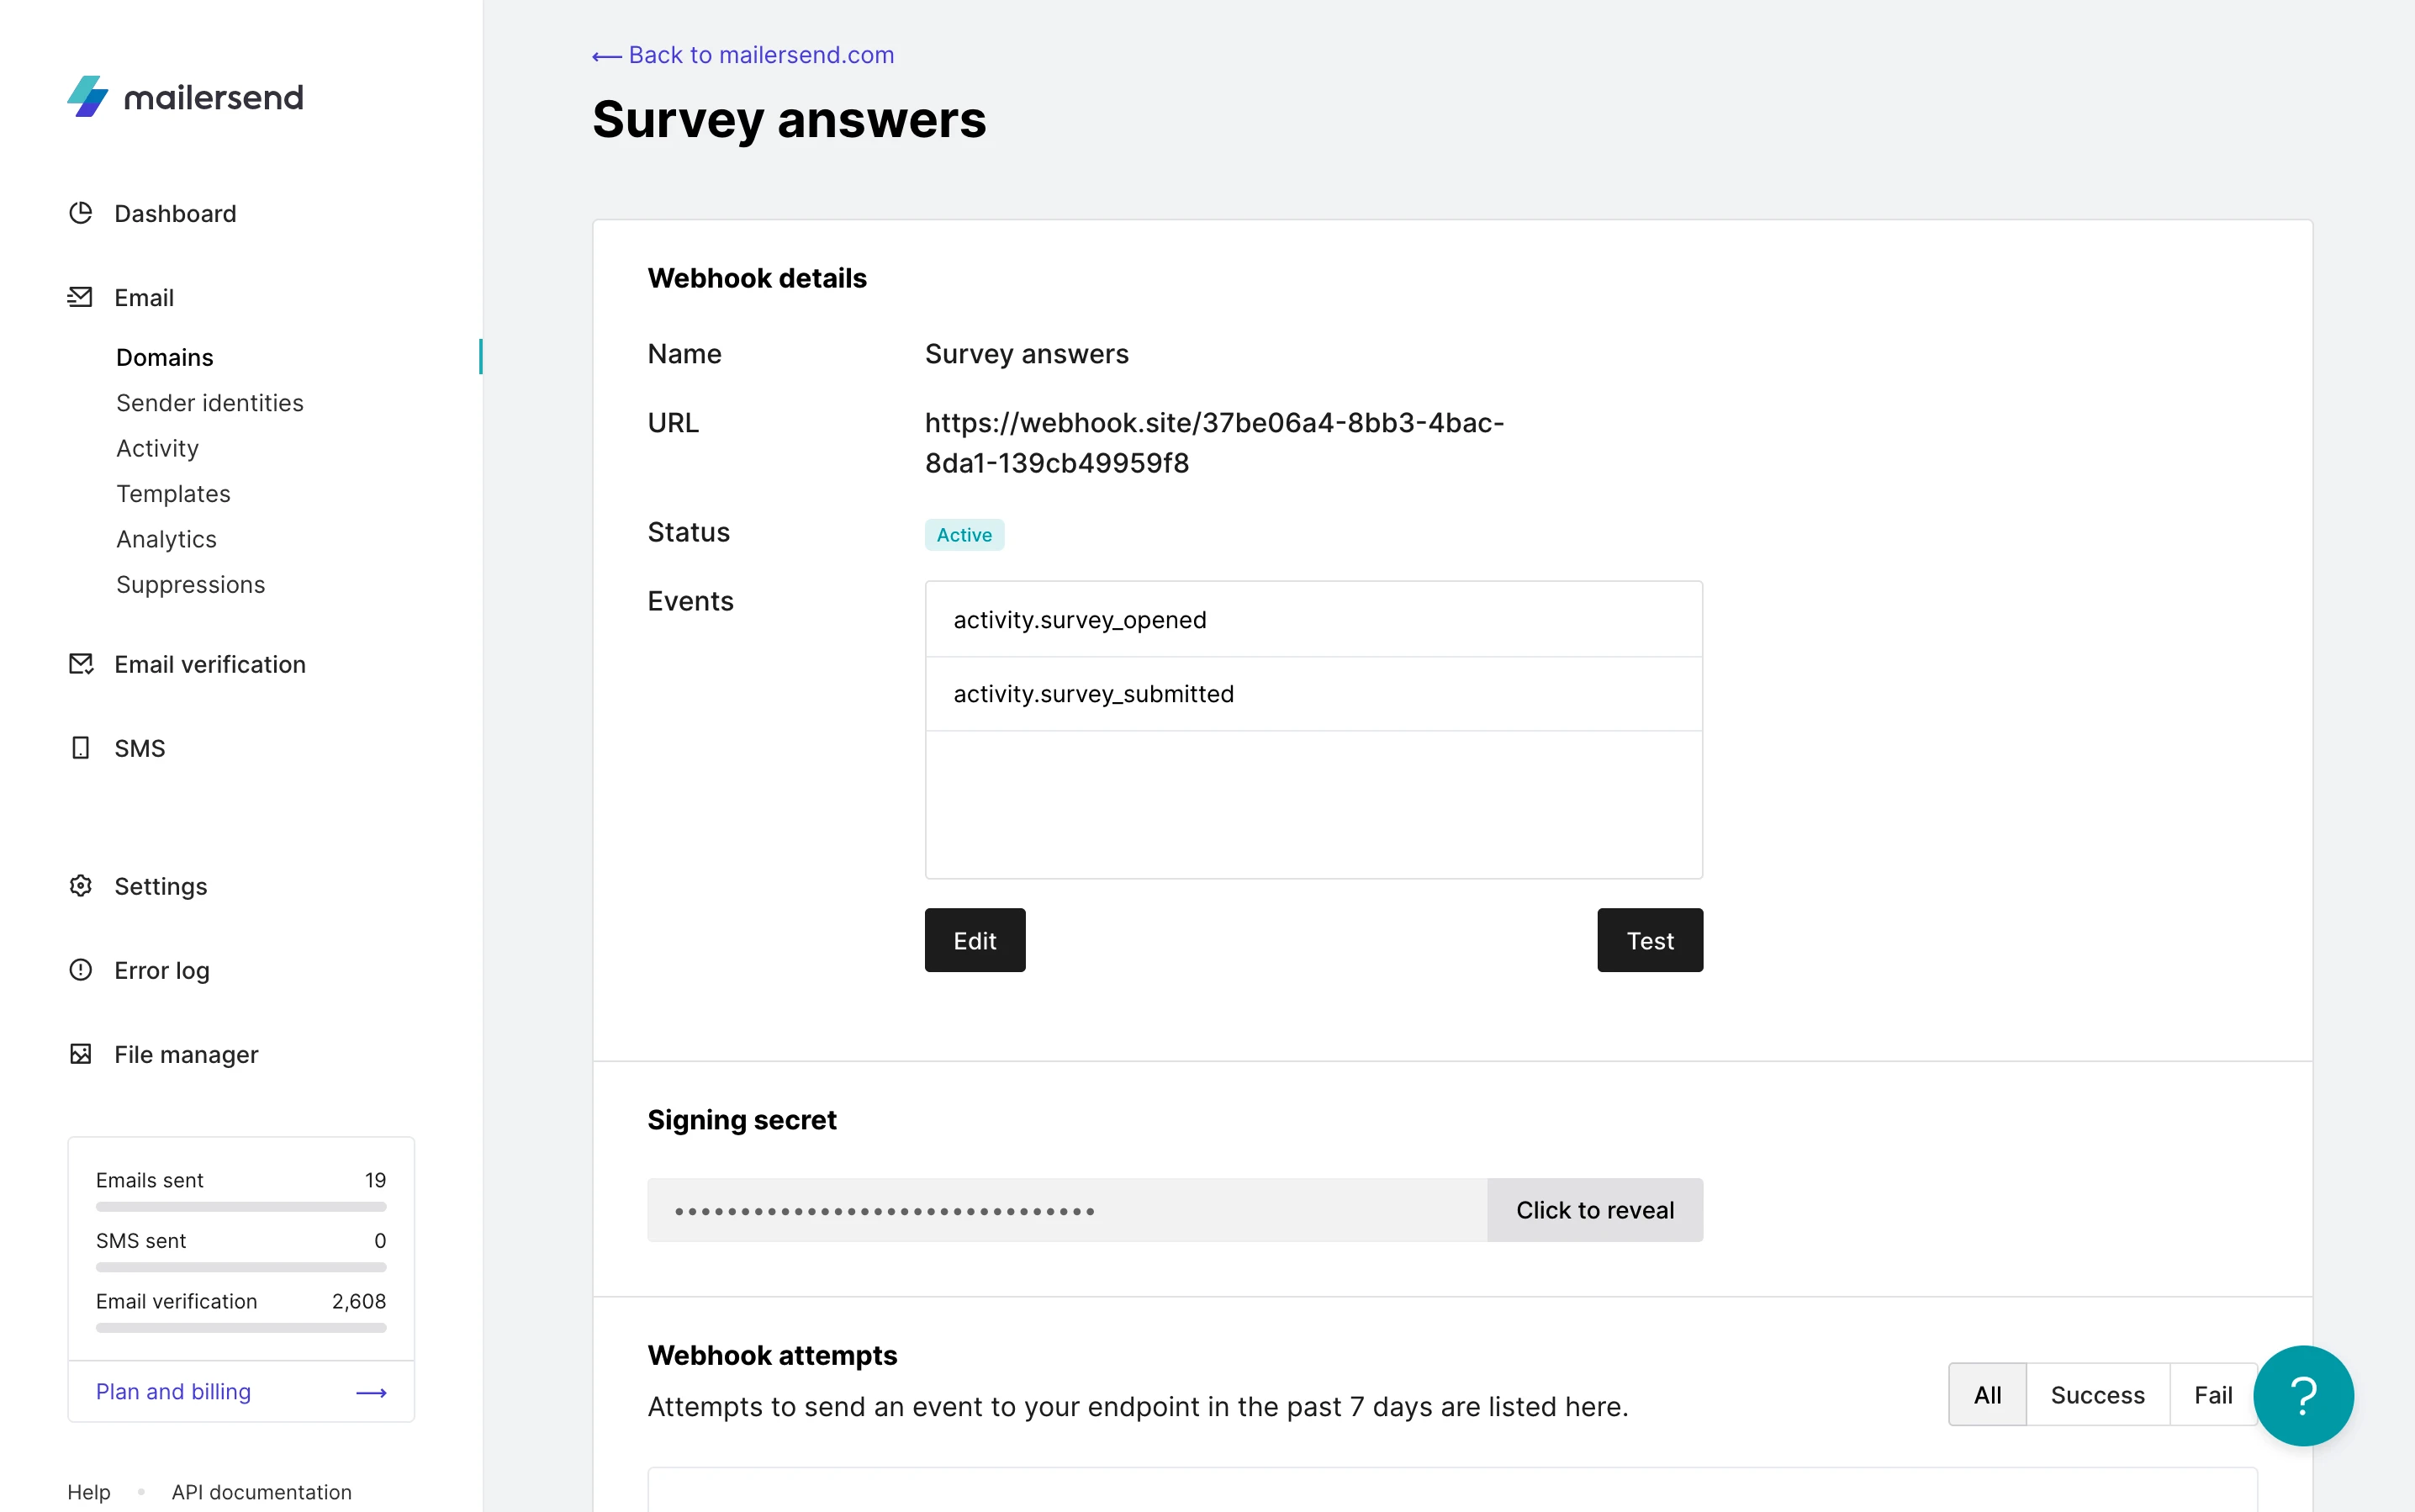
Add a Name, Endpoint URL, and add the events activity.survey_opened and activity.survey_submitted.
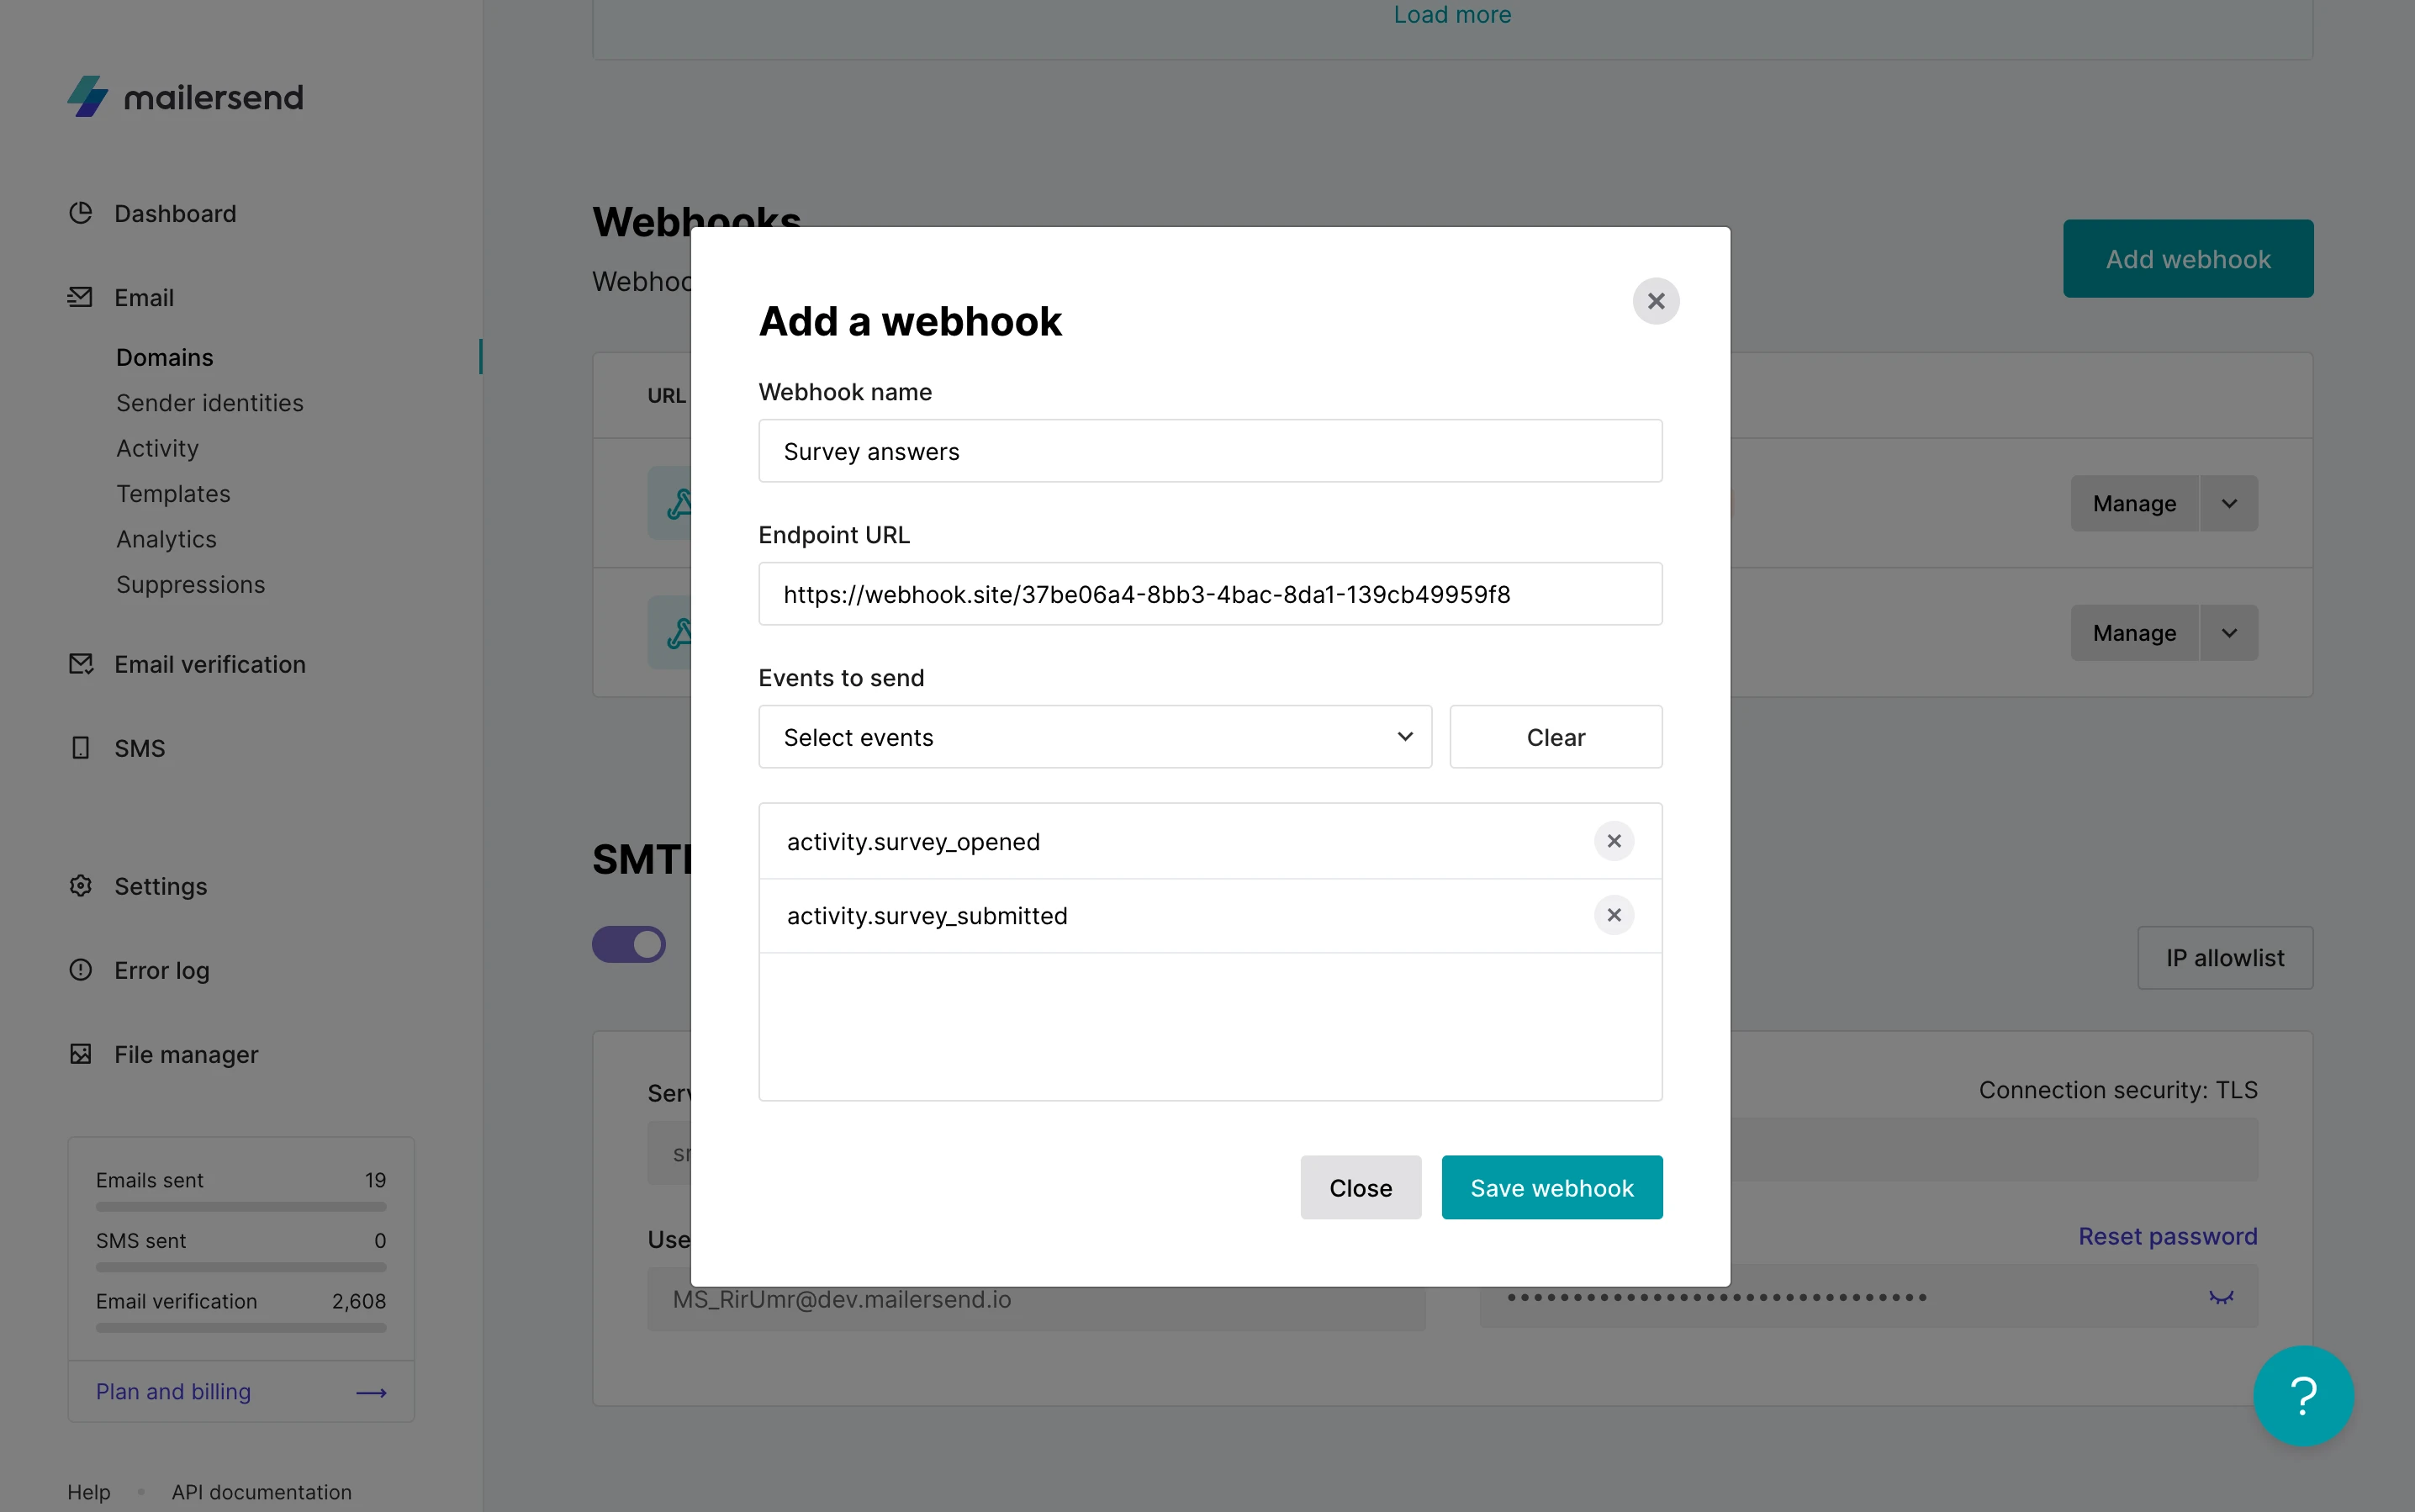
6. Click Save webhook.
You can test your email by sending a test email and an endpoint URL from webhook.site.
To see details of your webhook, click the Manage button. All of the webhook activity is displayed on the bottom of the webhook page, where you can see each attempt to reach your endpoint URL and the response.
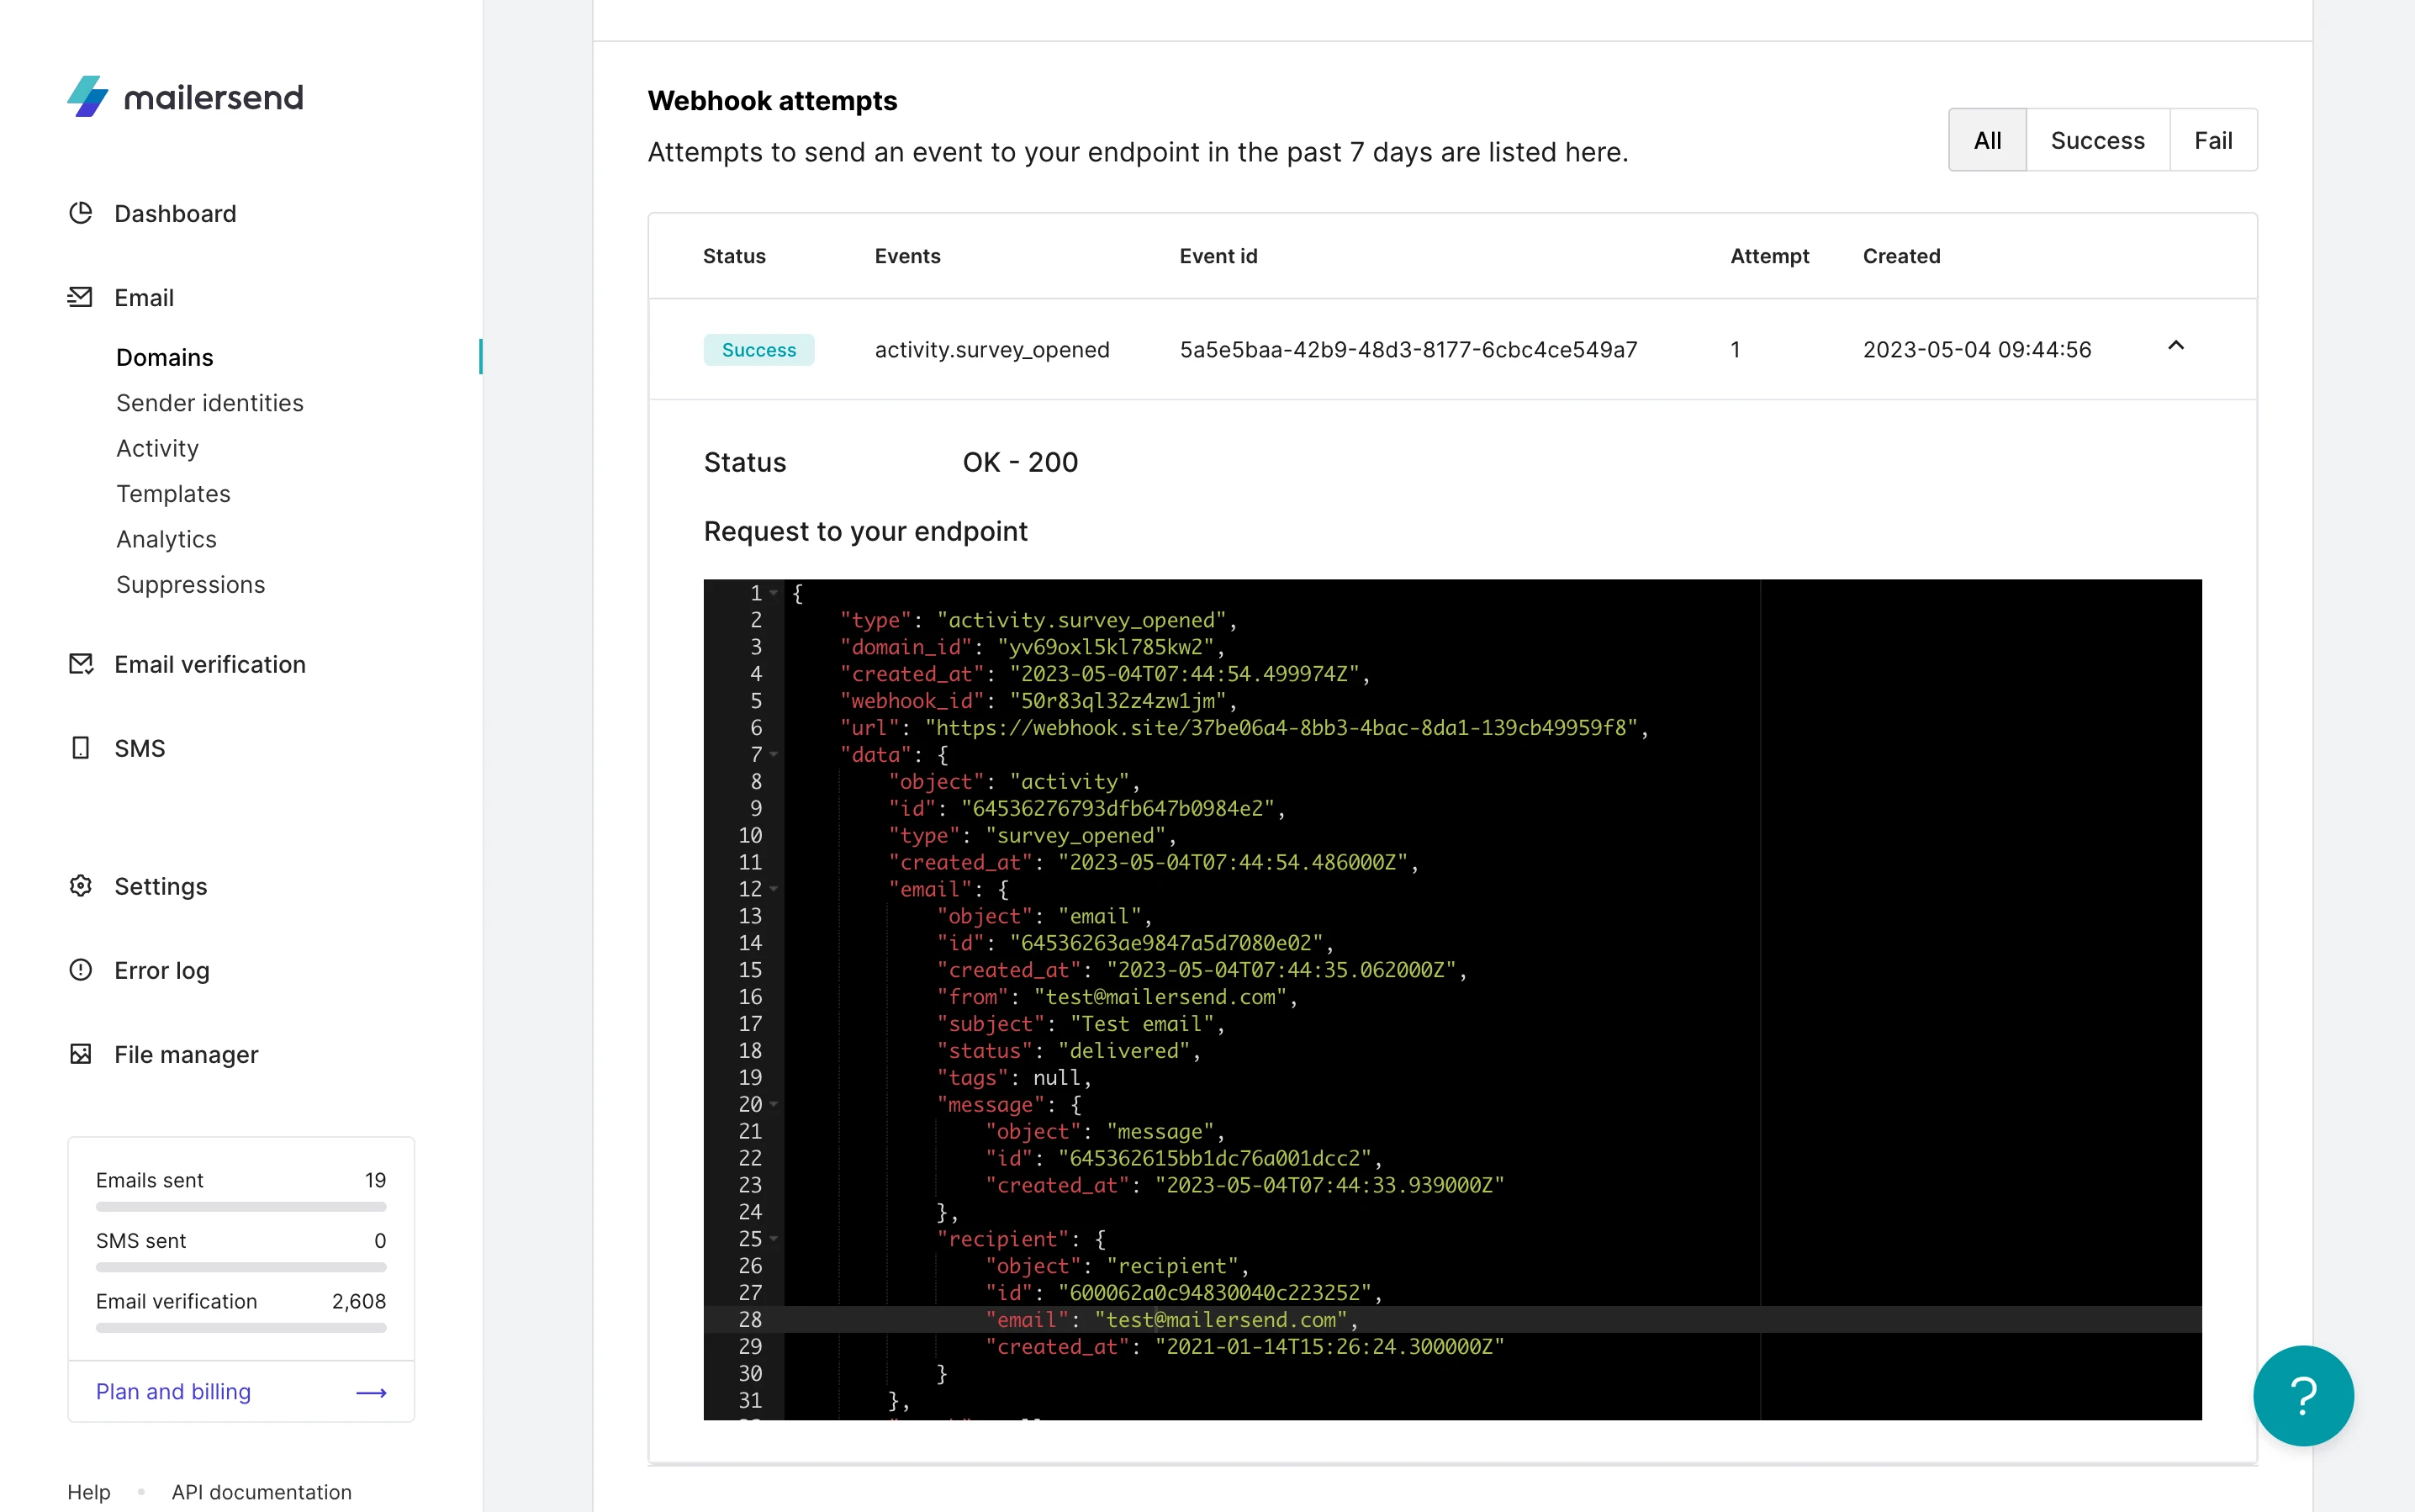
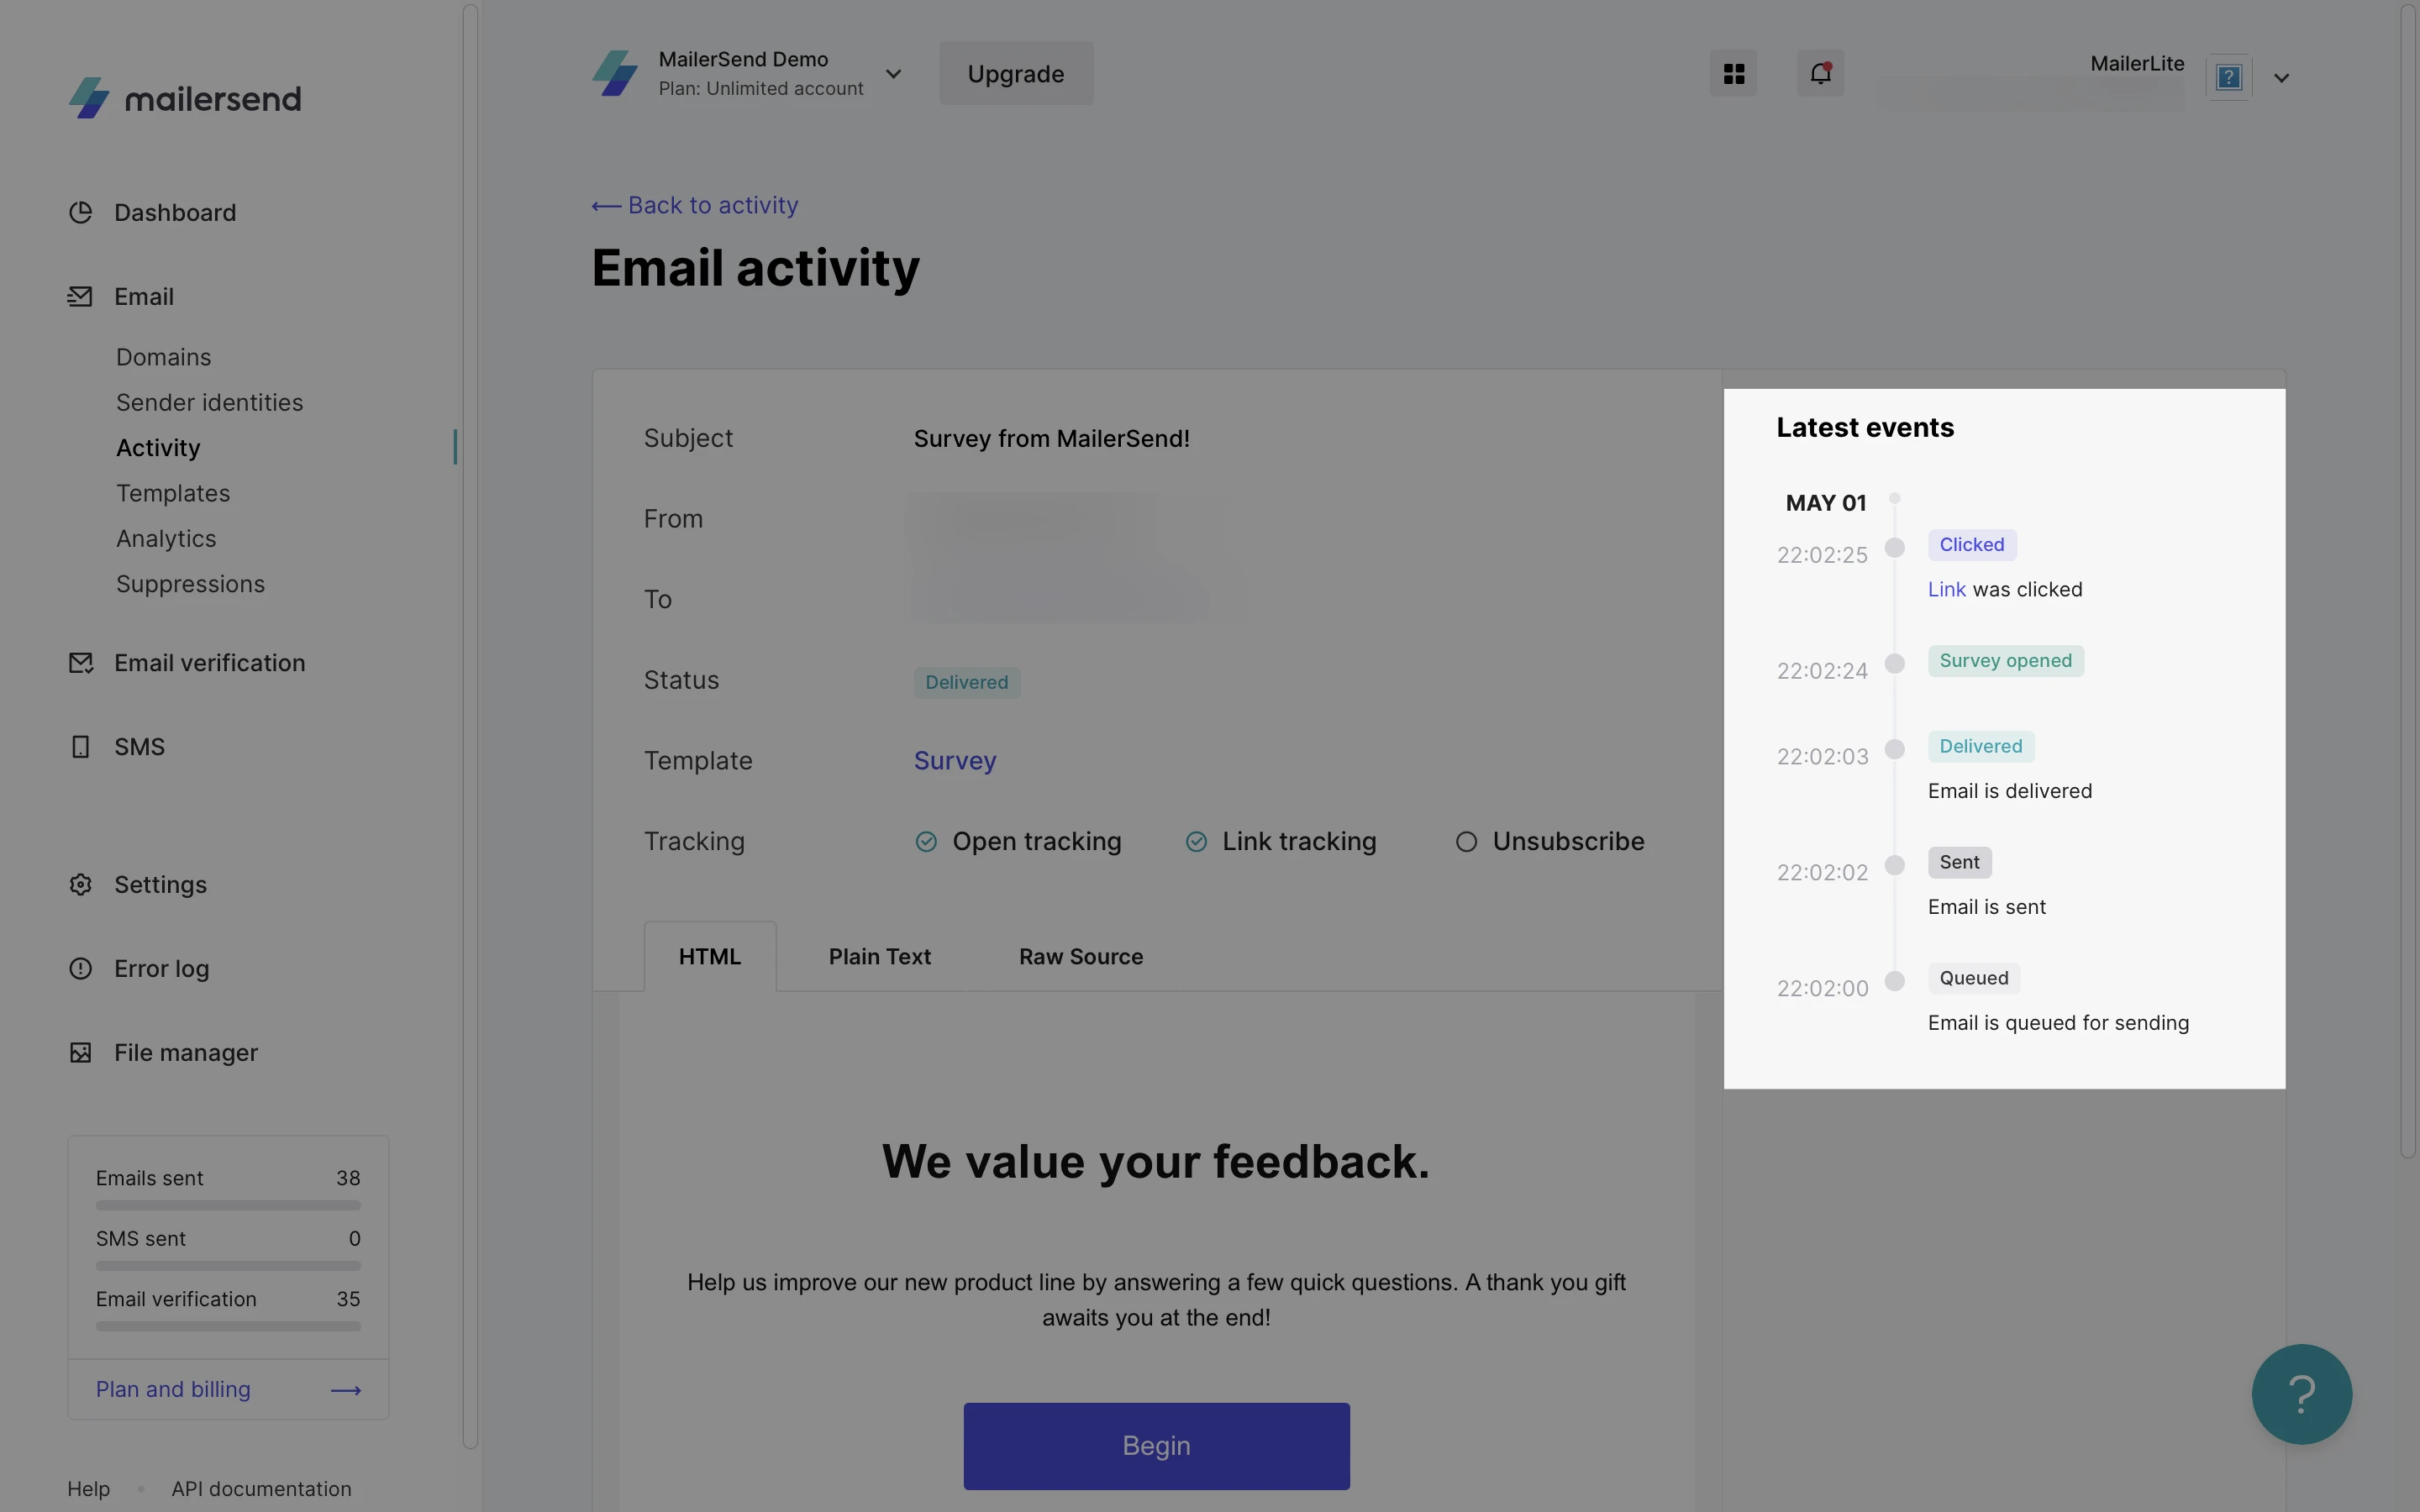
After sending an email, the opened event will be displayed right after it happens, and the survey answers will be submitted 30 minutes after the last question has been answered.
You can parse your answers in your app or use an automation platform like Make or Zapier to send the webhook’s payload to any other third-party tool like Airtable or Google Sheet.
To add a survey:
Navigate to the Emails > Templates page.
Click Create template.
Choose the Drag & Drop editor.
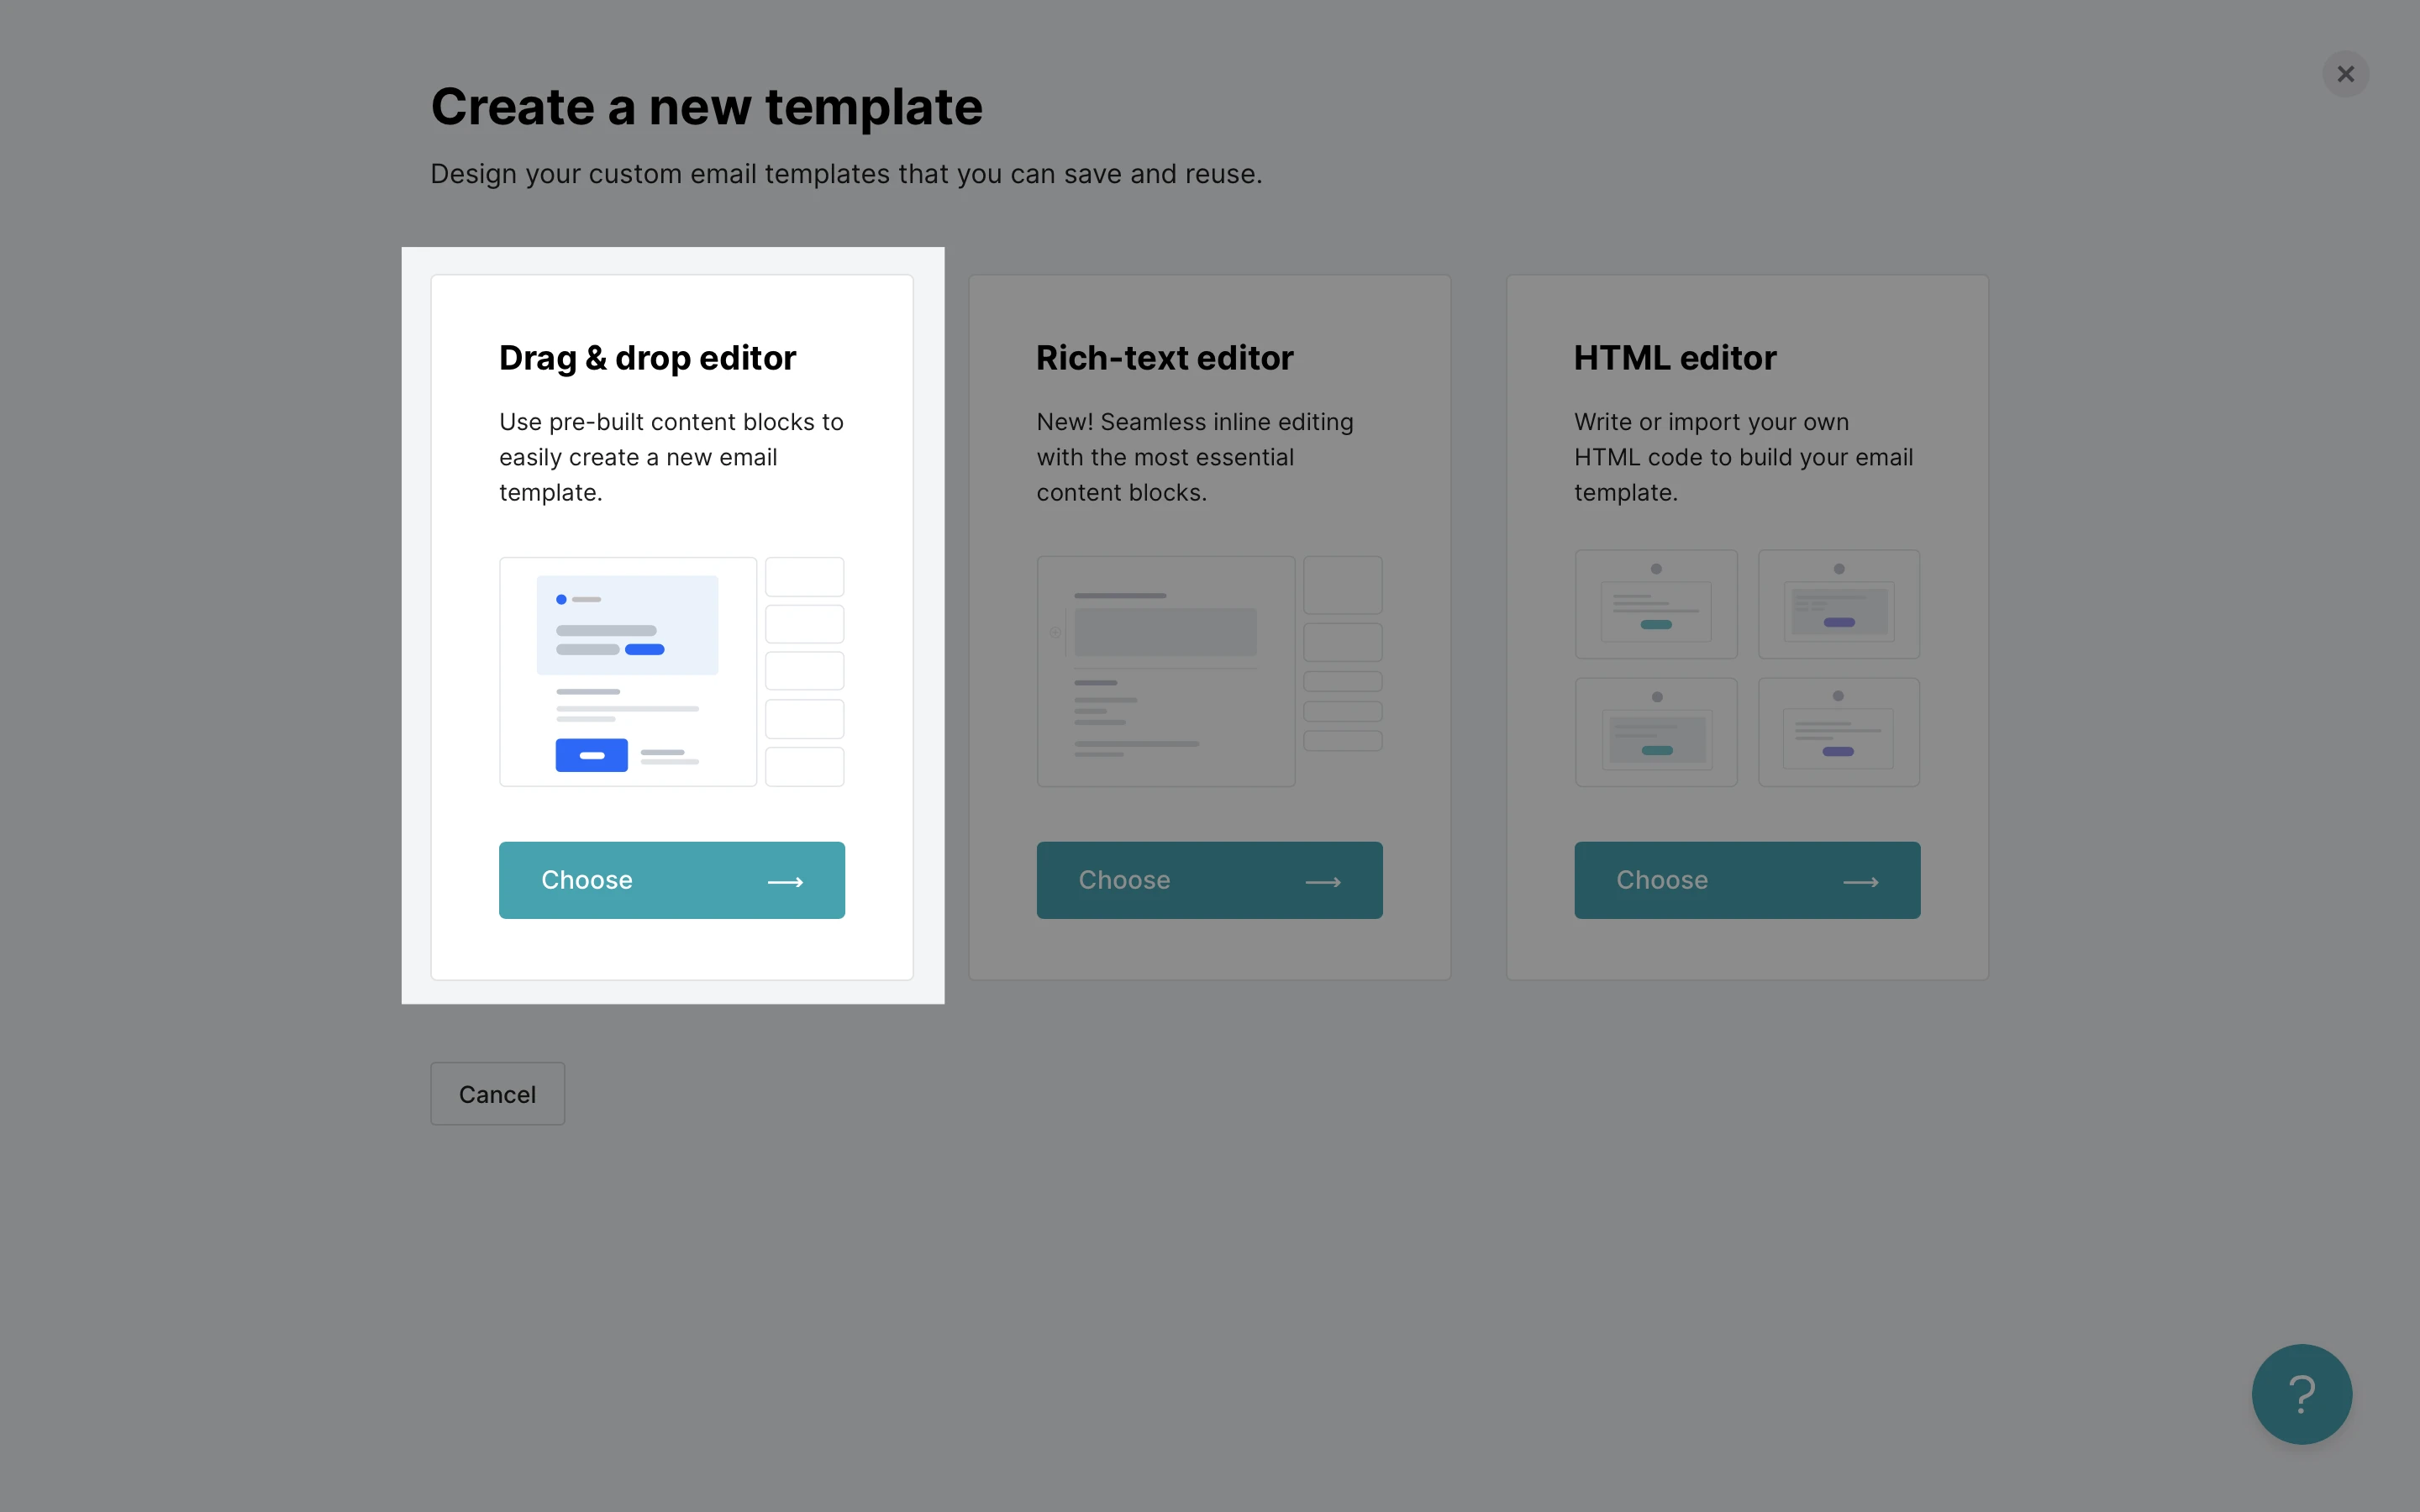
4. Choose to create a template from scratch or start with a pre-made design.
5. In the Blocks tab, locate the Survey block under the Special category.
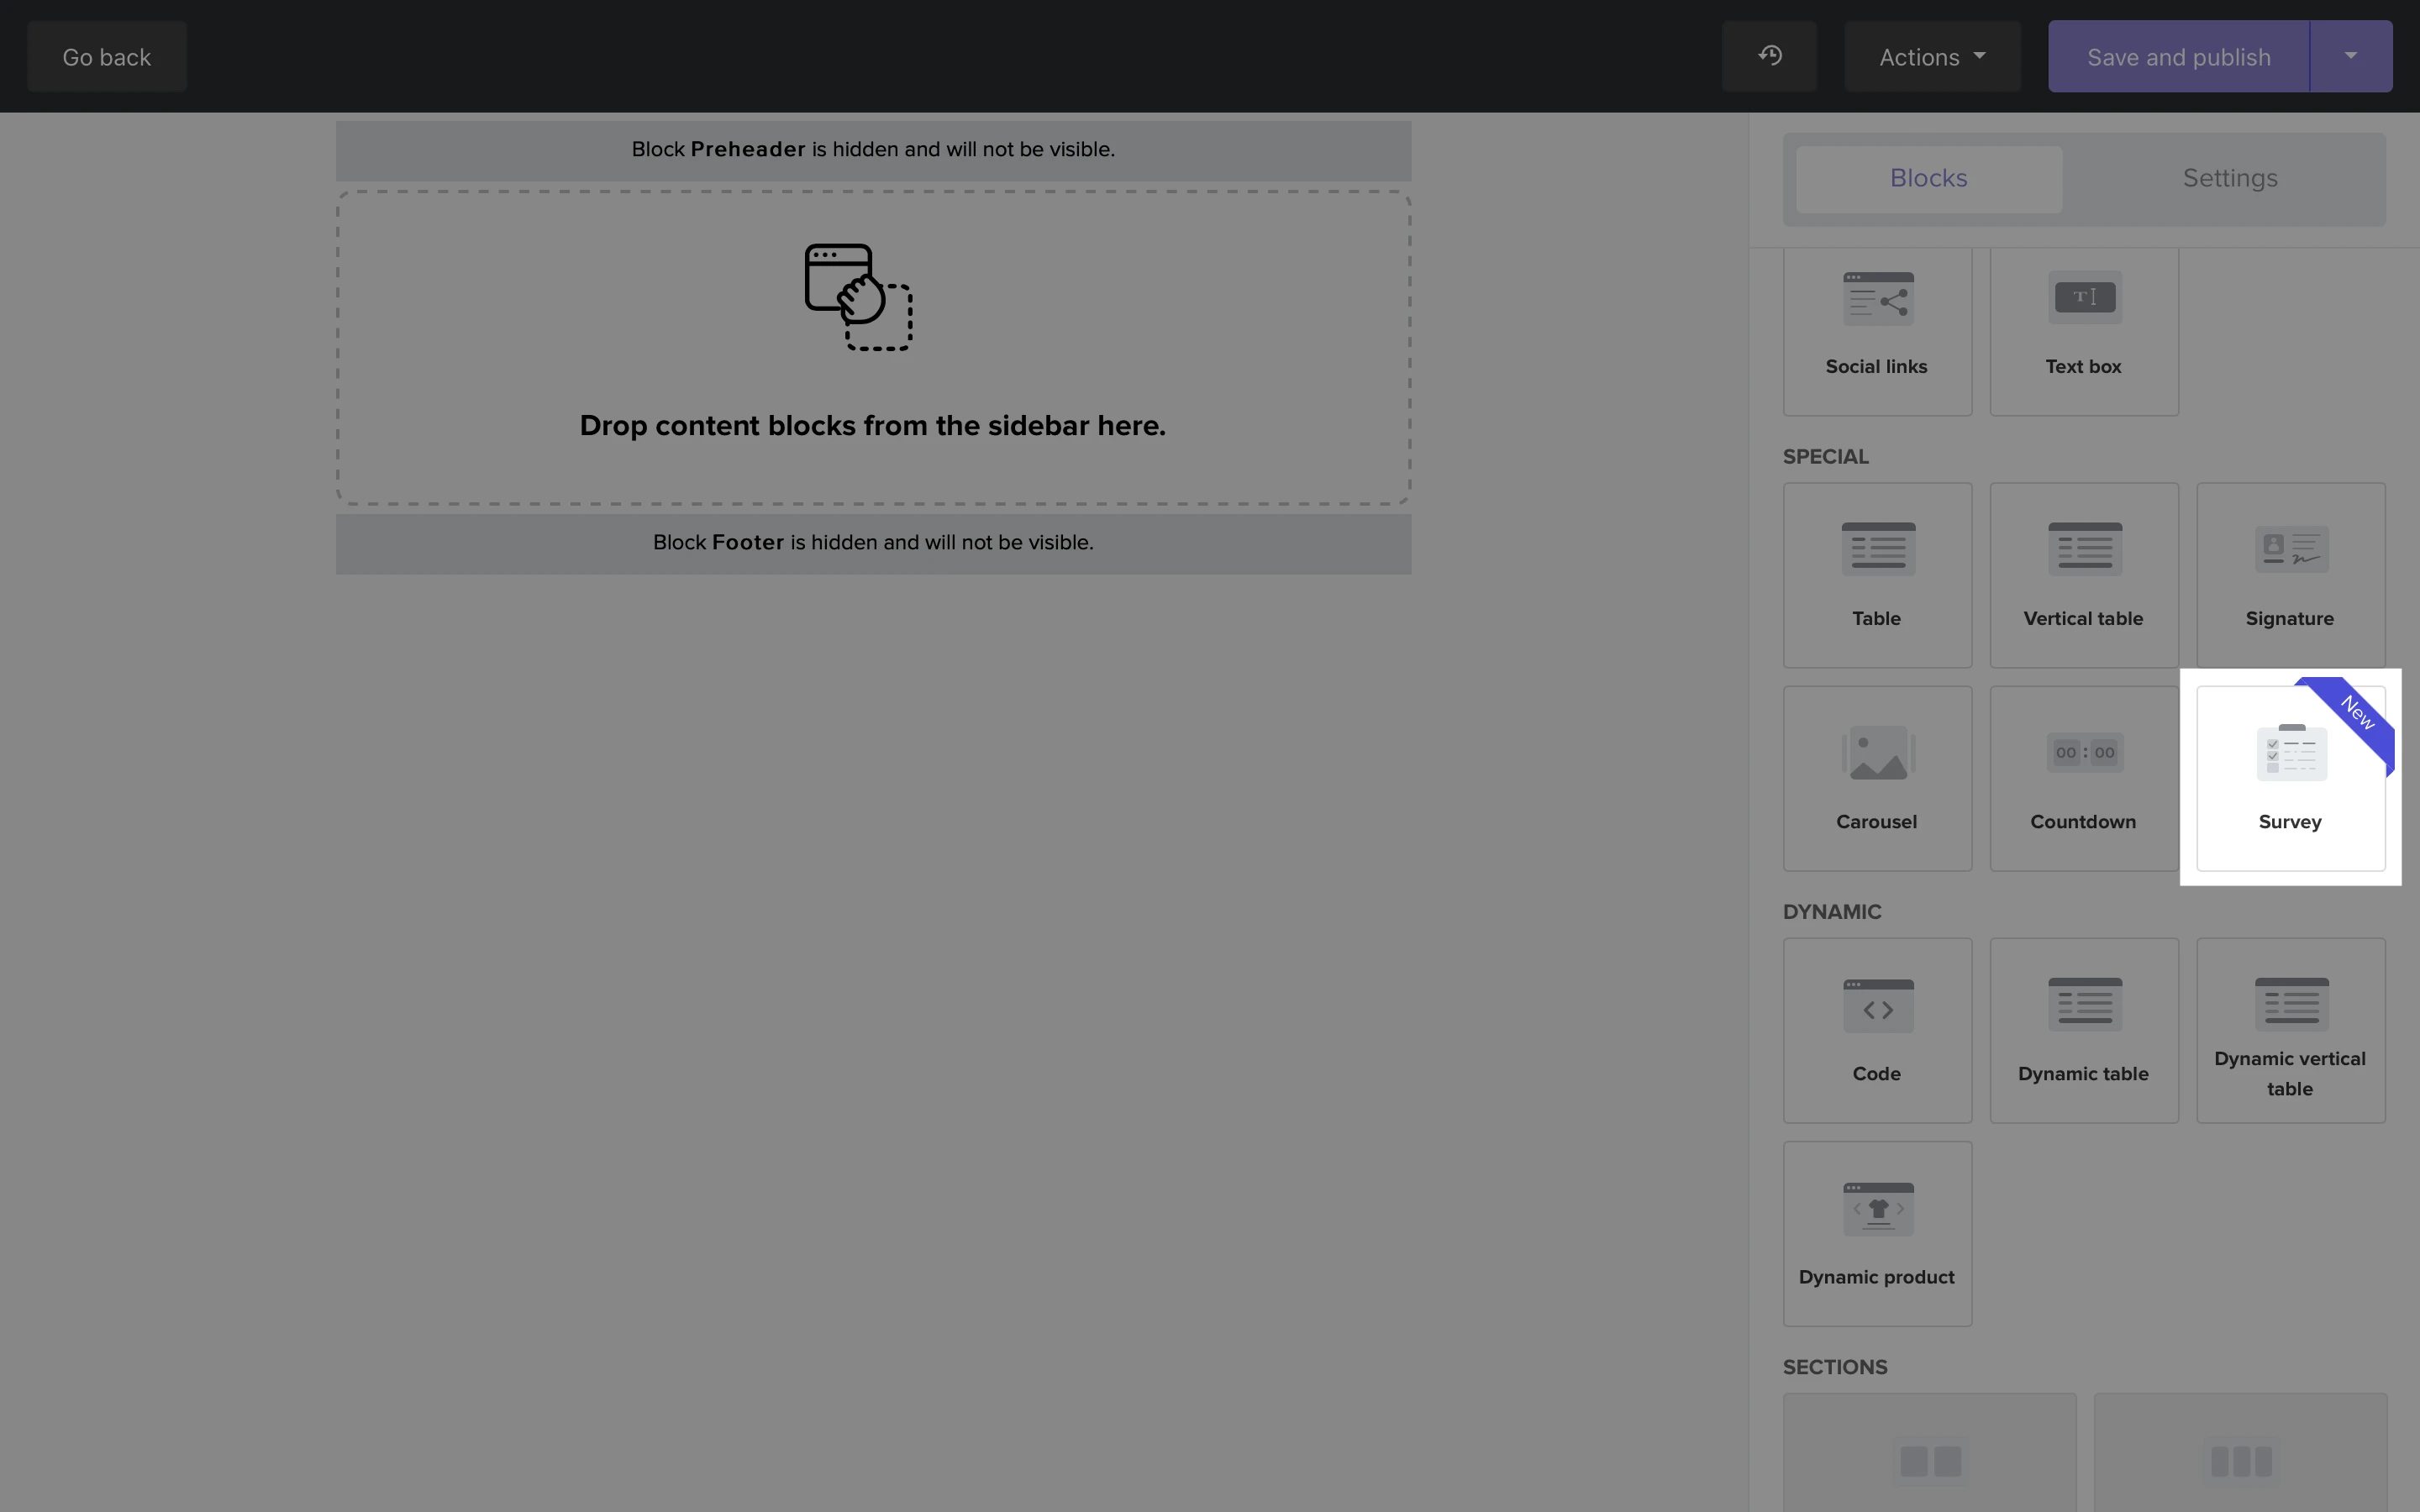
6. Drag the block into your email template.
Questions
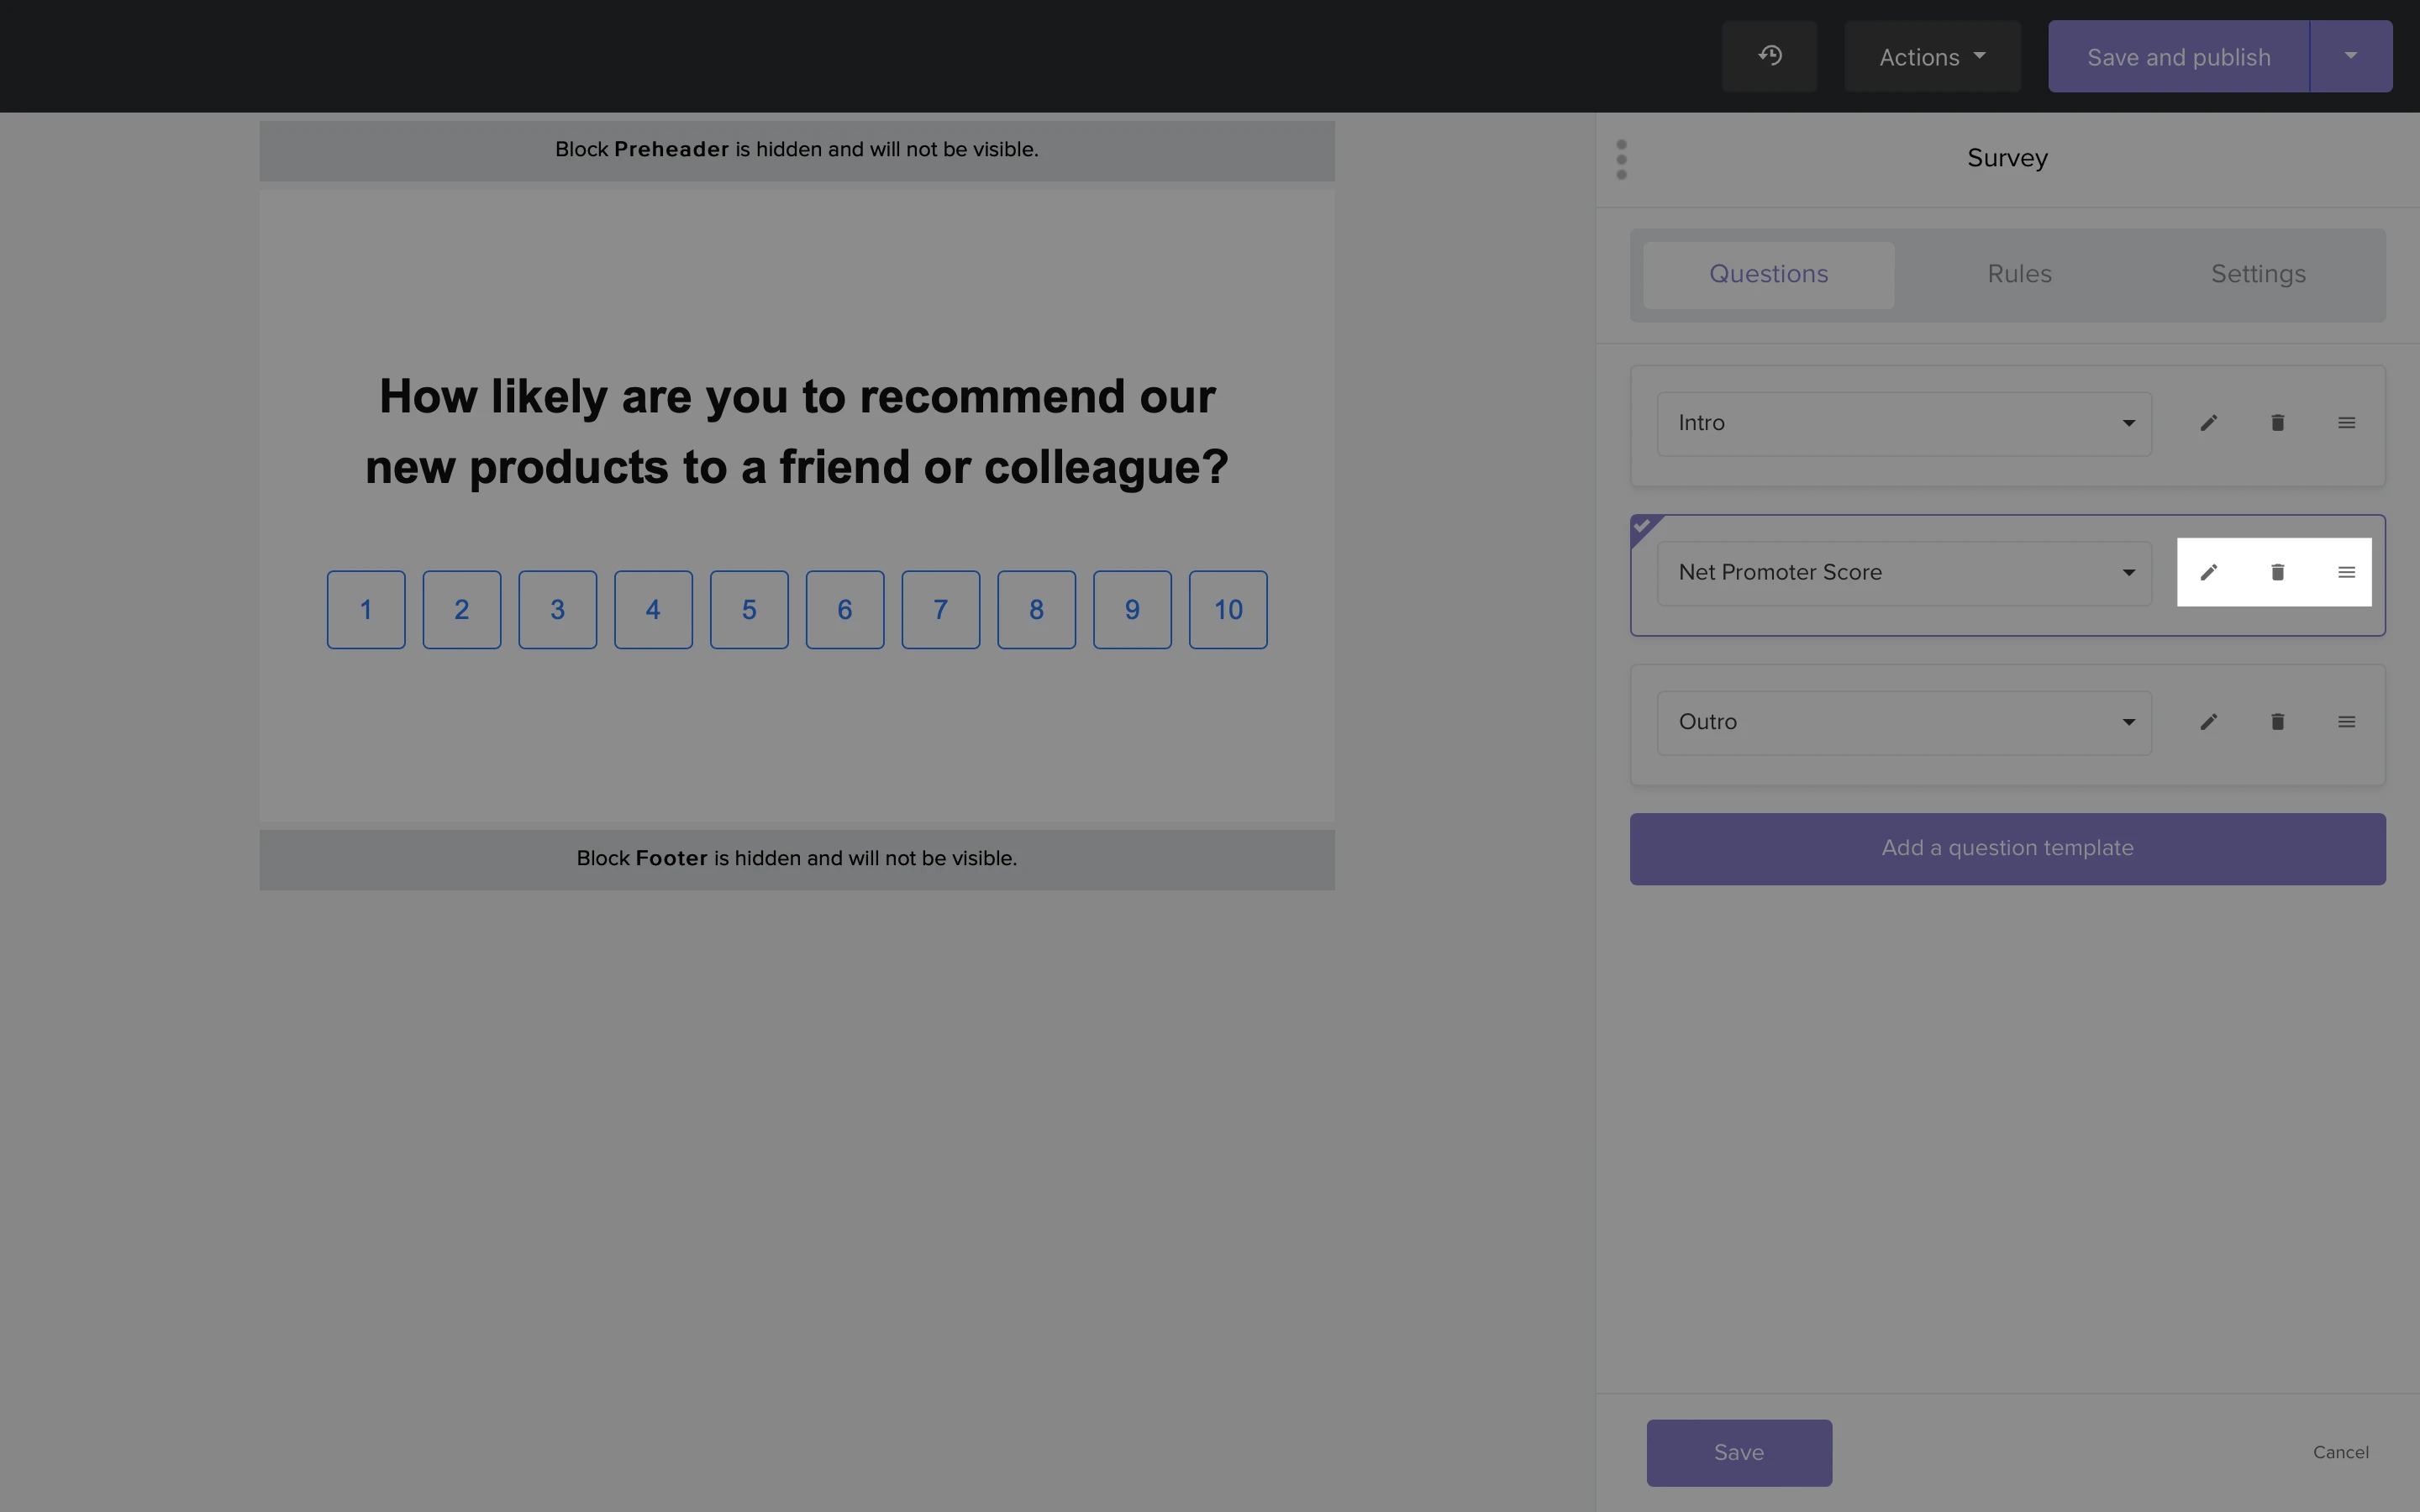
The Questions tab is where you will add your questions. For Surveys, there are eight types of questions you can add:
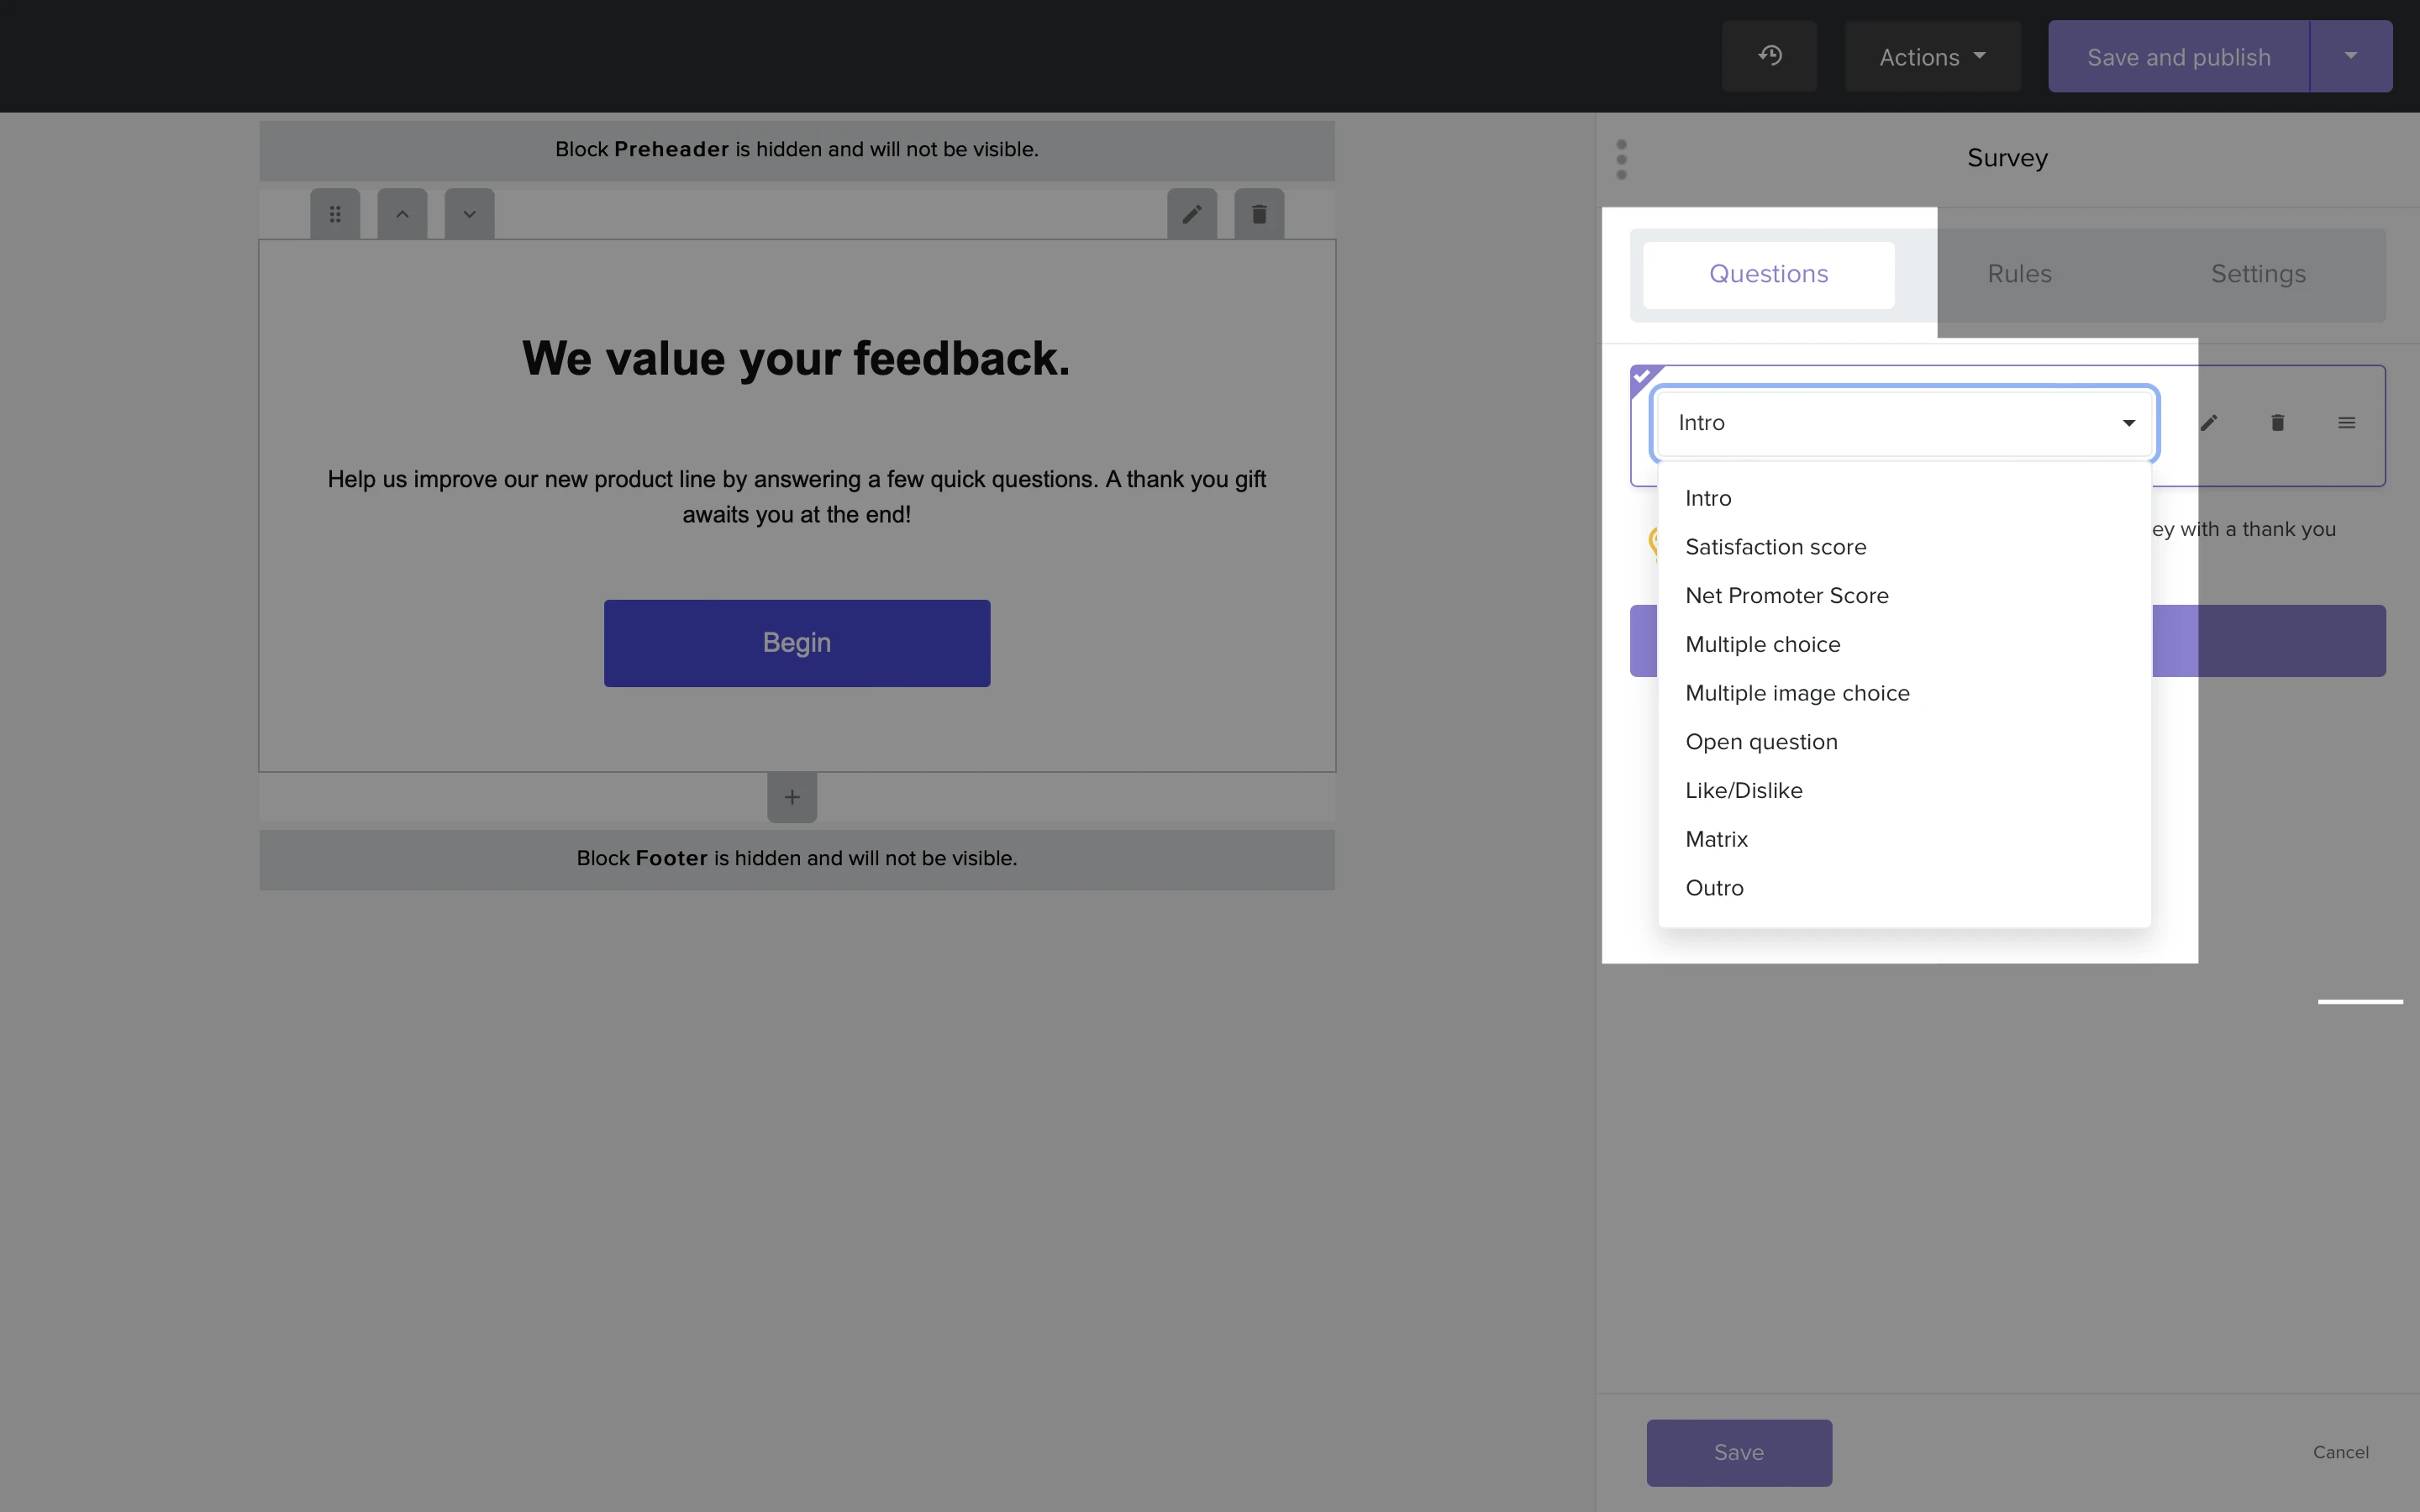
Intro: This step introduces your survey. We suggest adding a short description here
Satisfaction score: This question asks subscribers to provide a satisfaction score of 1-5 using smiley faces, hearts, or star icons
Net Promoter Score: This question asks participants to provide a satisfaction score of 1-10
Multiple choice: A question with multiple answers to choose from
Multiple image choice: A question with multiple images as answers to choose from
Open question: A question with an open answer box in which subscribers can type and submit any reply
Like/Dislike: A question that can be answered with a positive or negative response For example, thumbs up or thumbs down, smiley face or sad face, etc.
Matrix: Questionnaire layout where multiple questions share the same answer choices in a grid
Outro: Indicates the end of the survey. This is an important step and we recommend adding a short thank you message here.
To add additional questions to your survey, click the Add a question template button. A survey can have up to 5 questions.
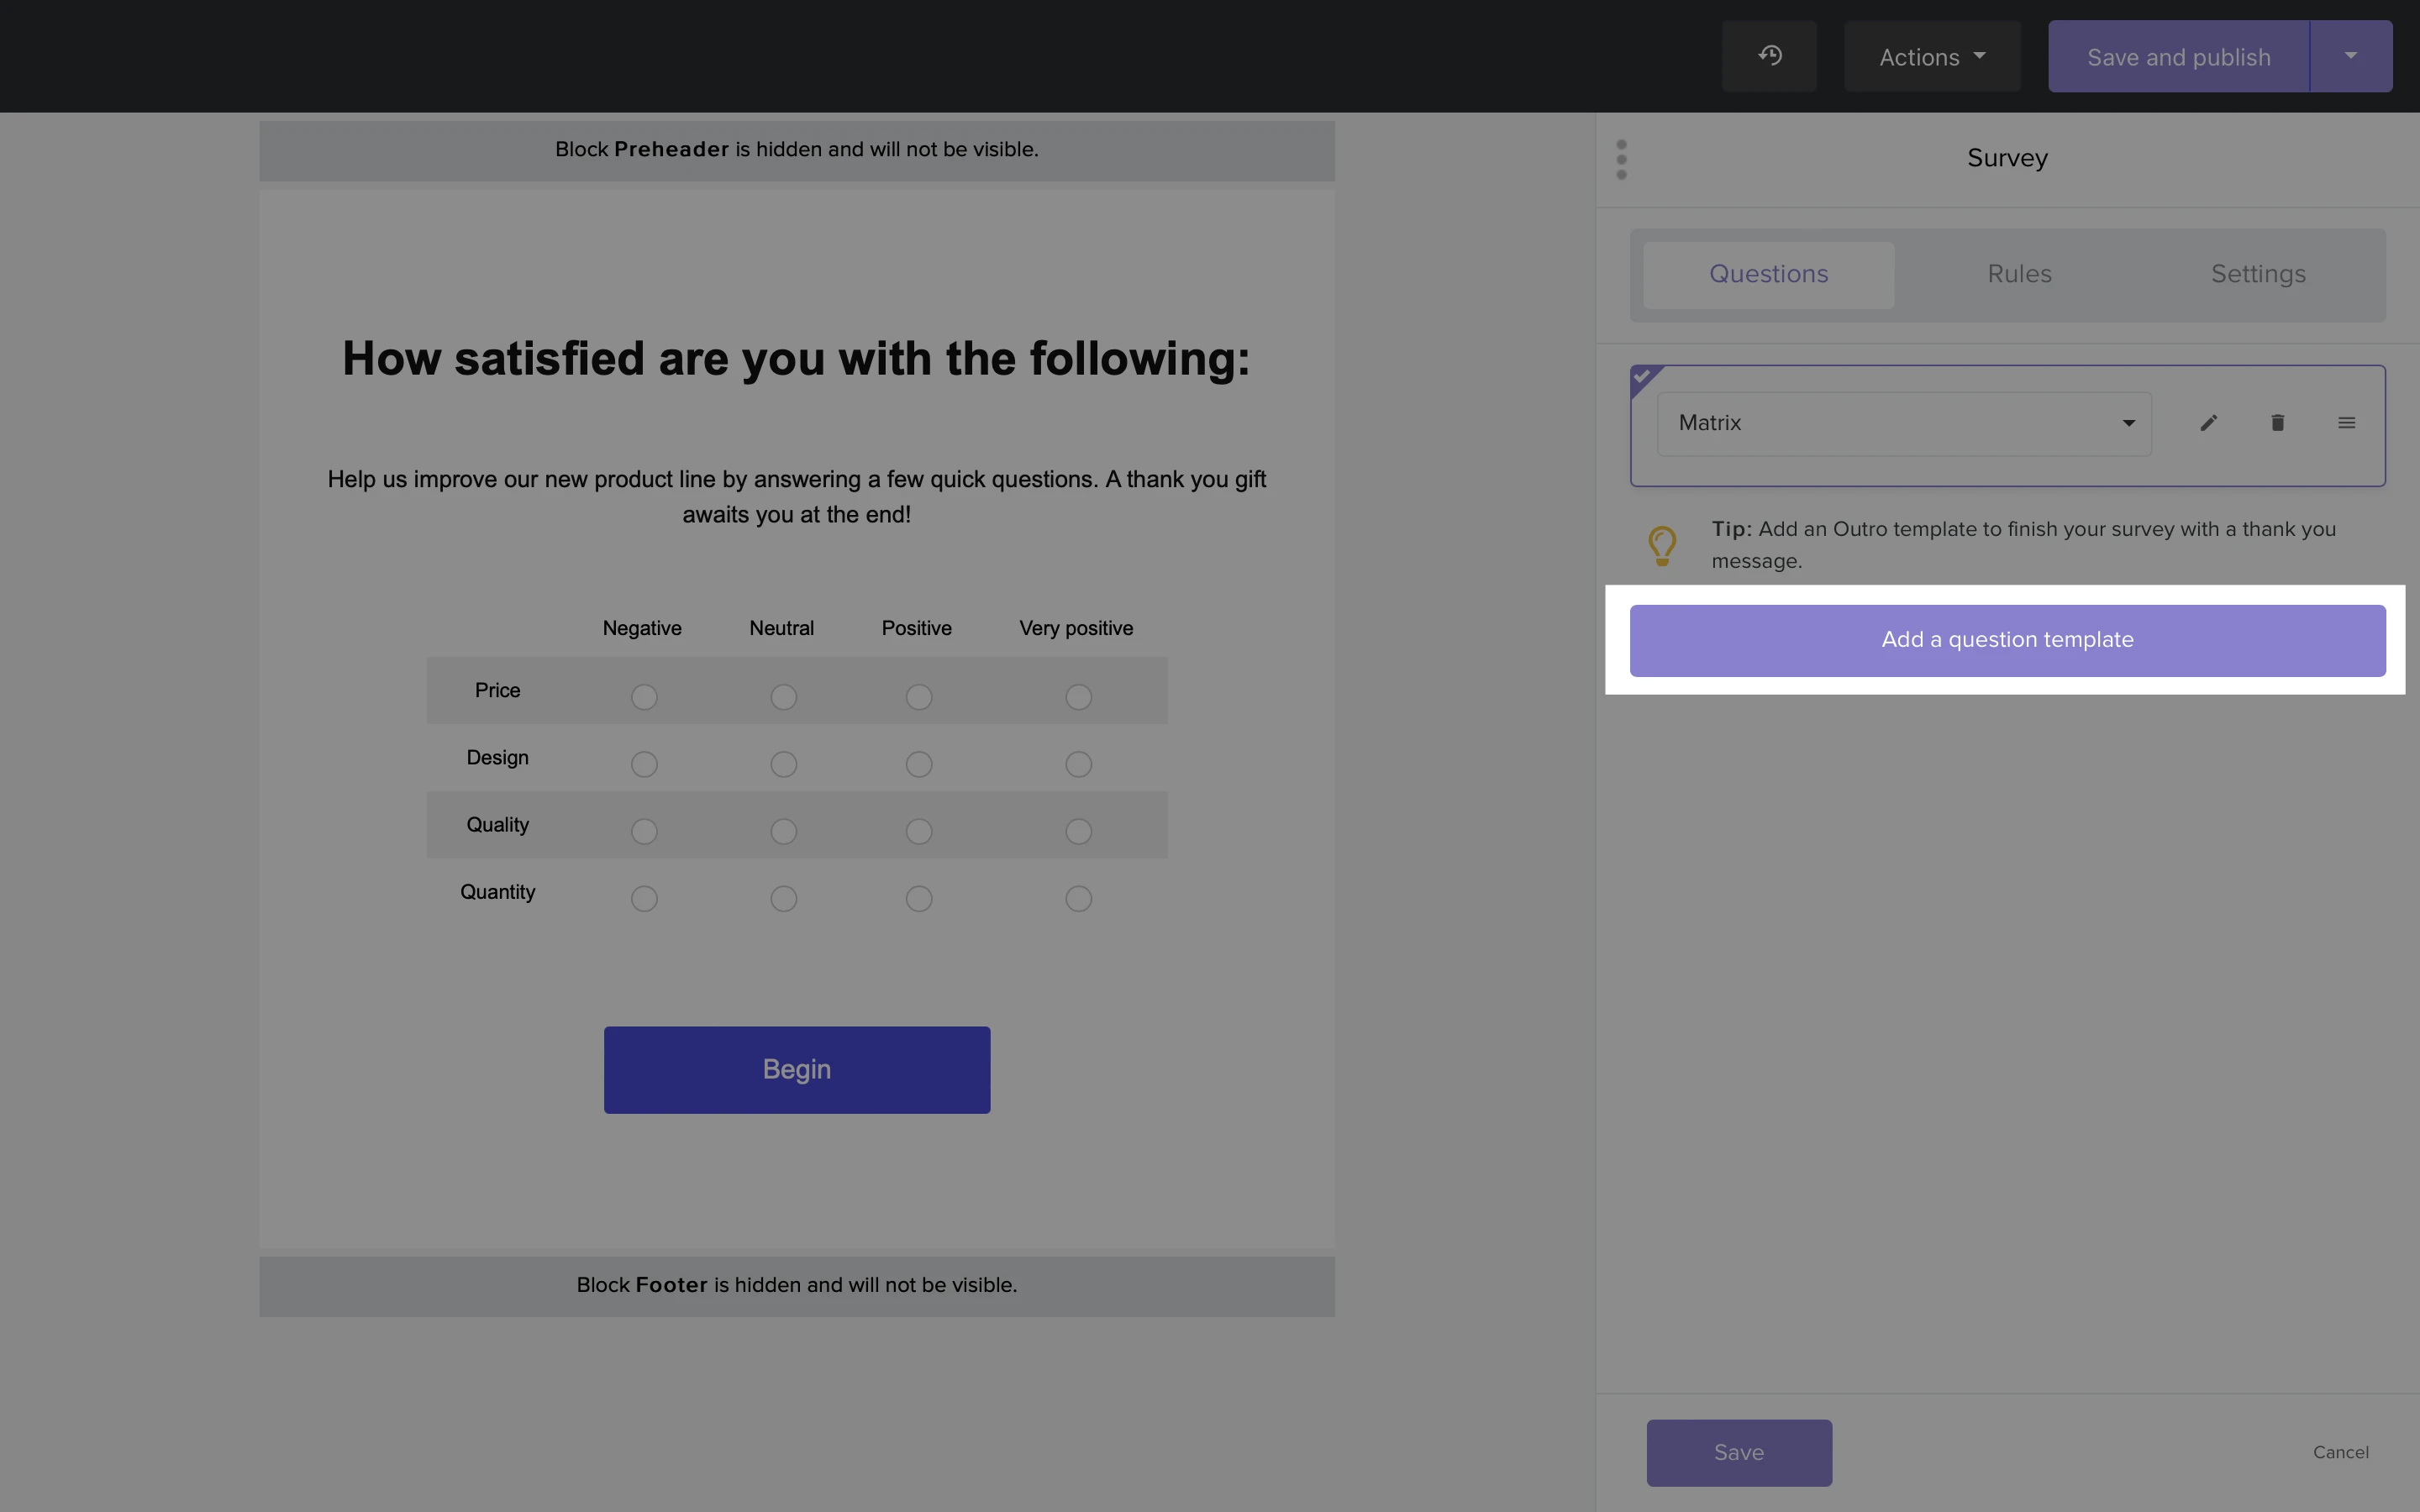
Then click the pencil icon to edit the Question, Description, and Answers. Click the trash icon to remove a question. If you want to reorder your questions, click the three horizontal lines and drag to rearrange them.
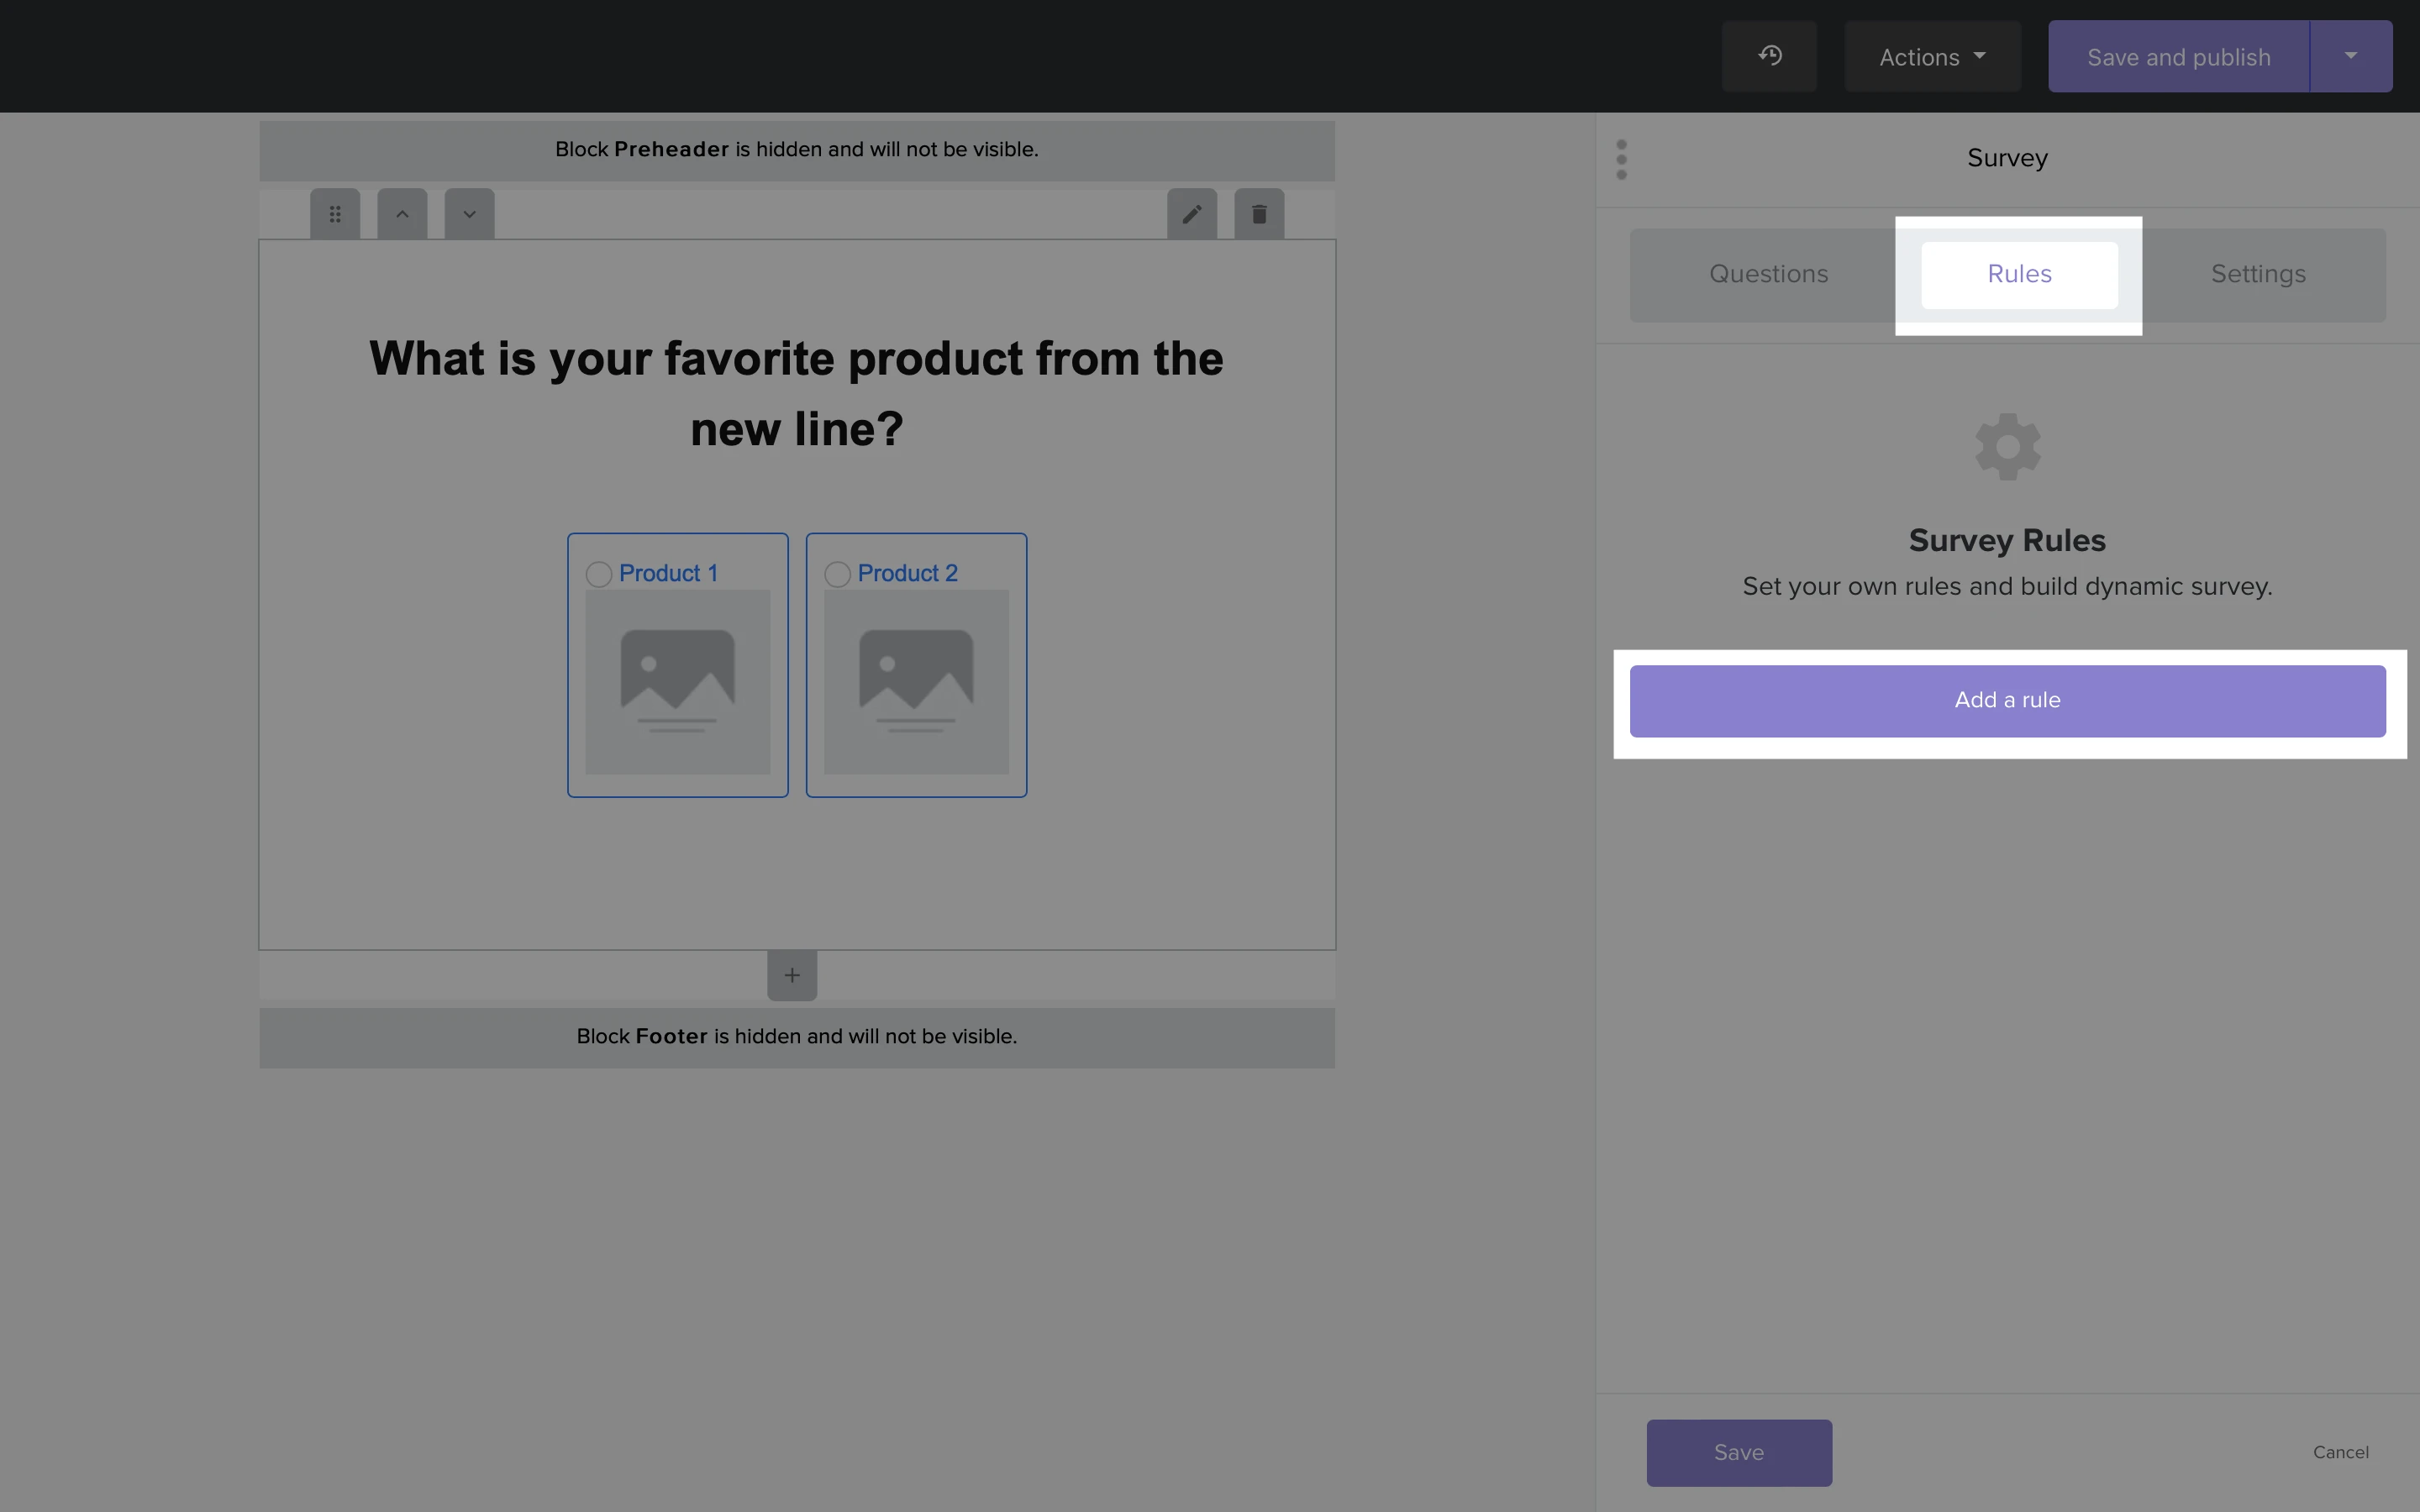
Rules
Make sure your survey is functional by adding rules. In the Rules tab, you can predefine a rule that performs a certain action if a question is answered in a certain way.
To add rules to your survey:
Click on the Survey block to select it.
In the sidebar, click the Rules tab.
Click Add a rule.
4. Use the dropdown menu to select a question.
5. Choose whether your rule will be applied if that question Is answered or Is answered with a specific answer.

6. If you chose Is answered with a specific answer, select the specific answer.
7. Finally, select the action Skip to the question, which allows you to choose a question to skip to when the subscriber meets the conditions of your rule.
Once you have set up your rule, click Save.
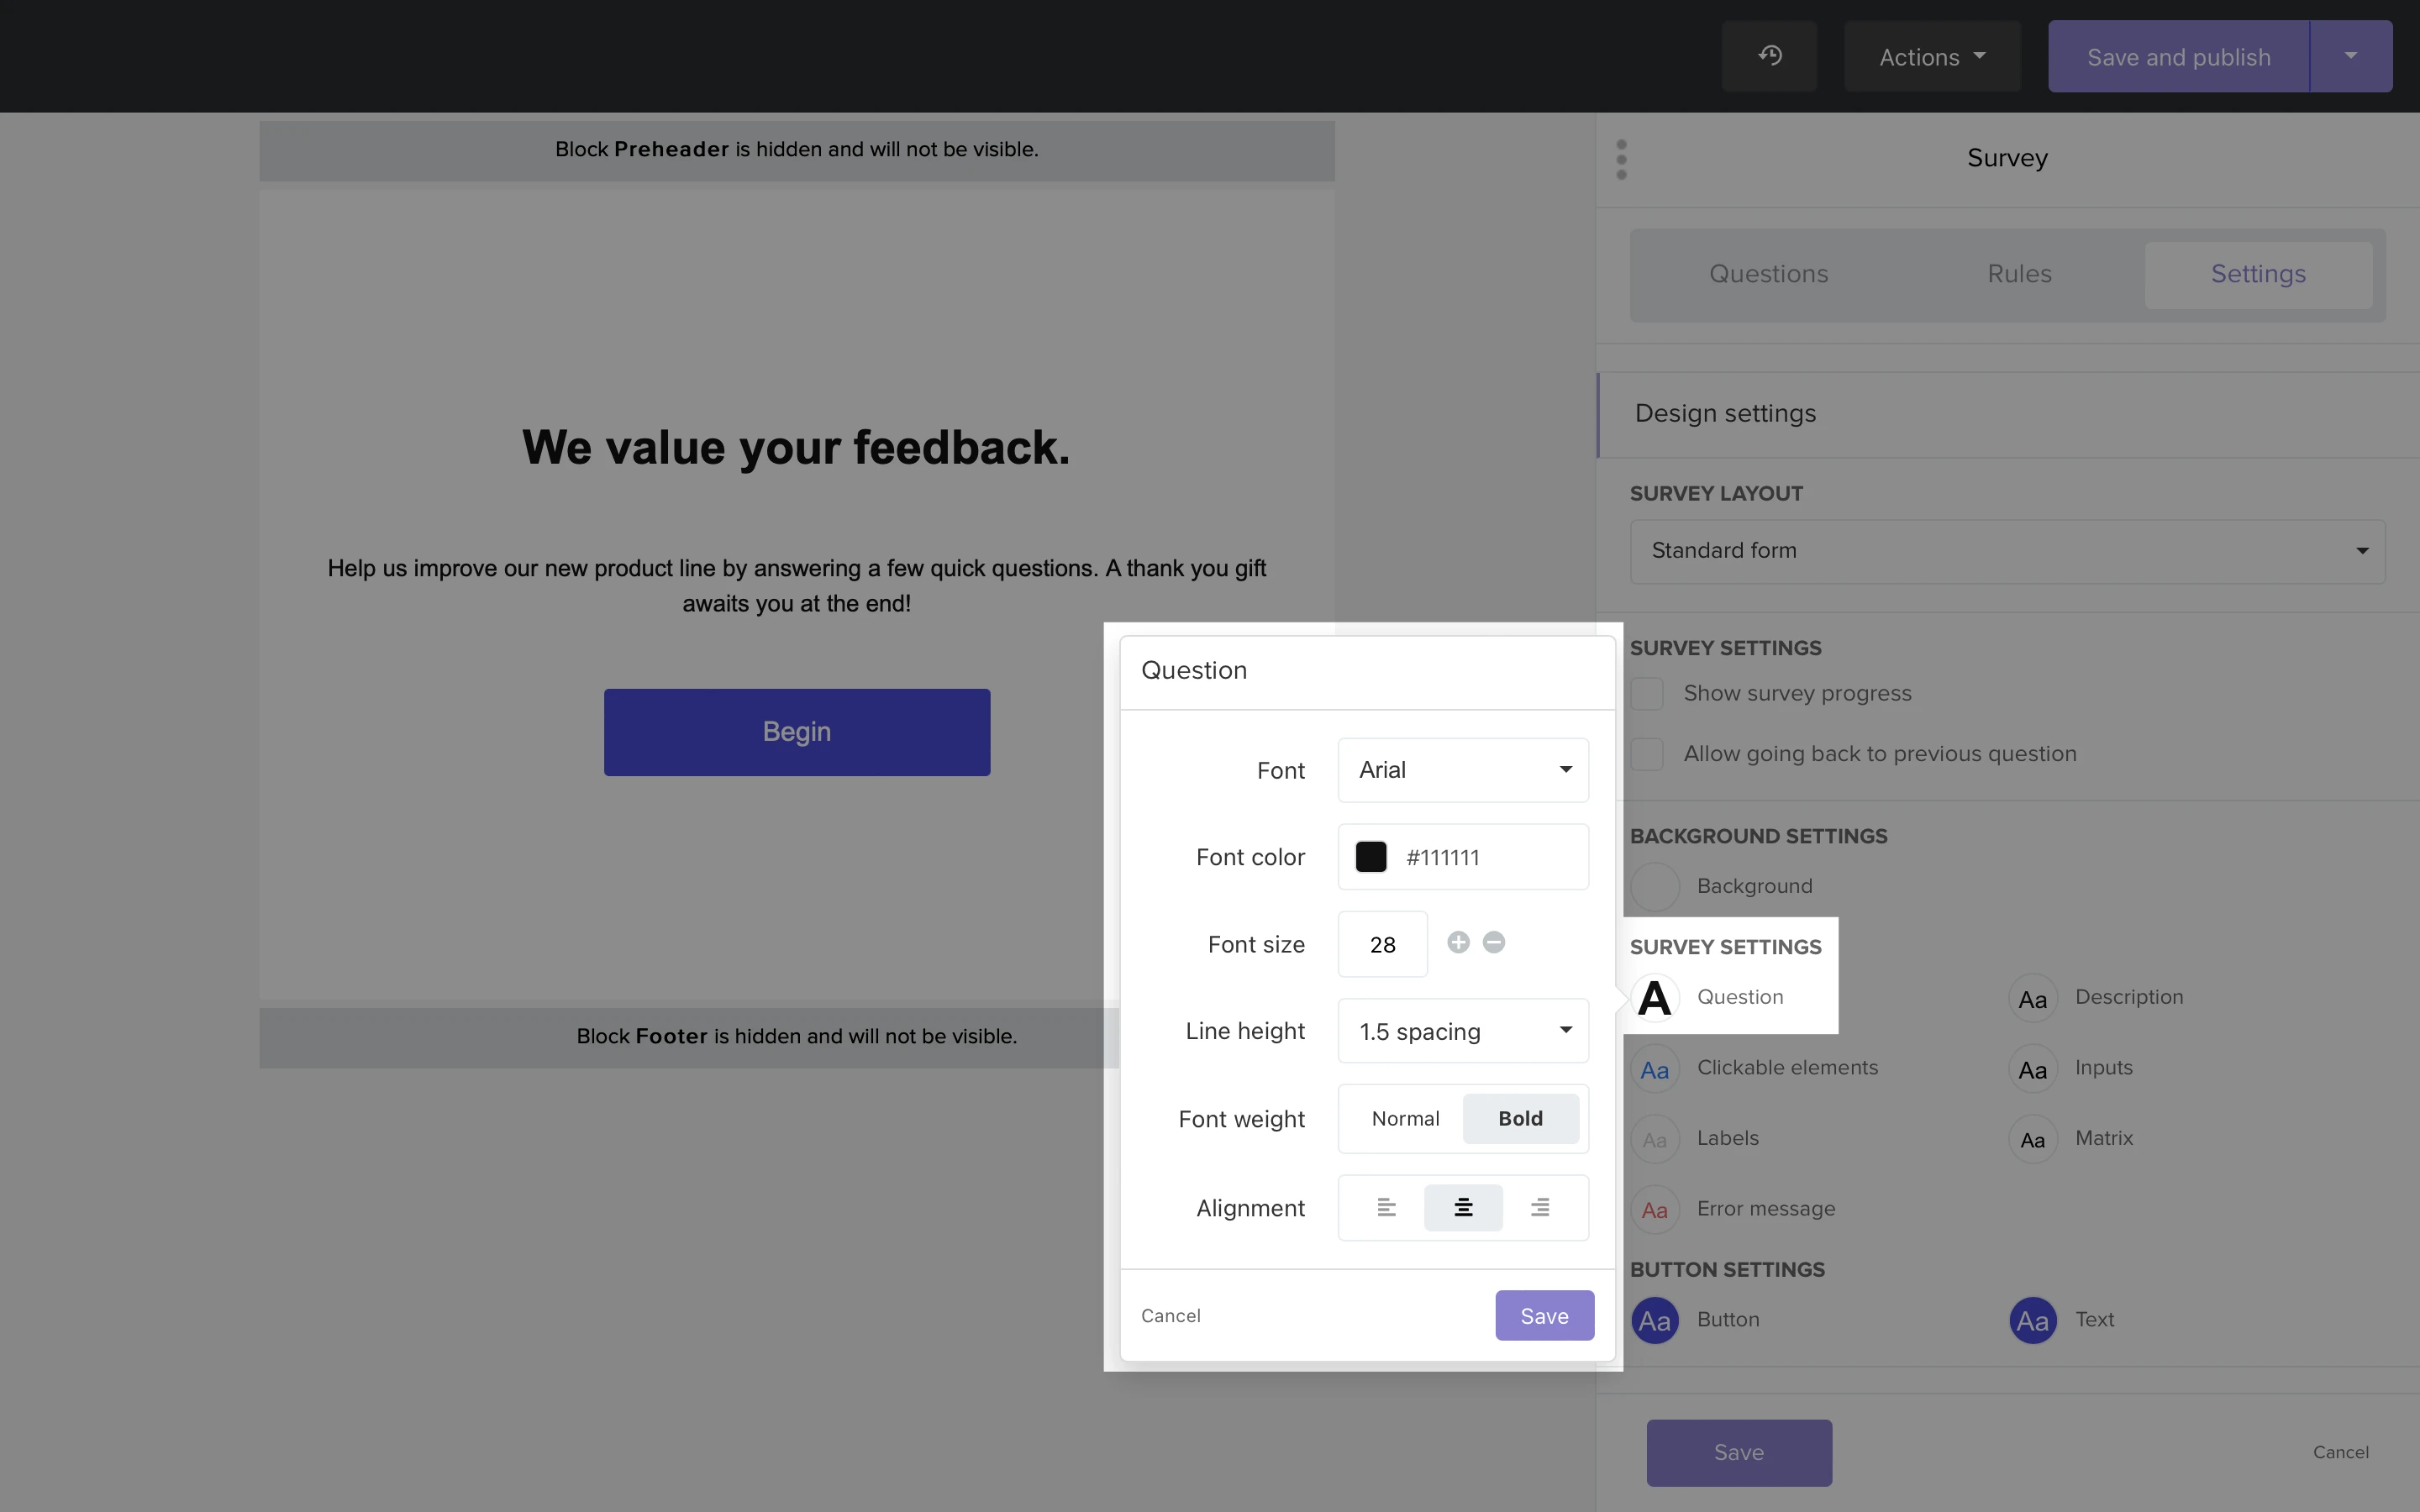
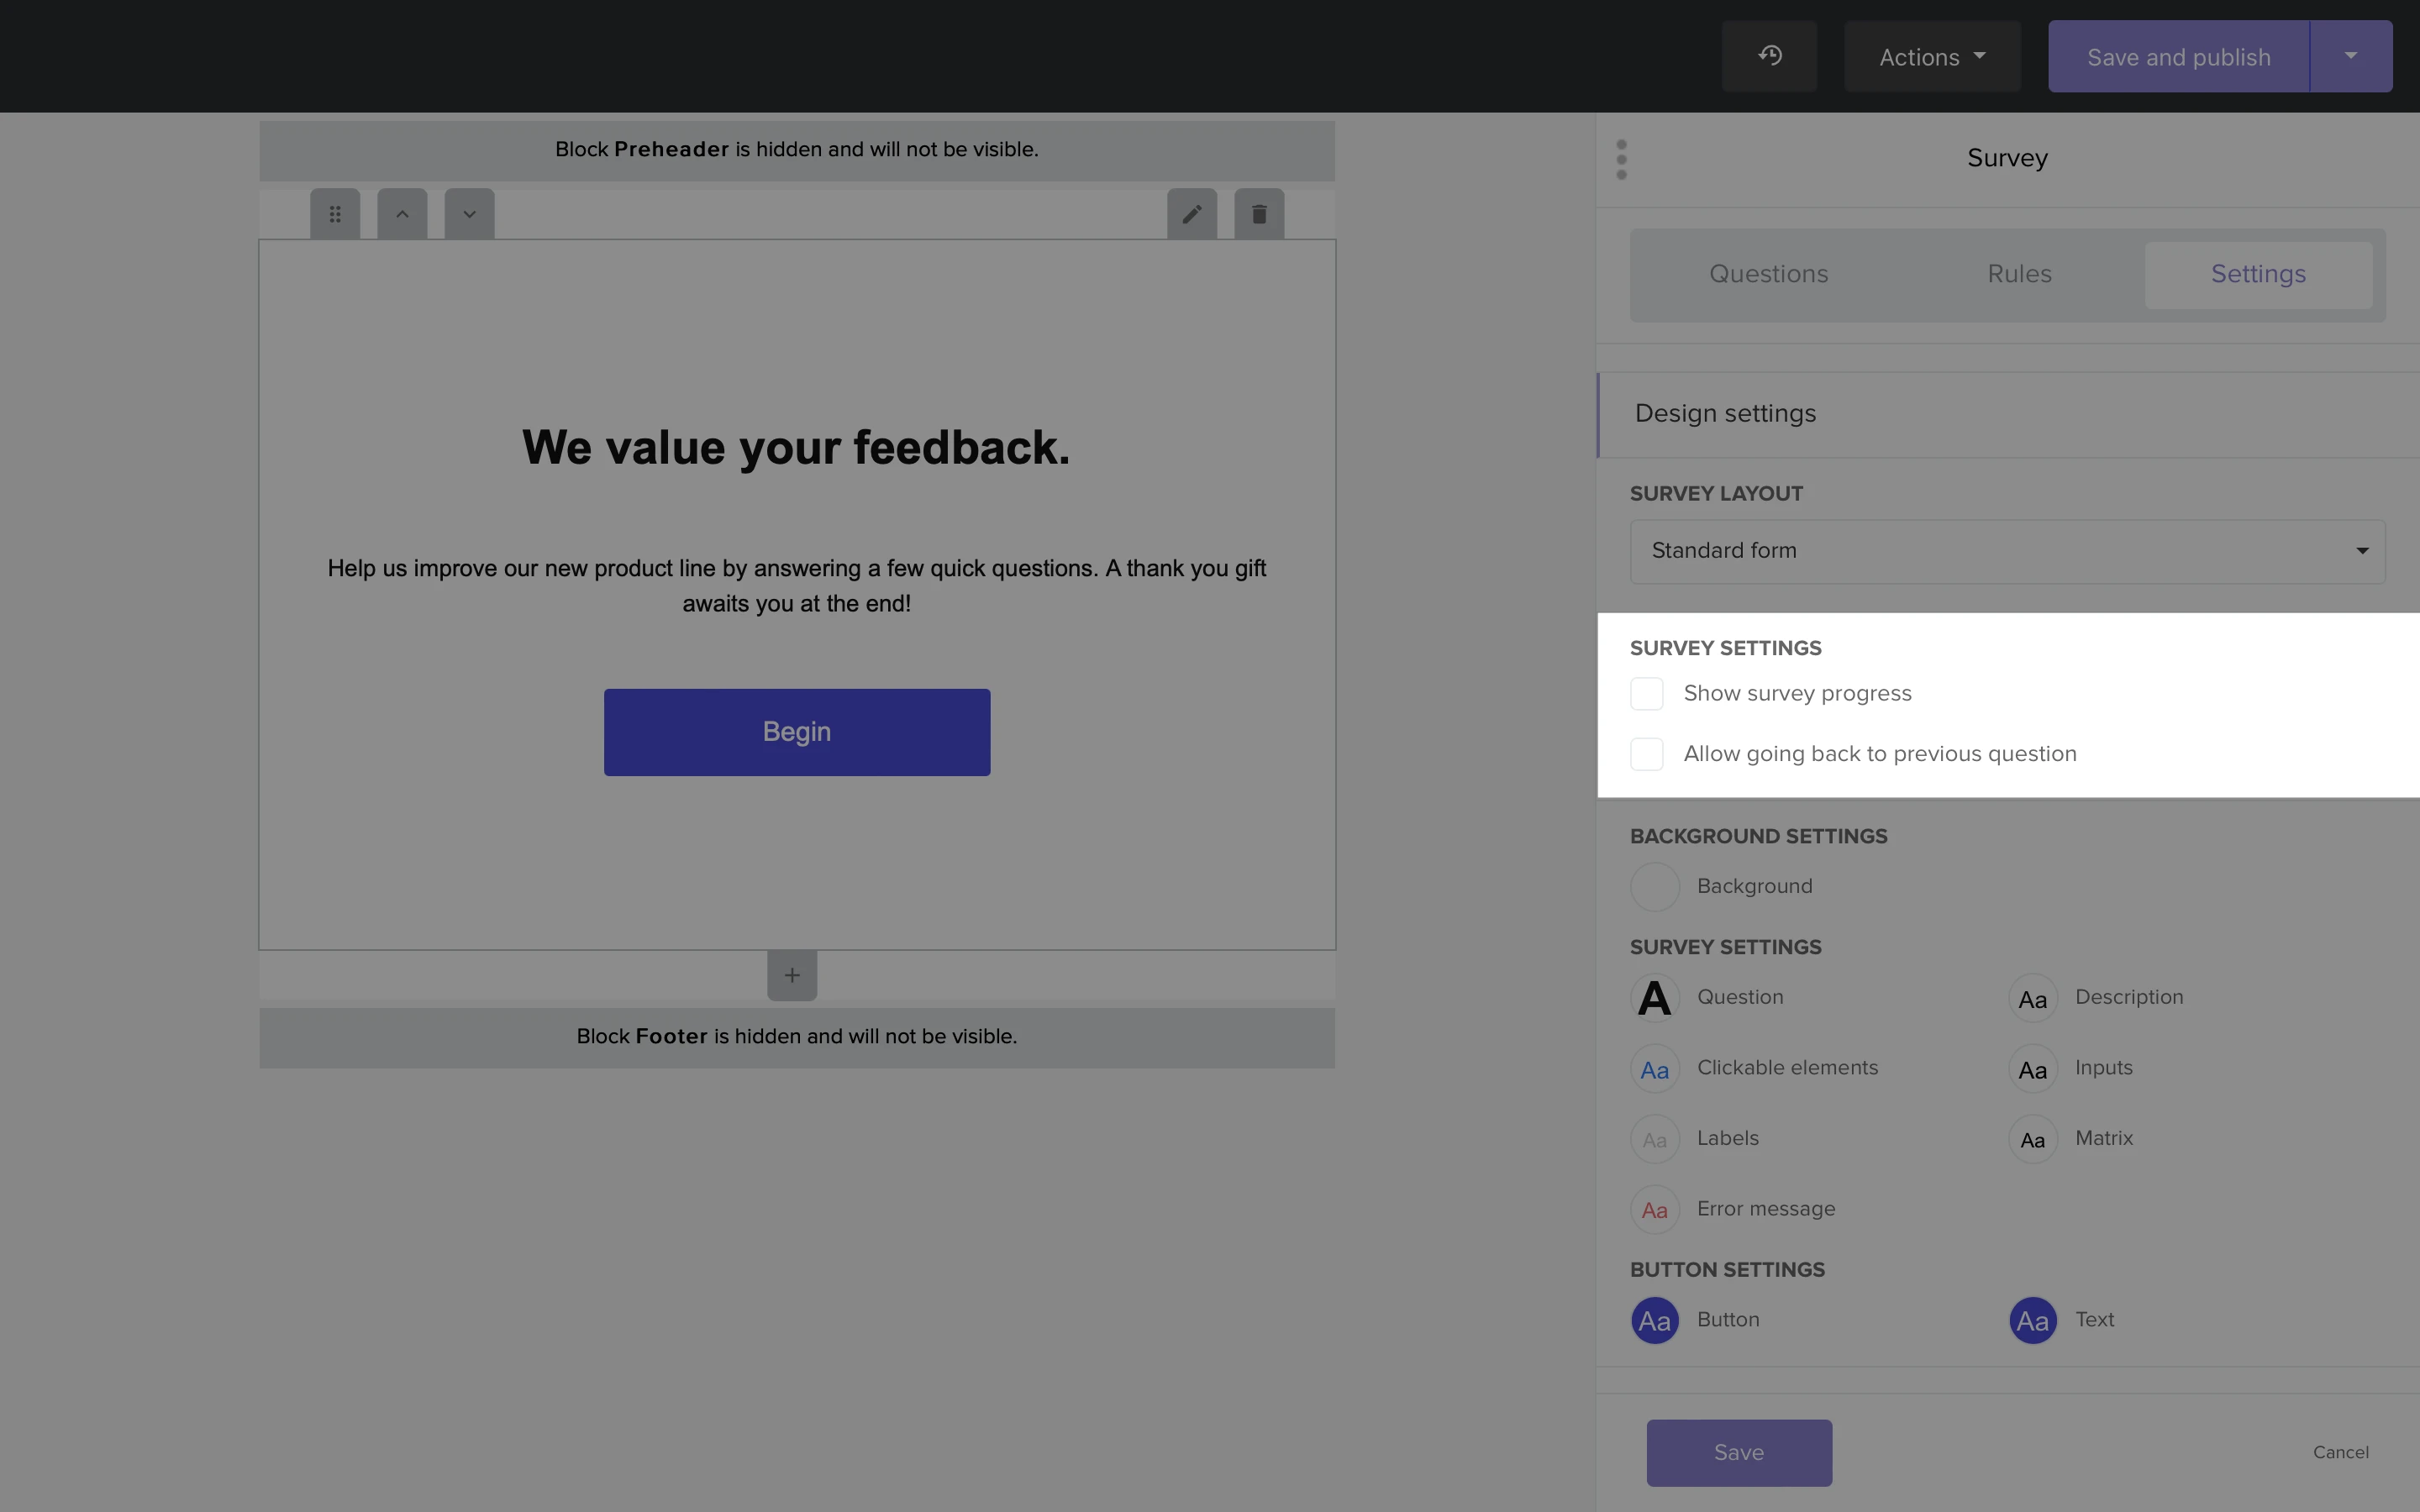
Settings
Under the Settings tab you can apply design settings to your Survey block such as Background and Content style.
Show survey progress: This will provide the respondents with a visual indication of their progress, such as a progress bar, showing how much of the survey they have completed and what remains.
Allow going back to previous questions: Enables respondents to navigate back to questions they have already answered and make changes if needed. If this option is not selected, respondents will be unable to return to previous questions and modify their answers once they have moved forward in the survey.
If the correct web hook events have been added and content tracking has been enabled on your domain, you will be able to view your survey events from the Activity page.
Navigate to the Emails > Activity page.
Choose the email address that you wish to view the survey results for. Under Subject, click the subject of the email.