How to integrate MailerSend with Airtable
What is Airtable?
Airtable is a cloud-based platform that combines the power of a database with the flexibility of a spreadsheet. This makes it a powerful tool for a wide range of tasks, including project management, CRM, customer support, and more.
Airtable's integration with MailerSend makes it easy to create data-driven email campaigns and send a personalized email to an entire Airtable row of contacts with a single click.
MailerSend’s library of responsive templates provides a quick start for sending Airtable HTML emails. With this integration, you can pull data from an Airtable record to personalize emails for individual recipients, making each message more targeted to your Airtable database of contacts.
How to use the MailerSend Airtable integration
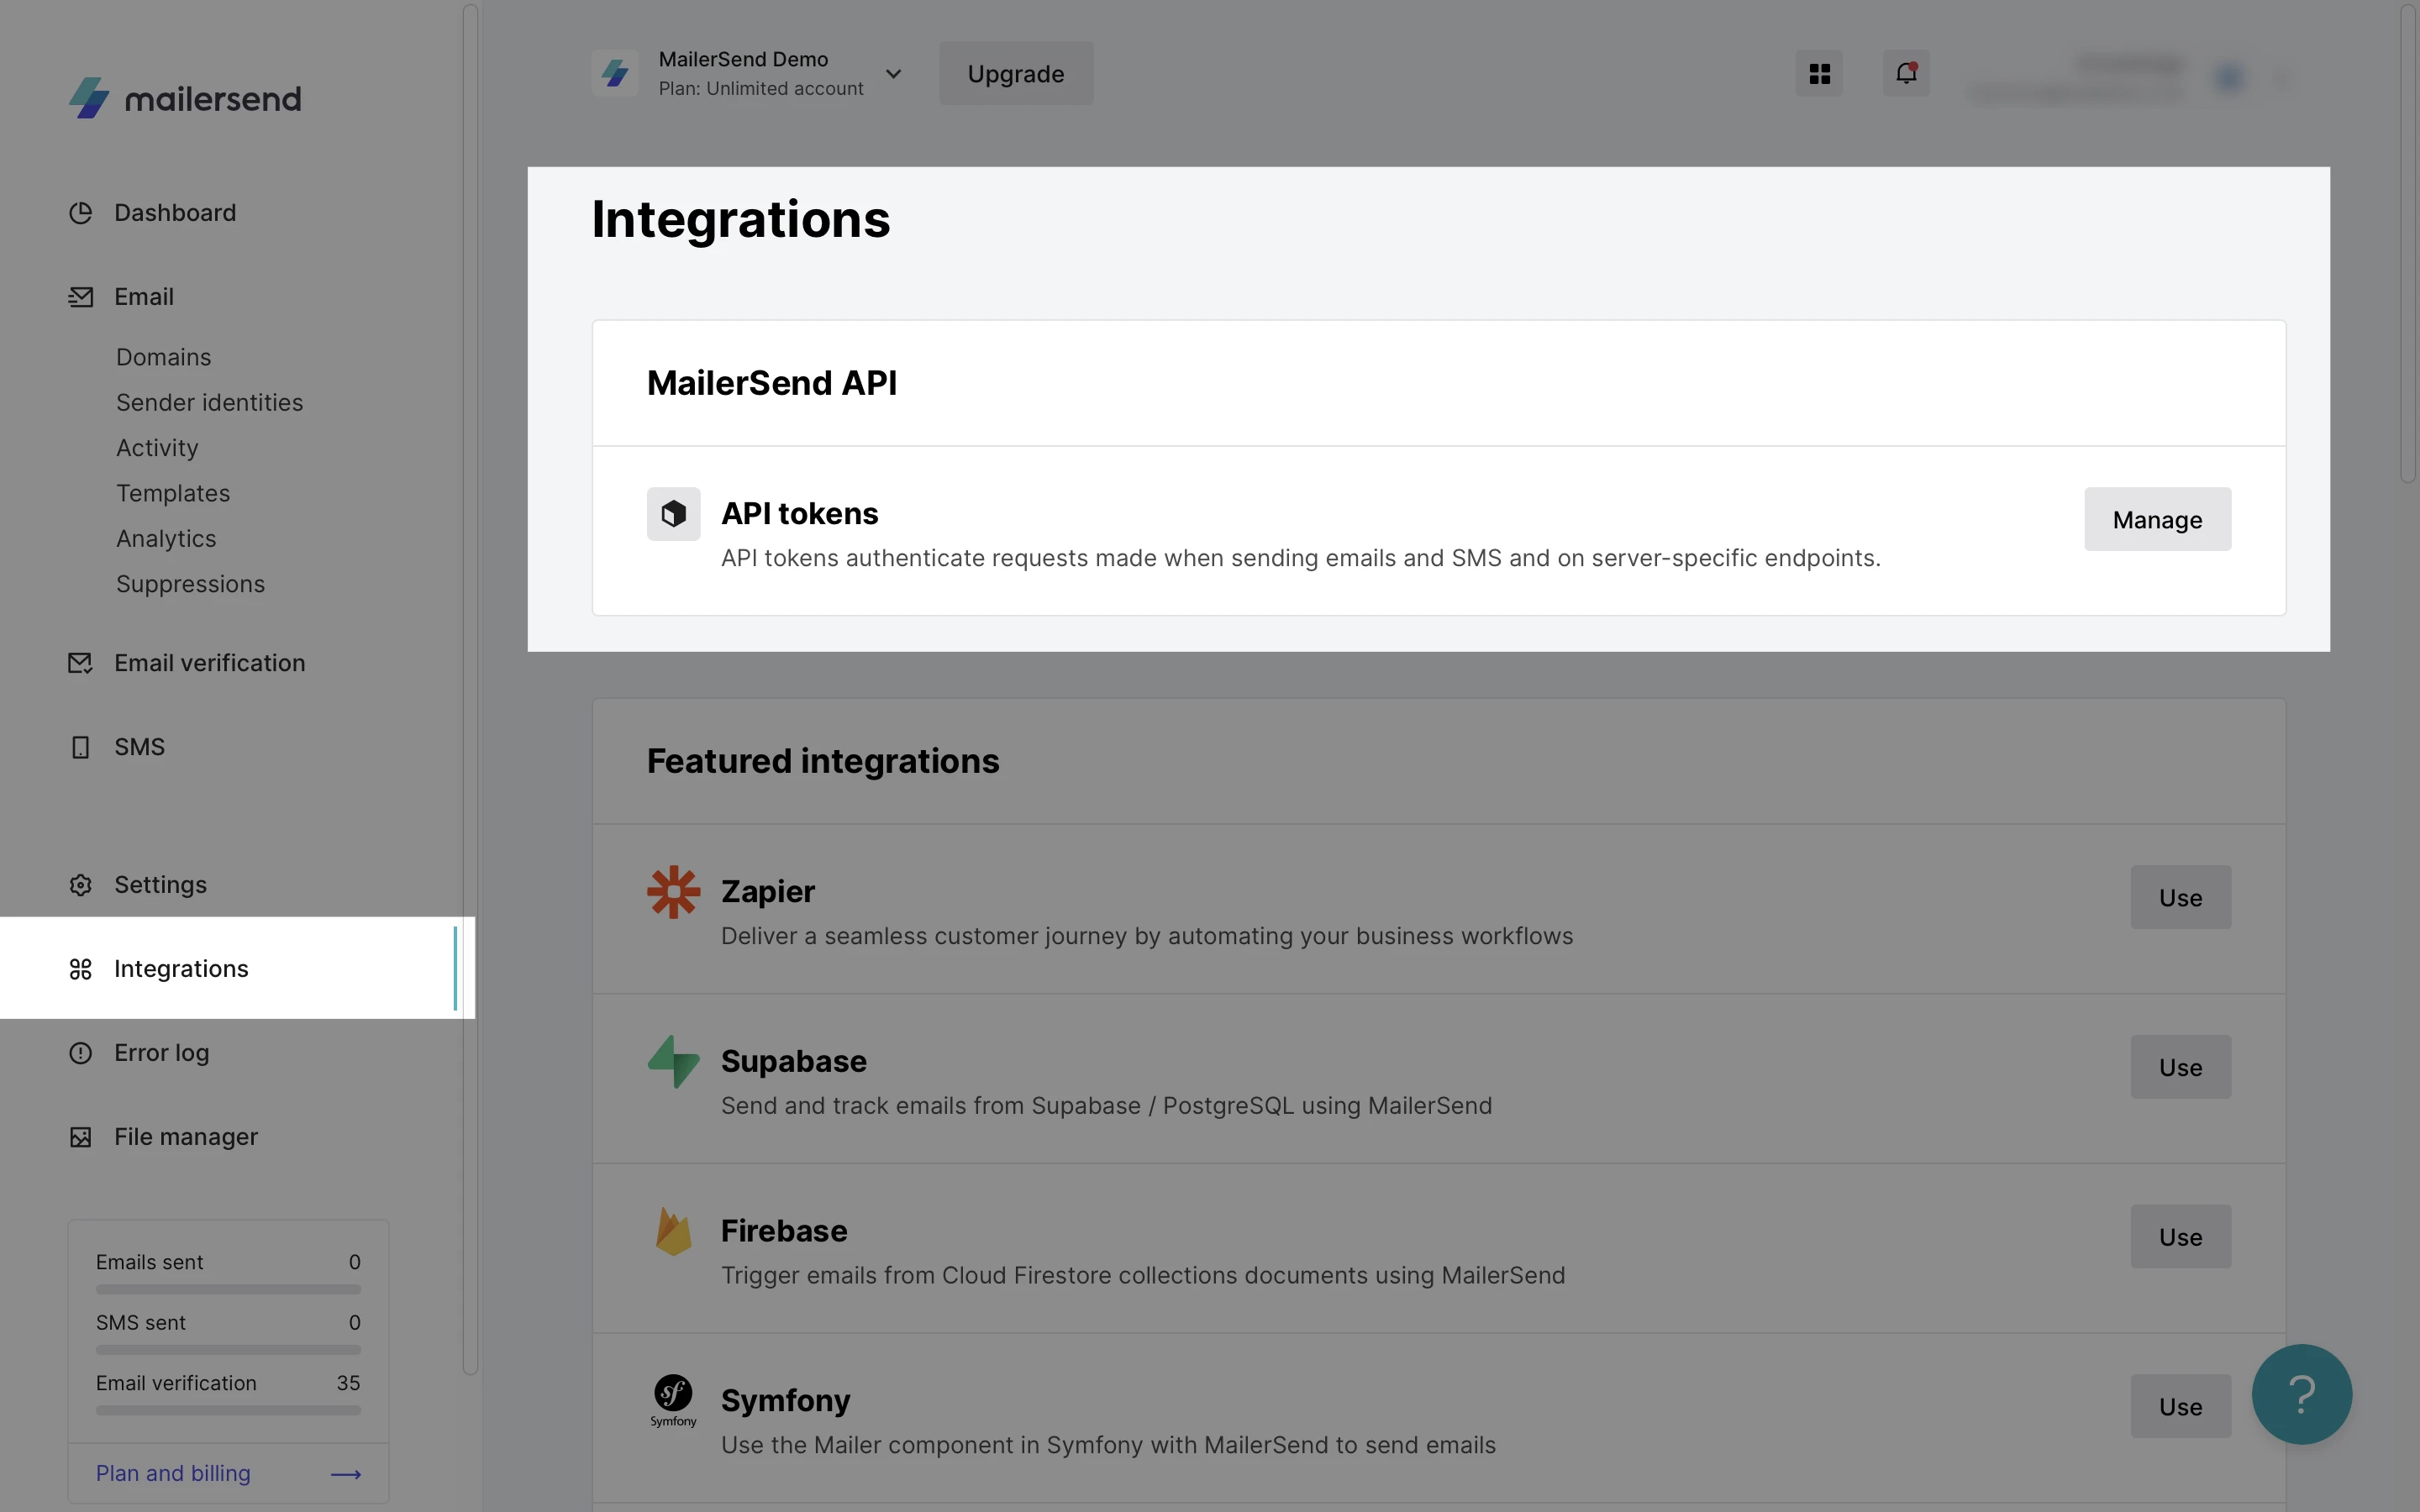
1. Starting in MailerSend, go to the Integrations page.
2. Under MailerSend API, click Manage.
3. Click Generate new token.
4. Enter a token name, domain, and permissions for your Airtable integration.
5. Click Create token.
6. Copy or download your unique API key.
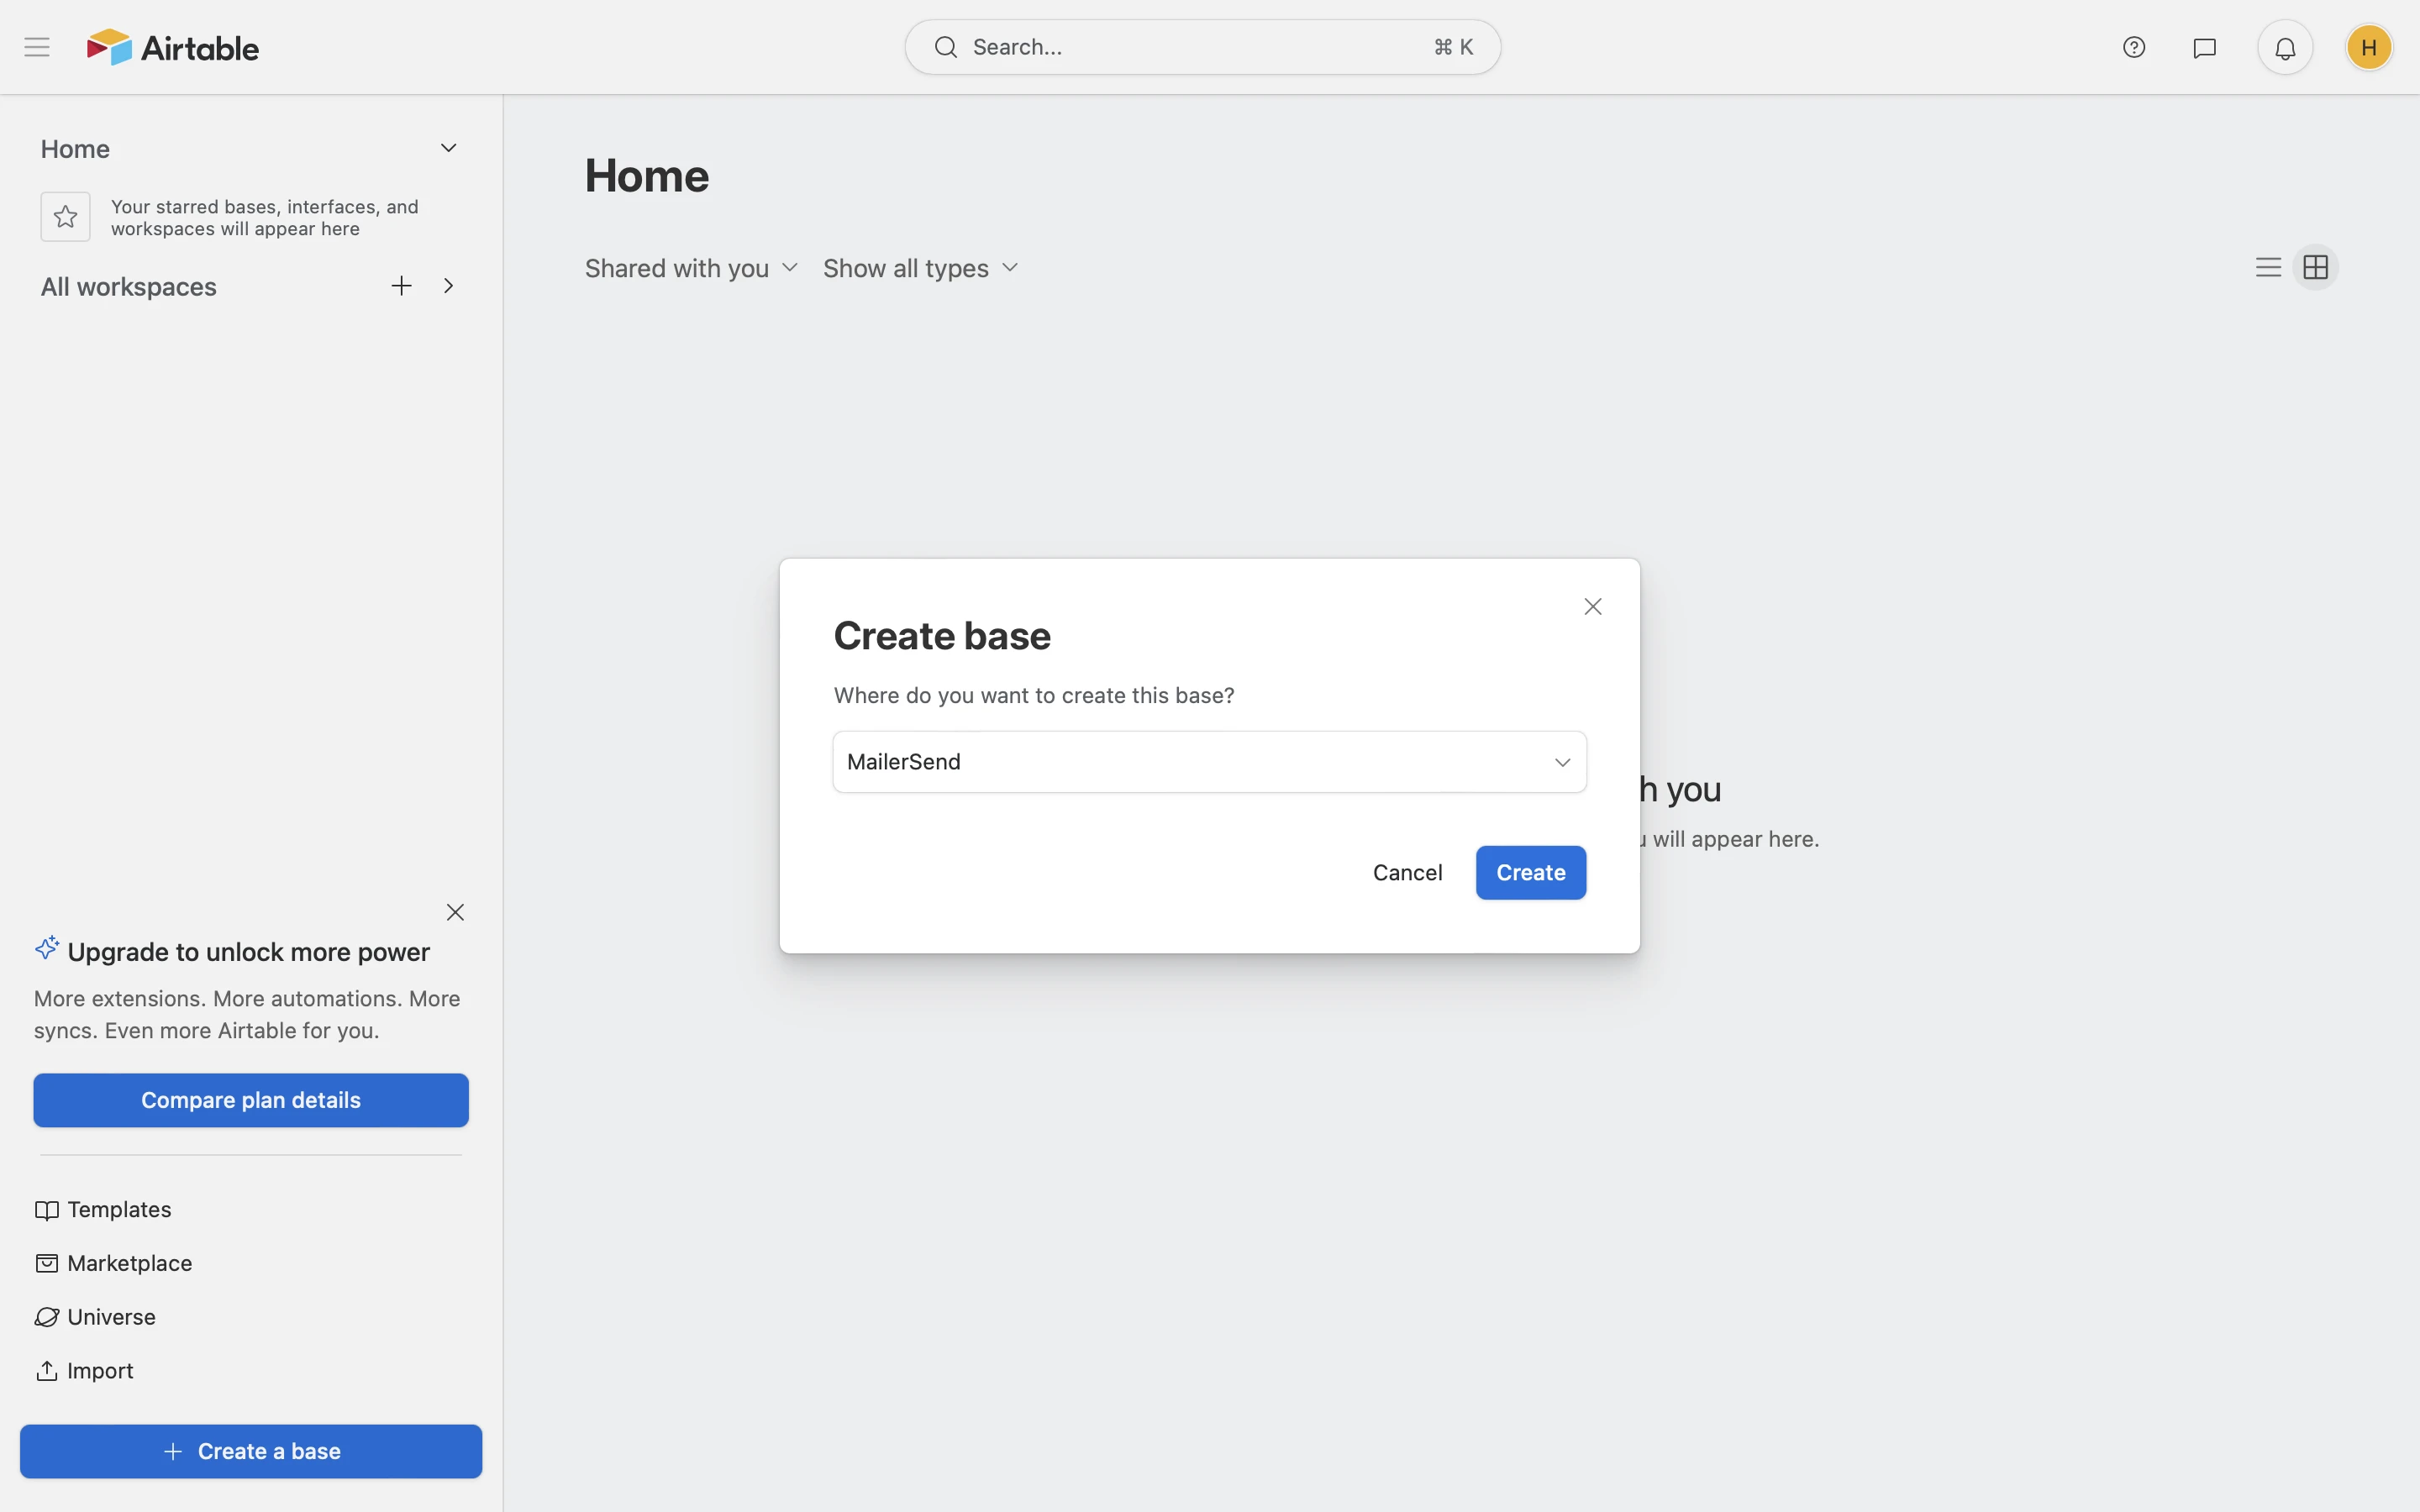
7. In Airtable, create a new base for MailerSend by clicking + Create a base.
8. Navigate to Extensions and click Add an extension.
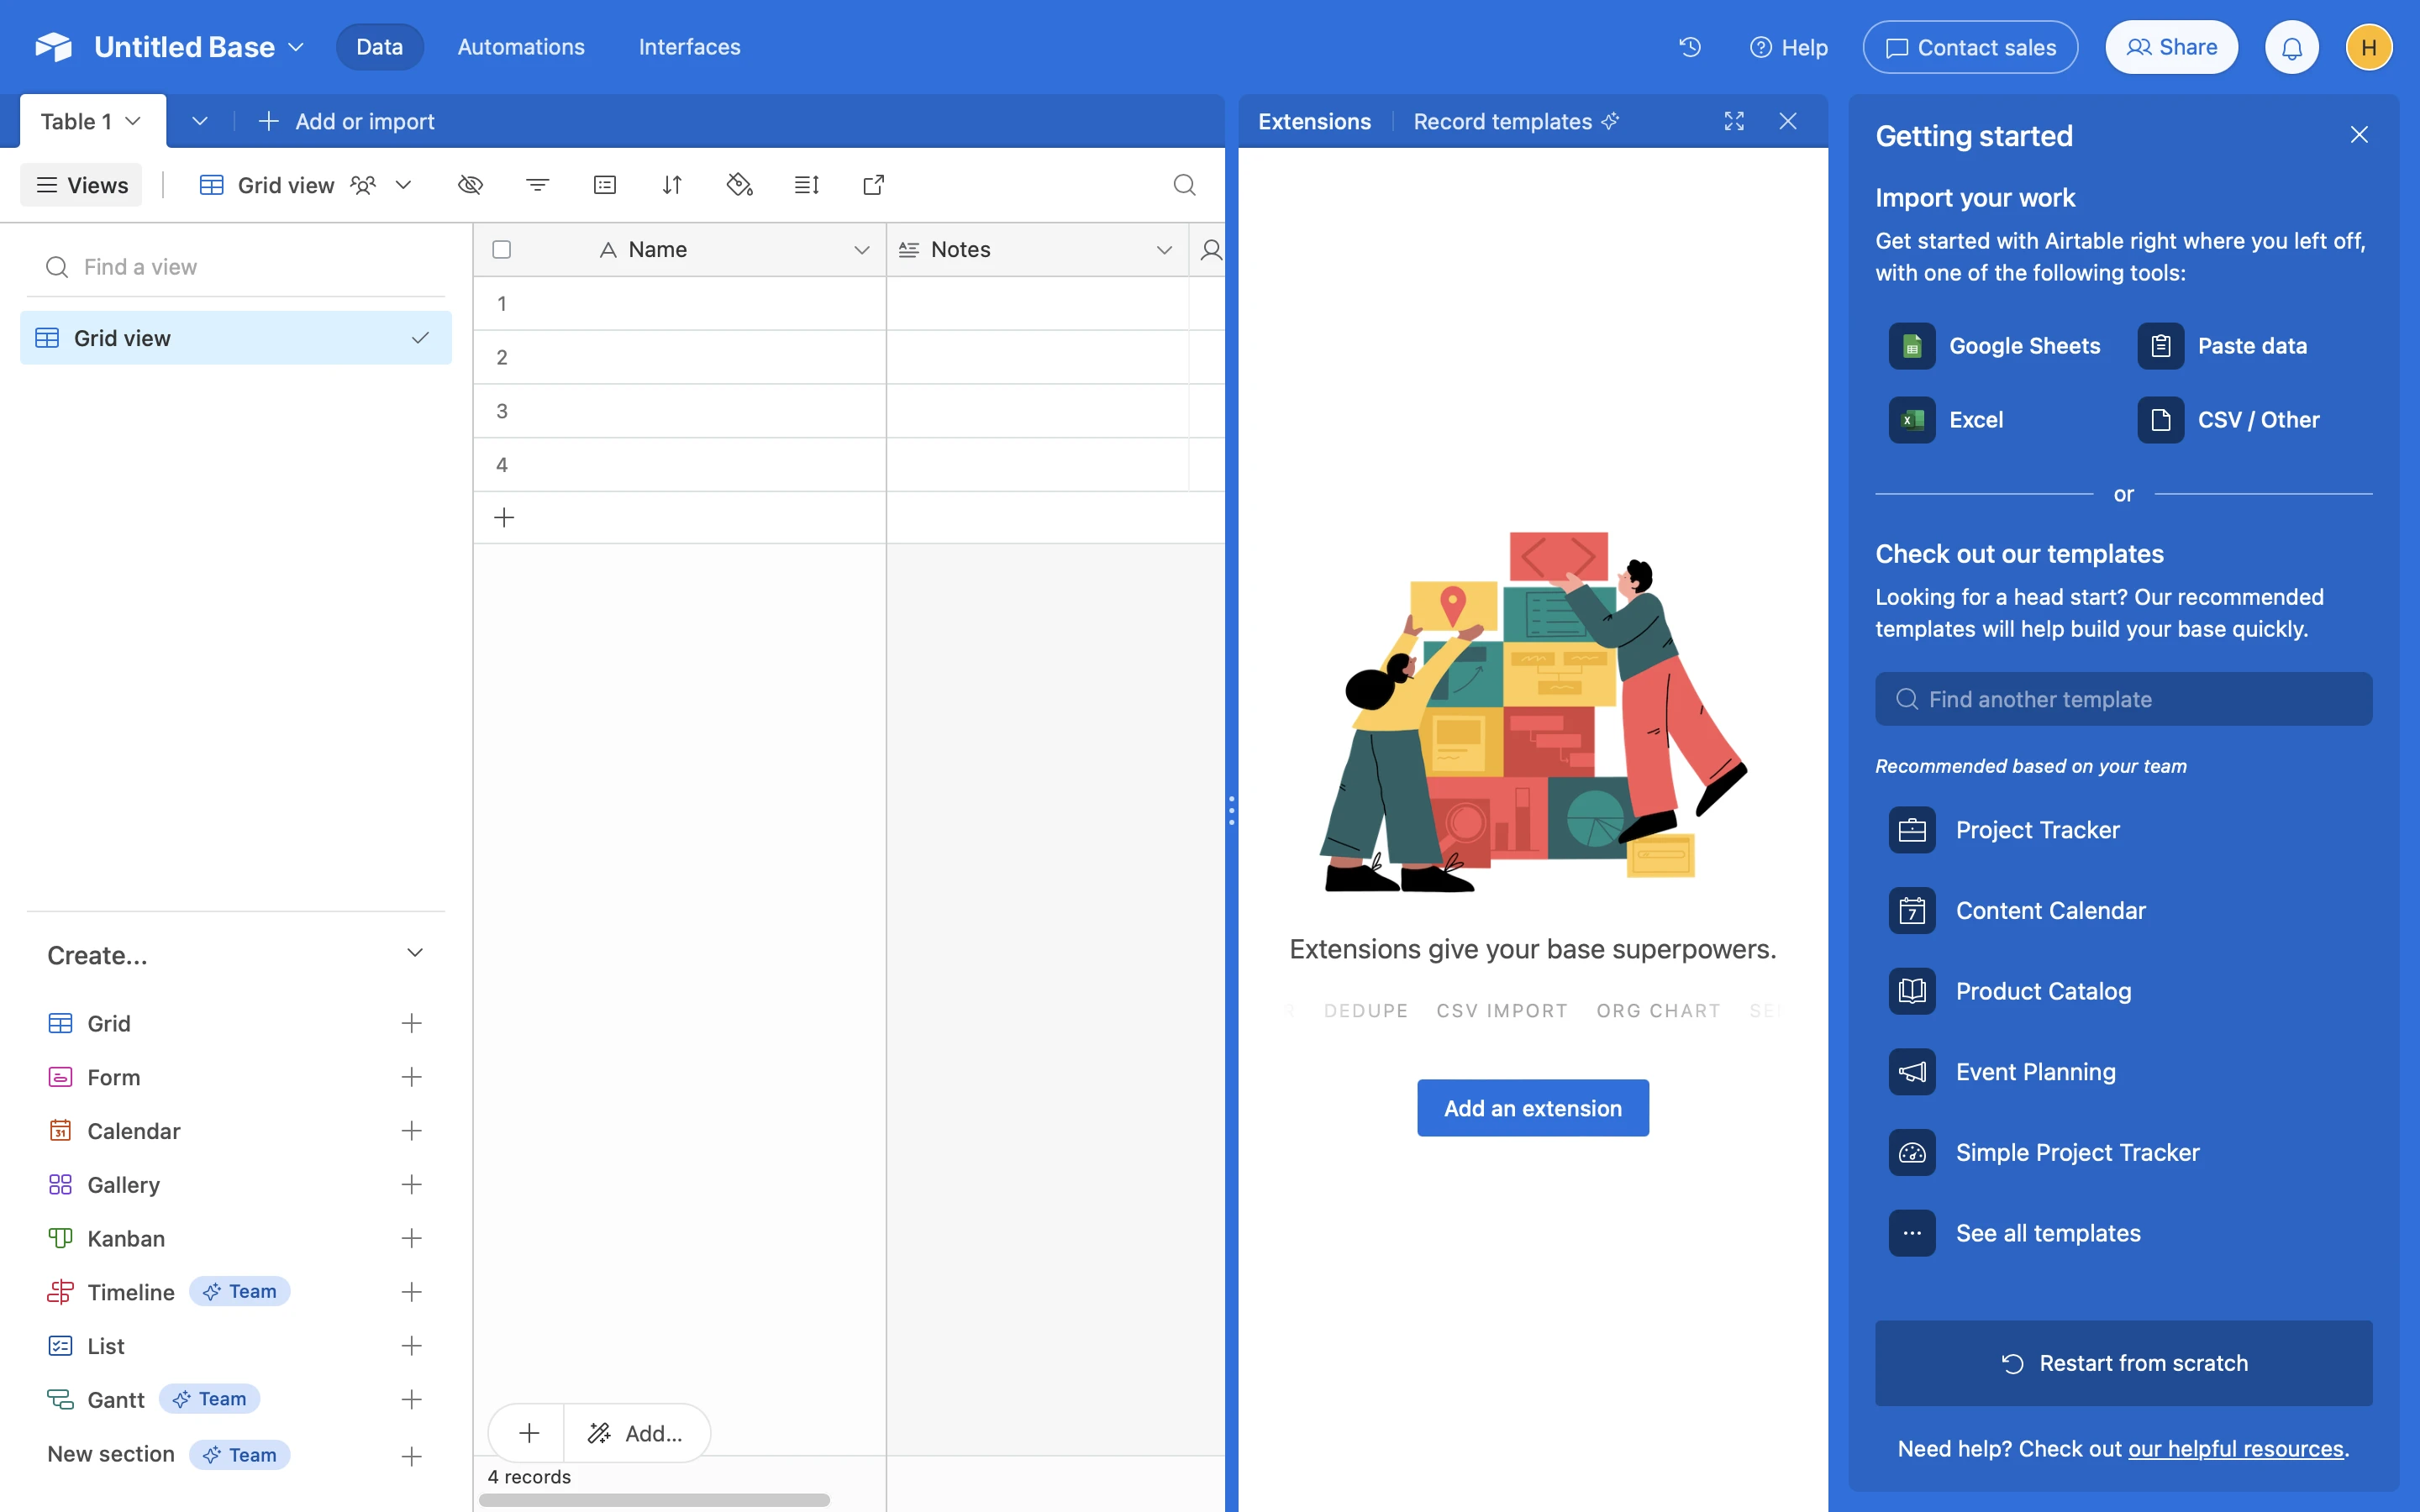
9. Install the MailerSend extension to your base and paste the API token in the correct field.
10. In Settings and sender information, enter a “From” name and “Reply-to” email address and save.
11. On the Send an email page, select the table and view you would like to use to send emails to. Select the To, CC and BCC fields and add a subject and body to your email.
To use a MailerSend template, enable the template option and enter your template ID
To add an attachment, use the Attachment field
To add personalization to the email, use a {{tag}} using the name of the Airtable column
To insert an email address into the To, CC, or BCC fields from another table, use Airtable's lookup fields
To send a single email message to multiple email addresses, add the email addresses separated by a comma.
12. Click Send.
And that’s it! To verify that the email was successfully sent, you can choose to display the sending status in the Results field and then click Get Results. Additionally, you can monitor the status of the email by visiting the Activity page within MailerSend.