Getting started with MailerSend
Step 1: Sign up for a free MailerSend account
1. Create your free MailerSend account.
2. Confirm your email address from the verification email sent to the address you signed up with.
Your account will now be activated with a trial plan and you can send an email with your trial domain.
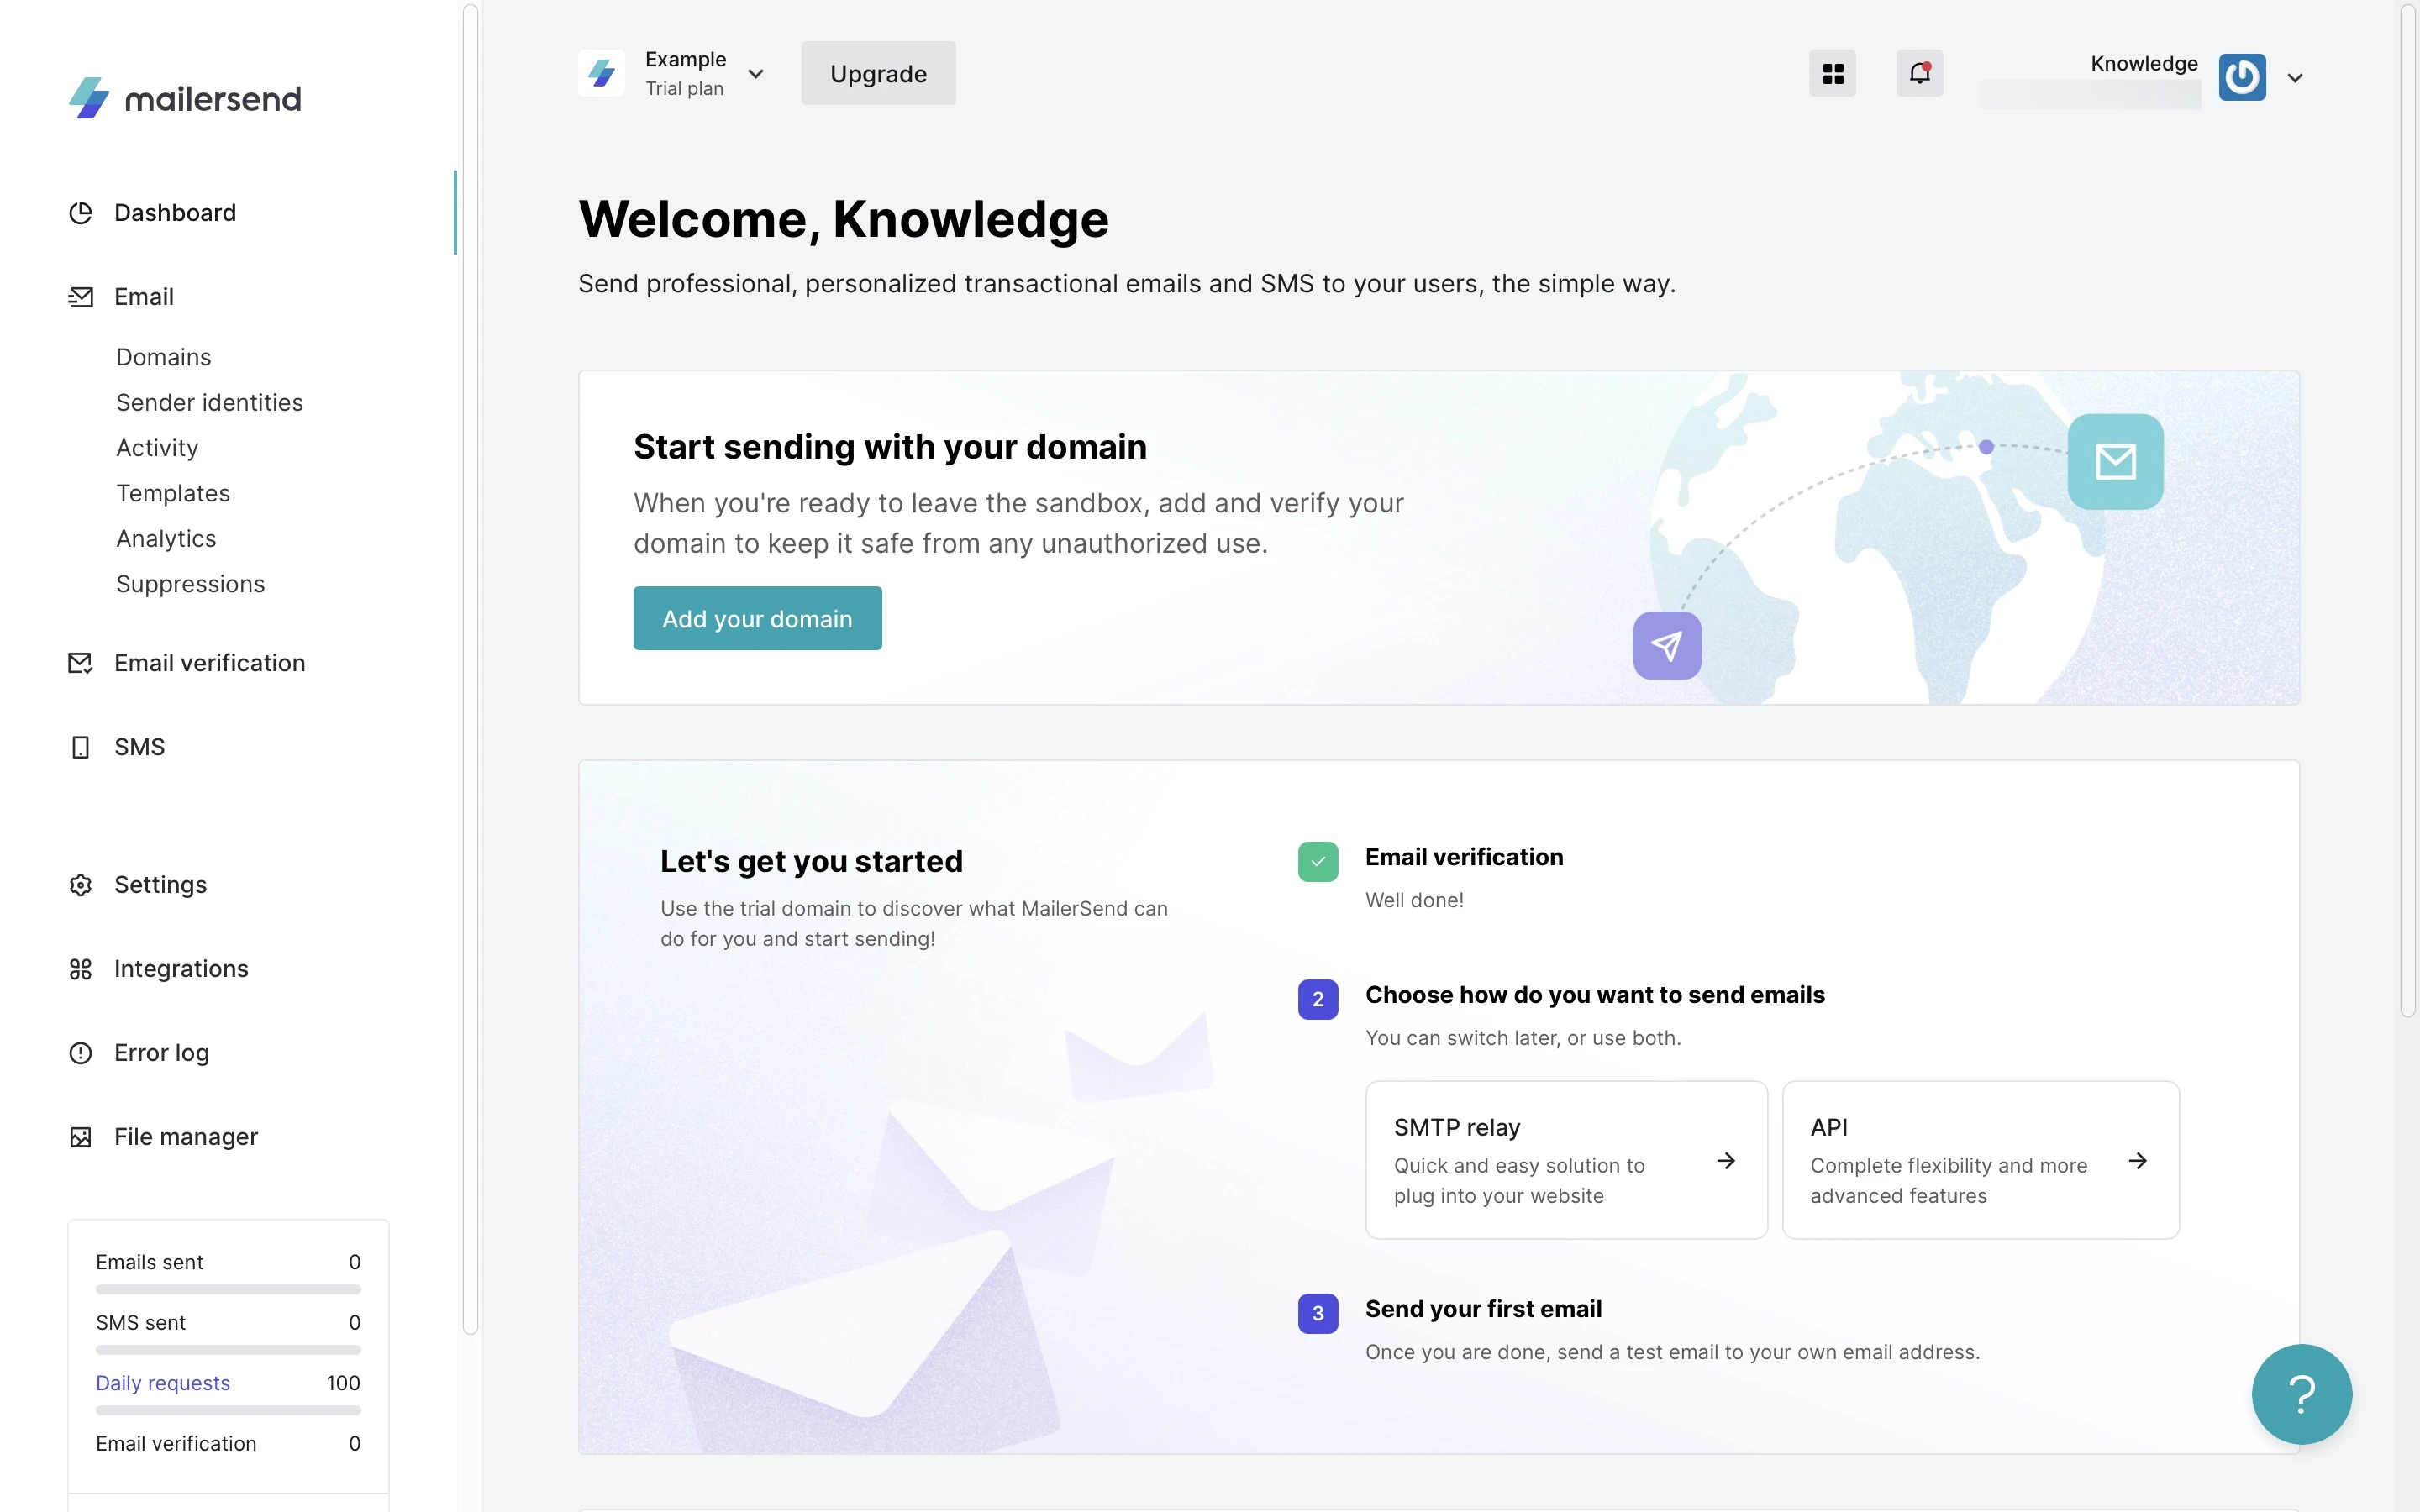
Step 2: Create an API token or SMTP user
To send email with the API, from the dashboard:
1. Click the API option.
2. Enter a name and expiration date for your API token and select the permissions.
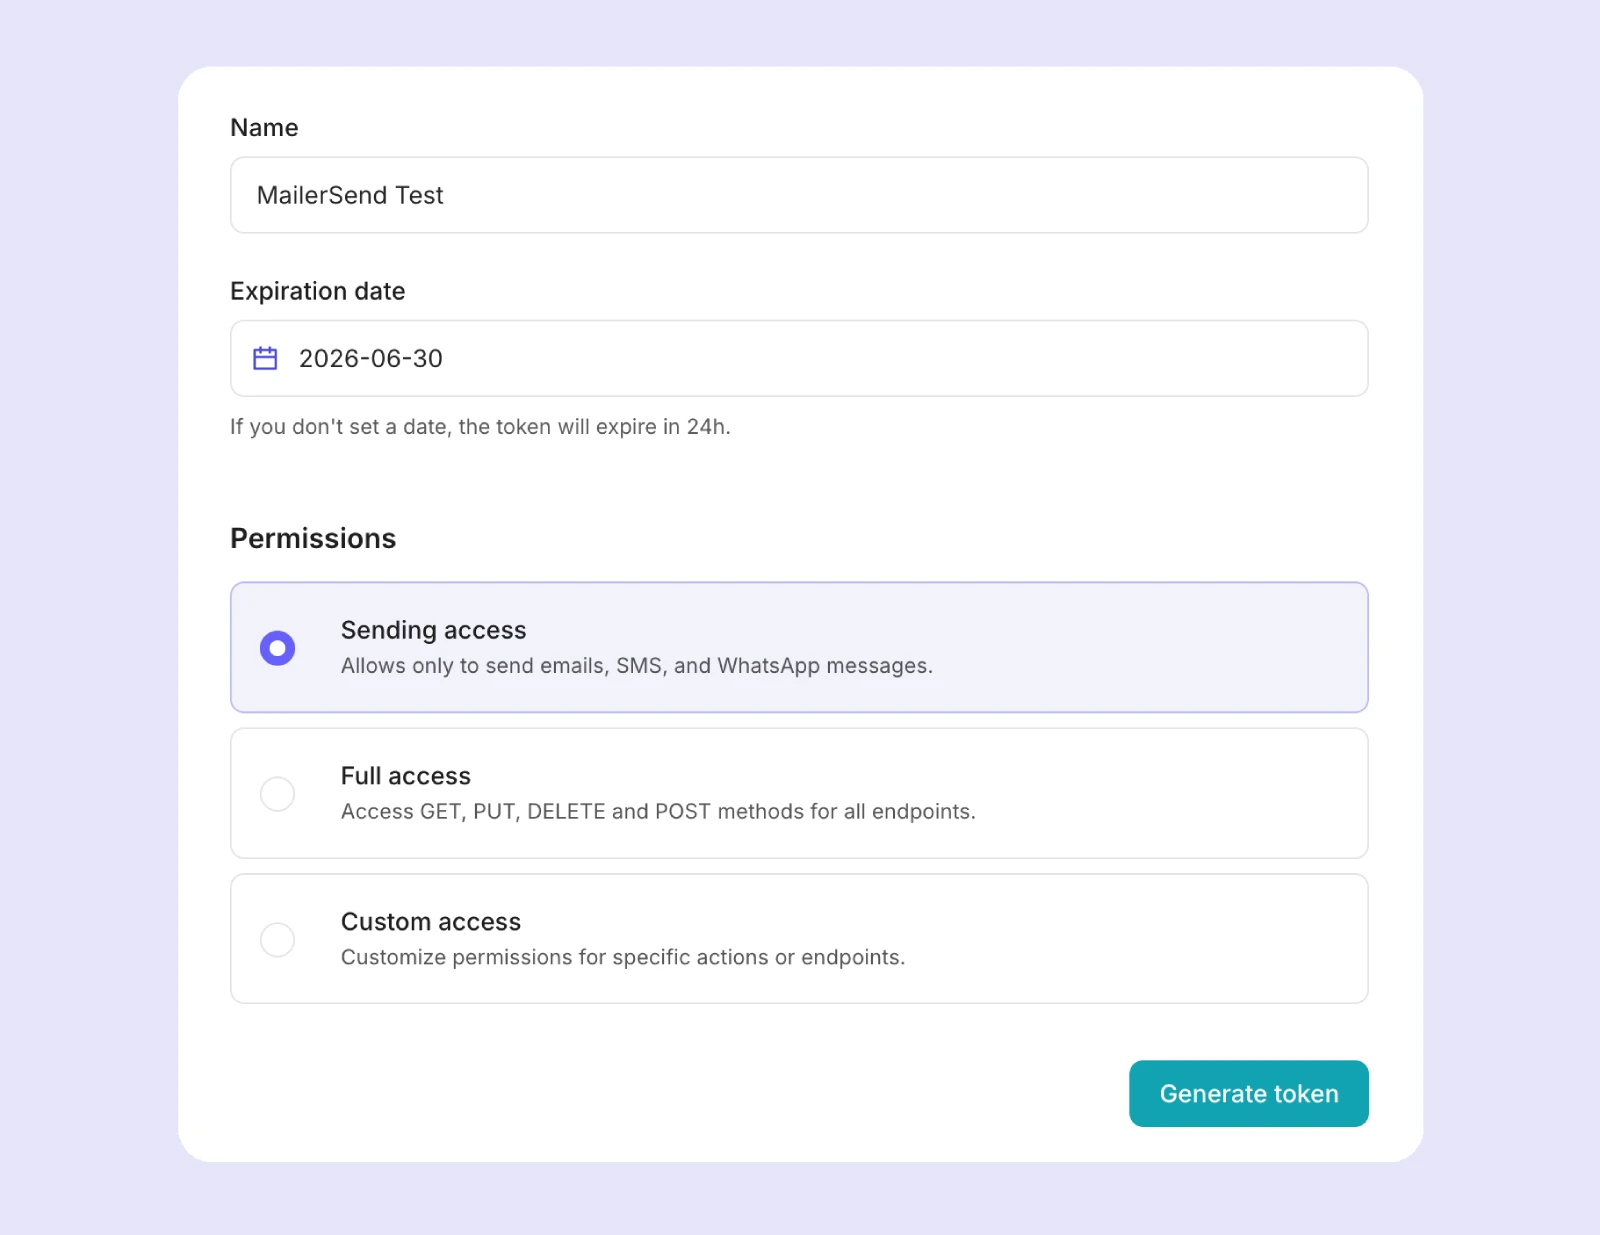
3. Click Generate token.
4. Save or download your API token. You won't be able to access it again for security reasons.
To send an email with the SMTP relay, from the dashboard:
1. Click the SMTP relay option.
2. Enter a name for your SMTP user.
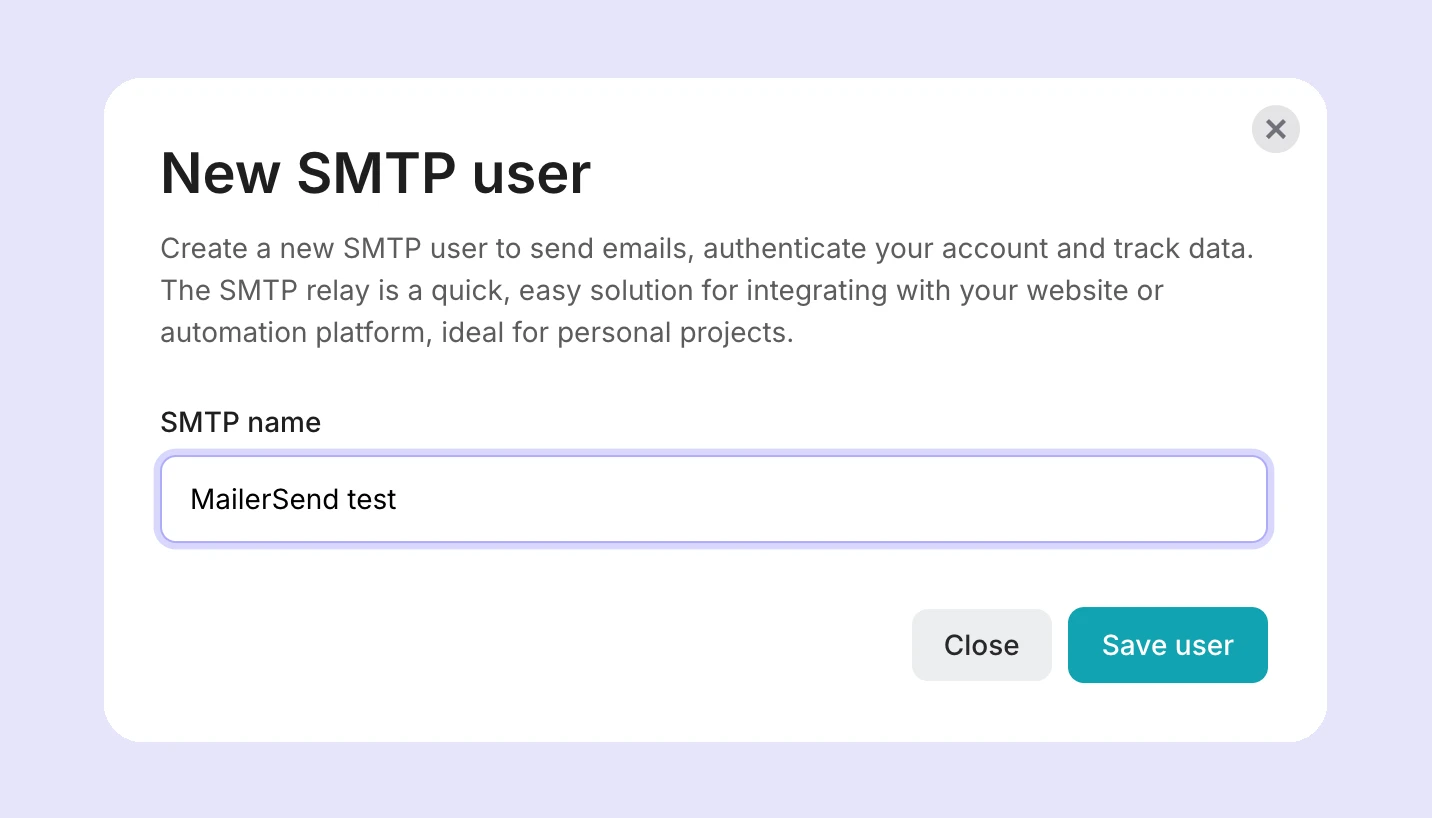
3. Click Save user.
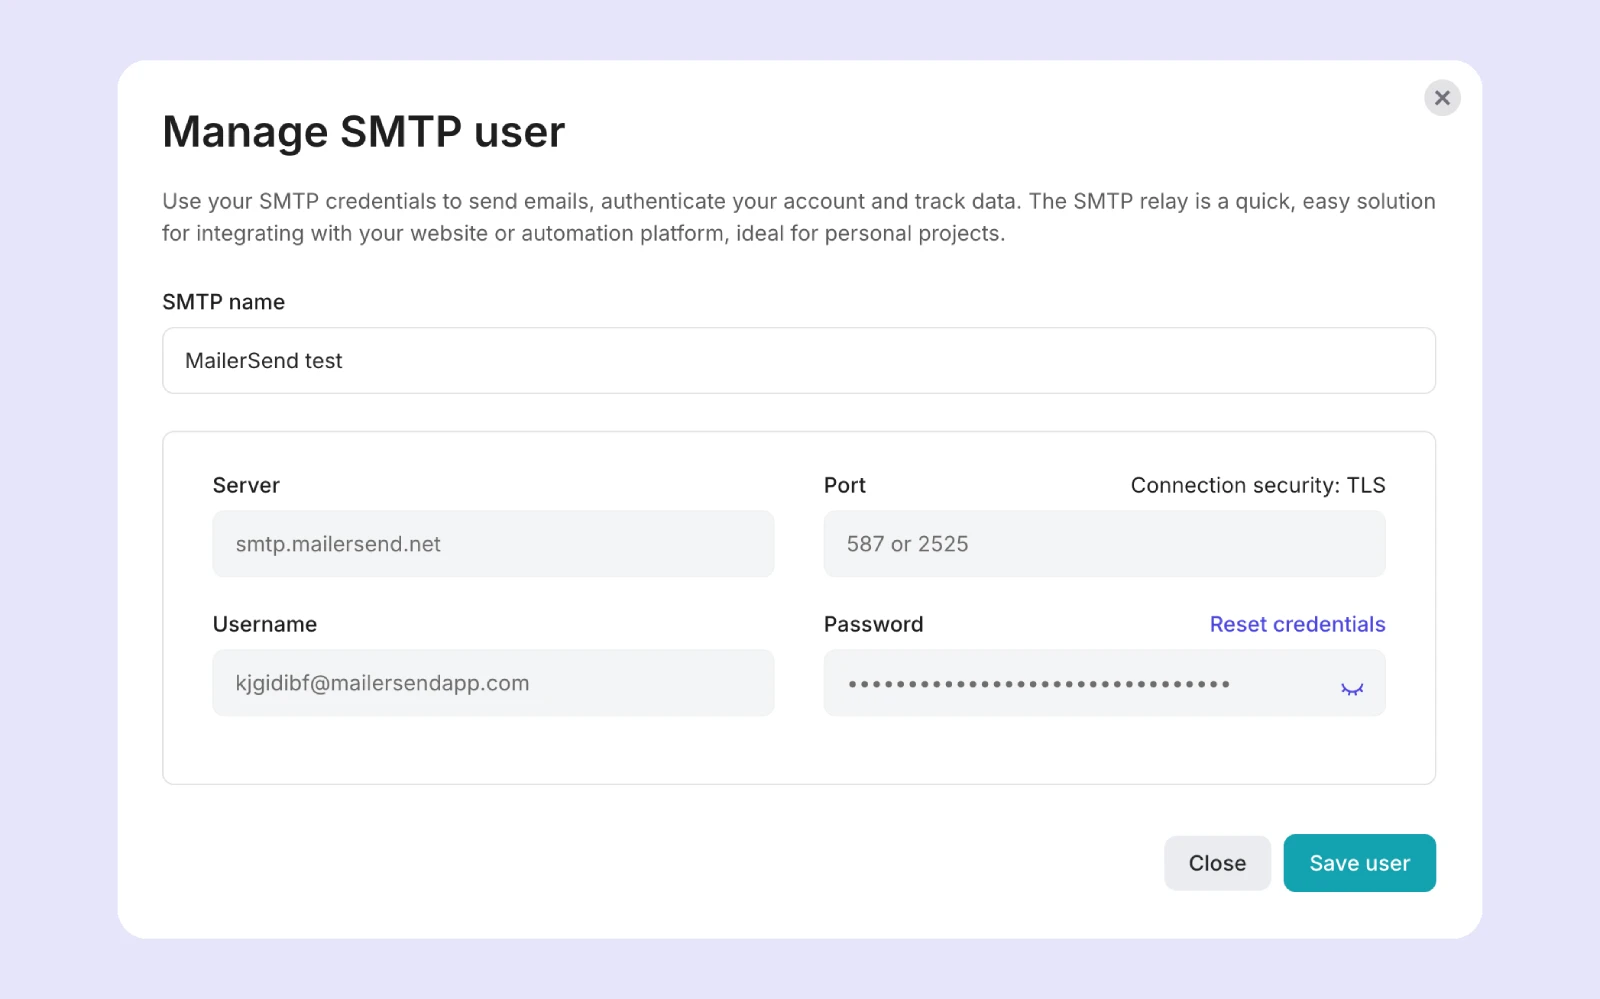
4. Your SMTP credentials will be generated and you can close the pop-up.
Step 3: Send an email
1. Install the SDK for your preferred language:
composer require mailersend/mailersendcomposer require mailersend/laravel-driver<dependency>
<groupId>com.mailersend</groupId>
<artifactId>java-sdk</artifactId>
<version>1.5.0</version>
</dependency>npm install mailersendgo get github.com/mailersend/mailersend-gopip install mailersendgem install mailersend-ruby2. Then copy and paste the code snippet into your project, adding your API token.
use MailerSend\MailerSend;
use MailerSend\Helpers\Builder\Recipient;
use MailerSend\Helpers\Builder\EmailParams;

$mailersend = new MailerSend();

$recipients = [
    new Recipient('your@client.com', 'Your Client'),
];

$emailParams = (new EmailParams())
    ->setFrom('your@domain.com')
    ->setFromName('Your Name')
    ->setRecipients($recipients)
    ->setSubject('Subject')
    ->setHtml('This is the HTML content')
    ->setText('This is the text content')
    ->setReplyTo('reply to')
    ->setReplyToName('reply to name');

$mailersend->email->send($emailParams);<?php
namespace App\Mail;
use Carbon\Carbon;
use Illuminate\Bus\Queueable;
use Illuminate\Mail\Mailable;
use Illuminate\Mail\Mailables\Attachment;
use Illuminate\Mail\Mailables\Content;
use Illuminate\Mail\Mailables\Envelope;
use Illuminate\Queue\SerializesModels;
use Illuminate\Support\Arr;
use MailerSend\Helpers\Builder\Personalization;
use MailerSend\Helpers\Builder\Variable;
use MailerSend\LaravelDriver\MailerSendTrait;
class TestEmail extends Mailable
{
use Queueable, SerializesModels, MailerSendTrait;
public function __construct() {}
public function envelope(): Envelope
{
return new Envelope(
subject: 'Test Email',
);
}
public function content(): Content
{
$to = Arr::get($this->to, '0.address');
$this->mailersend(
template_id: null,
tags: ['tag'],
personalization: [
new Personalization($to, [
'var' => 'variable',
'number' => 123,
'object' => [
'key' => 'object-value'
],
'objectCollection' => [
['name' => 'John'],
['name' => 'Patrick']
],
])
],
precedenceBulkHeader: true,
sendAt: new Carbon('2022-01-28 11:53:20'),
);
return new Content(
view: 'emails.test_html',
text: 'emails.test_text'
);
}
public function attachments(): array
{
return [
Attachment::fromStorageDisk('public', 'example.png')
];
}
}import com.mailersend.sdk.emails.Email;
import com.mailersend.sdk.MailerSend;
import com.mailersend.sdk.MailerSendResponse;
import com.mailersend.sdk.exceptions.MailerSendException;
public void sendEmail() {
Email email = new Email();
email.setFrom("name", "your email");
email.addRecipient("name", "your@recipient.com");
email.addRecipient("name 2", "your@recipient2.com");
Recipient recipient = new Recipient("name", "your@recipient3.com");
email.AddRecipient(recipient);
email.setSubject("Email subject");
email.setPlain("This is the text content");
email.setHtml("<p>This is the HTML content</p>");
MailerSend ms = new MailerSend();
ms.setToken("Your API token");
try {
MailerSendResponse response = ms.emails().send(email);
System.out.println(response.messageId);
} catch (MailerSendException e) {
e.printStackTrace();
}
}import 'dotenv/config';
import { MailerSend, EmailParams, Sender, Recipient } from "mailersend";
const mailerSend = new MailerSend({
apiKey: process.env.API_KEY,
});
const sentFrom = new Sender("you@yourdomain.com", "Your name");
const recipients = [
new Recipient("your@client.com", "Your Client")
];
const emailParams = new EmailParams()
.setFrom(sentFrom)
.setTo(recipients)
.setReplyTo(sentFrom)
.setSubject("This is a Subject")
.setHtml("<strong>This is the HTML content</strong>")
.setText("This is the text content");
await mailerSend.email.send(emailParams);package main
import (
"context"
"os"
"fmt"
"time"
"github.com/mailersend/mailersend-go"
)
func main() {
ms := mailersend.NewMailersend(os.Getenv("MAILERSEND_API_KEY"))
ctx := context.Background()
ctx, cancel := context.WithTimeout(ctx, 5*time.Second)
defer cancel()
subject := "Subject"
text := "This is the text content"
html := "<p>This is the HTML content</p>"
from := mailersend.From{
Name: "Your Name",
Email: "your@domain.com",
}
recipients := []mailersend.Recipient{
{
Name: "Your Client",
Email: "your@client.com",
},
}
sendAt := time.Now().Add(time.Minute * 5).Unix()
tags := []string{"foo", "bar"}
message := ms.Email.NewMessage()
message.SetFrom(from)
message.SetRecipients(recipients)
message.SetSubject(subject)
message.SetHTML(html)
message.SetText(text)
message.SetTags(tags)
message.SetSendAt(sendAt)
message.SetInReplyTo("client-id")
res, _ := ms.Email.Send(ctx, message)
fmt.Printf(res.Header.Get("X-Message-Id"))
}from mailersend import MailerSendClient, EmailBuilder
ms = MailerSendClient()
email = (EmailBuilder()
.from_email("sender@domain.com", "Your Name")
.to_many([{"email": "recipient@domain.com", "name": "Recipient"}])
.subject("Hello from MailerSend!")
.html("<h1>Hello World!</h1>")
.text("Hello World!")
.build())
response = ms.emails.send(email)require "mailersend-ruby"
ms_client = Mailersend::Client.new('your_mailersend_token')
ms_email = Mailersend::Email.new(ms_client)
ms_email.add_recipients("email" => "ron@parksandrec.com", "name" => "Ron")
ms_email.add_recipients("email" => "leslie@parksandrec.com", "name" => "Leslie")
ms_email.add_from("email" => "april@parksandrec.com", "name" => "April")
ms_email.add_subject("Time")
ms_email.add_text("Time is money, money is power, power is pizza, and pizza is knowledge. Let's go.")
ms_email.add_html("<b>Time is money, money is power, power is pizza, and pizza is knowledge. Let's go.</b>")
ms_email.sendSend with SMTP
To send with SMTP, add the following to your code or app configuration:
SMTP server: smtp.mailersend.net
Port: 587 or 2525
SMTP username
SMTP password
Step 4: Check your email activity
Once you've sent your email, you can check your inbox to see if it's arrived as well as the Activity page.
To view the email's activity status, go to Email > Activity.
From here, you'll be able to see every point of a message's journey, from queued and sent to delivered, bounced, clicked and more.
Next steps: Take it live
Add a domain
When you're ready to start sending to recipients, the first step is to add your domain:
1. In the dashboard, scroll to the Start sending transactional emails section and click Add domain.
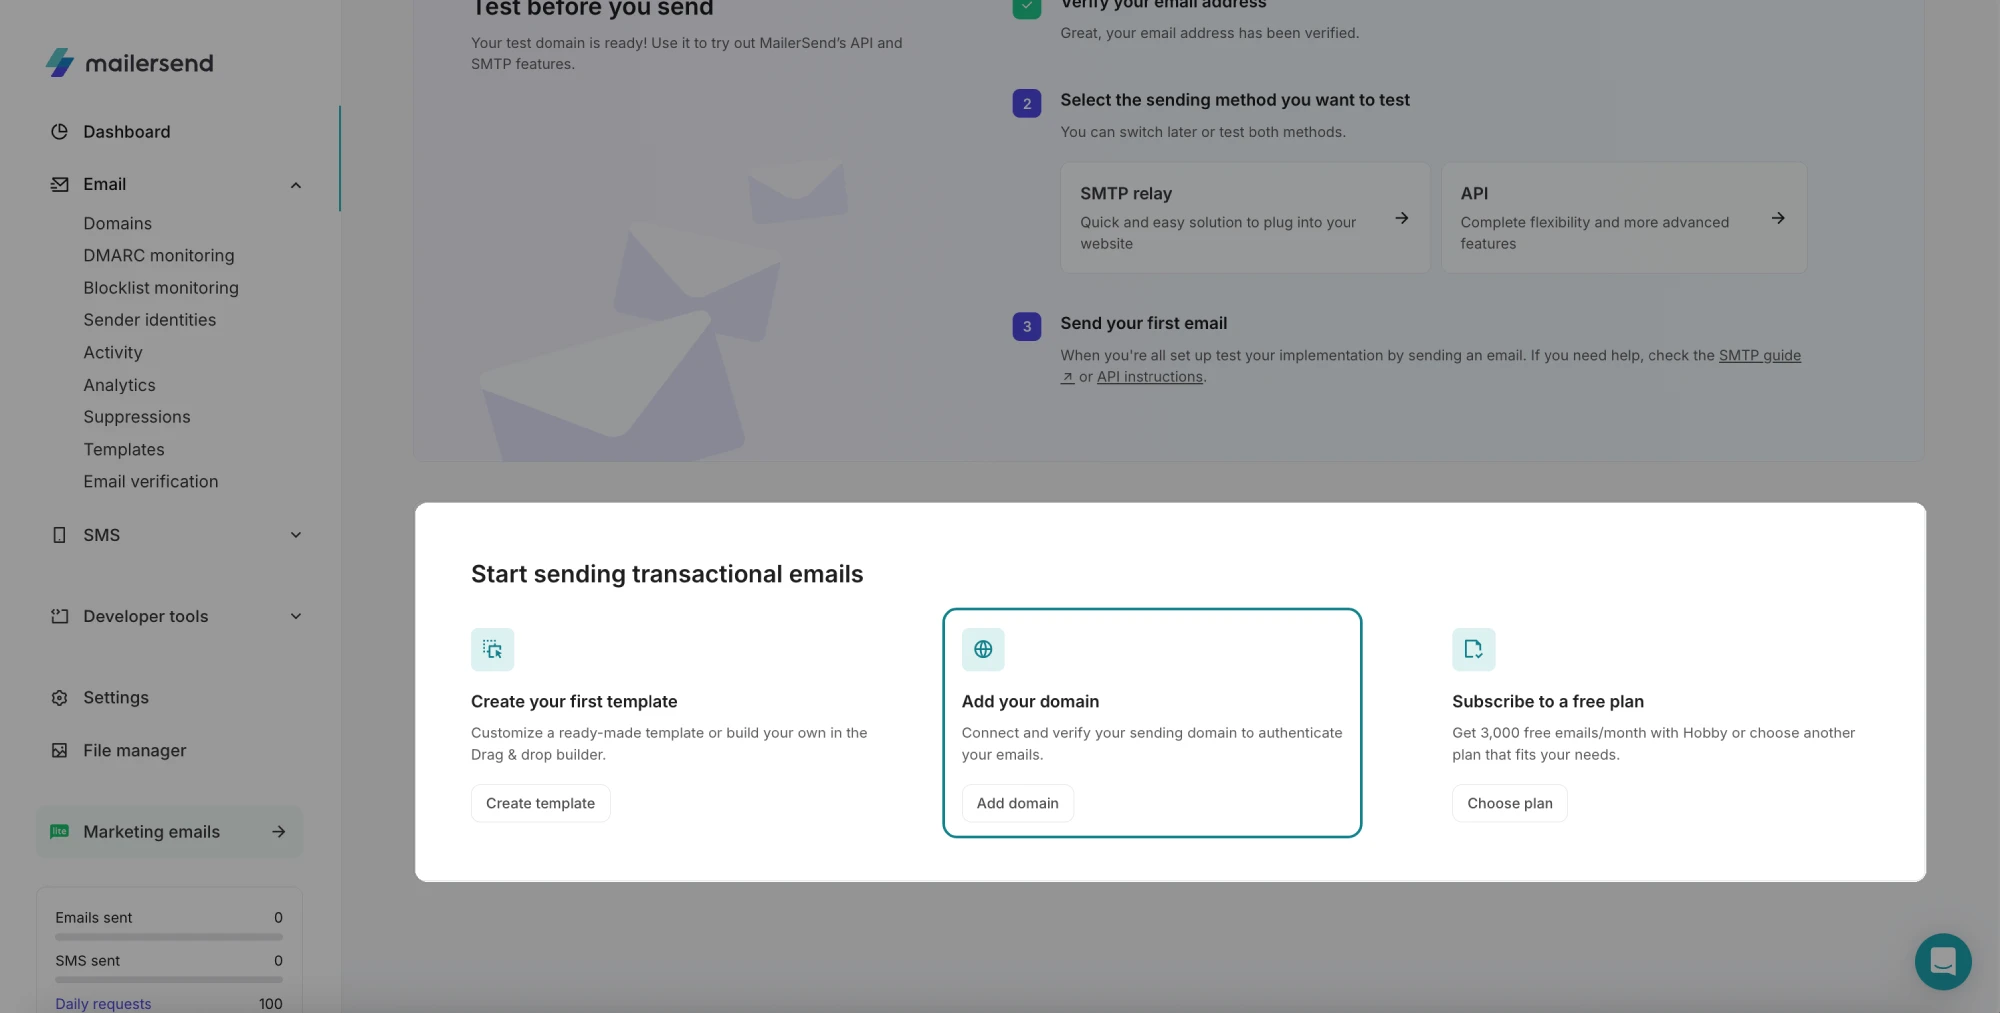
2. Click the Add domain button and follow the steps to authenticate your domain. With automatic domain connect, it only takes a few minutes.
Learn more:
Get approved
The account approval process is a crucial step for accessing all MailerSend features. This involves providing details about your company or organization and explaining how you plan to use MailerSend. The more information you provide, the quicker you'll gain full access to all features.
To submit your account for approval, just click Get approved from the notification in the dashboard.
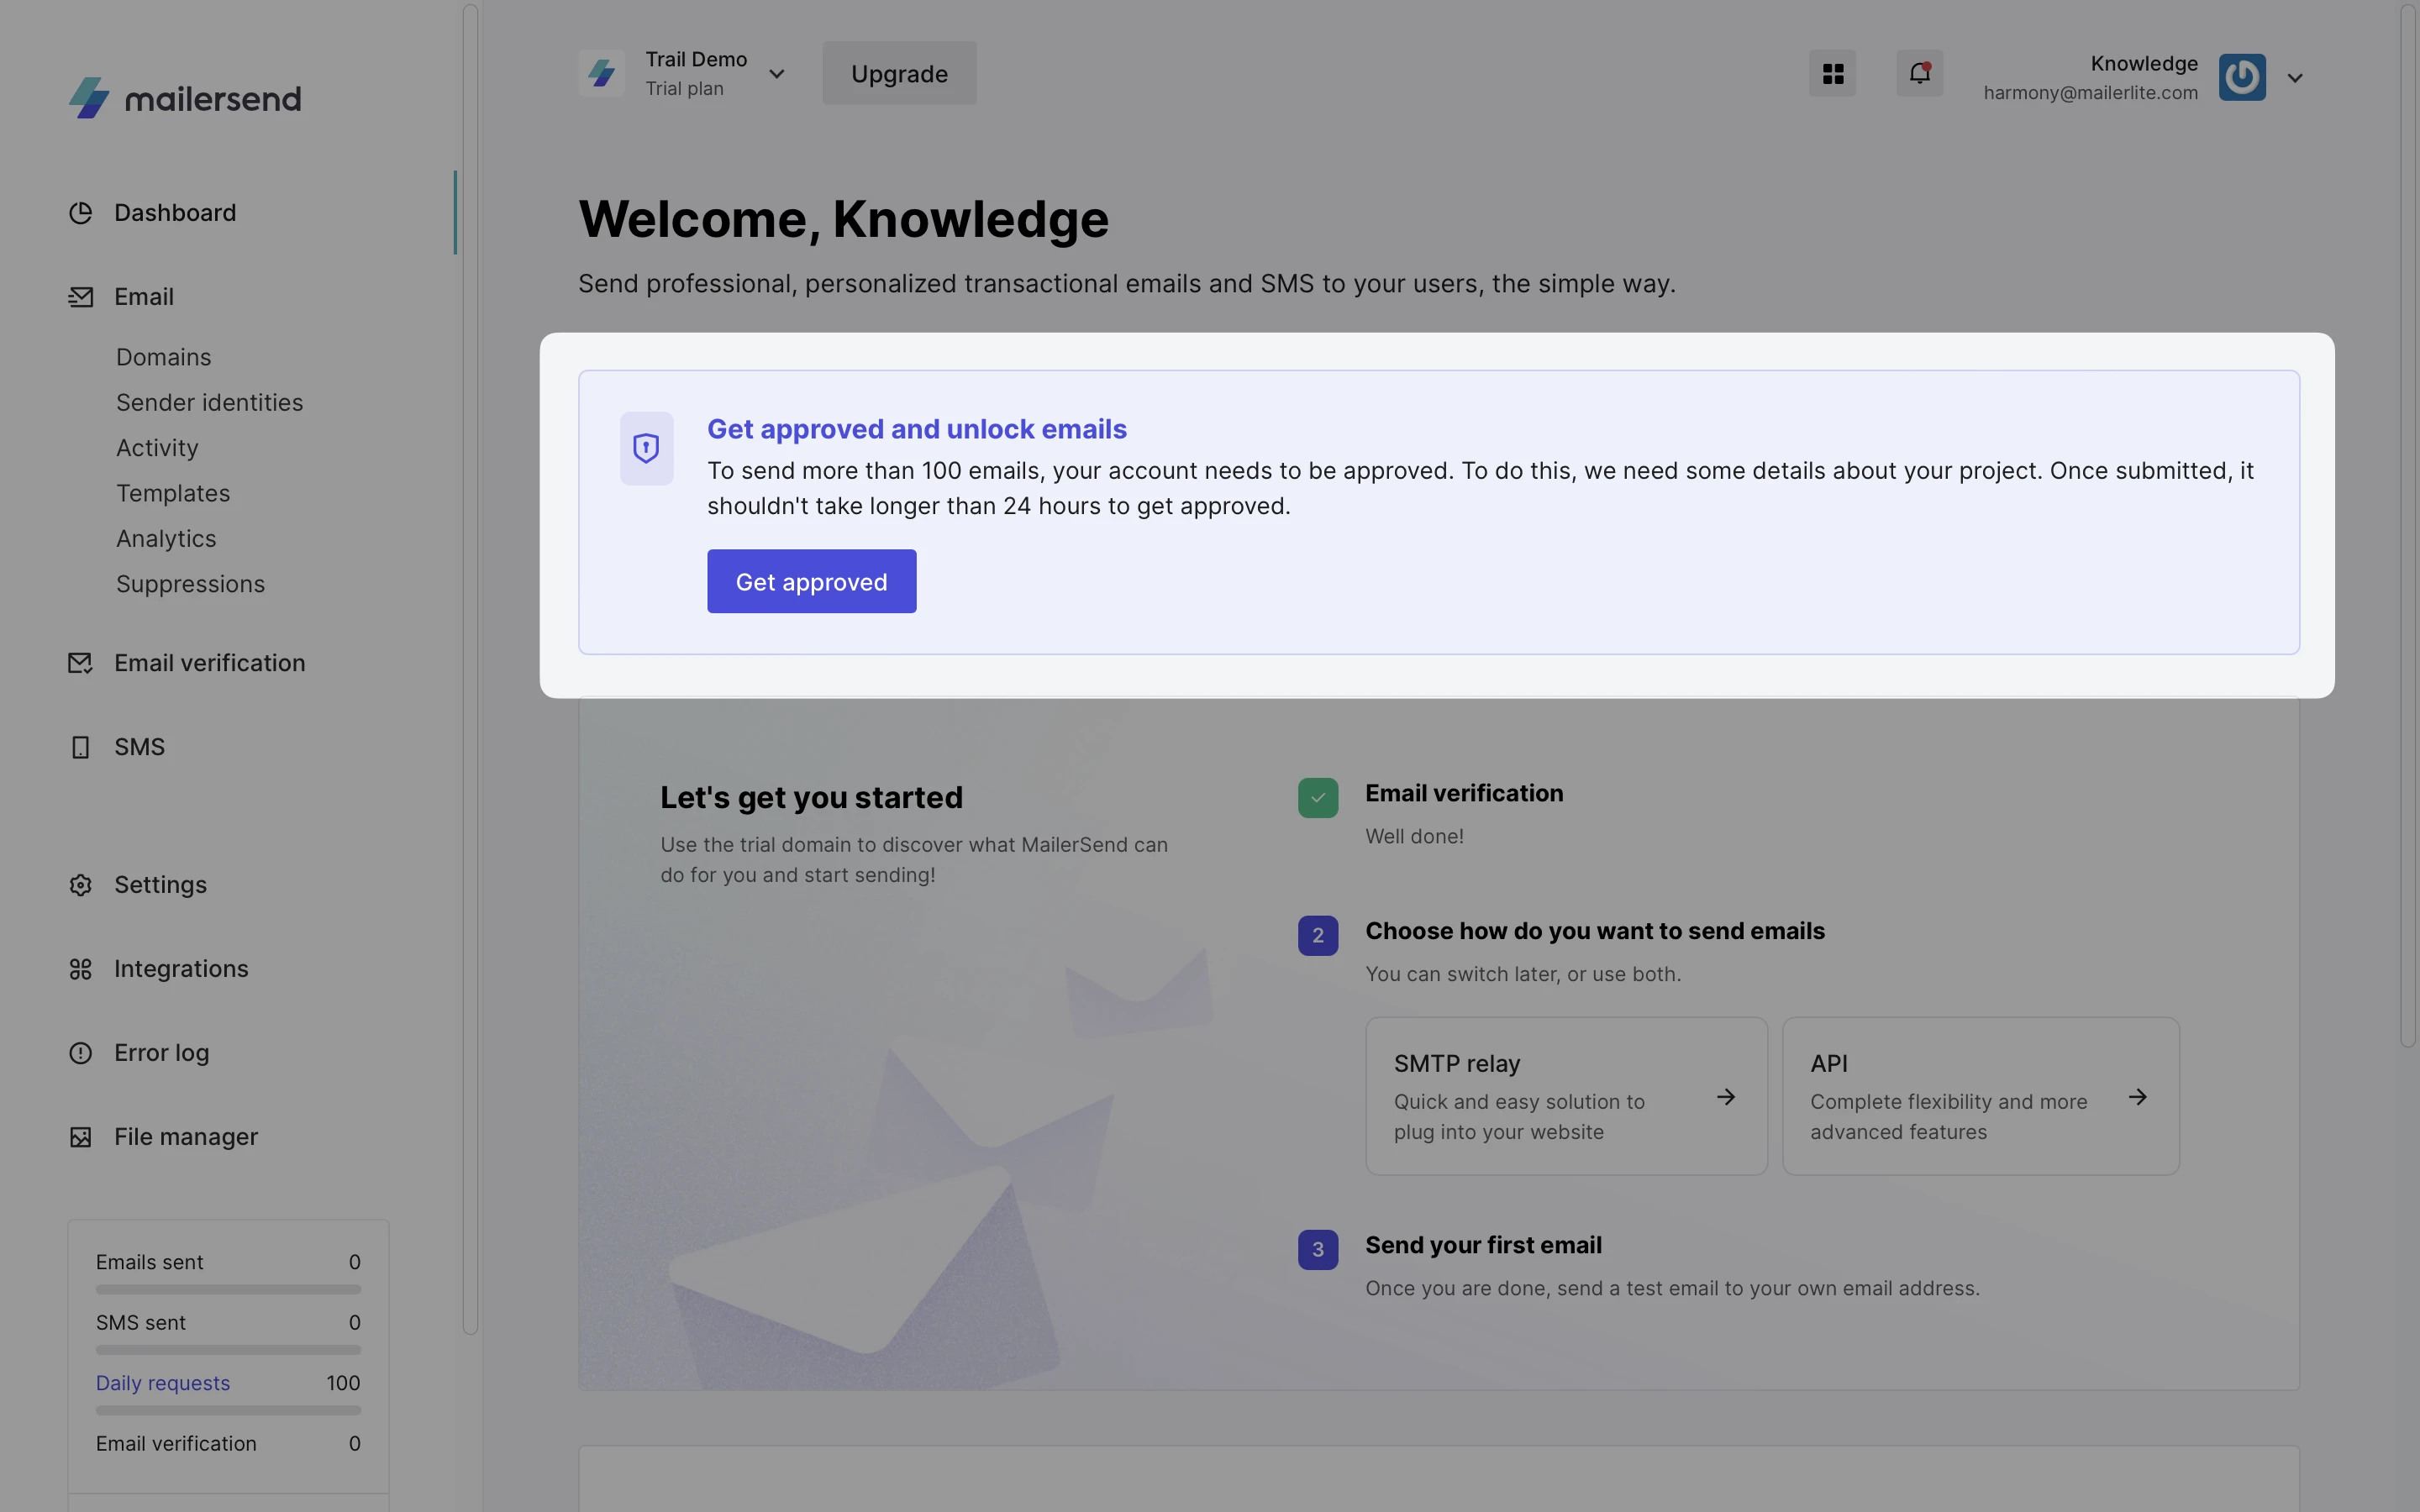
The approval process is usually very quick but can take up to 48 hours. We recommend you to provide clear, detailed information in your approval requests to help speed up this process. Rest assured, we'll notify you as soon as a decision is made.
Subscribe to a Free plan
The Free plan gives you 500 emails a month free. To subscribe:
1. In the dashboard, scroll to the Start sending transactional emails section and click Choose plan.
2. Select a plan, click Upgrade and follow the steps to confirm your subscription.
Learn more:
More resources to enhance your sending
Customizing emails and templates:
Advanced sending and receiving:
| Add webhooks | → |
| Set up bulk emailing | → |
| Process incoming emails | → |
Need more info?
Feel free to reach out to support@mailersend.com. A member of our support team will gladly assist you.