How to start sending emails
When testing MailerSend for the first time, you can send transactional emails using the trial domain or any verified domain you have added on your account. Check our article on How to verify and authenticate a sending domain for further instructions.
Make sure you check our developer documentation, where you can find all available parameters that help you send better and more complex emails through MailerSend.
Send emails using the API
Once you have verified your domain in MailerSend, follow these steps:
Navigate to the Domains page and click Manage next to the desired domain.
When your API token is ready, and scroll down to the Advanced settings section of the page. Under API instructions, you’ll find a few examples of how to send your emails using cURL, PHP, Laravel, Java, Ruby, Node.js, Go and Python.
The easiest way to start sending transactional emails is by copying and pasting the cURL command into your terminal by sending a POST request to https://api.mailersend.com/v1/email.
Additionally, any email has to be sent with a FROM address matching the verified domain or an associated subdomain.
Once you send your first email, you can check the status of your message in the Activity tab.
How to send transactional emails using SMTP
Check that your domain is verified in MailerSend, then follow these steps:
Navigate to the Domains page.
Find the domain from which you want to send emails via SMTP and click Manage.
Scroll down to SMTP
Click Generate new user.
By creating SMTP users, the following information will be automatically generated:
Username
Password
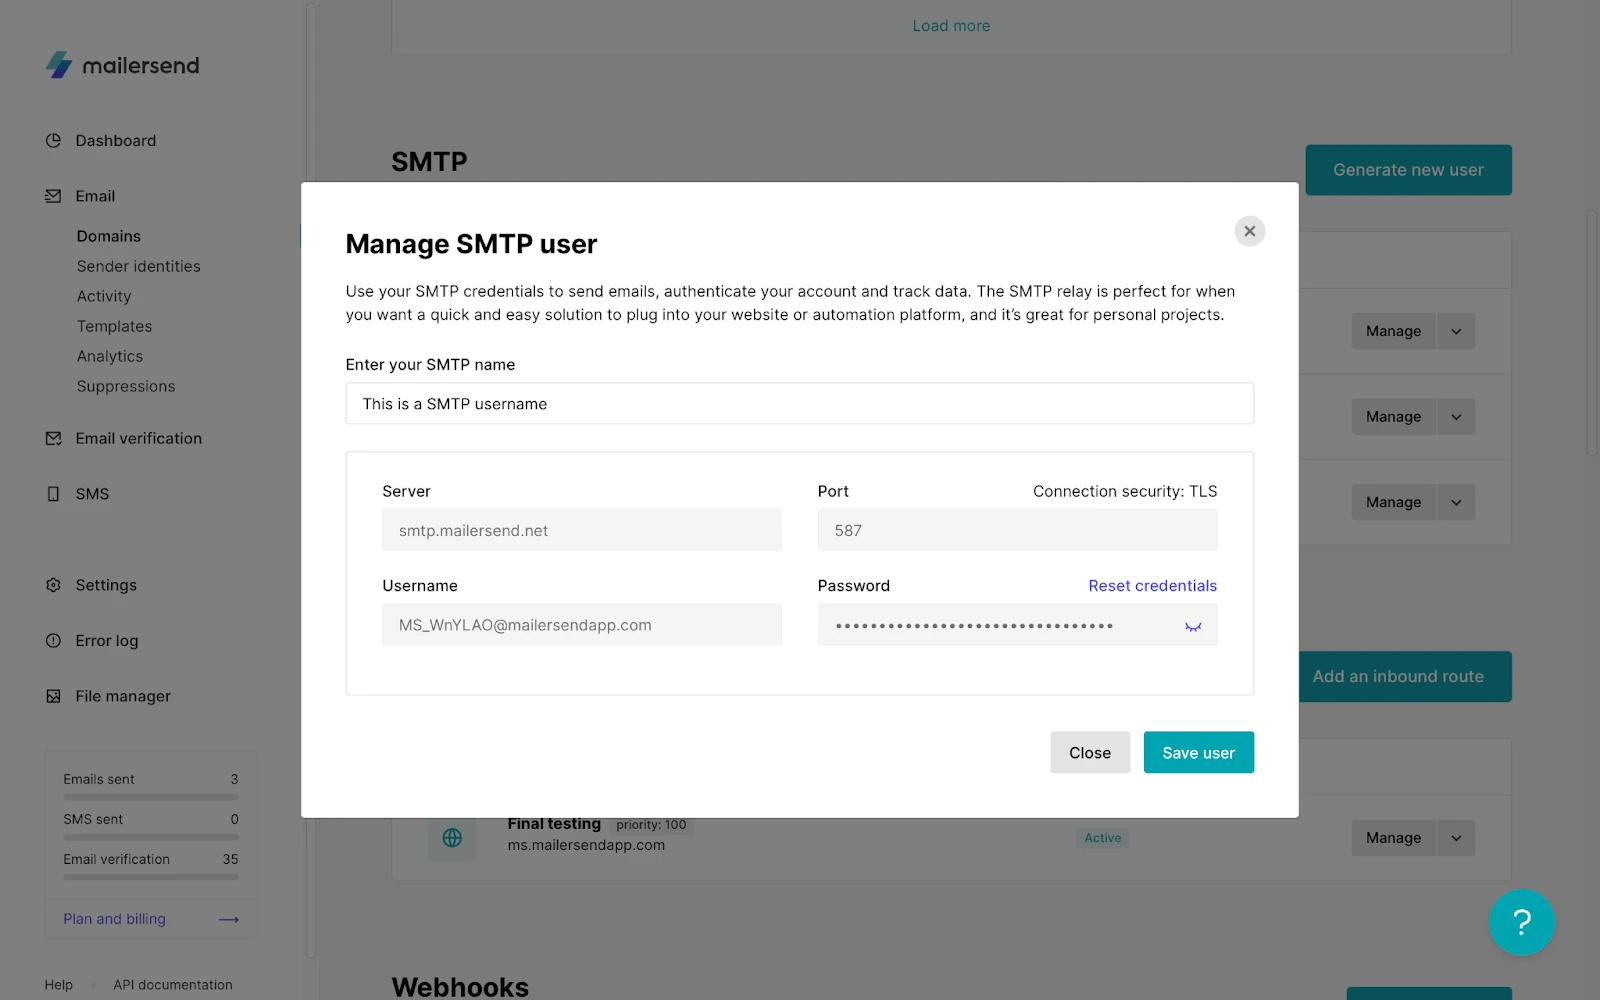
You will be required to enter this information into your content management system either directly or via a plugin. Either way, all systems will require you to enter your Server (SMTP host), Port, Username and Password.
Find more information about sending emails with the SMTP relay.
After sending your first email, you can check the status of your message in the Activity tab.
Additionally, any email has to be sent with a FROM address matching the verified domain or an associated subdomain.
How to add CC and BCC recipients
CC and BCC recipients can be included in transactional emails sent both via API or SMTP.
To include CC and BCC recipients in your sending, simply copy the recipients' block:
"to": [
		{
			"email": "info@mailersend.com"
		}
]
and replace “to” with one of the following parameters.
JSON parameter | Type | Required | Free, Hobby, Starter, Professional accounts | Enterprise accounts |
cc | object [ ] | No | Max 10 | Max 50 |
bcc | object [ ] | No | Max 10 | Max 50 |
CC and BCC example
"from": {
		"email": "hello@example.com"
	},
	"to": [
	{
			"email": "recipient1@gmail.com"
		}
	],
	"cc": [
	{
			"email": "recipient2@gmail.com"
	},
		{
			"email": "recipient3@gmail.com"
	},
		{
			"email": "recipient4@gmail.com"
	},
		{
			"email": "recipient5@gmail.com"
	}
	],
	"bcc": [
		{
			"email": "recipient6@gmail.com"
	}
]"To" recipients are able to see each other
Transactional emails are messages that are automatically sent to users in response to specific actions, such as signing up for a service, making a purchase, or resetting a password.
The “to” parameter specifies the recipient(s) of the transactional email. Since these emails are often sent one at a time, it's common to have a single recipient specified in the “to” field. However, it's also possible to specify multiple recipients, for example, if you're sending a notification to a group of users.
When multiple recipients are specified in the “to” field, each recipient will be able to see the email addresses of the other recipients. This is because MailerSend is designed for transactional emailing, where it's common and expected for recipients to see each other's email addresses.
If you wish to send an email where recipients can't see each others' addresses, add them as BCC recipients.
Duplicated recipients
You may have received this error when sending an email: “{recipient email} is being duplicated in the to recipients list.”
To avoid this error in the future, please ensure any unique recipient email address is added just once to the 'to' recipients list. If you want to send more than one copy of an email to the same recipient, you can use the CC and BCC fields.
You can find more information on the available request parameters for our email endpoint here.
Alternatively, you can enable the Ignore duplicated recipients setting in MailerSend. Once turned on, this will prevent emails from being sent to duplicated recipients in your API request(s). You can enable this by:
1. Navigating to your domain in MailerSend (https://app.mailersend.com/domains) and hitting Manage
2. Scrolling towards the bottom till you come across the Advanced settings pane and hitting the More settings button.
3. Toggle on Ignore duplicated recipients.
How to add media and attachment files
There are 4 different JSON parameters that you can use to add media and attachment files into your emails sent via API, which you can find on our Developer documentation.
You can send attachments such as PDF files, Office documents, images, zip files, video files, and more. The attachment file must be less than 25MB in size.
To send an attachment, you can:
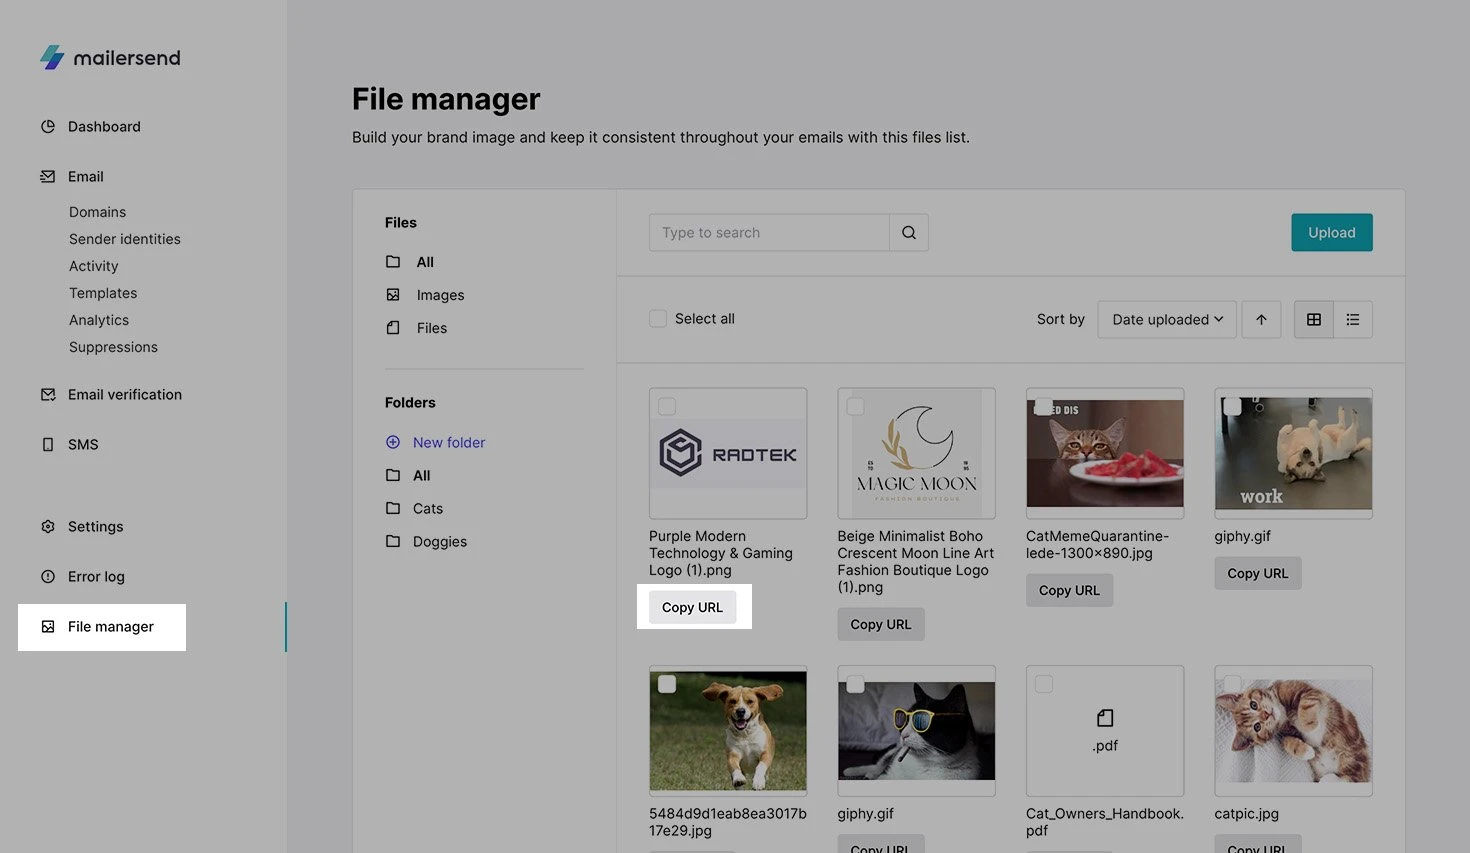
Upload a file to your File manager (or host your file on any other server) and use its URL in the response body of the API call. This would redirect the recipients to open a new tab where the file can be downloaded.
To open your File manager, open the account menu in the bottom left of the screen and select the respective option.
Use Base64 to encode your file and include it within a JSON parameter.
JSON parameter | Type | Required | Details |
attachments | object[ ] | no | |
attachments.*.content | string | yes | Base64 encoded content of the attachment |
attachments.*.filename | string | yes | |
attachments.*.id | string | no | Can be used in content as an<img/> tag. TBD |
Here is an example of how a JSON parameter could look in the response body of an API call:
{
  "attachments": [
     {
       "content": "iVBORw0KGgoAAAANSUhEUgAAC0AAAAcICAYAAACv5EAVAAAEGWlDQ1",
       "filename": "logo.png",
       "id": "logo.png"
     }
   ]
}How to add triggers and automations via Zapier
Zapier is a web-based application that allows you to connect hundreds of different applications with one another.
In MailerSend, you can use both API and webhooks to connect to Zapier, which you can find on the management page of each Domain. Zapier uses our API to execute action events and webhooks to create trigger events.
To create an API token, head to Domains and select the domain you want to use. On the domain’s page, you will find the API section where you can create and manage each entry.
There are 7 trigger events:
Email is sent
Email is delivered
Email is opened
Email is clicked
Email is soft-bounced
Email is hard-bounced
Recipient has unsubscribed
There are 2 action events:
Send an email
Send a template-based email
For a more detailed exploration of what you can do with MailerSend, view our Zapier integration.
How to personalize your emails
You can generate dynamic content for each recipient when sending emails using the Email API endpoint to personalize your emails in the subject, html, and text fields.
Keep in mind that:
Advanced personalization only compiles the template if personalization data is passed via Email API
It is cached server-side, but the hash is calculated based on content, so it will reset with every change
Variables
Variables should begin with double curly brackets {{ followed by the name of the variable and closed with double opposite curly brackets }} as so: {{variable}}
When using a variable, keep in mind that:
It must be enclosed within double curly brackets {{variable}}
It may contain alphanumeric characters and underscores (_)
It must not start with a number or underscore
It is case-sensitive, which means that {{VAR}} is different from {{var}}
Conditional statement
You can show different content to each recipient if they meet a specific condition.
The conditional statement should always be included between the {% %} block. It should start with the if keyword, followed by the statement being tested, and end with the endif keyword.
It’s also possible to nest if statements inside one another, including the use of the elseif and else keywords before endif, although not necessary.
For example, let’s say you’re letting your recipients know you’re having a sale of a specific item and only have limited stock. To point out whether the item is still available for sale or not, you could write the following piece of code:
{% if boolean == true %}
   Available
{% elseif number > 0 %}
   Only {{number}} left!
{% else %}
   Sold-out!
{% endif %}
The output of this code would show Available if there’s enough stock, Only number left if there’s a shortage of items, or Sold-out! if there aren’t any items left in stock.
You can also use filters, which modify something in the value of the variable. They are separated from the variable by the pipe symbol |.
The filters you can use are escape, length, lower, upper, and keys.
An example of using the length filter could be:
{% if users|length > 10 %}
   ...
{% endif %}
Foreach
You can print the data of an array, or a collection of data, by looping through each of its items.
The loop should be included between the {% %} block, start with the for keyword and end with the endfor keyword.
You can also use filters, which modify something in the value of the variable. They are separated from the variable by the pipe symbol |.
The filters you can use are escape, length, lower, upper, and keys.
For example, let’s say you want to print out a grocery shopping list. You could use the following piece of code:
{% if array|length > 0 %}
   <ul>
        {% for value in array %}
           <li>{{value}}</li>
        {% endfor %}
   </ul>
{% endif %}
The final result would render:
Potatoes
Rice
Beans
How to use MailerSend templates
To explore the pre-made templates or create your own:
Head to Templates.
Click Create template.
Choose whether you want to write or import your HTML template, use our Rich-text editor or our Drag & drop editor.
Once you are satisfied with the email design, name the template and click on Save changes.
You can find the Sending instructions at the bottom of the template's page, for which cURL, PHP, Laravel, Java, Ruby, Node, Go, and Python can be used.
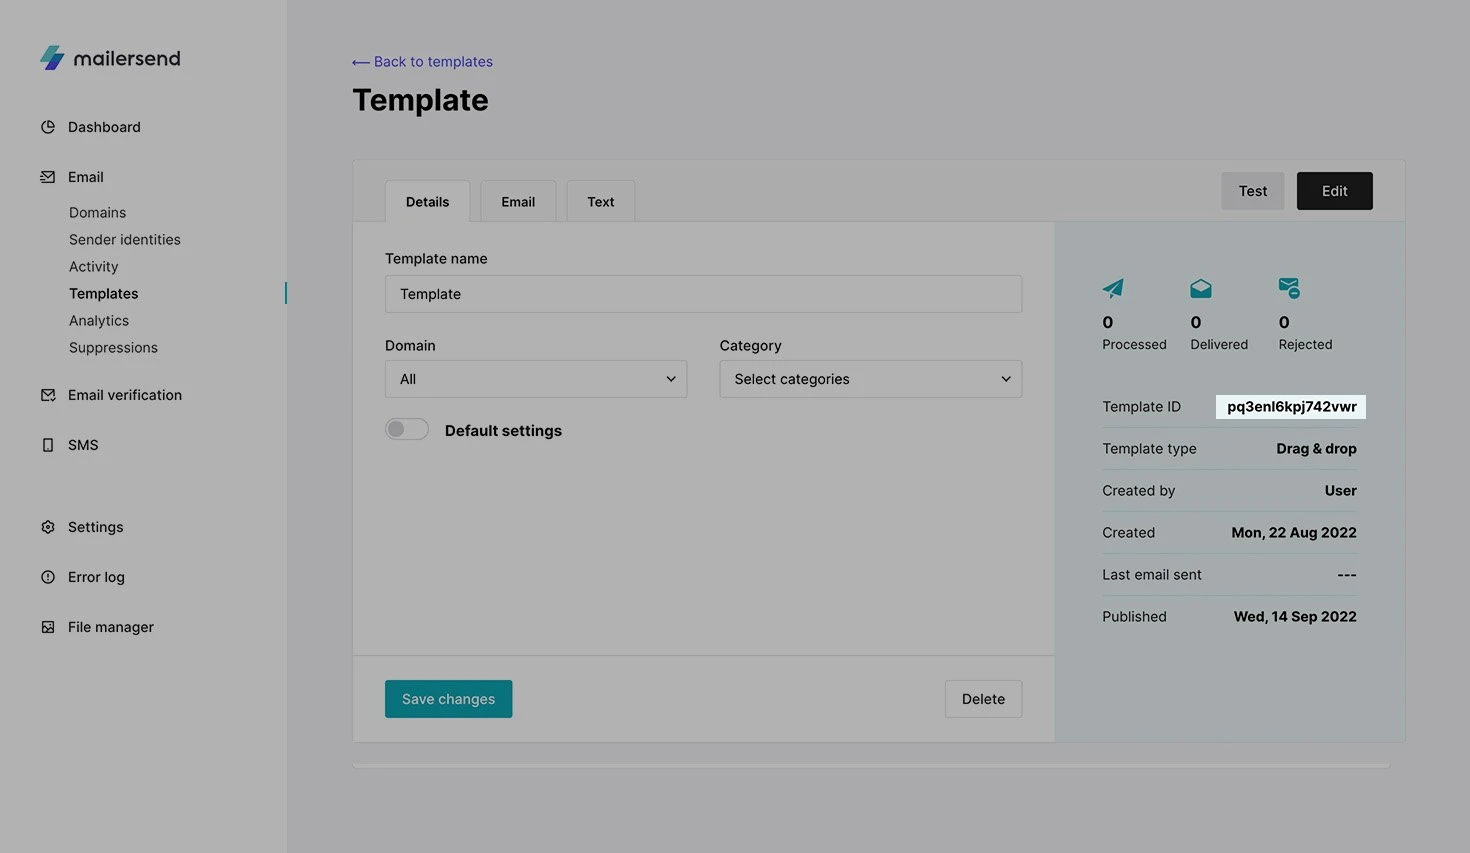
Each template has its own ID, which you can find in 2 places:
On the main Templates page, under the template’s name
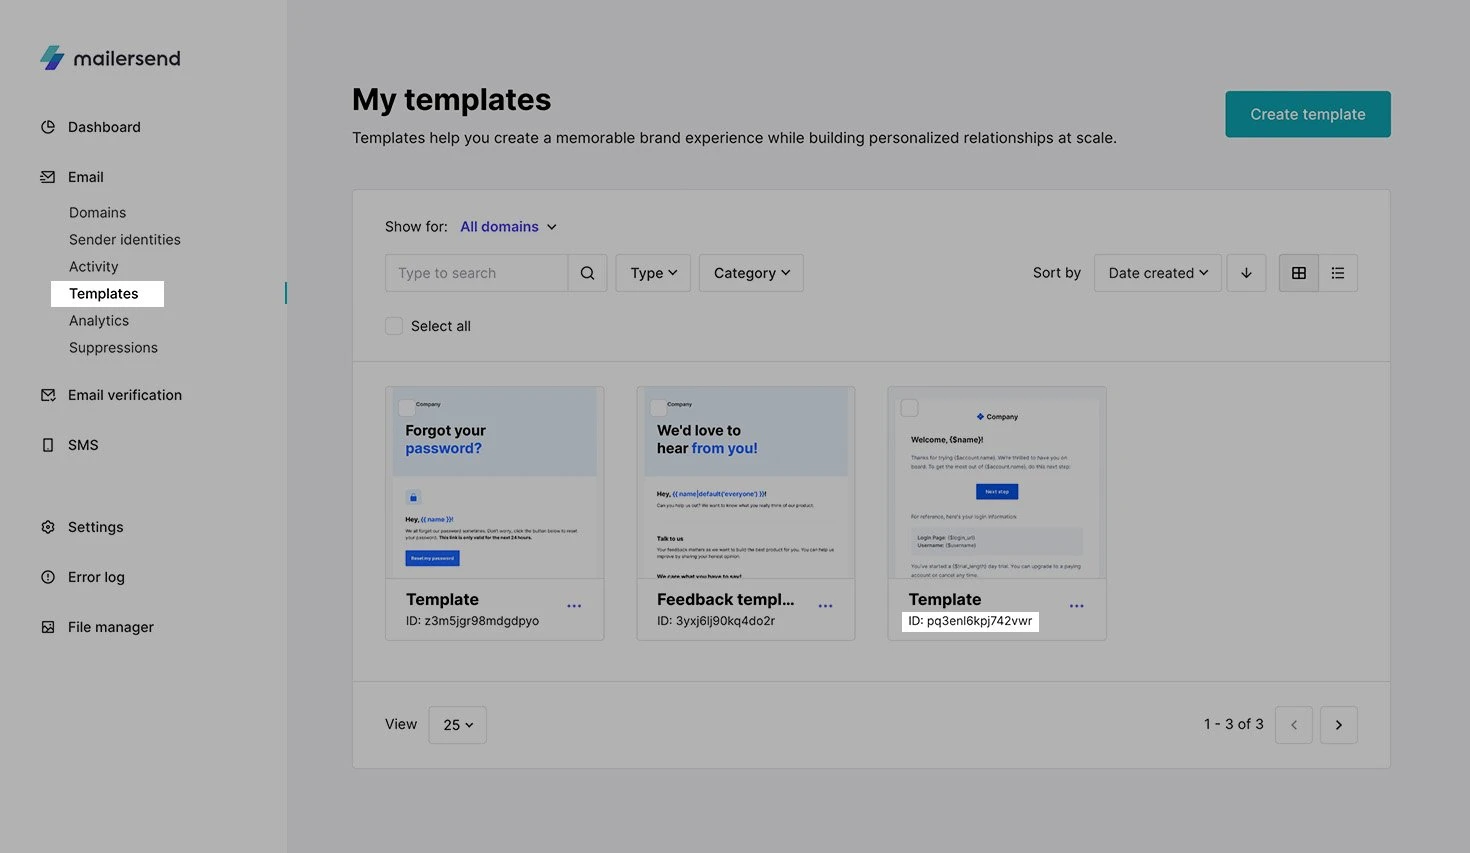
In the right-side column of the Template page
The template ID is already included within the sending instructions; copy the ones for your language of choice.
How to use custom fonts in templates
To use a custom font in your email template using the drag & drop editor or HTML editor:
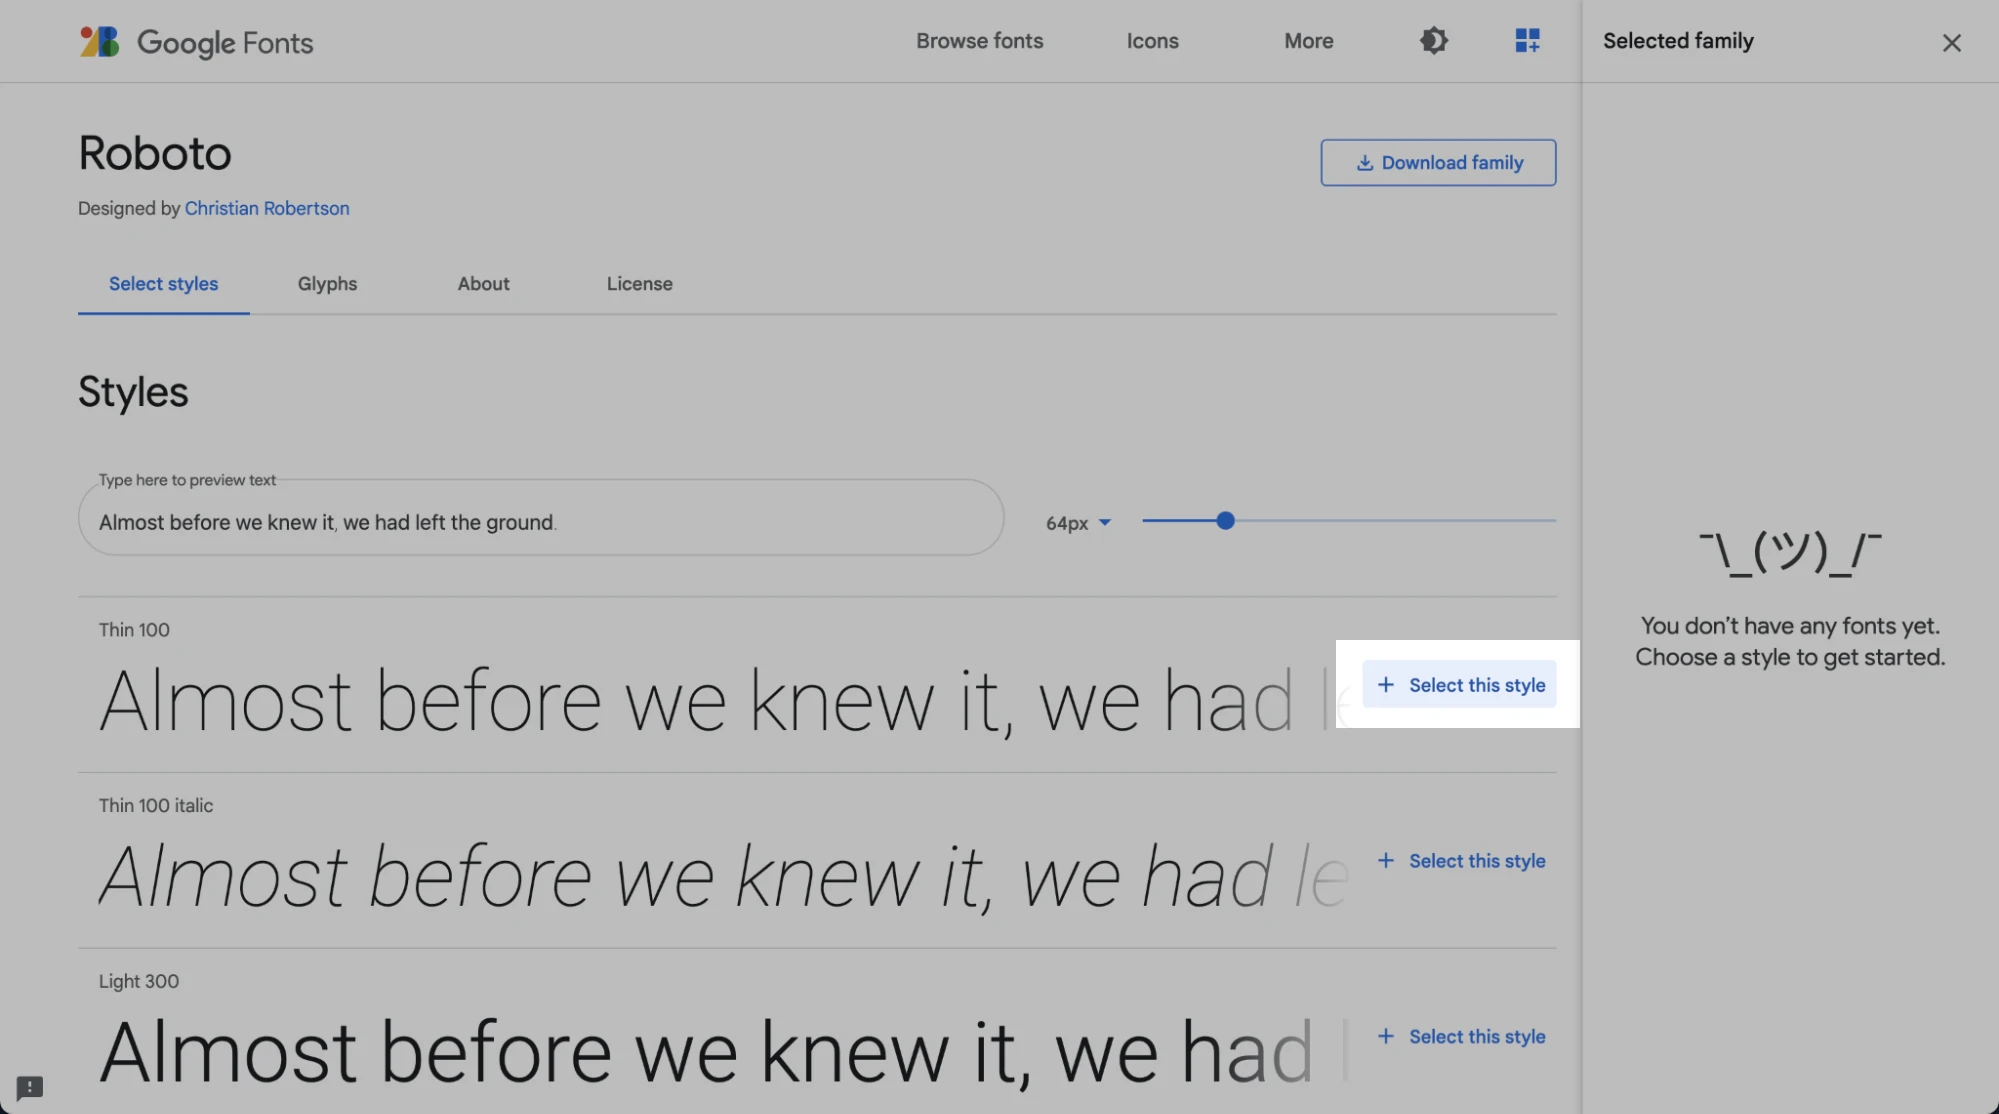
Pick a web safe font or a web font, for example, from Google Fonts.
If using Google Fonts, click + Select this style next to the font to open a side panel.
Drag & drop editor
To use a custom font with the drag & drop editor:
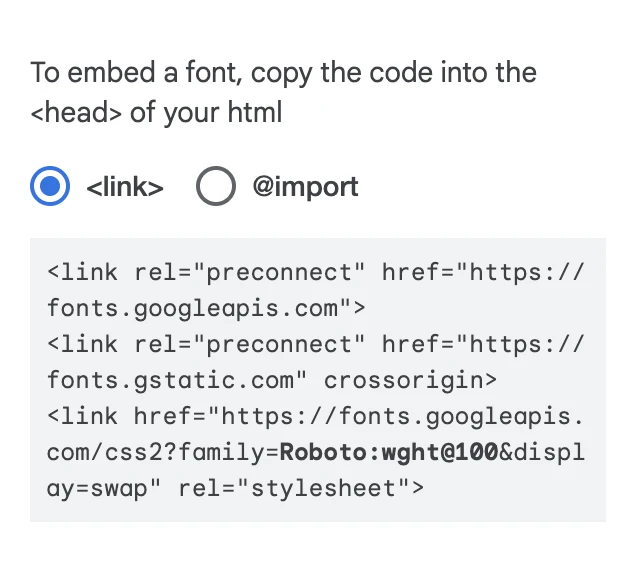
In Google Fonts, select <link> and copy the code.
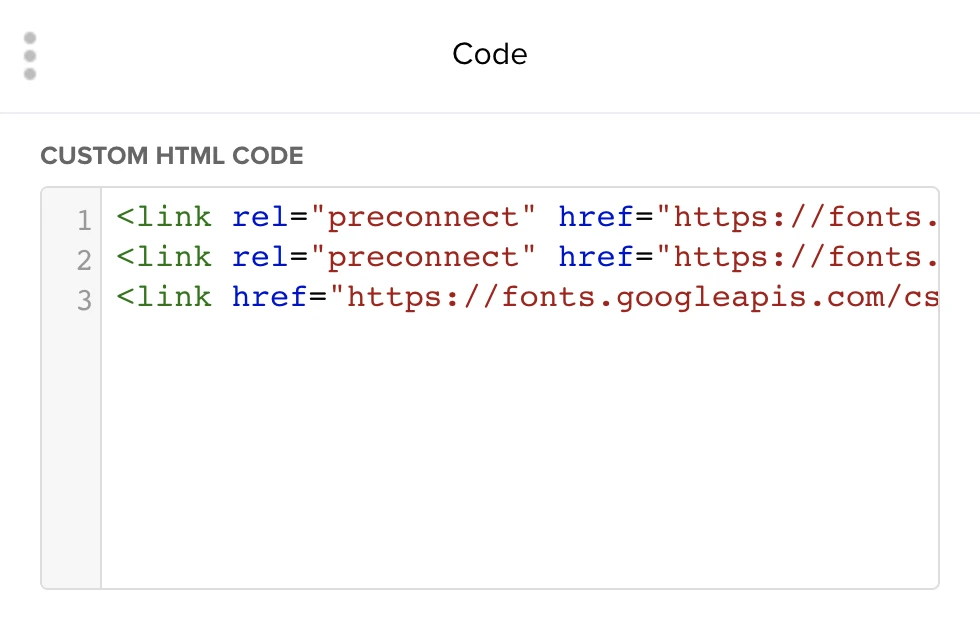
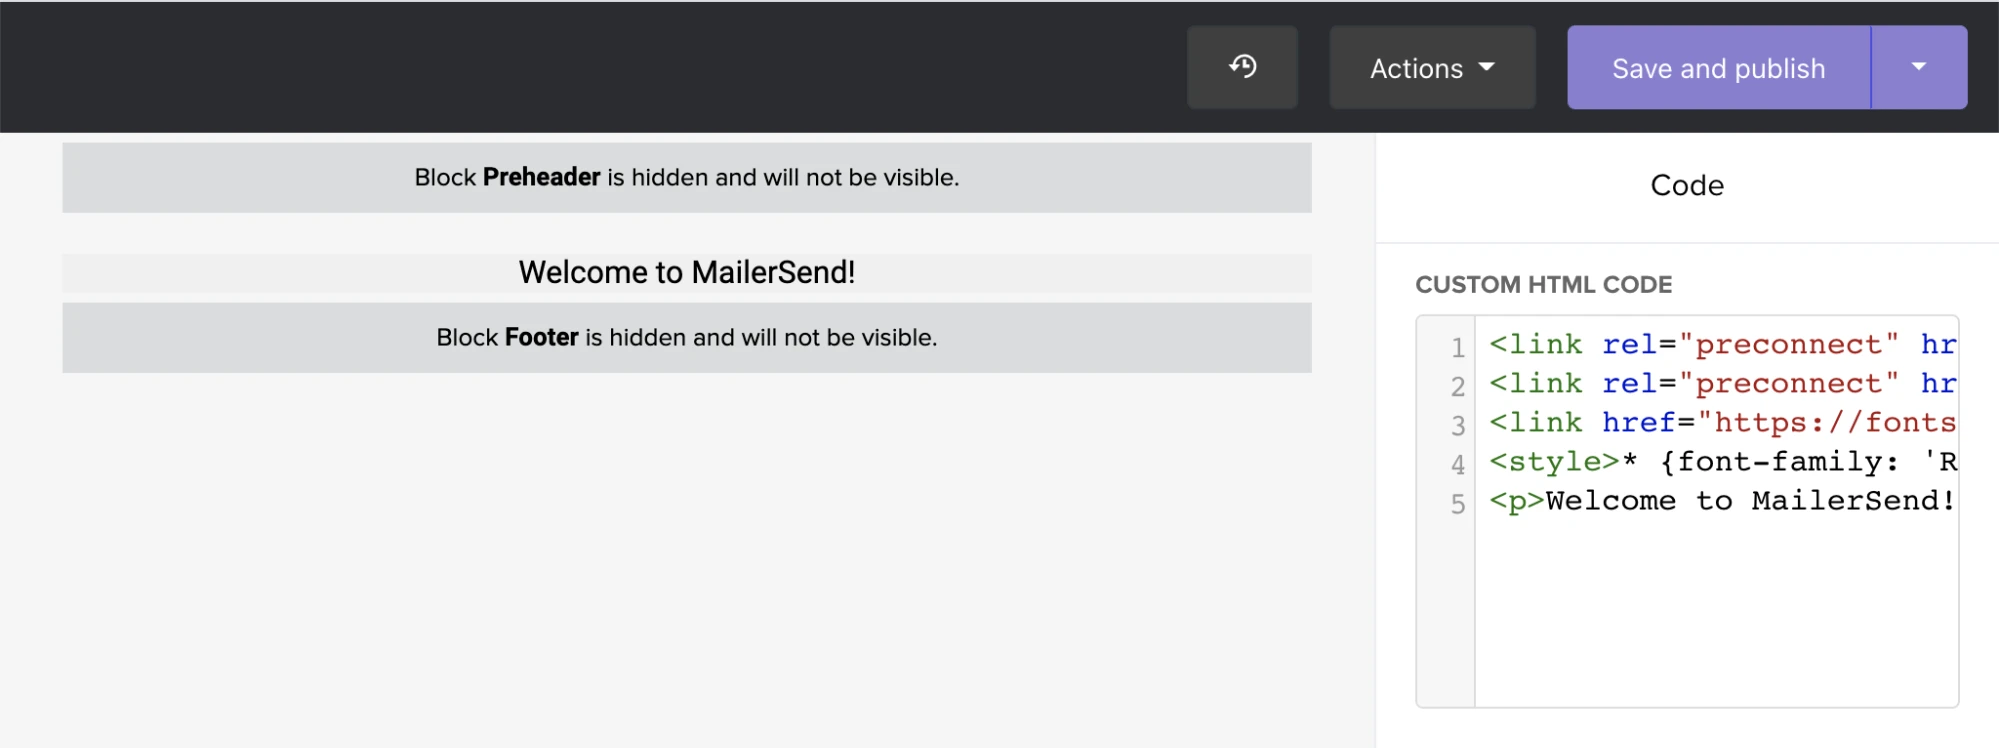
In MailerSend, insert a code block below the Block Preheader and paste the code in the Custom HTML code field.
Add the following code to the one that you just pasted:
<style>p { !important }</style>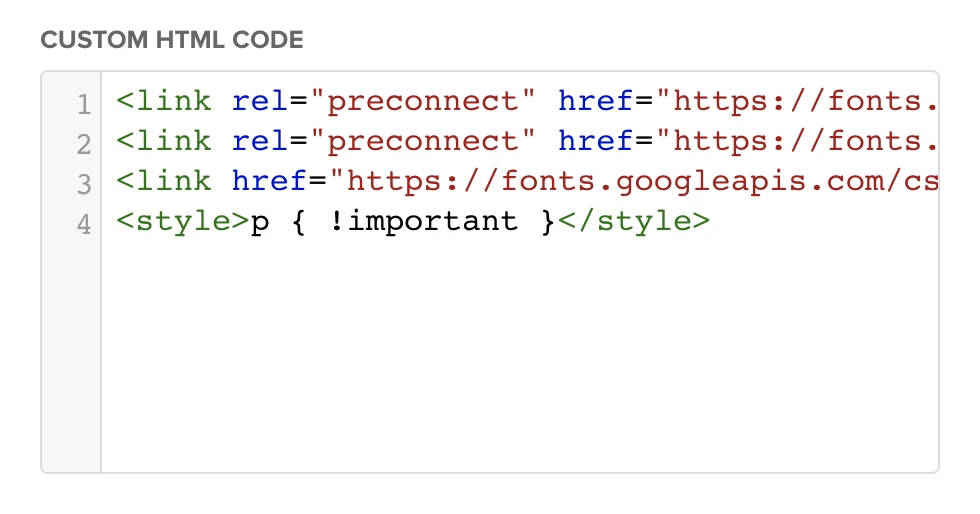
Go back to the Google Fonts page and copy the code under CSS rules to specify families.
Paste the code between the curly brackets { } and before !important like this:
<style>p {font-family: 'Roboto', sans-serif; !important } </style>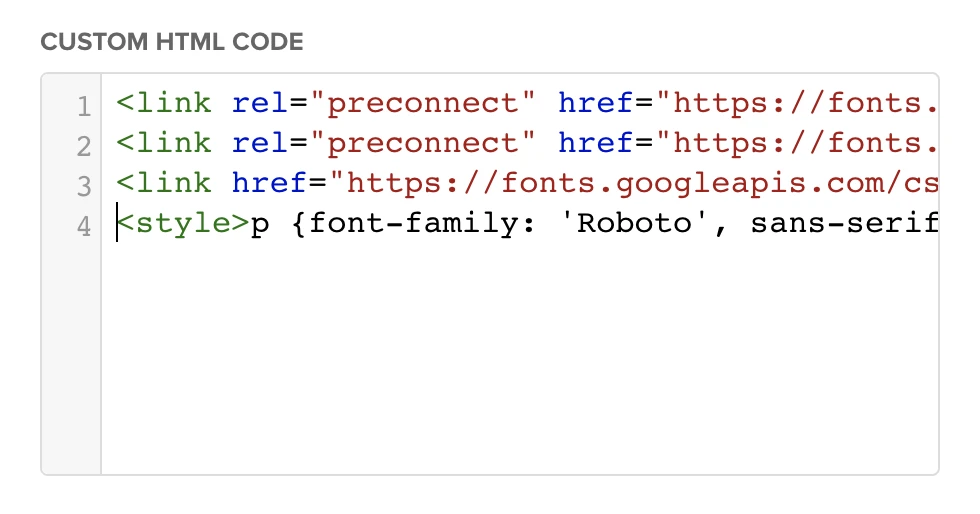
To use the custom font throughout the template—including the text, headings, and buttons—replace the p with an asterisk * like this:
<style>* {font-family: 'Roboto', sans-serif; !important }</style>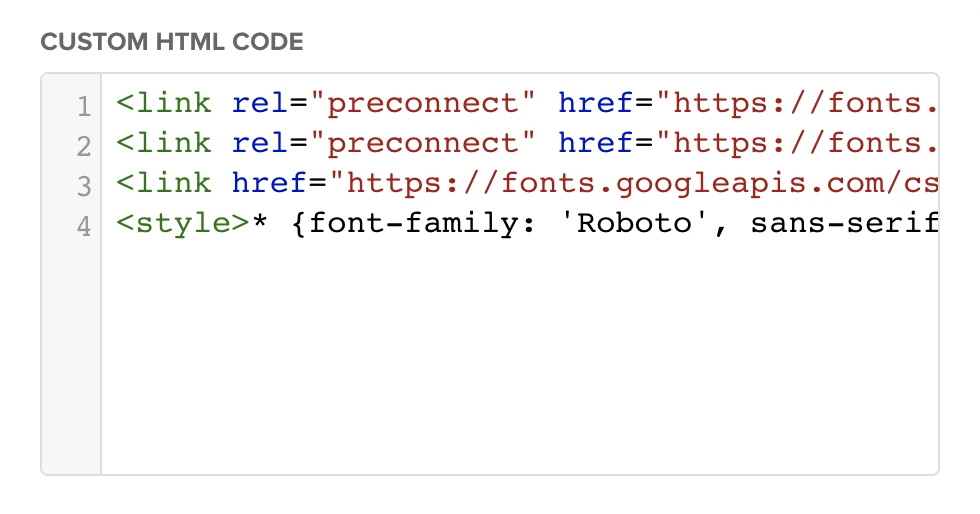
Write the text for your email template, enclosing them in <p> tags.
HTML editor
For the HTML editor, you can either use the <link> or @import tags from Google Fonts.
If you’re using the <link> tag:
Copy the <link> tag from Google Fonts and paste it inside the <head> part of your template in MailerSend.
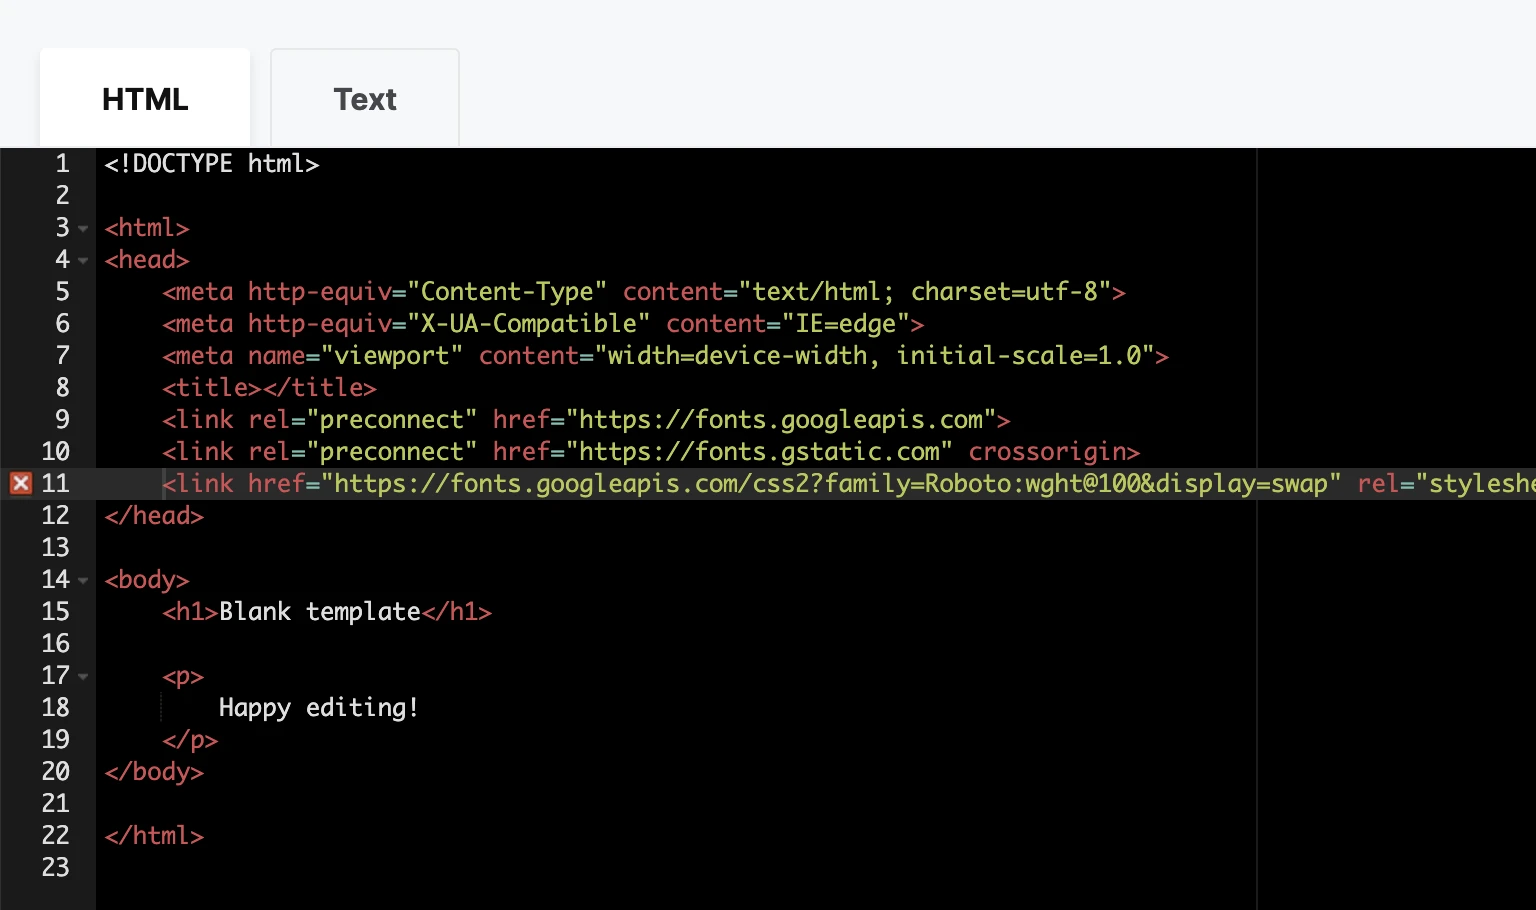
Then define the font family by adding the following code to the <style> tag:
<style type=”text/css”>body {font-family: 'Roboto', sans-serif;}</style>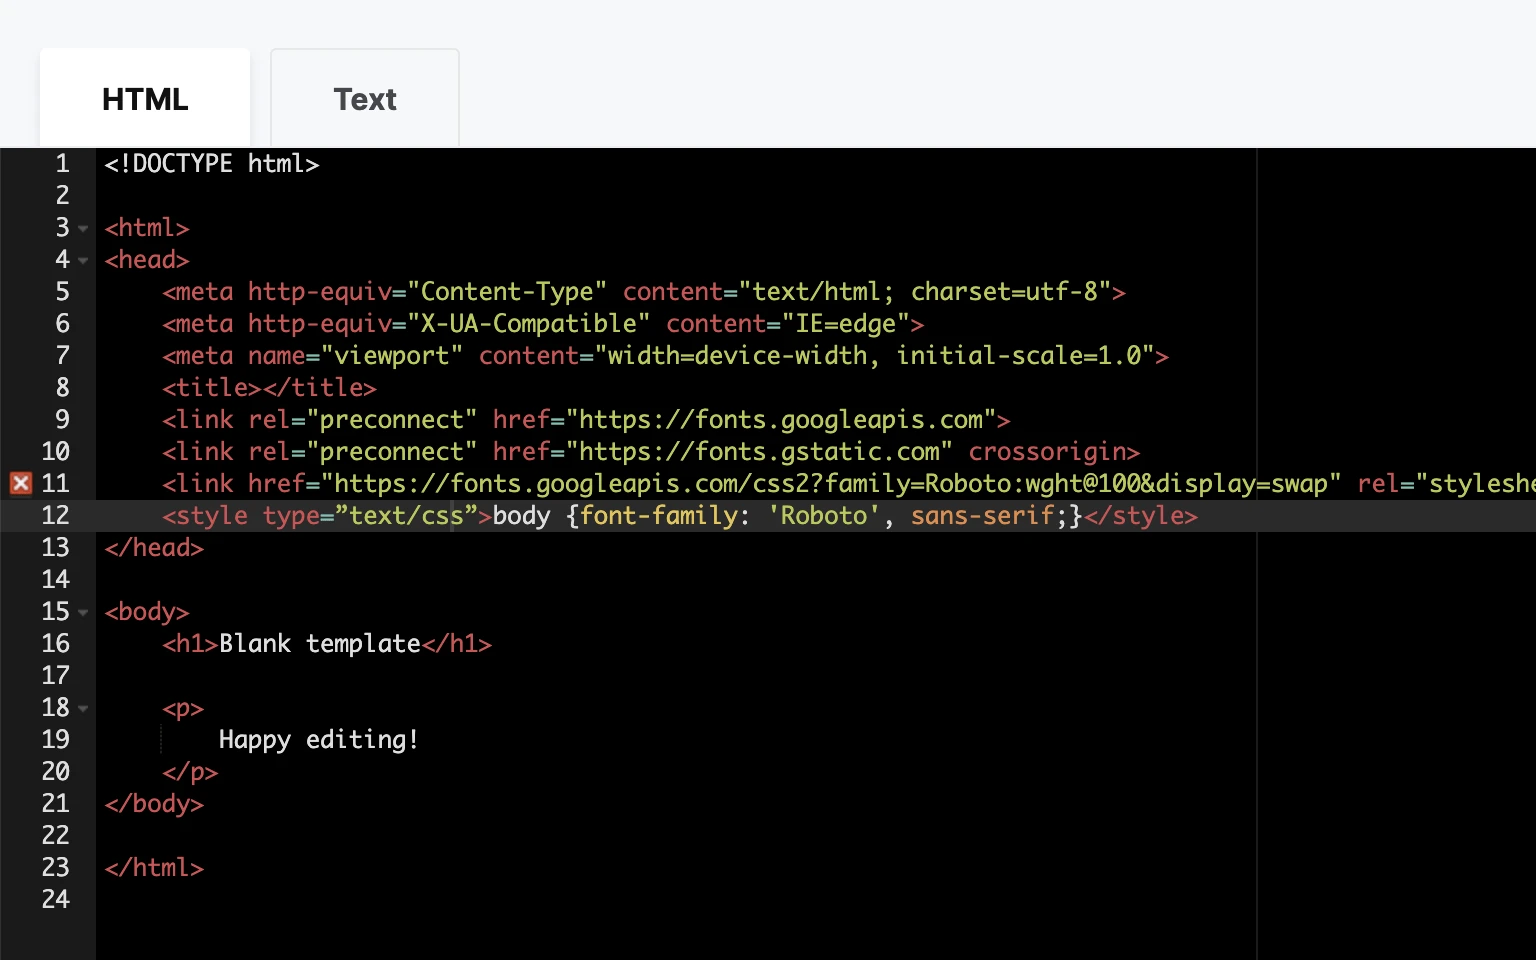
Your template will now display the custom font for the body of your email.
If you’re using the @import tag:
Copy the @import tag from Google Fonts and paste inside the <head> part of your template in MailerSend.
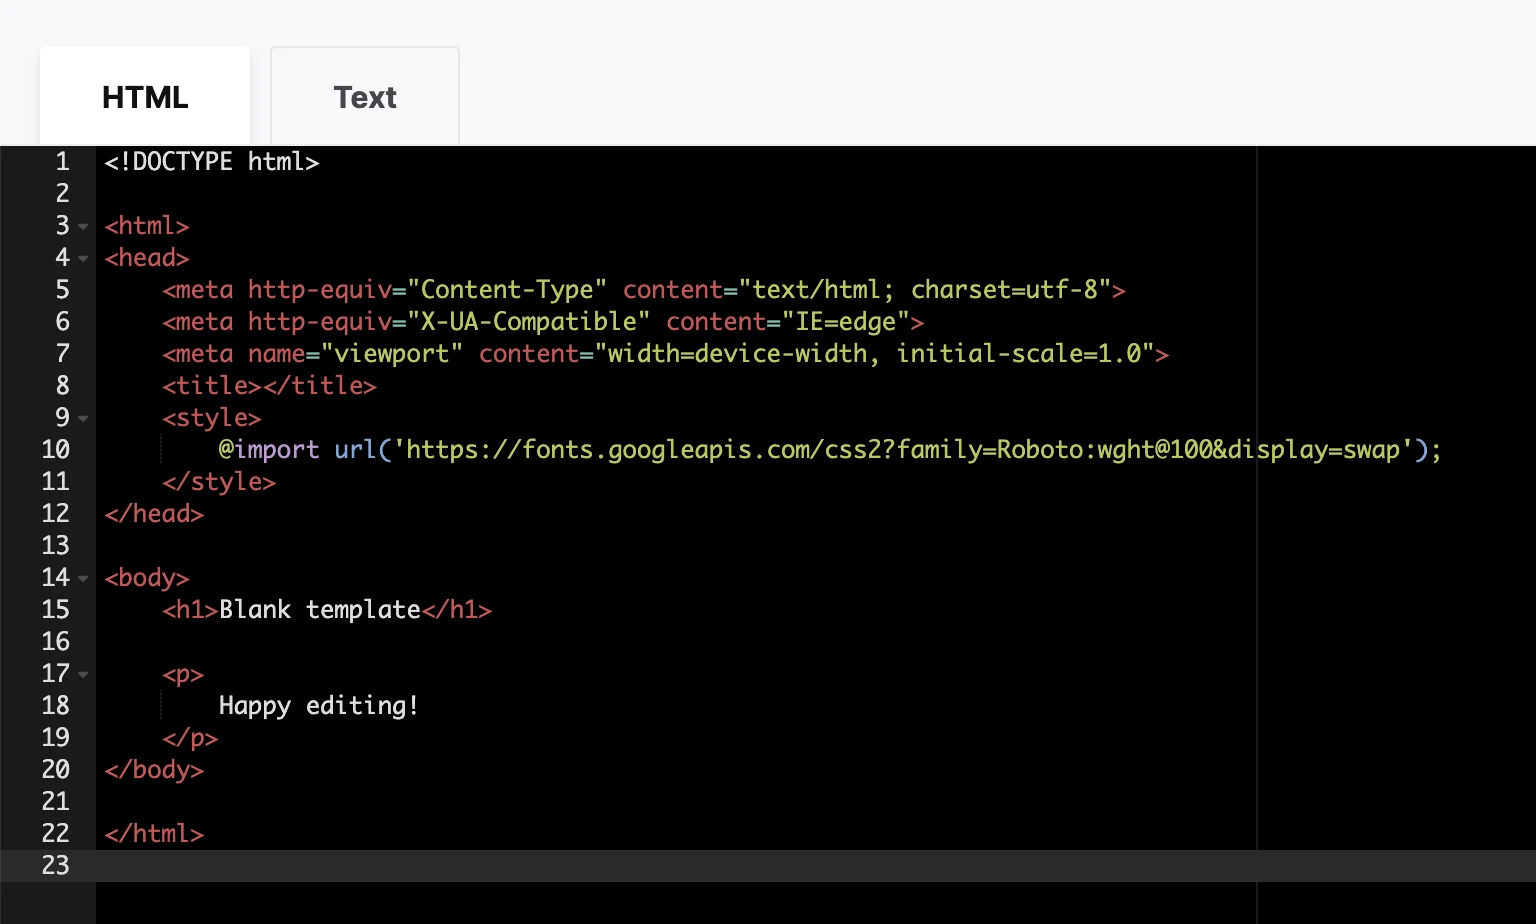
2. Then define the font family by adding the following code to the <style> tag:
body {font-family: 'Roboto', sans-serif;}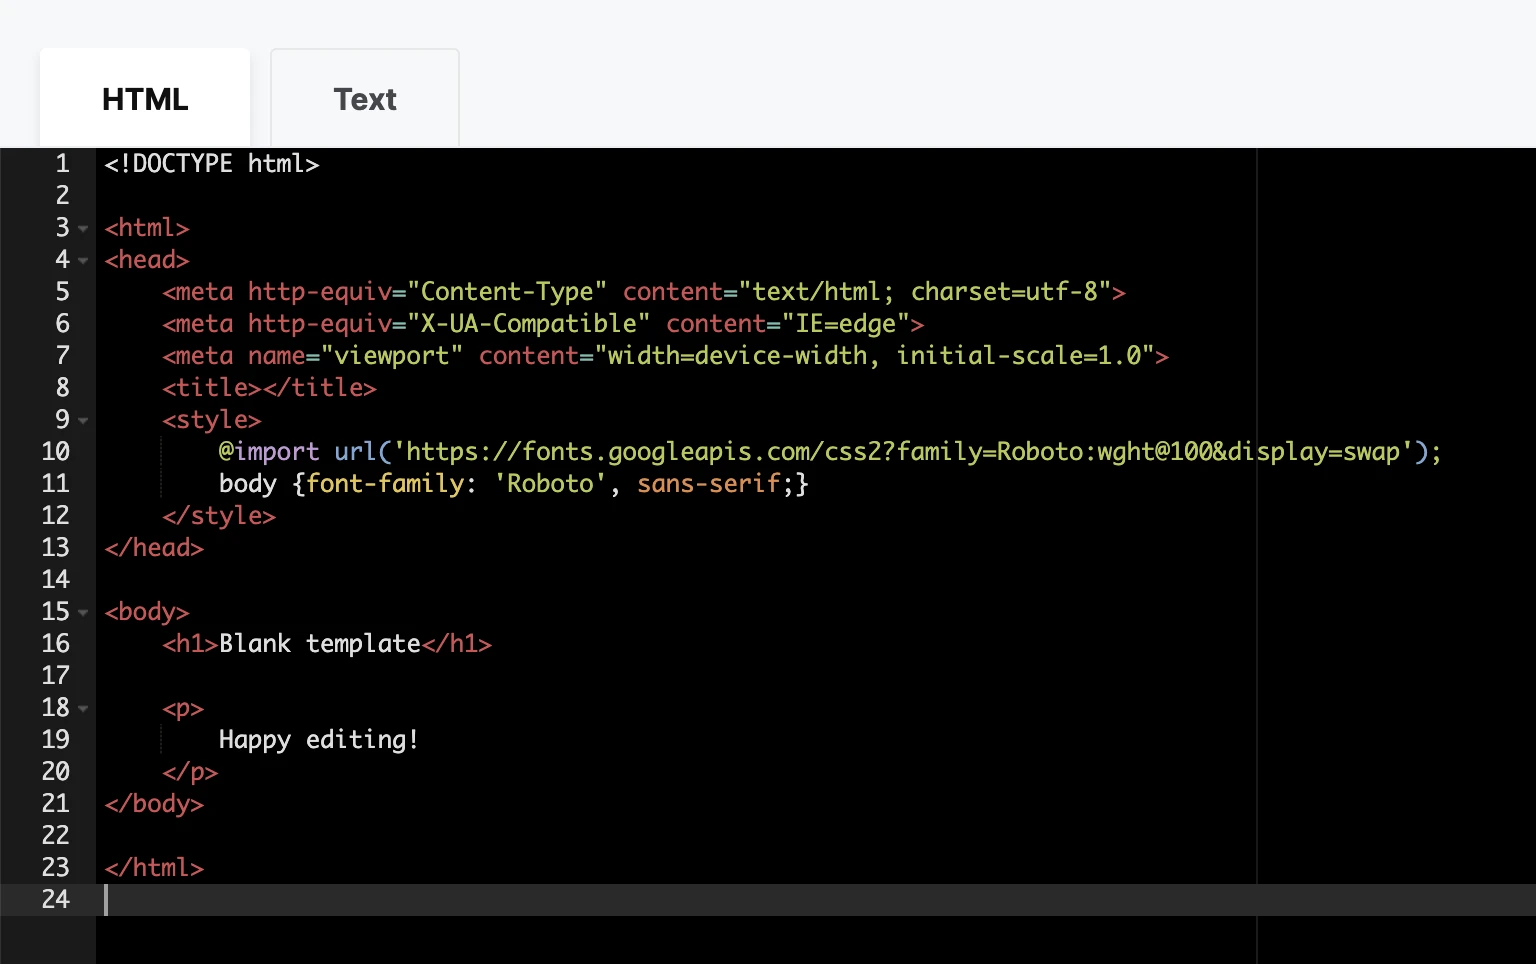
Your template will now display the custom font for the body of your email.
How to troubleshoot transactional emails not sending
When trying to send an email via an API request or an SMTP relay server, you may come across an error that prevents the email from being sent or received.
To start troubleshooting both API and SMTP connections:
Check the FROM email you're sending from. It must match the verified domain that the API token or SMTP credentials belong to
Check your credentials. Your API token or your SMTP credentials must be valid and authorized before you can start sending emails
To start troubleshooting API requests:
Make sure you're providing either a valid HTML, a text version, or a template ID. One of these three parameters has to be included in your API request
Verify that you’re using the correct API request, which should be POST https://api.mailersend.com/v1/email
Check that all of the JSON parameters in the body are properly enclosed and there aren’t any typos
REST API response codes
If there’s an issue with successfully submitting an API request, you will get a numbered response code, which is specific to a client-side error. See all API response codes you might encounter on the Developers' documentation.
The most common ones are:
400 | Bad request |
401 | Unauthorized |
403 | Forbidden |
405 | Method not allowed |
408 | Request timeout |
422 | Unprocessable entity - validation error |
422 - unprocessable entity
422 errors can encompass multiple errors types, the most common include:
From email must be verified | The domain of the from email address must match the domain that the API token or SMTP credentials are from. |
You must provide HTML and/or text versions of the email or template ID. | The API request is missing one of the 3 parameters needed to send the content, either the text or HTML version or the template ID. |
This file type is not supported. | The attachment file encoded in Base 64 is not part of our supported filetypes. Please refer to our supported filetypes here. |
The reply to email must be a valid email address. | The reply_to email parameter is not a valid email address, it may be missing an "@", make sure it's a valid email address without typos. |
Email quota reached | The account's quota has been reached. Make sure your account has been approved so you can send more than 100 emails per month. |
Rejected emails
You can also verify the status of the email by using the GET request with the ID of the email sent.
soft_bounced | Your email was not delivered because it soft-bounced. A soft bounce is a temporary rejection by a receiving recipient’s server. This may happen because the recipient's inbox is full. |
hard_bounced | Your message was not delivered. The message was returned to our servers because the recipient's address is invalid. A hard bounce may occur because the domain name does not exist or because the recipient is unknown. You will not be able to send future email messages to recipients that hard-bounced. Use the Suppressions tool to check and manage all rejected recipients. |
junk | Your message was sent to your recipient’s junk folder. |
unsubscribed | Your message was rejected because the recipient's email address is in your Suppression list. |
spam_complaints | Similarly, your message was rejected because the recipient's email address is in your Suppression list. |
What are MailerSend’s rate limits?
Rate limits restrict the number of requests a user can make per minute. They exist to protect shared servers from being abused by spammers—protecting the sender's reputation of all that server’s users.
MailerSend rate limits
MailerSend has a default rate limit on all endpoints. If you exceed that rate limit, you will receive a 429 error response with a “Too Many Attempts.” message. See all rate limits here.
Request type | Rate limit |
All API requests (excluding v1/email) | 60 requests per minute |
API requests to v1/email | 120 requests to v1/email per minute |
API requests to v1/bulk-email | 10 requests to v1/bulk-email per minute |
SMTP | 120 requests/minute |
Need more info?
Feel free to talk with us via live chat or contact us at support@mailersend.com with multiple recipients: