Domain tracking options
You can enable tracking for specific domains when sending emails with MailerSend. The tracking feature is helpful when you want to know how your recipients interact with your emails.
How to enable tracking
To enable or disable tracking, go to Domains and click Manage for your chosen domain. When enabled, you’ll see the page below where you can manage individual tracking options.
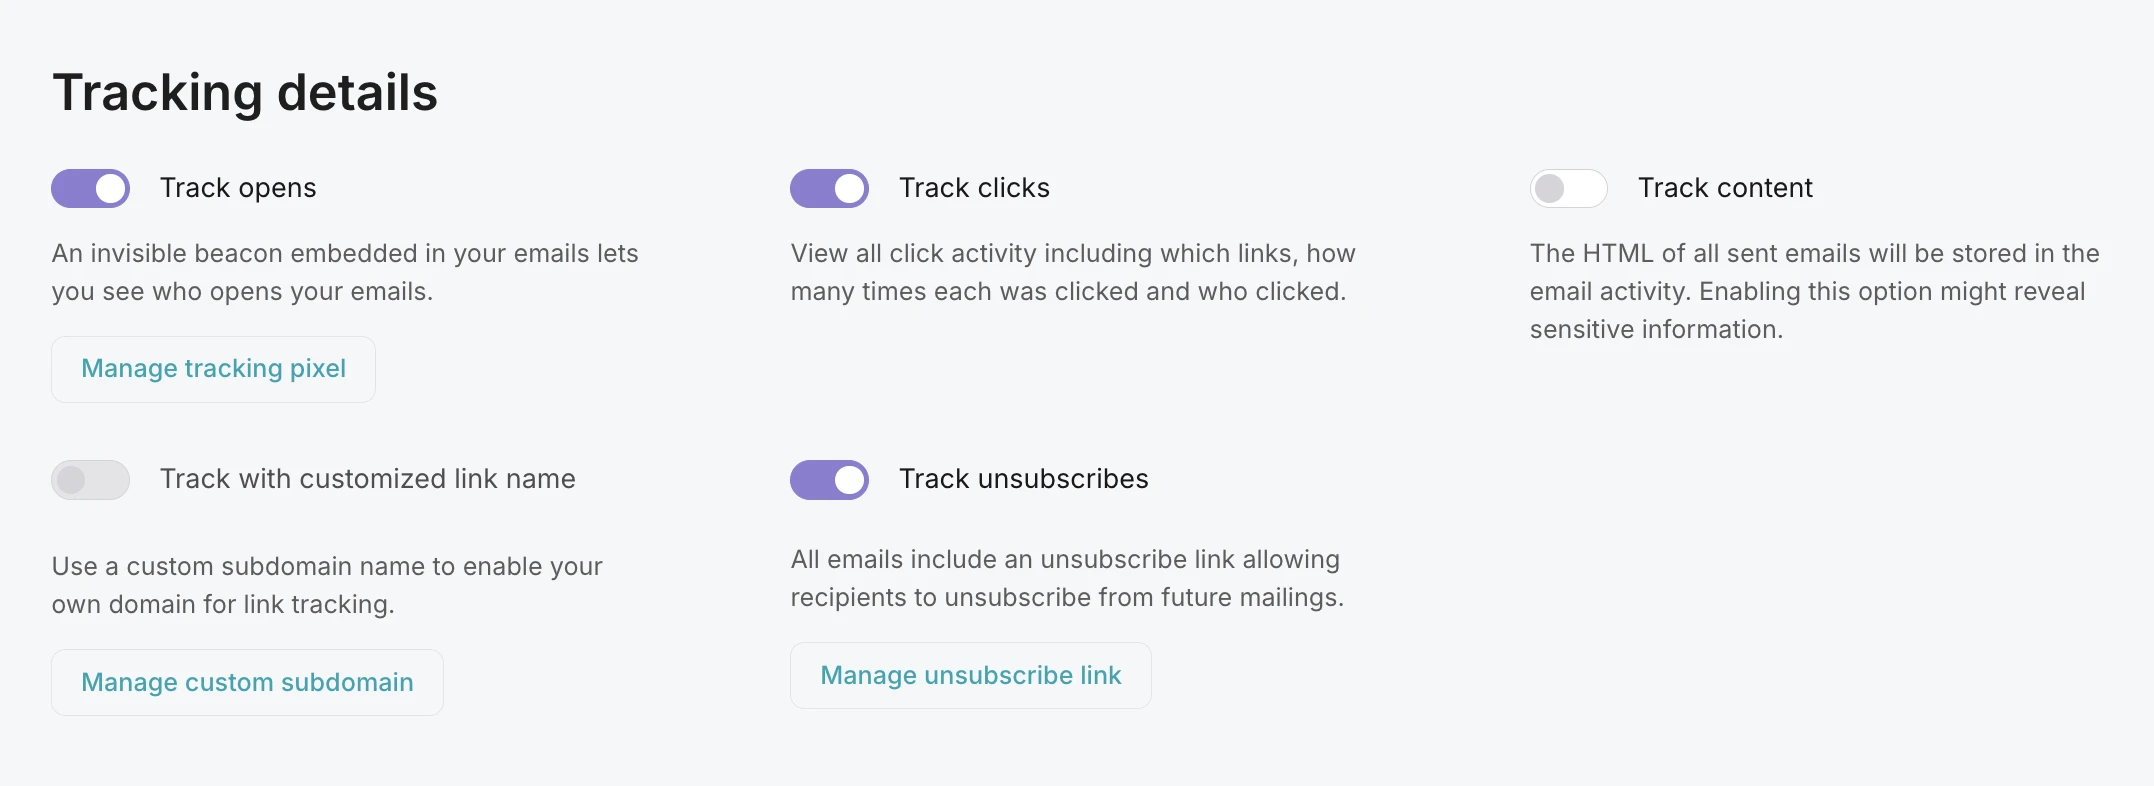
Track opens
When enabled, an invisible beacon embedded in your emails lets you see who has opened your emails.
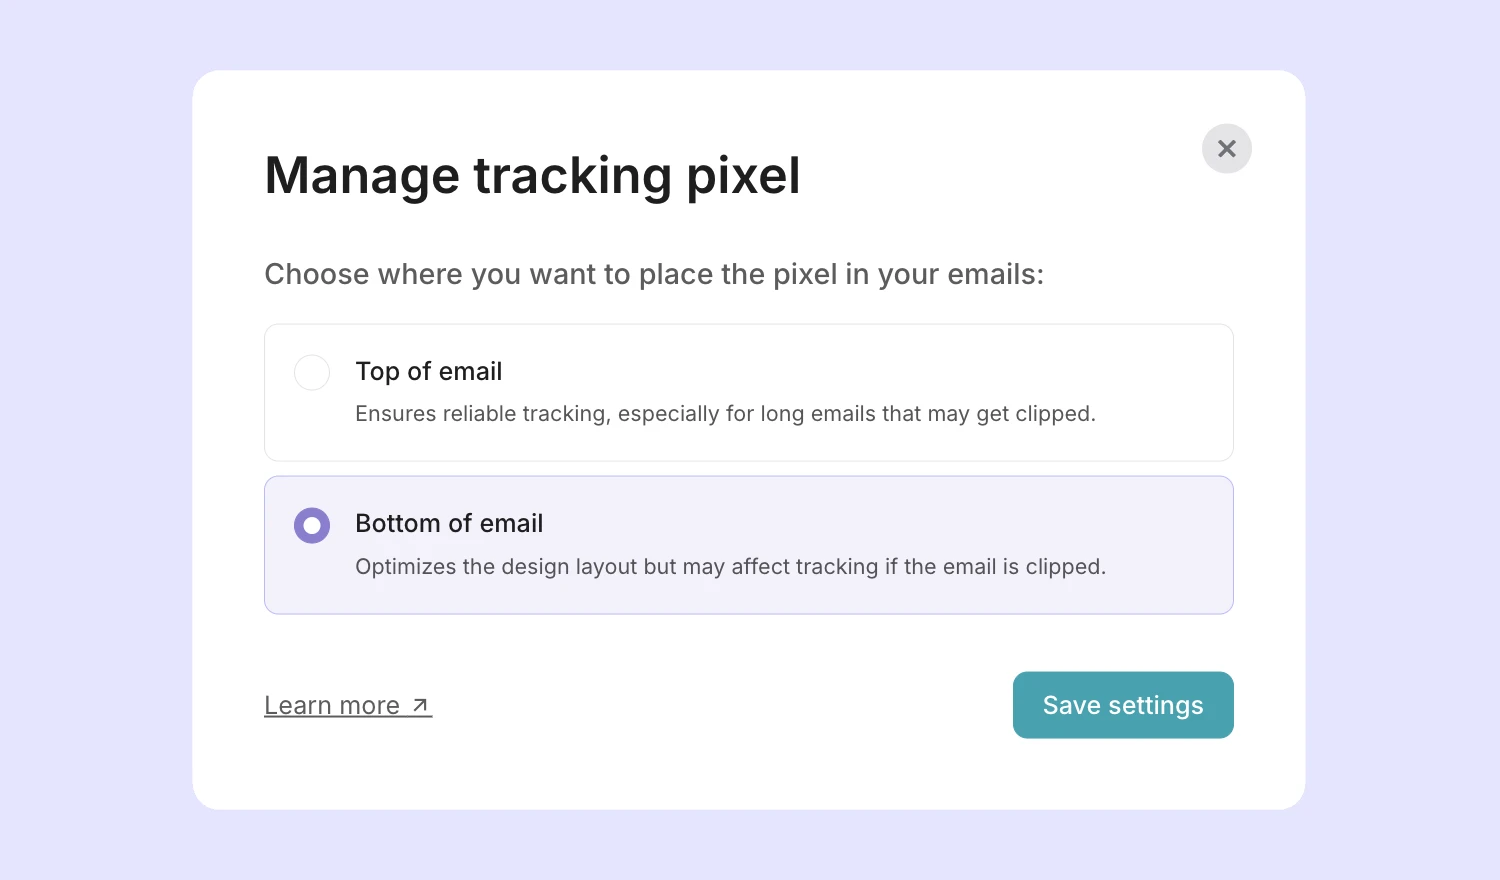
To track opens, MailerSend uses a simple tracking pixel that is embedded in the email. The pixel can be placed at:
The top of the email, right before opening the <body> tag, to ensure reliable tracking for longer emails that may get clipped
The bottom of the email, to optimize design layout, although this may affect tracking if the email is clipped
You can choose where you want to place the tracking pixel in your emails by clicking Manage tracking pixel.
Once a recipient or their email client activates images, the pixel is triggered and the email is marked as opened. Using this data, we can not only track opens but we can also detect the recipient’s location and what reading environment they’re using. All this data can be found on your Analytics page.
Once you choose to enable or disable open tracking, the action is applied immediately. From the moment you enable open tracking, all emails that you send will have the tracking pixel (and the same goes for disabling).
Track clicks
When click tracking is enabled, you can view all click activity—including which links are clicked, how many times each link was clicked, and which recipient clicked.
MailerSend automatically replaces all links in HTML and TEXT content that is sent via the MailerSend API.
In this example, the subdomain is “unique-subdomain” and your link tracking would look like this: unique-subdomain.click.mailersend.net/unique-id-for-unique-link
Please note that you can also use your own domain for tracking links.
Track content
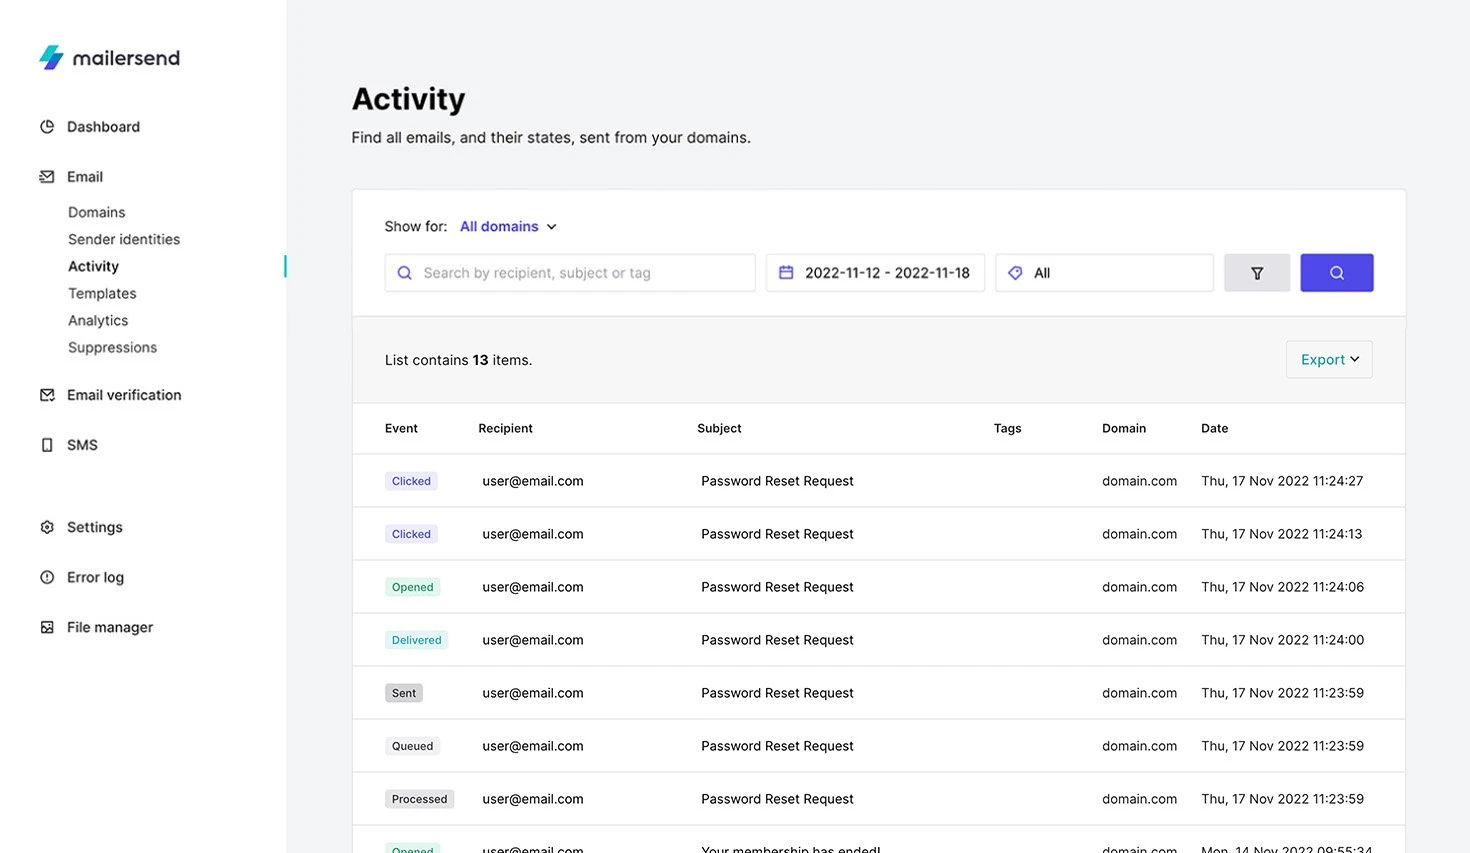
Content tracking is an internal feature that is only available for you. When enabled, all sent emails will be stored in your email activity and their HTML preview will be available.
With MailerSend, you can send your emails and provide HTML content through API. This will help you to see what your emails look like when they’re sent.
To see the email content, go to your Activity page and filter any status or email by subject line. Then click on the subject of any email to open the preview.
Track using custom subdomain
This option is available when click tracking is enabled. A custom subdomain allows you to use your own domain for link tracking.
To use a custom subdomain (link branding), you’ll need to:
Enable click tracking
Enable custom subdomain tracking
When custom subdomain tracking is enabled, you can see the Manage custom subdomain button. Here you can change the subdomain of your custom tracking link.
Tip: If you have already set your custom subdomain during the domain verification step, you don’t need to do anything. If you skipped this part, you can enable this feature once you choose to use Custom link branding. If you have enabled tracking and your domain doesn’t have any dedicated subdomain for link tracking, this verification pop-up will appear:
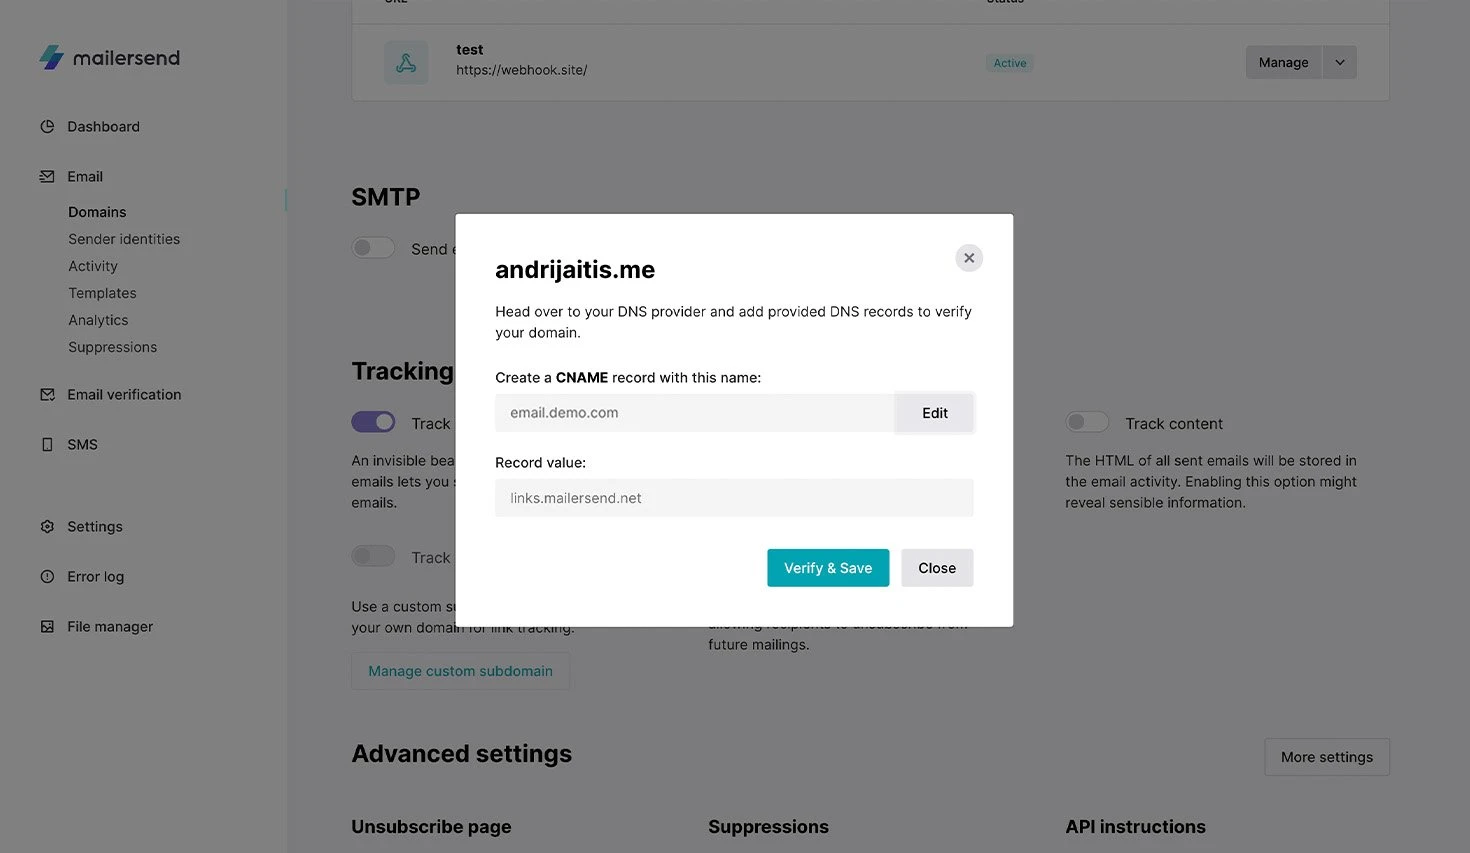
By default, we suggest creating the CNAME value as email.yourdomain.tld. This means that your tracking links will be email.yourdomain.tld/unique-id-for-unique-link
If you’re doing this for the first time, you can change the email value to any other value.
At MailerSend, we automatically issue a SSL certificate for your domain. This ensures that all links in your emails are safe.
Track unsubscribes
The unsubscribe tracking option allows your recipients to unsubscribe from your emails that are sent from a specific domain.
Once enabled, MailerSend automatically adds a List-Unsubscribe header to your messages.
Usually this header is available for email providers only, but it also allows some recipients (depending on the email client) to see an unsubscribe button that can be clicked to automatically stop receiving further emails. List-Unsubscribe is used by Gmail (Mailto, URL and 1-click RFC 8058) and Outlook.com, Yahoo! Mail and iOS Mail (Mailto).
With MailerSend, you can also insert an unsubscribe button in the body of your email. To do so, enable the unsubscribe tracking option and then click on the Manage unsubscribe link button that appears underneath. Now you can choose to insert an unsubscribe link in your HTML email content or TEXT version—or both. Just select the listed checkboxes.
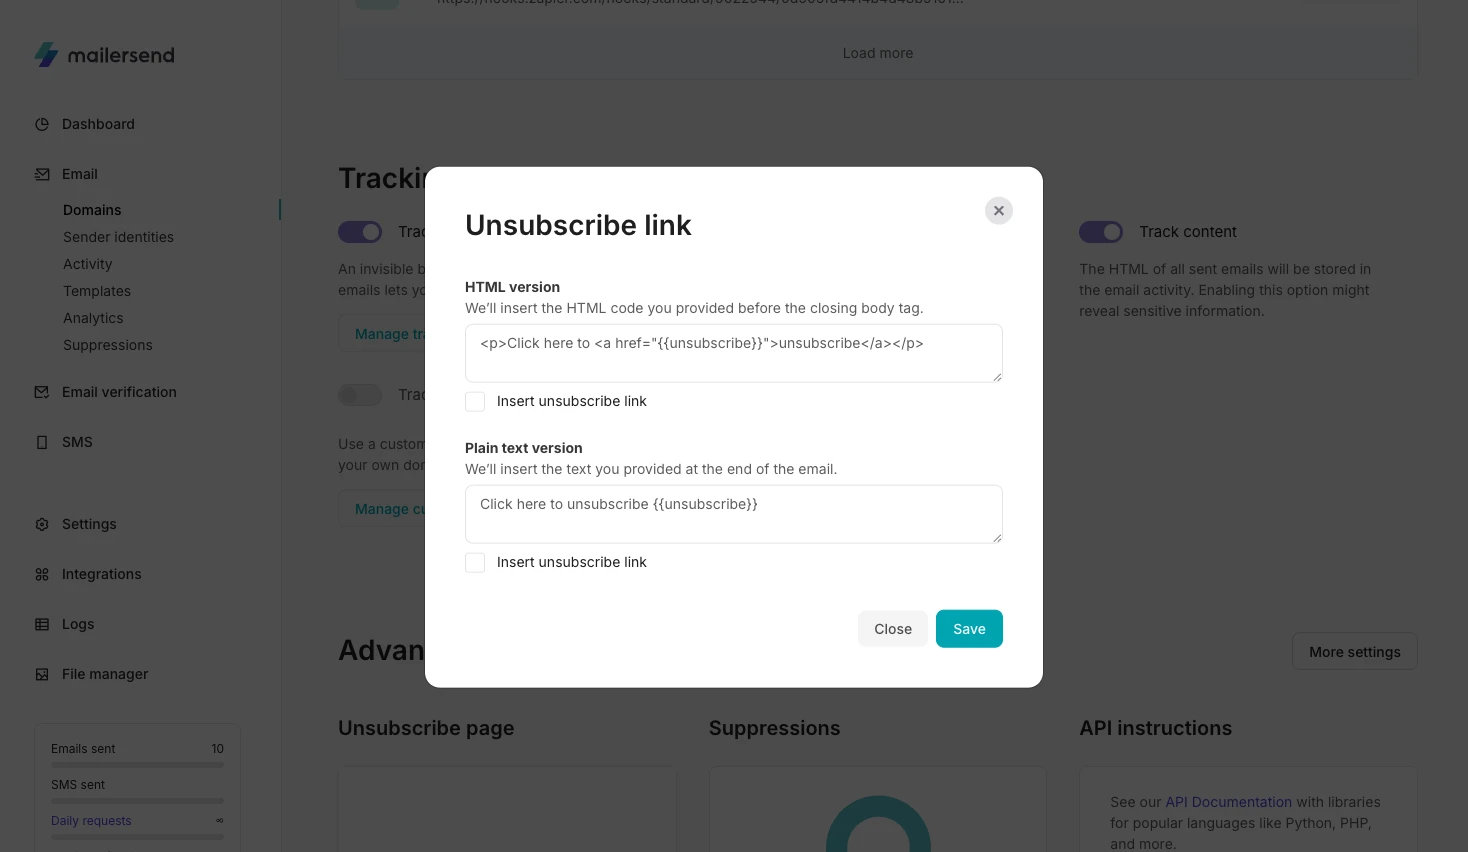
If you want to place the unsubscribe link in any other part of your email, simply add the variable {{unsubscribe}} at any place in your HTML or TEXT email. This variable will convert into a unique unsubscribe link.
Please note: The variable only works when unsubscribe tracking is enabled.
Once unsubscribe tracking is enabled, you can check the amount of unsubscribes on the Analytics page. You can also see this data on the Suppressions page, which you can access by clicking on the right corner in the top navigation bar.
Tracking emails sent from a subdomain
All statistics connected to emails sent from a subdomain will fall under the associated root domain. If you would like to get dedicated analytics for a specific subdomain, you will need to add the subdomain and verify it.