Split Testing
Split testing allows you to create up to 5 variations of your template and send them equally to your recipients. This is used to test the performance of your emails, leaving you with the most optimal version to maximize subscriber engagement. We recommend testing only one variable, depending on what you’re trying to achieve.
What elements can be tested for the best results?
Subject
Content
The various versions of your template will be shown equally across all recipients, and metrics for each version are recorded so you can see which performs best. When you select a winner, this unique version will be sent to all recipients.
To create a split test:
Go to the Templates page.
Click the Manage button for the template you wish to modify.
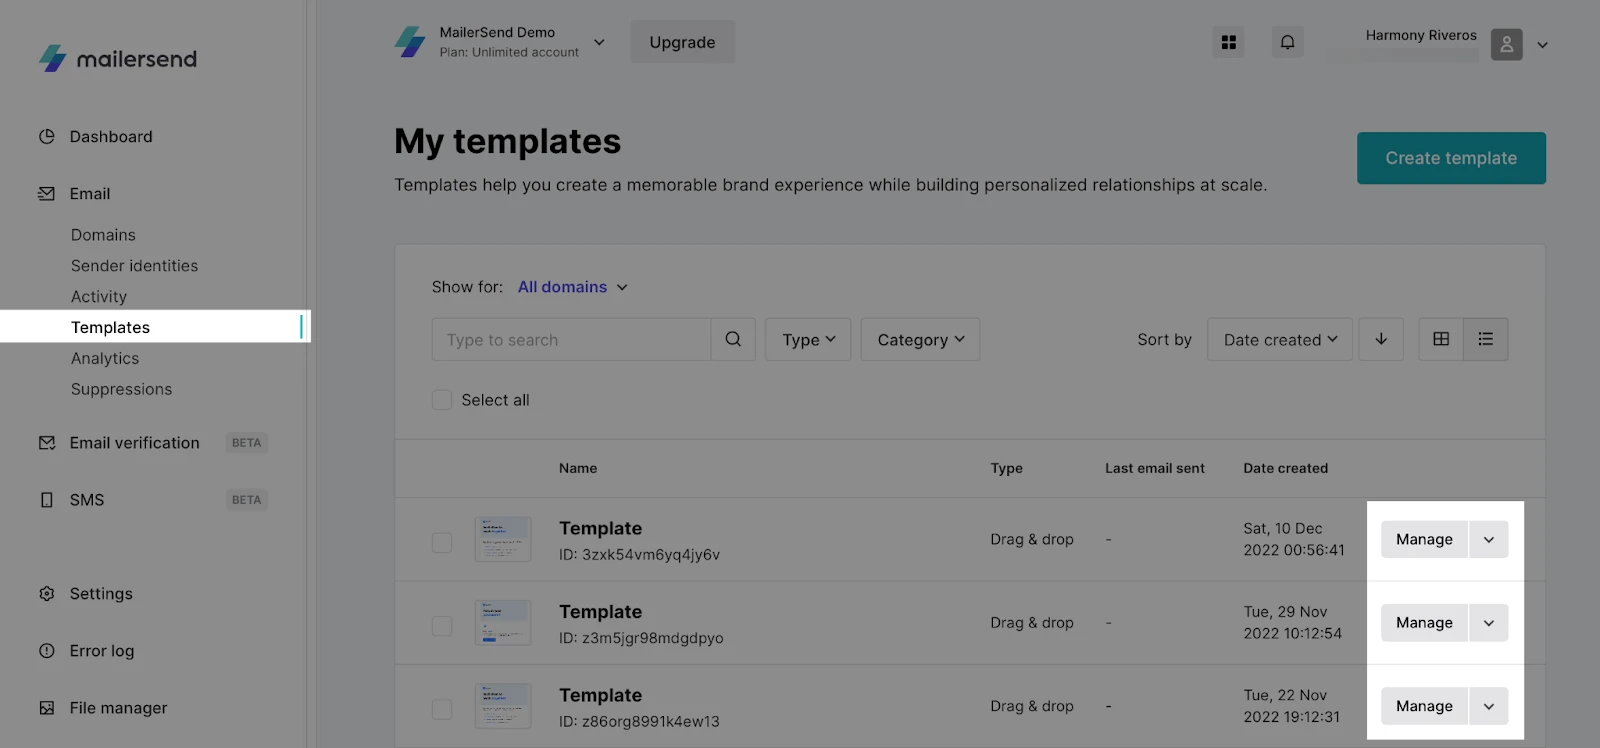
3. Click Create split test.
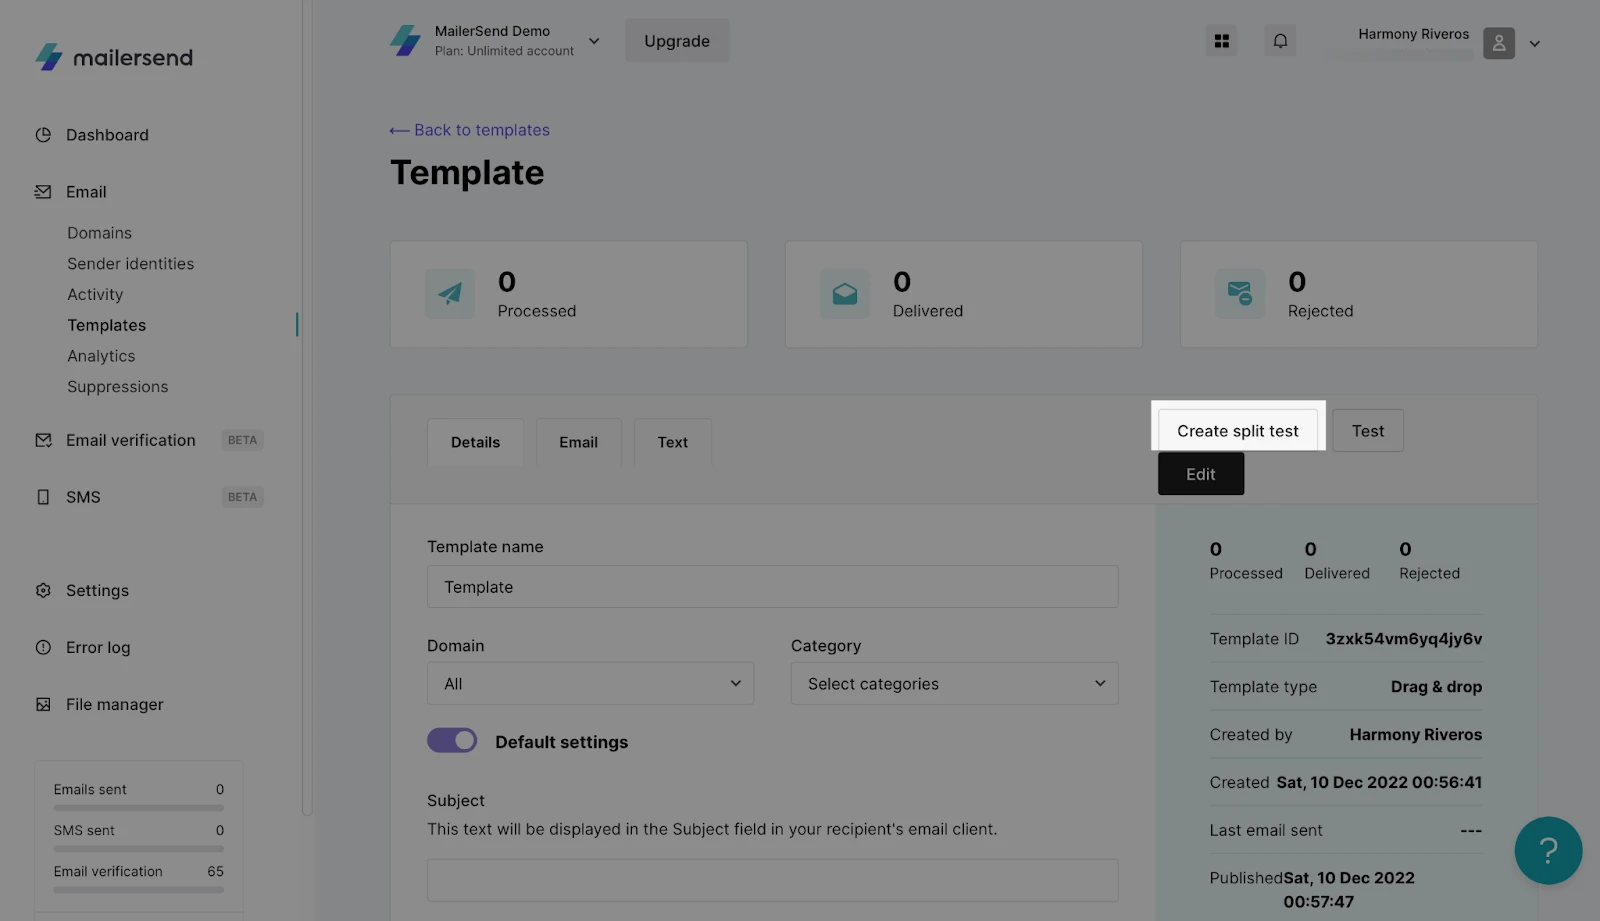
4. Confirm that the current template will be converted into a split test by clicking Yes.
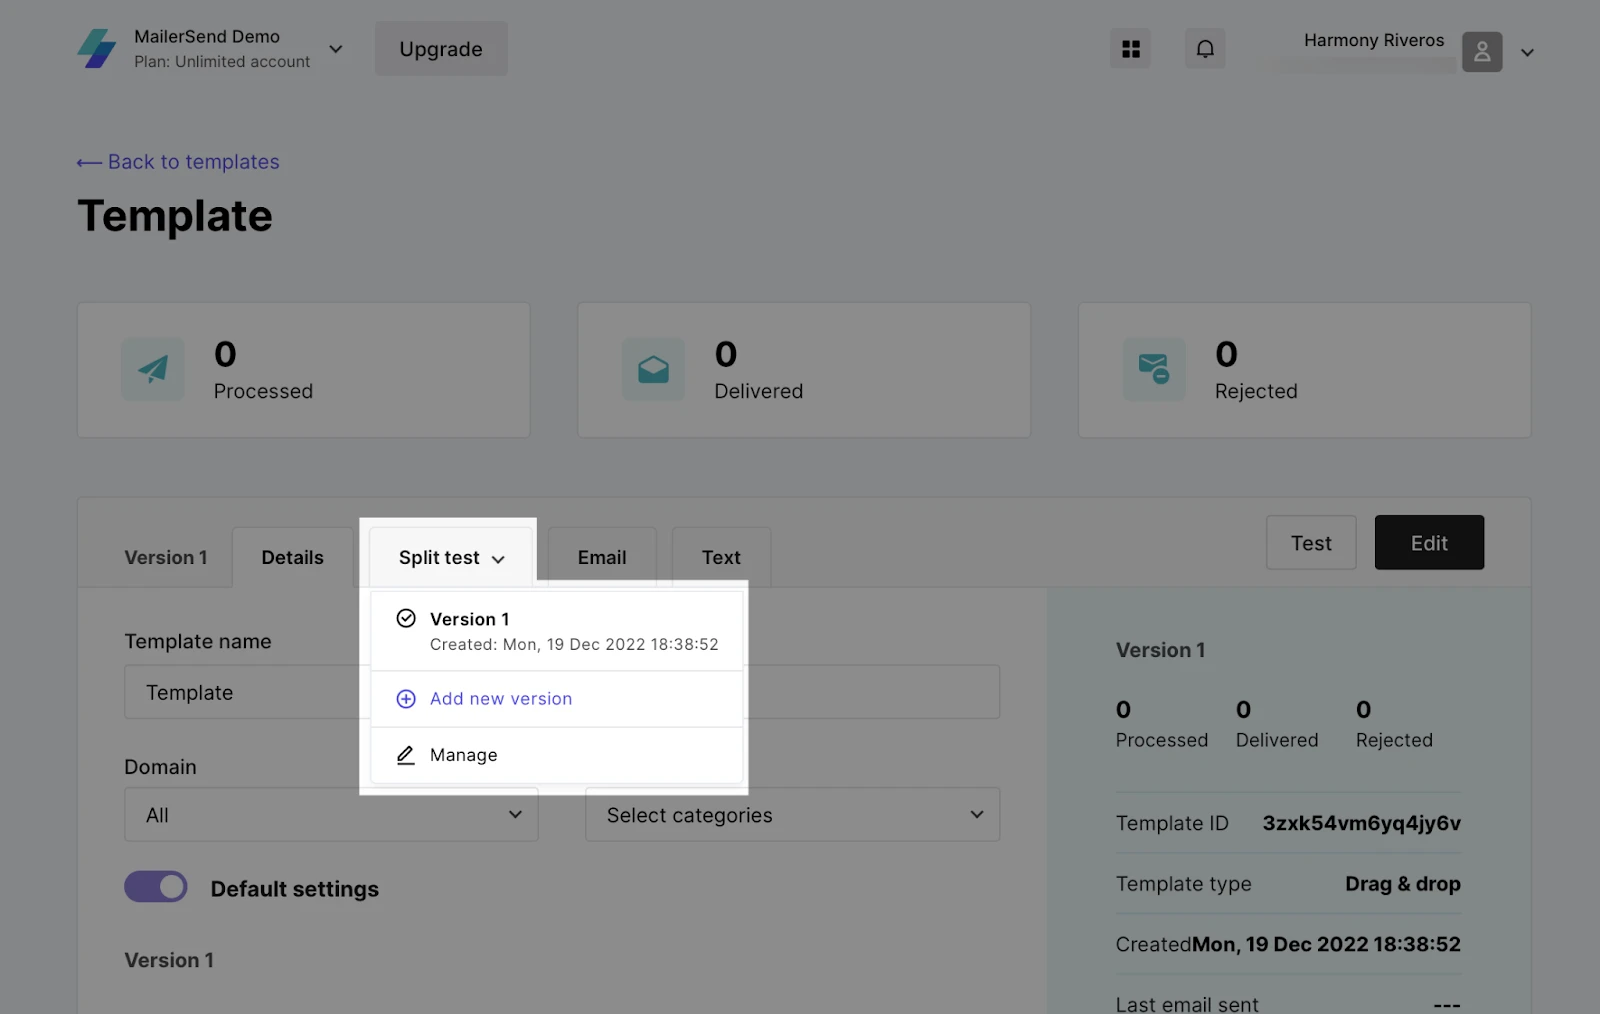
5. The original template will become Version 1. To create more versions, click the Split test tab and choose the option + add new version.
6. Choose how you would like to create the second version:
Create from scratch: Create a new template.
Copy original email: Make edits starting from the template used in Version 1.
You will be redirected to the email editor to create the second version of the split test.
8. Once a template has been edited, it will appear on the Split test page. You can create up to 5 versions for the same template-id.
9. After each version has been created, navigate to the Split test page and click Manage.
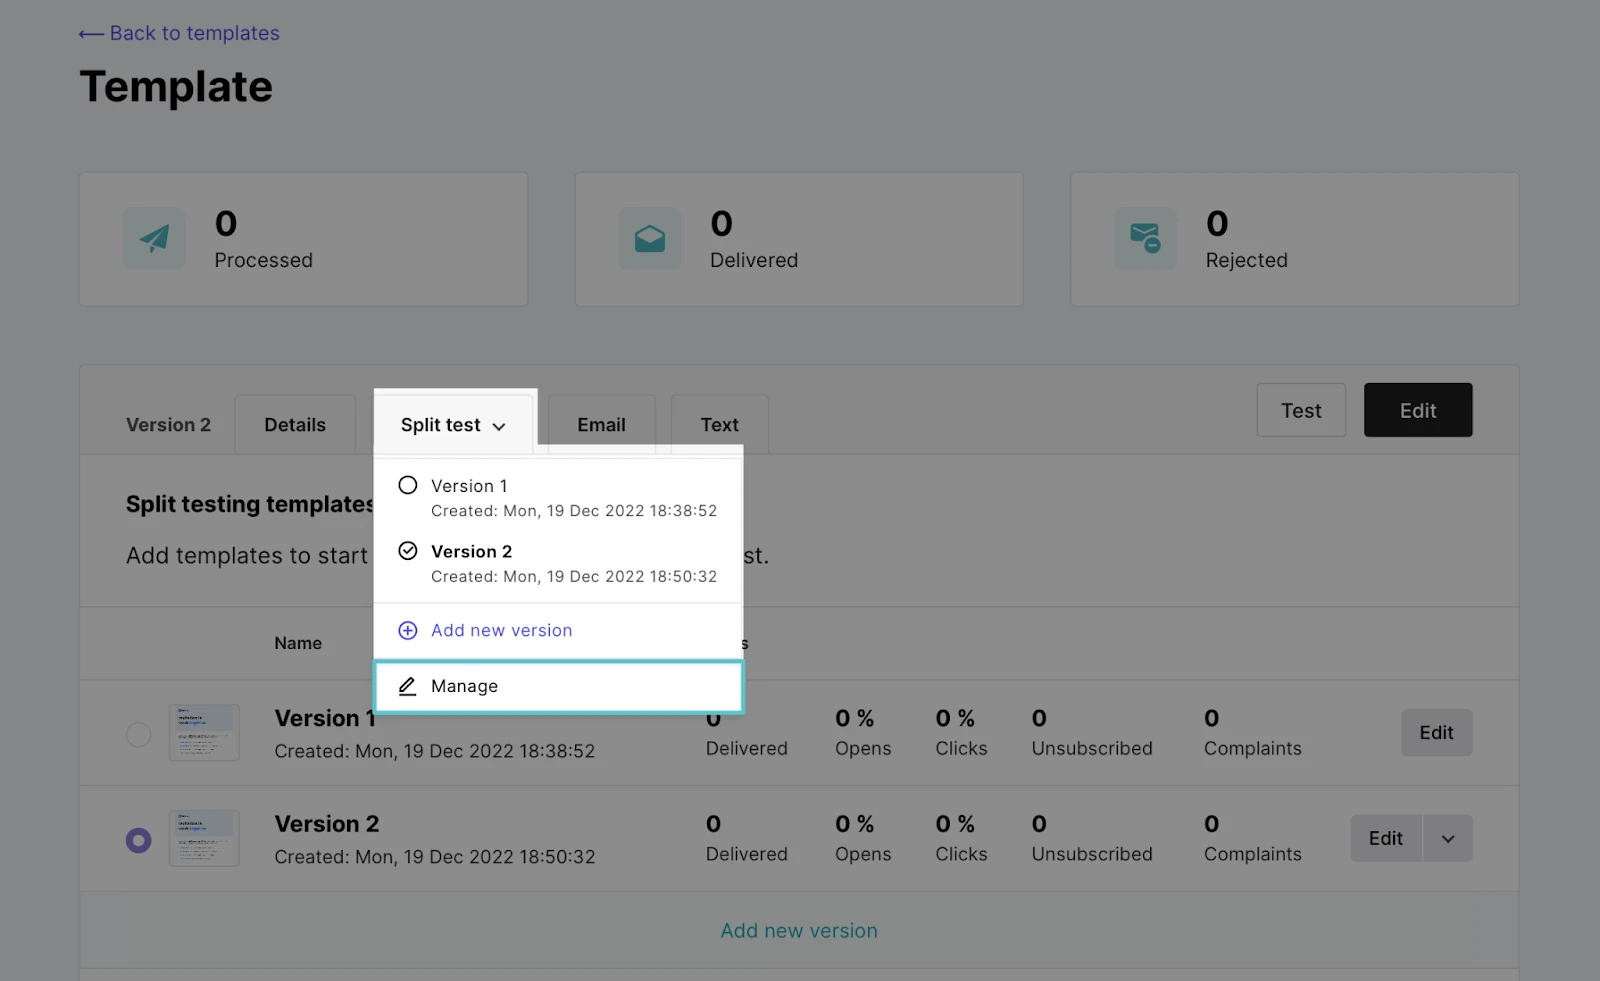
10. To edit a version, click the Edit button. To delete a version, click the side arrow for additional options and choose Delete.
11. Click Enable split testing to start the test.
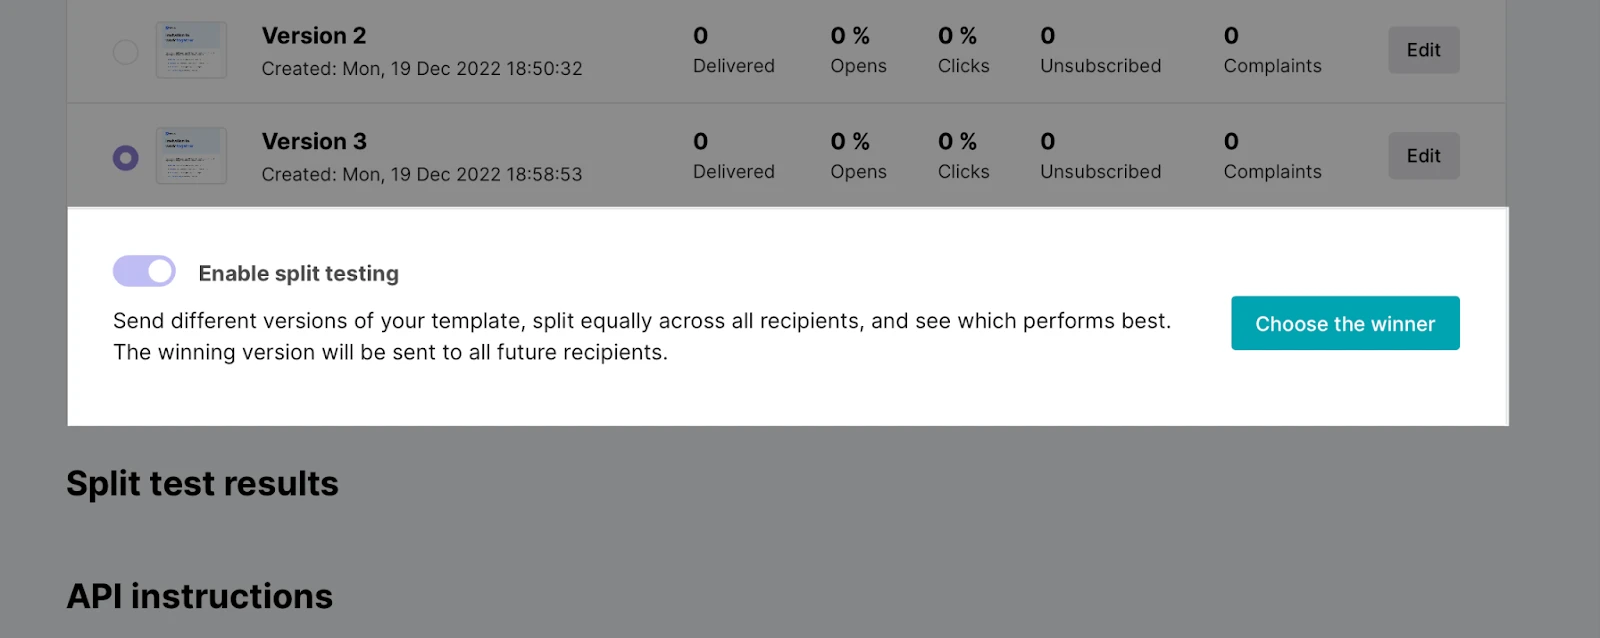
12. Confirm that the split test will begin and cannot be stopped until a winner is chosen by clicking Turn on.
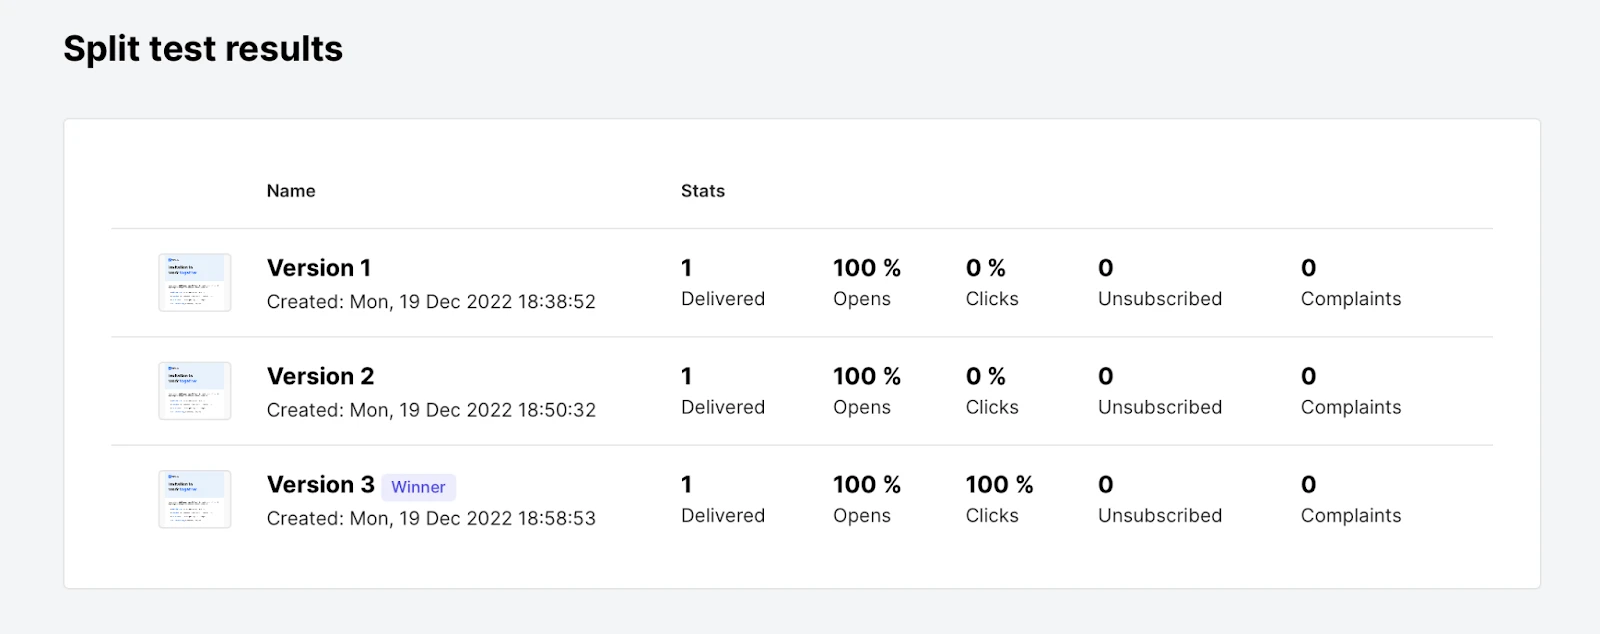
The Split test page will show the analytics for each test version, including metrics such as opens, clicks, and unsubscribes. When you are ready to decide the final version, click the button to choose the winner.
Split test results will be shown in the template settings.
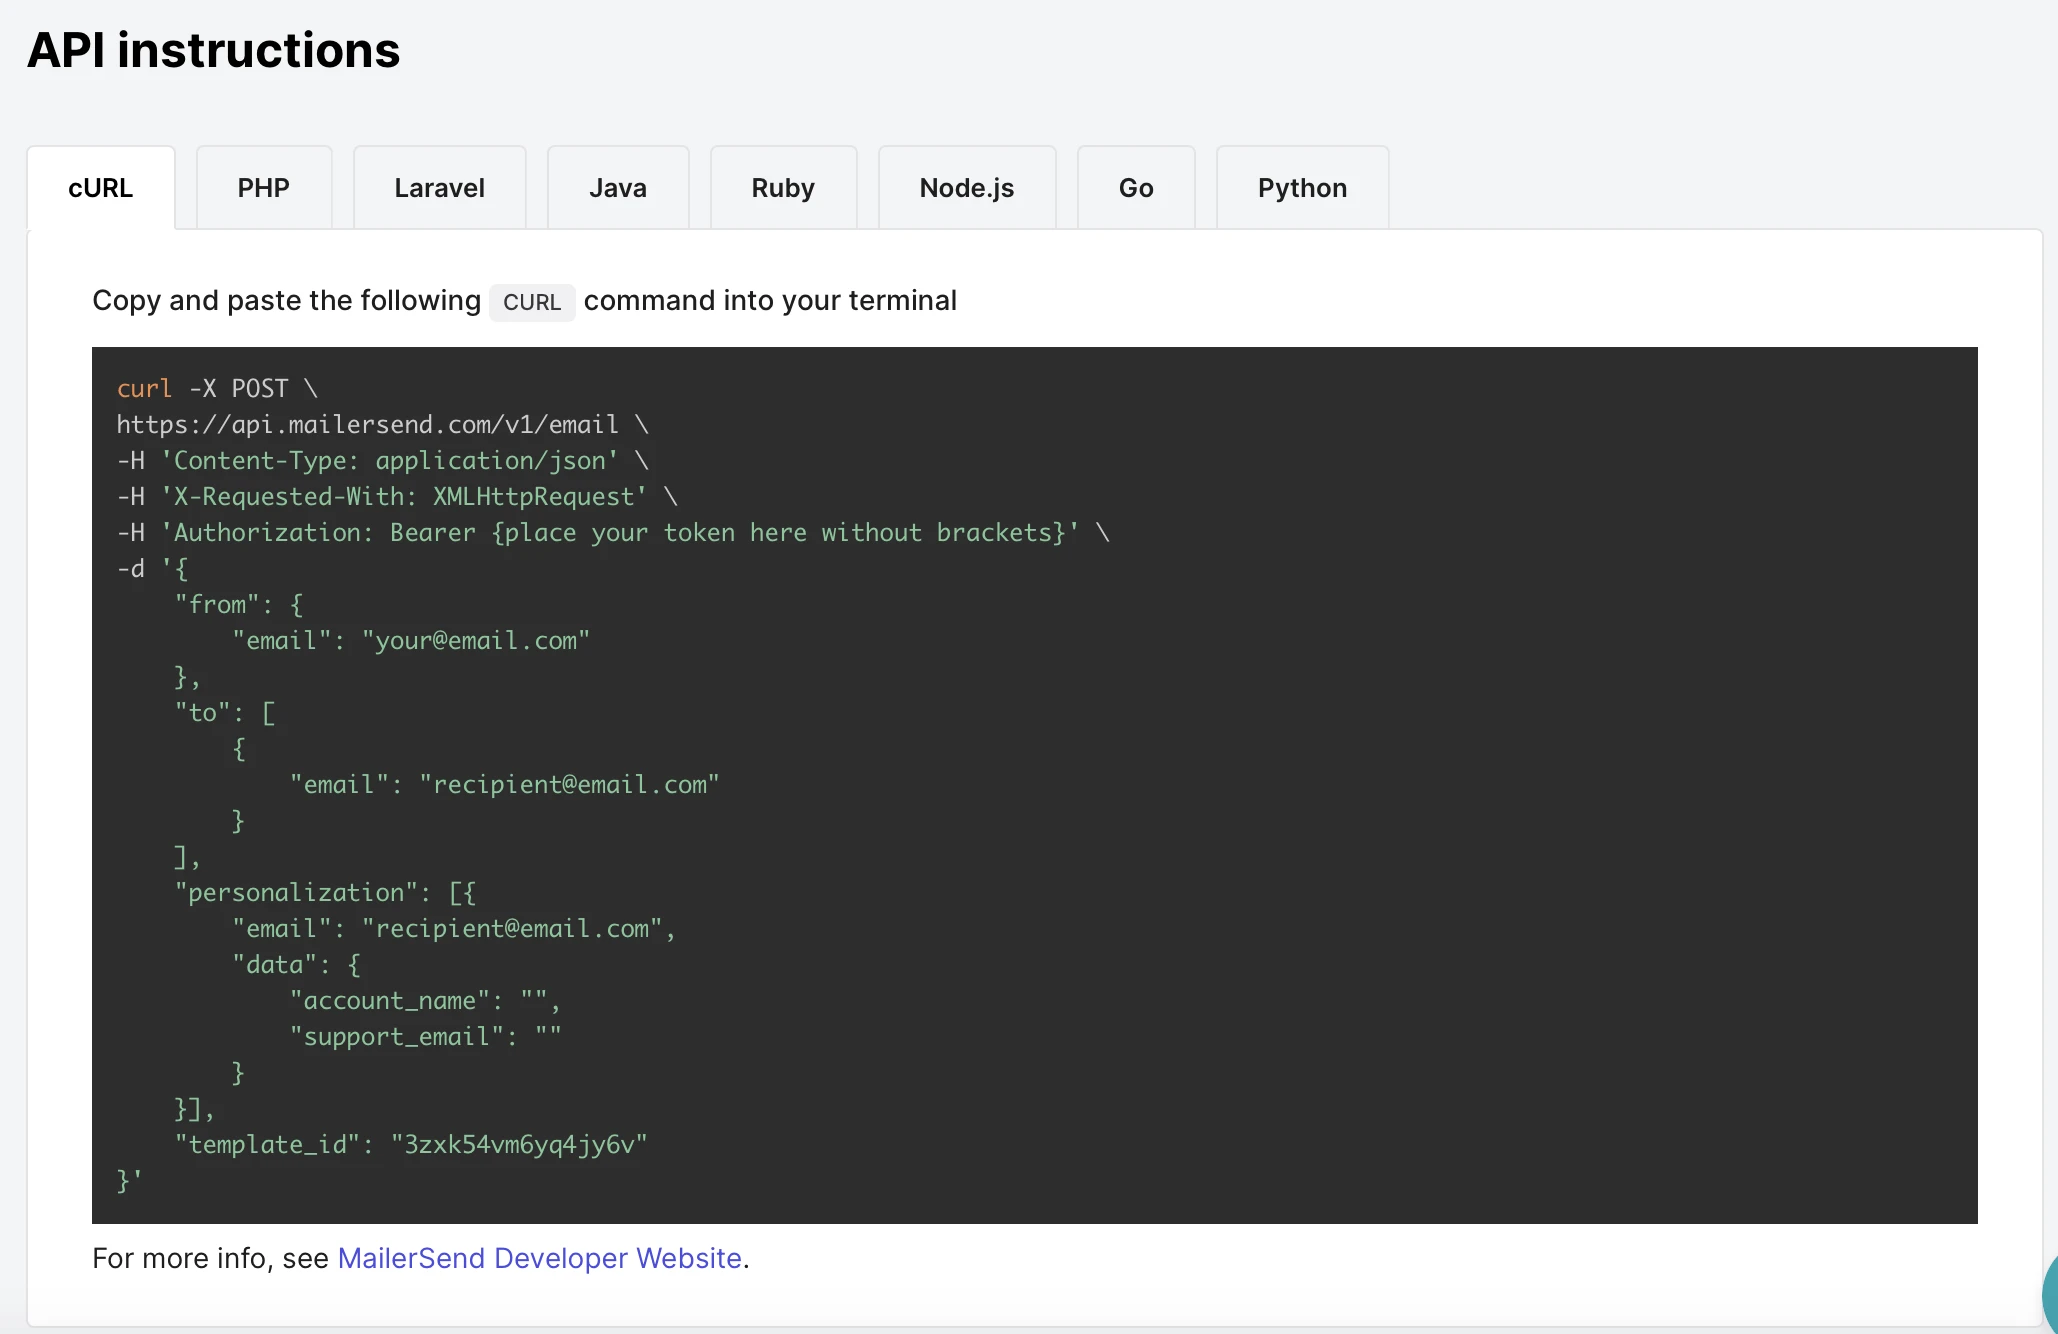
To send a template ID via API, check the API instructions section.