How to integrate MailerSend with WooCommerce
The MailerSend plugin for WooCommerce allows you to replace all default WooCommerce emails with your own custom templates in MailerSend. You can then track all email activity in your MailerSend account.
The MailerSend plugin for WooCommerce supports emails triggered by the following events:
New Order – Sent to the store admin to notify them of a new order placed on their site.
Canceled Order – Sent to the store admin to notify them of a canceled order.
Failed Order – Sent to the store admin to notify them of a failed order.
Order On-Hold – Contains order details after it’s placed on hold.
Order Processing – Sent after a completed payment; contains the order details.
Order Completed – Sent to customers when their orders are marked completed; indicates that the order has been shipped.
Order Refunded – Sent to customers when an order is refunded.
Customer Invoice – Sent to customers; contains the order information and payment links.
Customer Note – Sent when a customer note is added in the dashboard.
Password Reset – Sent to a customer after they request to reset their password.
New Account – Sent to the customer when they create a customer account.
How to set up the MailerSend plugin for WooCommerce
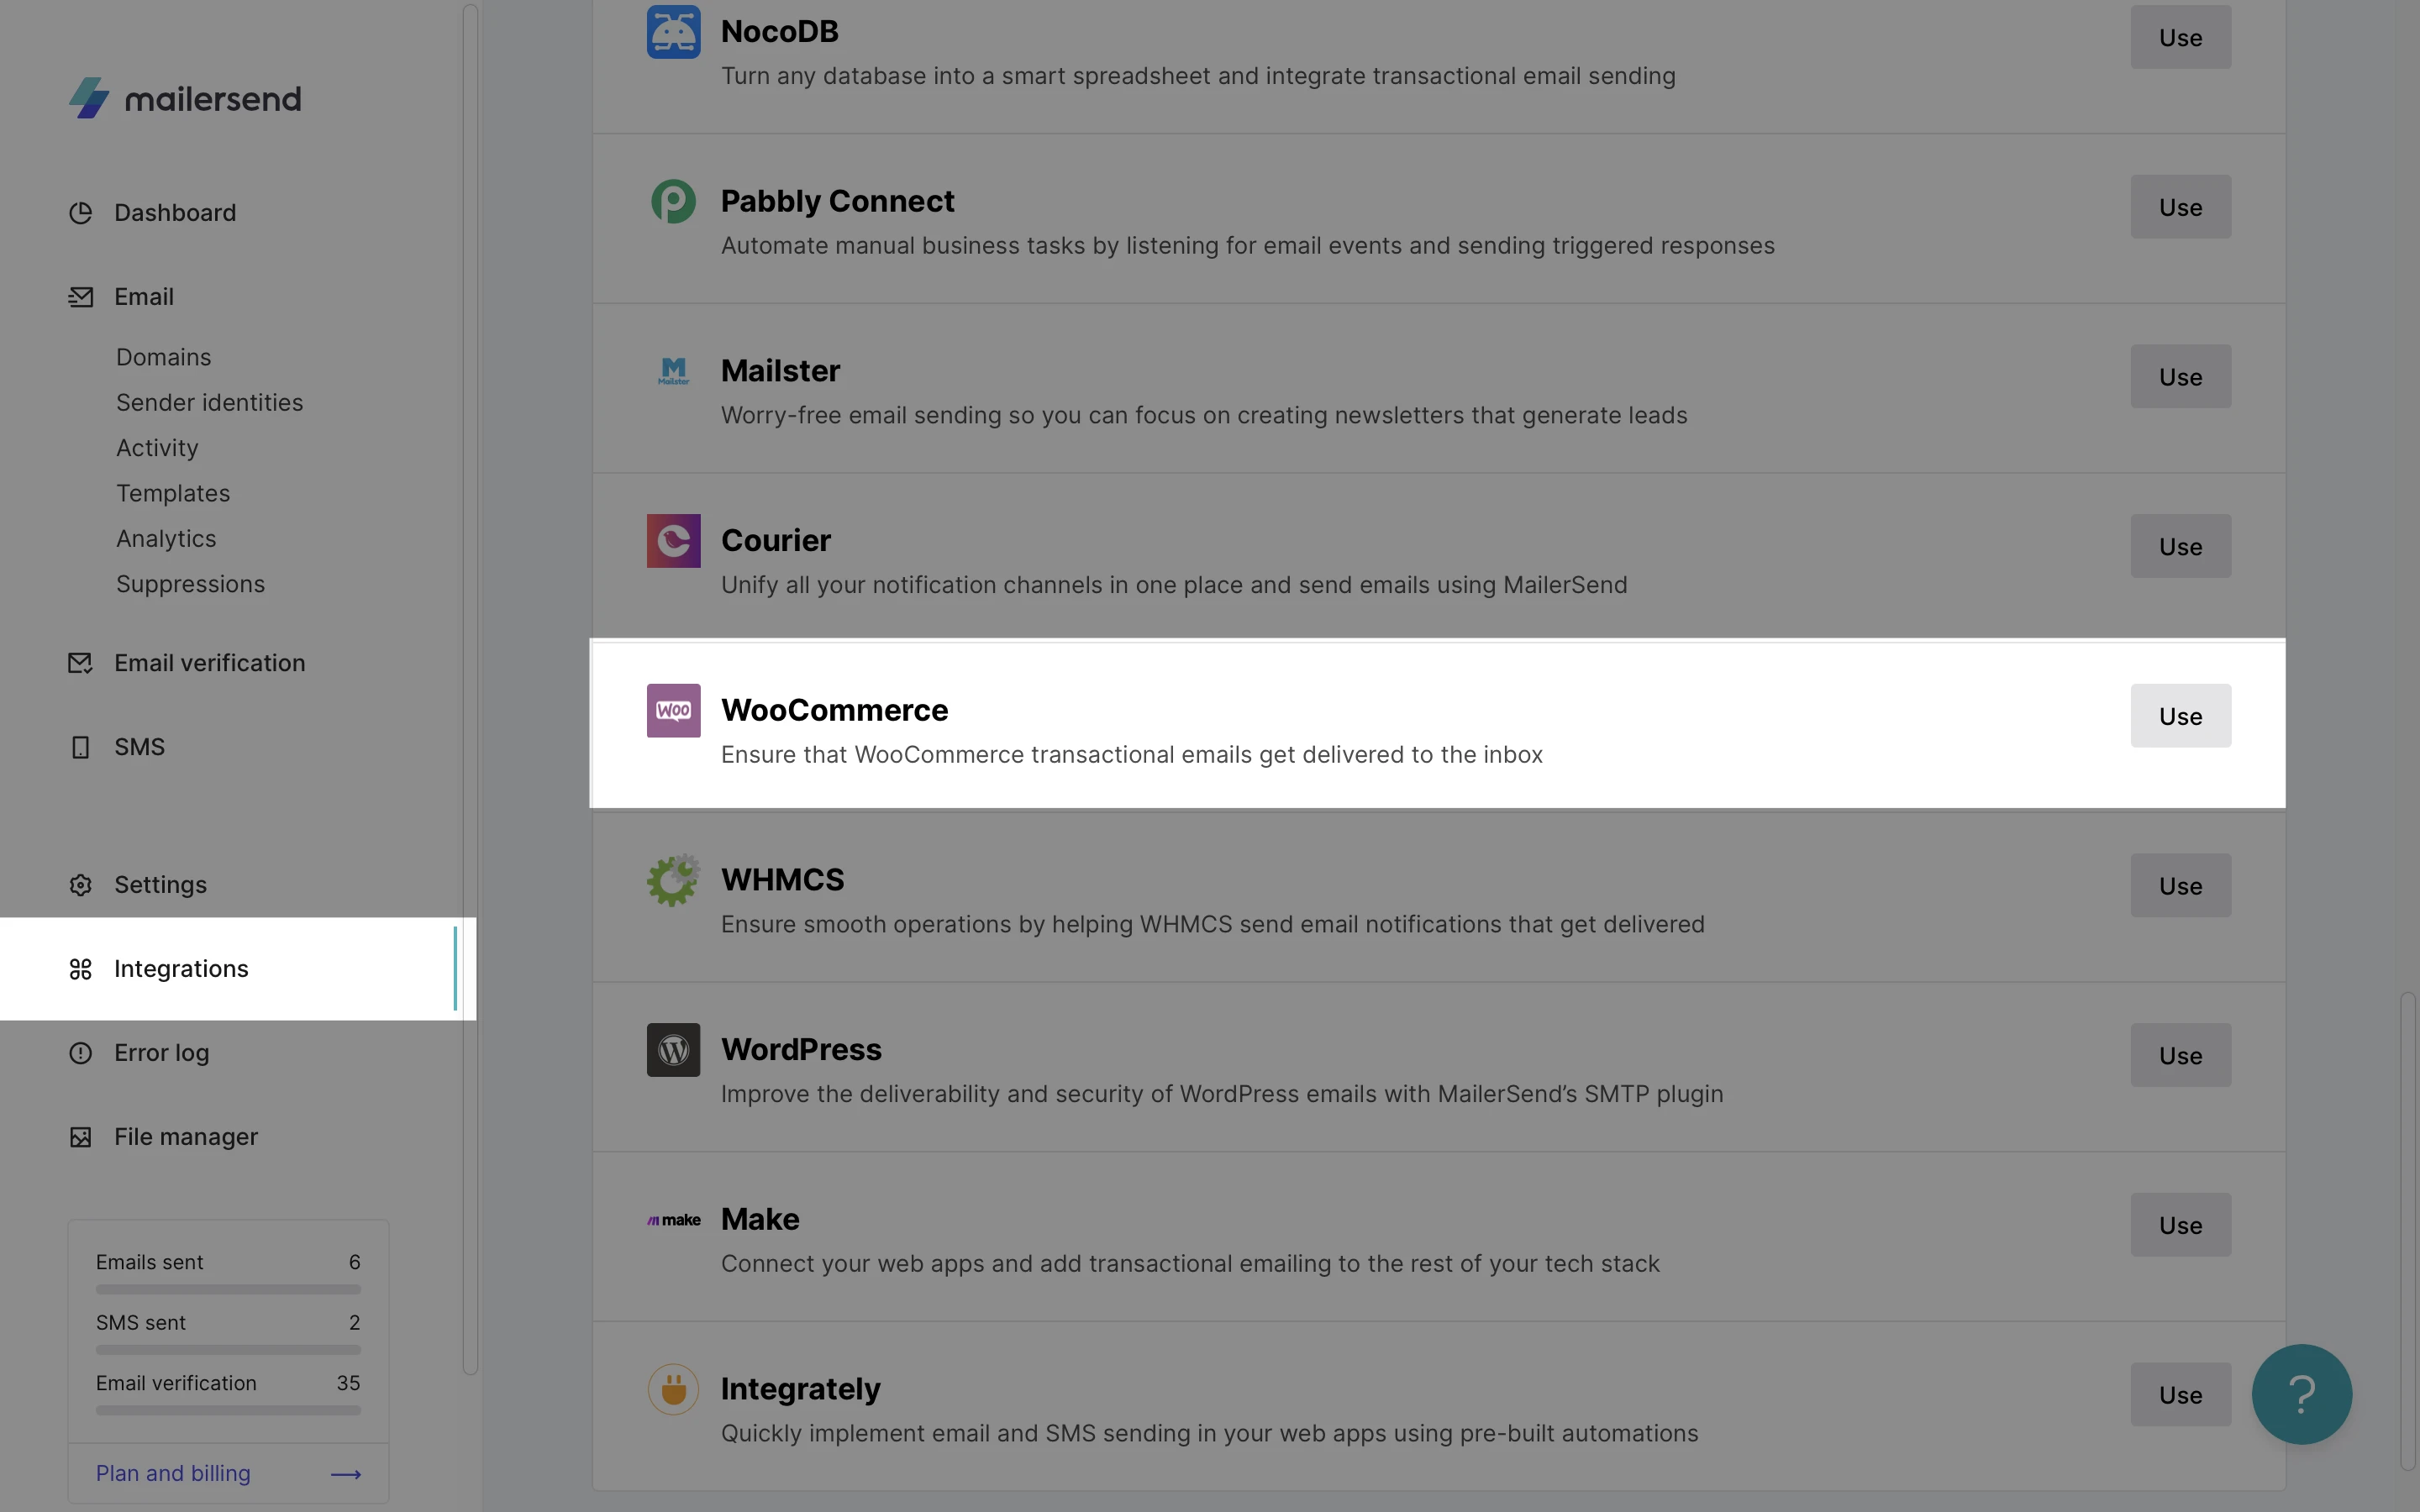
To locate the integration:
Navigate to the Integrations page and locate WooCommerce.
Click Use.
To set up the MailerSend plugin for WooCommerce:
1. Log in to your WordPress dashboard.
2. Navigate to Plugins, followed by Add new.
3. Search for MailerSend – Transactional emails for WooCommerce and click Install now.
4. Click Activate.
5. Use the sidebar to navigate to WooCommerce > MailerSend.
6. Enter your API token into the API token field and click Validate token.
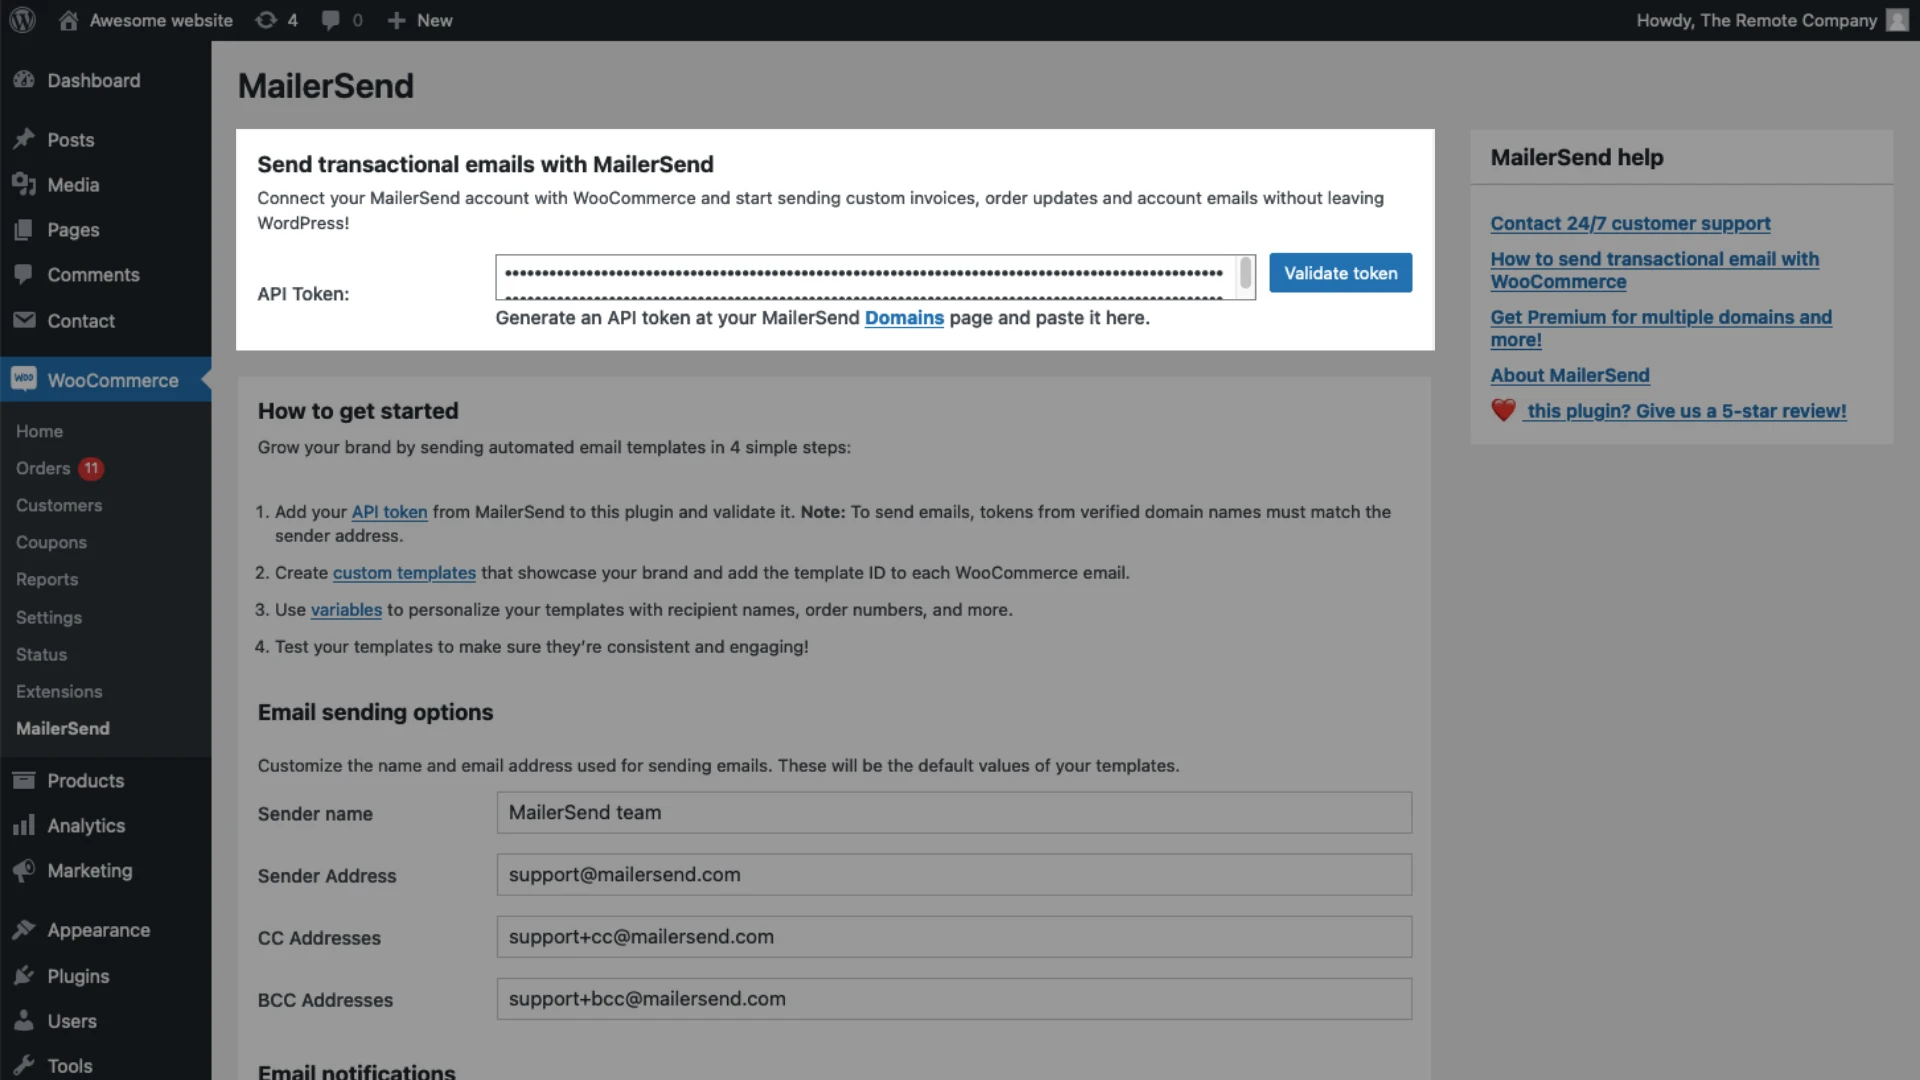
7. Under Email sending options, enter your sender name and address.
These are the WooCommerce default sender options for your emails. If you wish to edit the sender information for each template in MailerSend, navigate to each template page and enable Default settings.
If a template has values in the Default settings fields, they will overwrite the plugin’s sender options.
If you do not enable the default settings, the email will be sent with the WooCommerce sender options and the subject: “[WordPress] (notification name) {{order.order_number}}”.
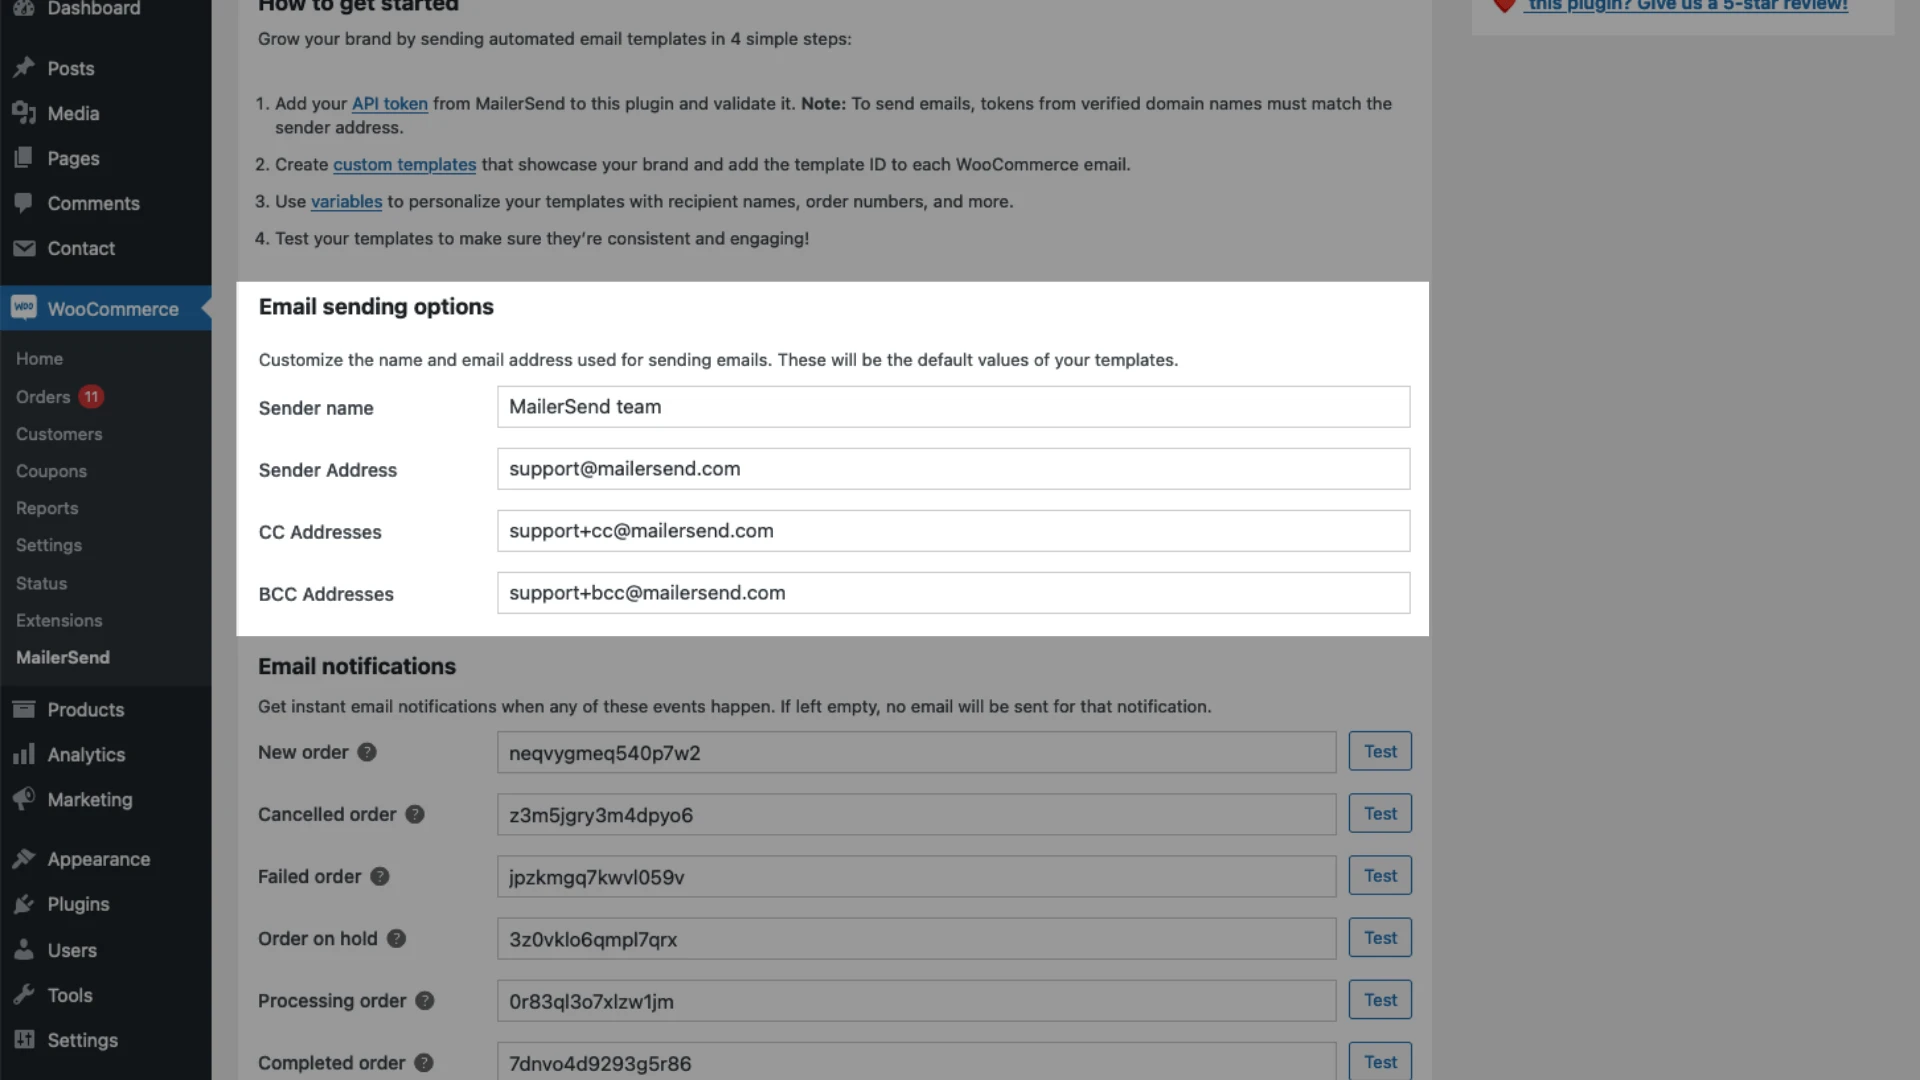
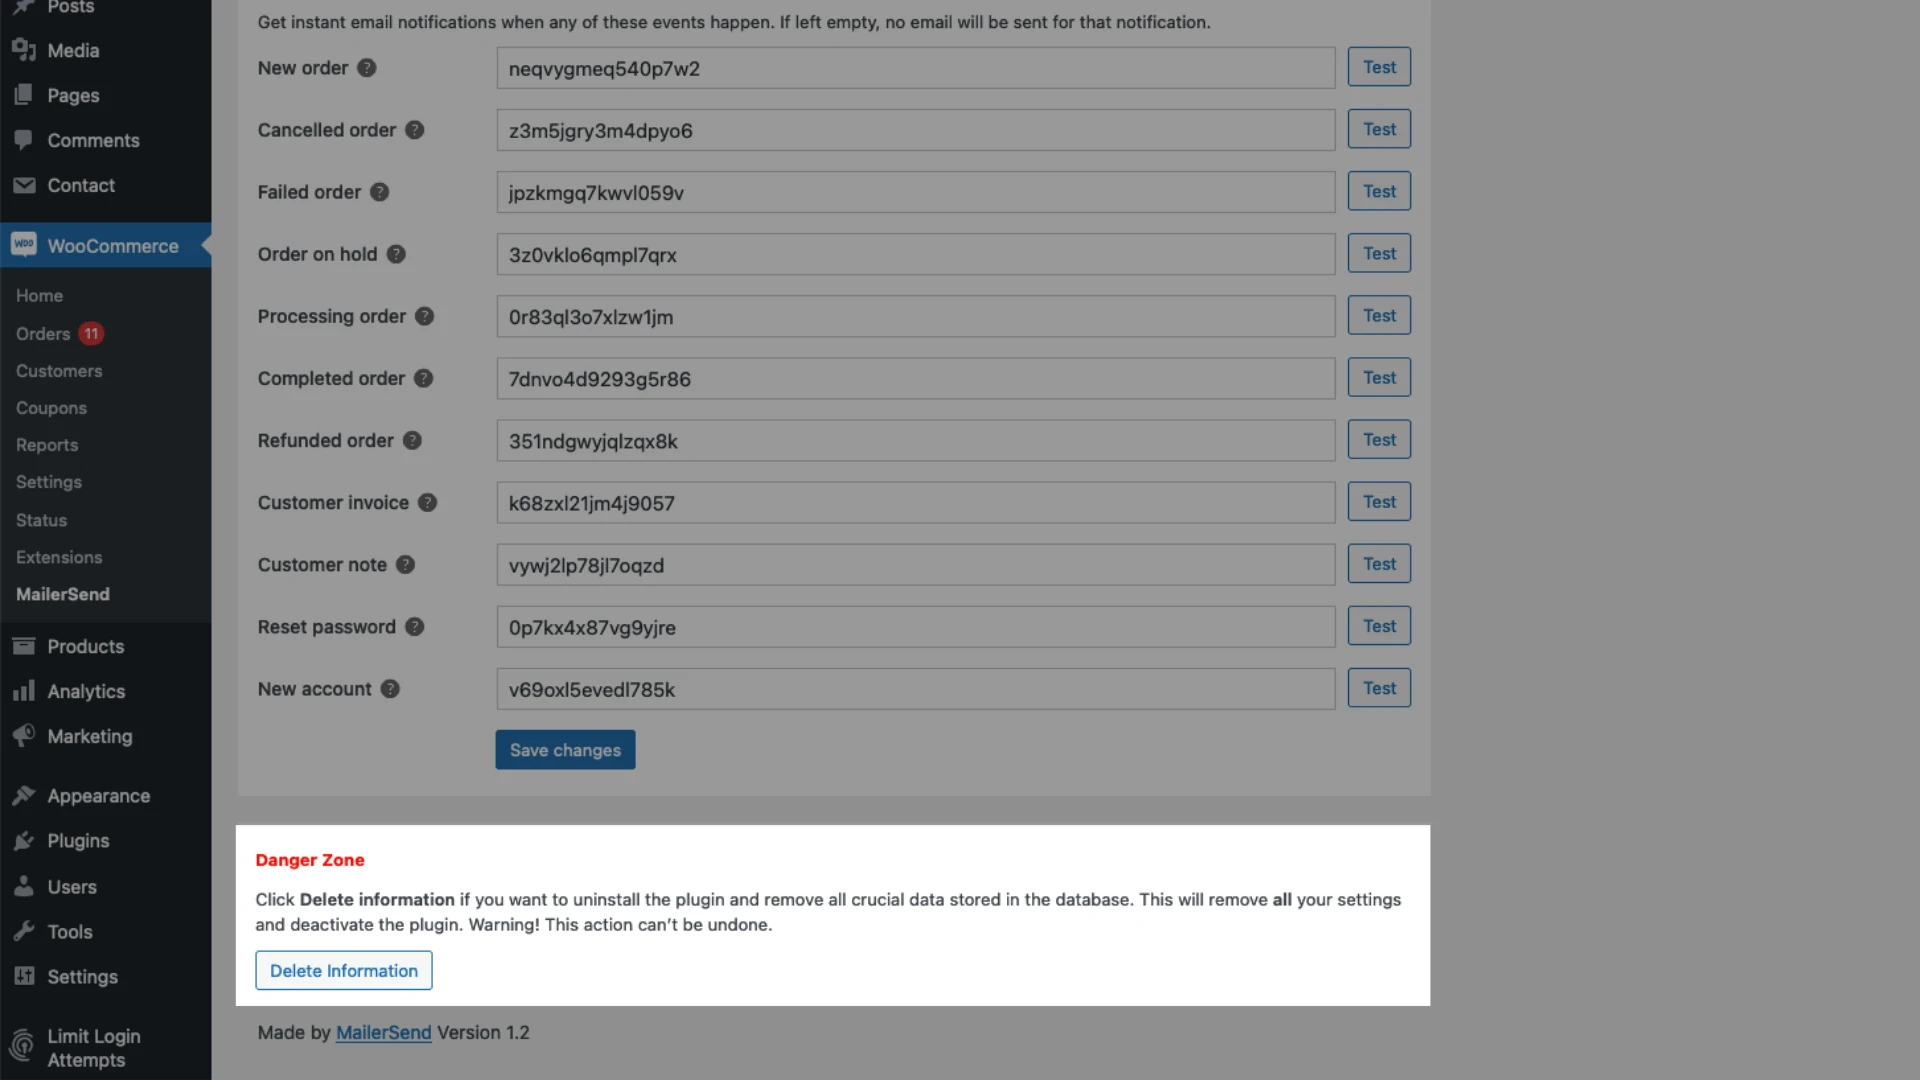
8. Under Email notifications enter your desired template ID into the corresponding field.
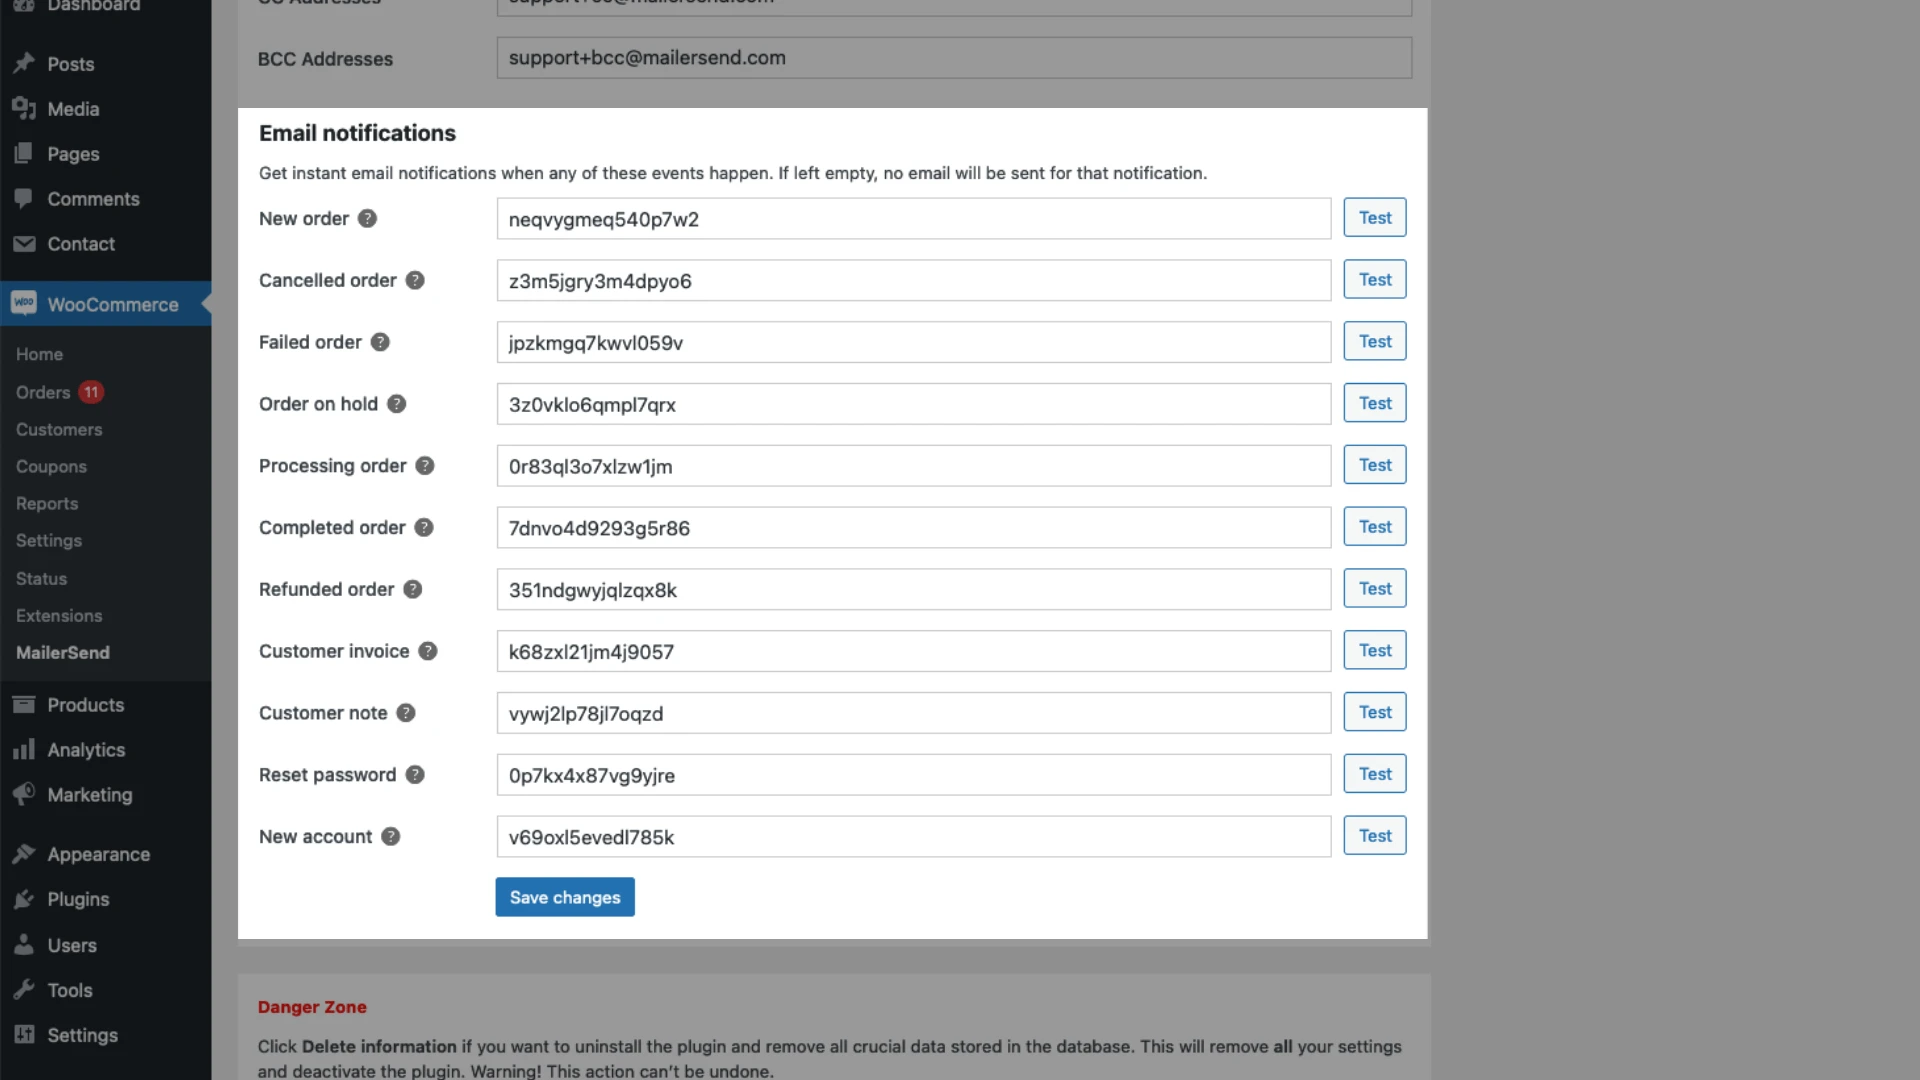
You can test each email by clicking the Test button. For the test email to fire, you will need to create a test order under WooCommerce > Orders.
9. Click Save changes.
That’s it! From now on your selected MailerSend templates will be triggered instead of the default WooCommerce templates. You can track all email activity on the Activity page in your MailerSend account.
How to deactivate the MailerSend plugin
If you no longer need the MailerSend plugin:
1. Navigate to WooCommerce > MailerSend.
2. Scroll down to the Danger Zone.
3. Click Delete information.
This will deactivate the plugin and remove all data stored in the database. Keep in mind, this action cannot be undone!
Which WooCommerce variables can I include in my MailerSend template?
There are over 30 WooCommerce variables that you can include in your MailerSend template:
Variable code | Variable definition |
{{items.product}} | Displays the name of the product (this must be added to a dynamic table). |
{{items.quantity}} | Displays the quantity of the products purchased (this must be added to a dynamic table). |
{{items.refunded_quantity}} | Displays the number of refunded products (this must be added to a dynamic table). |
{{items.new_quantity}} | Displays the quantity of products left after a refund (this must be added to a dynamic table). {items.newquantity}} = {{items.quantity}} - {{items.refundedquantity}} |
{{items.price}} | Displays the price of the products purchased (this must be added to a dynamic table). |
{{items.sku}} | Displays the SKU of the product purchased (this must be added to a dynamic table). |
{{items.meta_data}} | Displays all the metadata (key and value) of the product purchased (this must be added to a dynamic table). |
{{items.image}} | Displays the product image (this must be added to a dynamic table). |
{{customer.username}} | Displays the username of your customer. |
{{customer.first_name}} | Displays the first name of your customer. |
{{customer.last_name}} | Displays the last name of your customer. |
{{customer.name}} | Displays the first and last name of your customer. |
{{customer.email}} | Displays your customer’s email address. |
{{customer.phone}} | Displays your customer’s phone number. |
{{order.order_number}} | Outputs the number of the order. |
{{order.date}} | Outputs the date of the order. |
{{order.billing_address}} | Outputs the billing address for the specified order. |
{{order.billing_company_address}} | Outputs the company billing address for the specified order. |
{{order.shipping_address}} | Outputs the shipping address for the specified order. |
{{order.shippling_company_address}} | Outputs the company shipping address for the specified order. |
{{order.shipping_method}} | Displays the shipping method for the specified order. |
{{order.view_url}} | Shows the URL to the order’s information in the user's dashboard. |
{{order.customer_message}} | Displays the message your customer might have added during the checkout. |
{{order_coupons.code}} | Outputs the coupon code used by the customer for the order (requires the “after coupon used trigger” and must be added to a dynamic table). |
{{order_coupons.discount}} | Outputs the amount of the coupon used by the customer for the order (requires the “after coupon used trigger” and must be added to a dynamic table). |
{{order.refund_reason}} | Outputs the reason for the refund. |
{{invoice.subtotal}} | Outputs the order total minus the tax and shipping amounts. |
{{invoice.tax}} | Outputs the tax amount of the order. |
{{invoice.pay_method}} | Outputs the payment gateway or payment method used. |
{{invoice.pay_url}} | Outputs a URL for the customer to pay their (unpaid – pending) order. |
{{invoice.shipping_total}} | Outputs the amount of shipping fees of the order. |
{{invoice.total}} | Outputs the total order total including tax and shipping amounts. |
{{invoice.total_refunded}} | Outputs the total amount refunded. |
{{invoice.new_total}} | Outputs the new order total minus the refund amount. {{invoice.newtotal}} = {{invoice.total}} - {{invoice.totalrefunded}} |
{{invoice.discount_total}} | Outputs the total discounted amount when a coupon is added. |
{{note_to_customer}} | Displays the note to the customer added on the order. |
{{store.url}} | Outputs your store’s URL/web address without HTTPS. |
{{store.name}} | Displays the name of your store. |
{{user.username}} | Displays the username of your user (when they created an account). |
{{user.name}} | Displays the name of your user (when they created an account). |
{{user.email}} | Displays the email of your user (when they created an account). |
{{user.reset_link}} | Displays the link to reset the password to the user’s admin space. |
How to send emails from WooCommerce using MailerSend SMTP servers
If you want to quickly send your WooCommerce emails with SMTP, you can use MailerSend's SMTP relay server as well.
Download the official SMTP plugin and then activate it. Your emails will then be sent via SMTP instead of using our email API.
To learn more, take a look at these instructions on how to install the official SMTP plugin and how to send emails via SMTP.
Need more info?
Feel free to reach out to support@mailersend.com. A member of our support team will gladly help you.