How to create a template
Design professional, branded email templates that drop right into your code. You can use the drag & drop editor or import your own HTML to create a template that you can save and use for future emails.
Get started
To create a template:
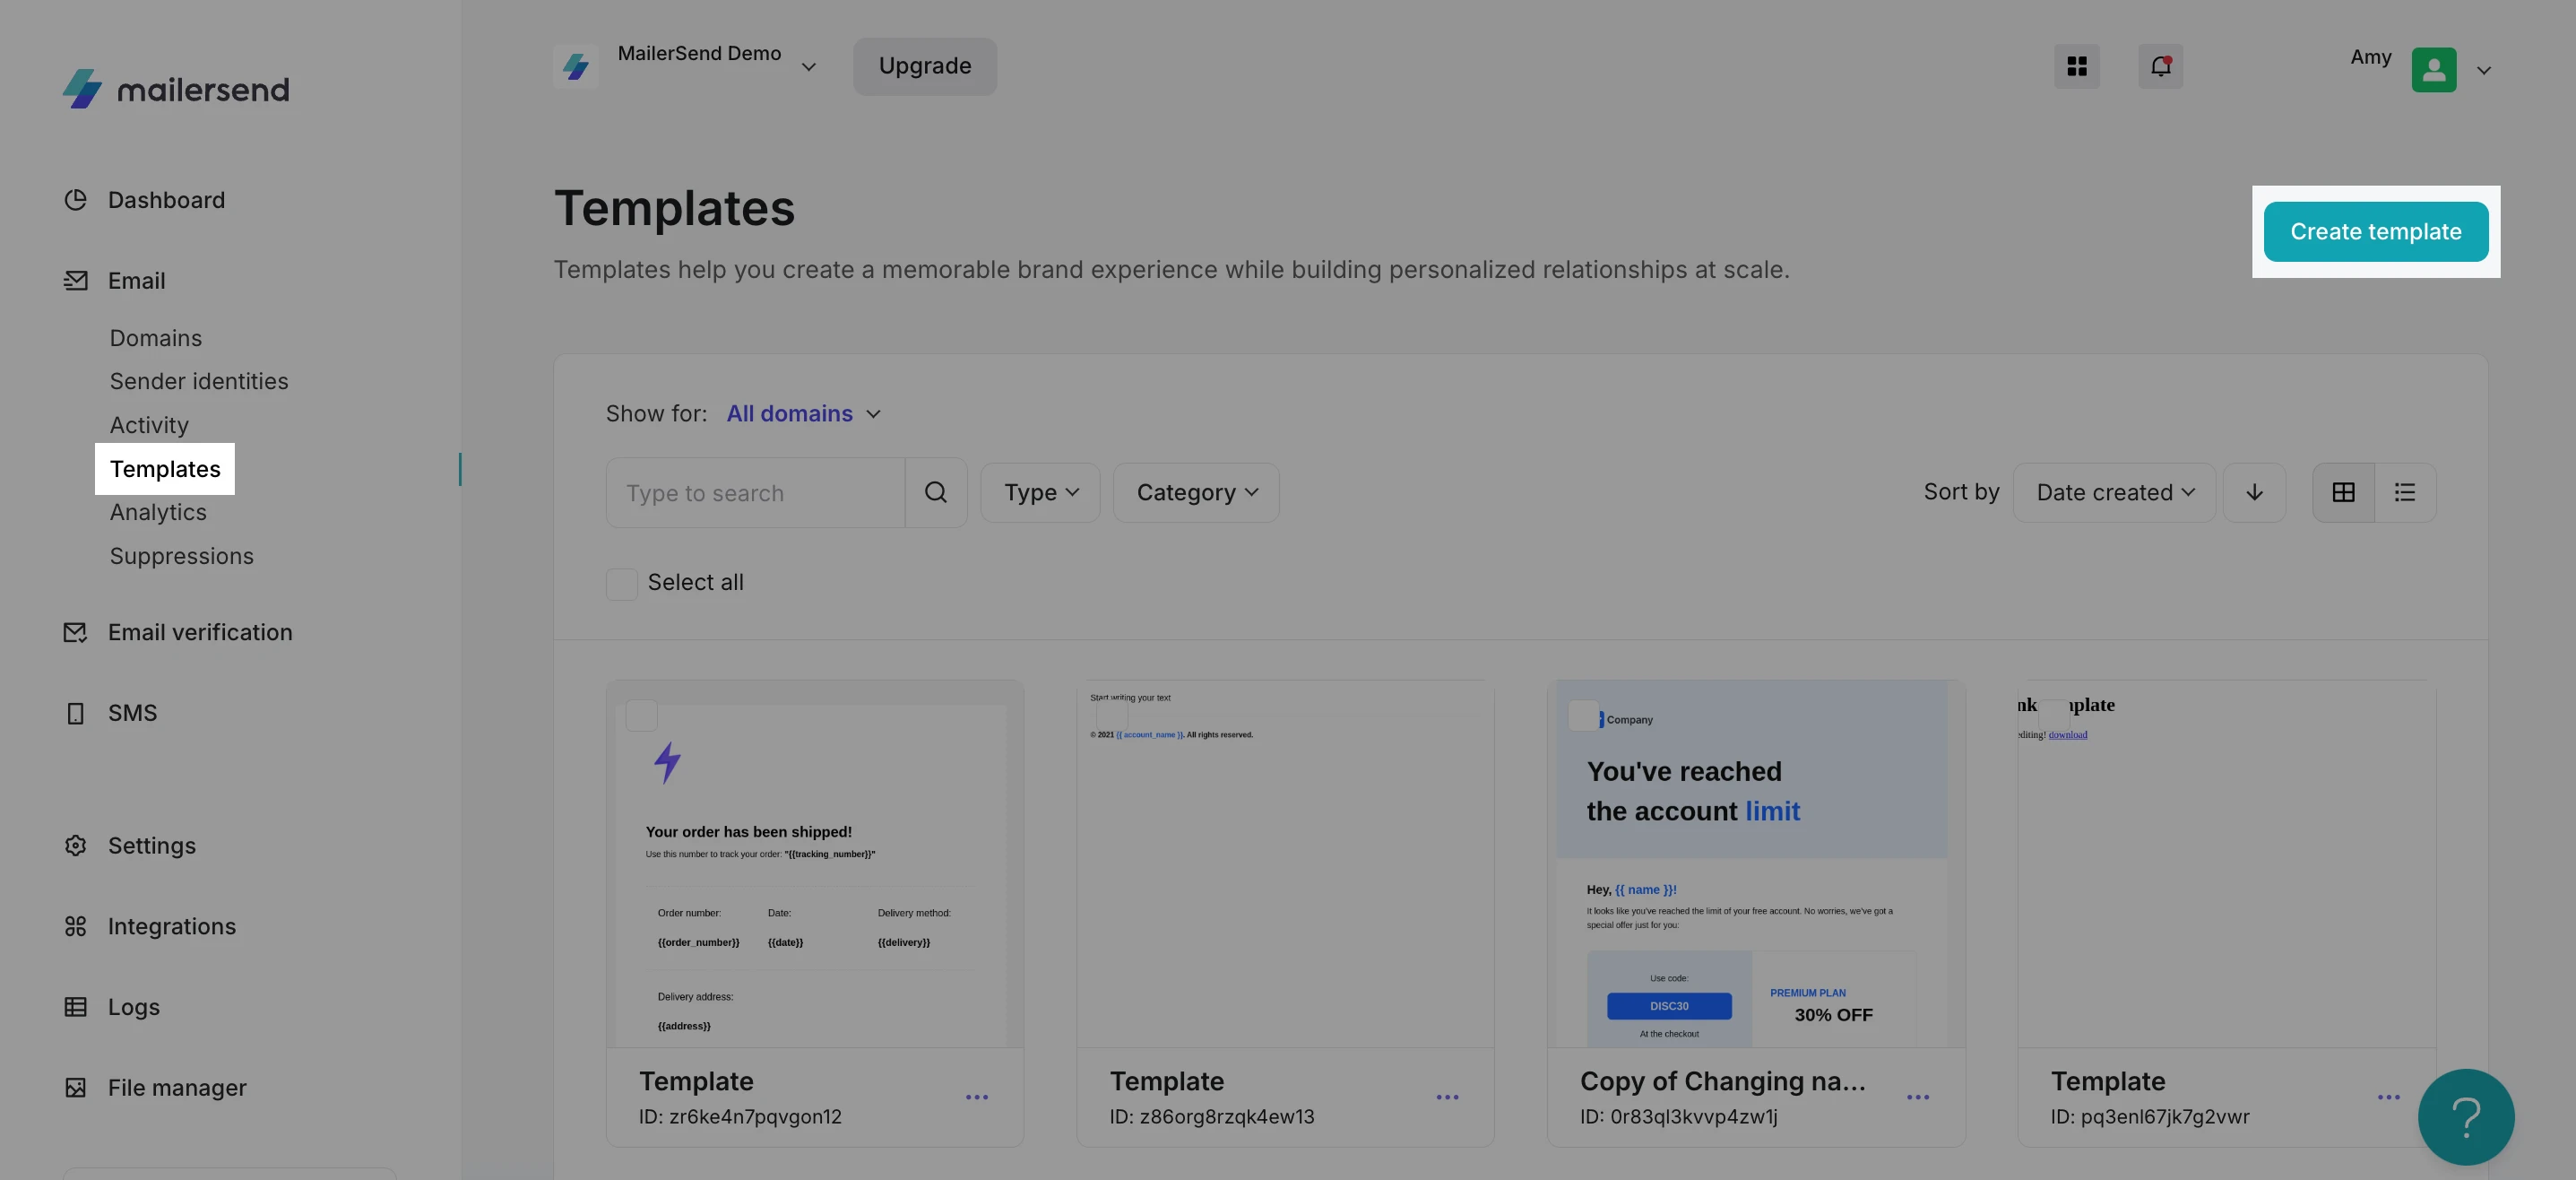
1. From under Email, navigate to the Templates page.
2. Click Create template.
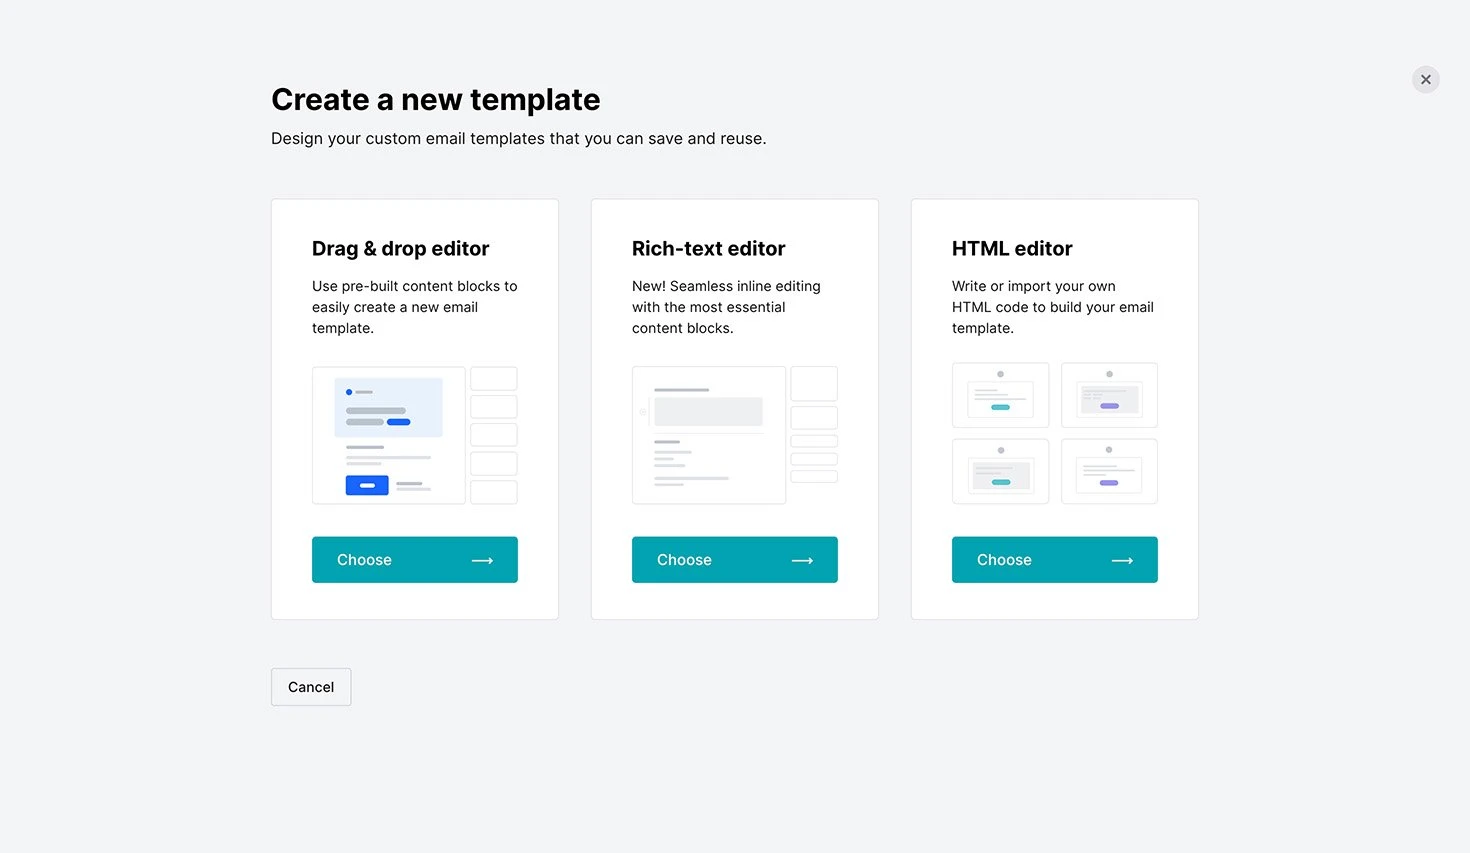
3. Select the editor you want to choose to build your template.
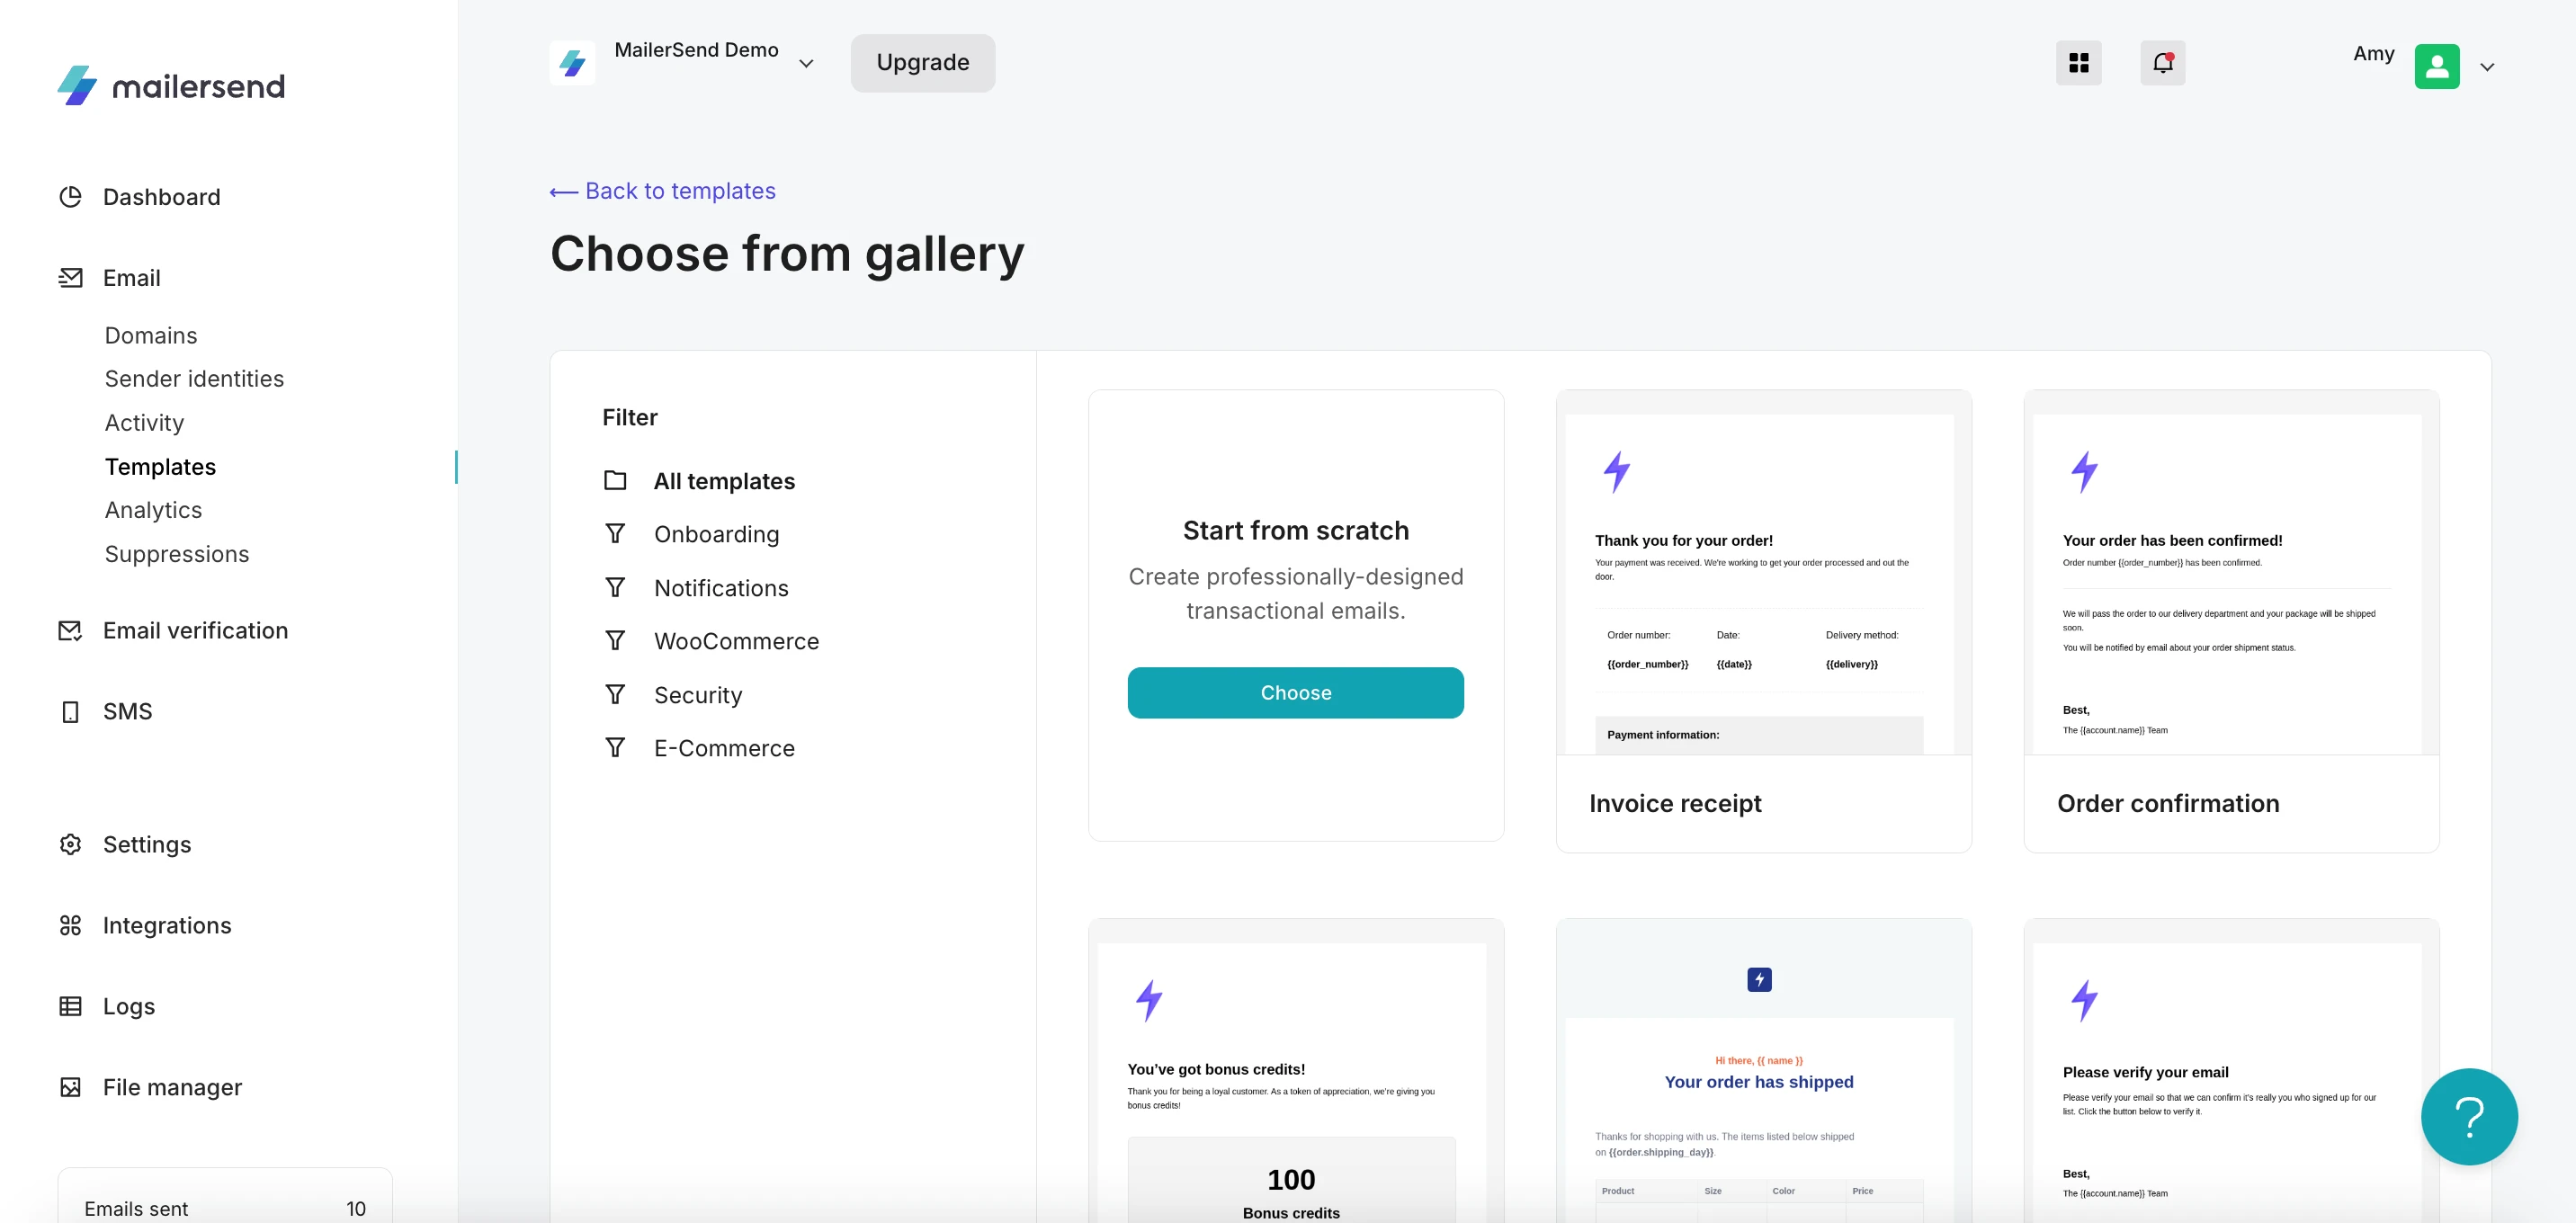
4. Select a pre-made email template to build from, or build your email template from scratch.
5. Design your template.
6. Save your changes.
Template details
When you save a newly created template or click Manage on an existing template, you'll be taken to the Template details page. This is where you can configure the options for your template, get the API instructions, send a test email, and create a split test.
In the main options in the Details tab, you can add a name for your template, select a domain, and choose a category. You can also add a description. We recommend adding some information about when the email is sent, the variables used, and anything else that will help you identify it.
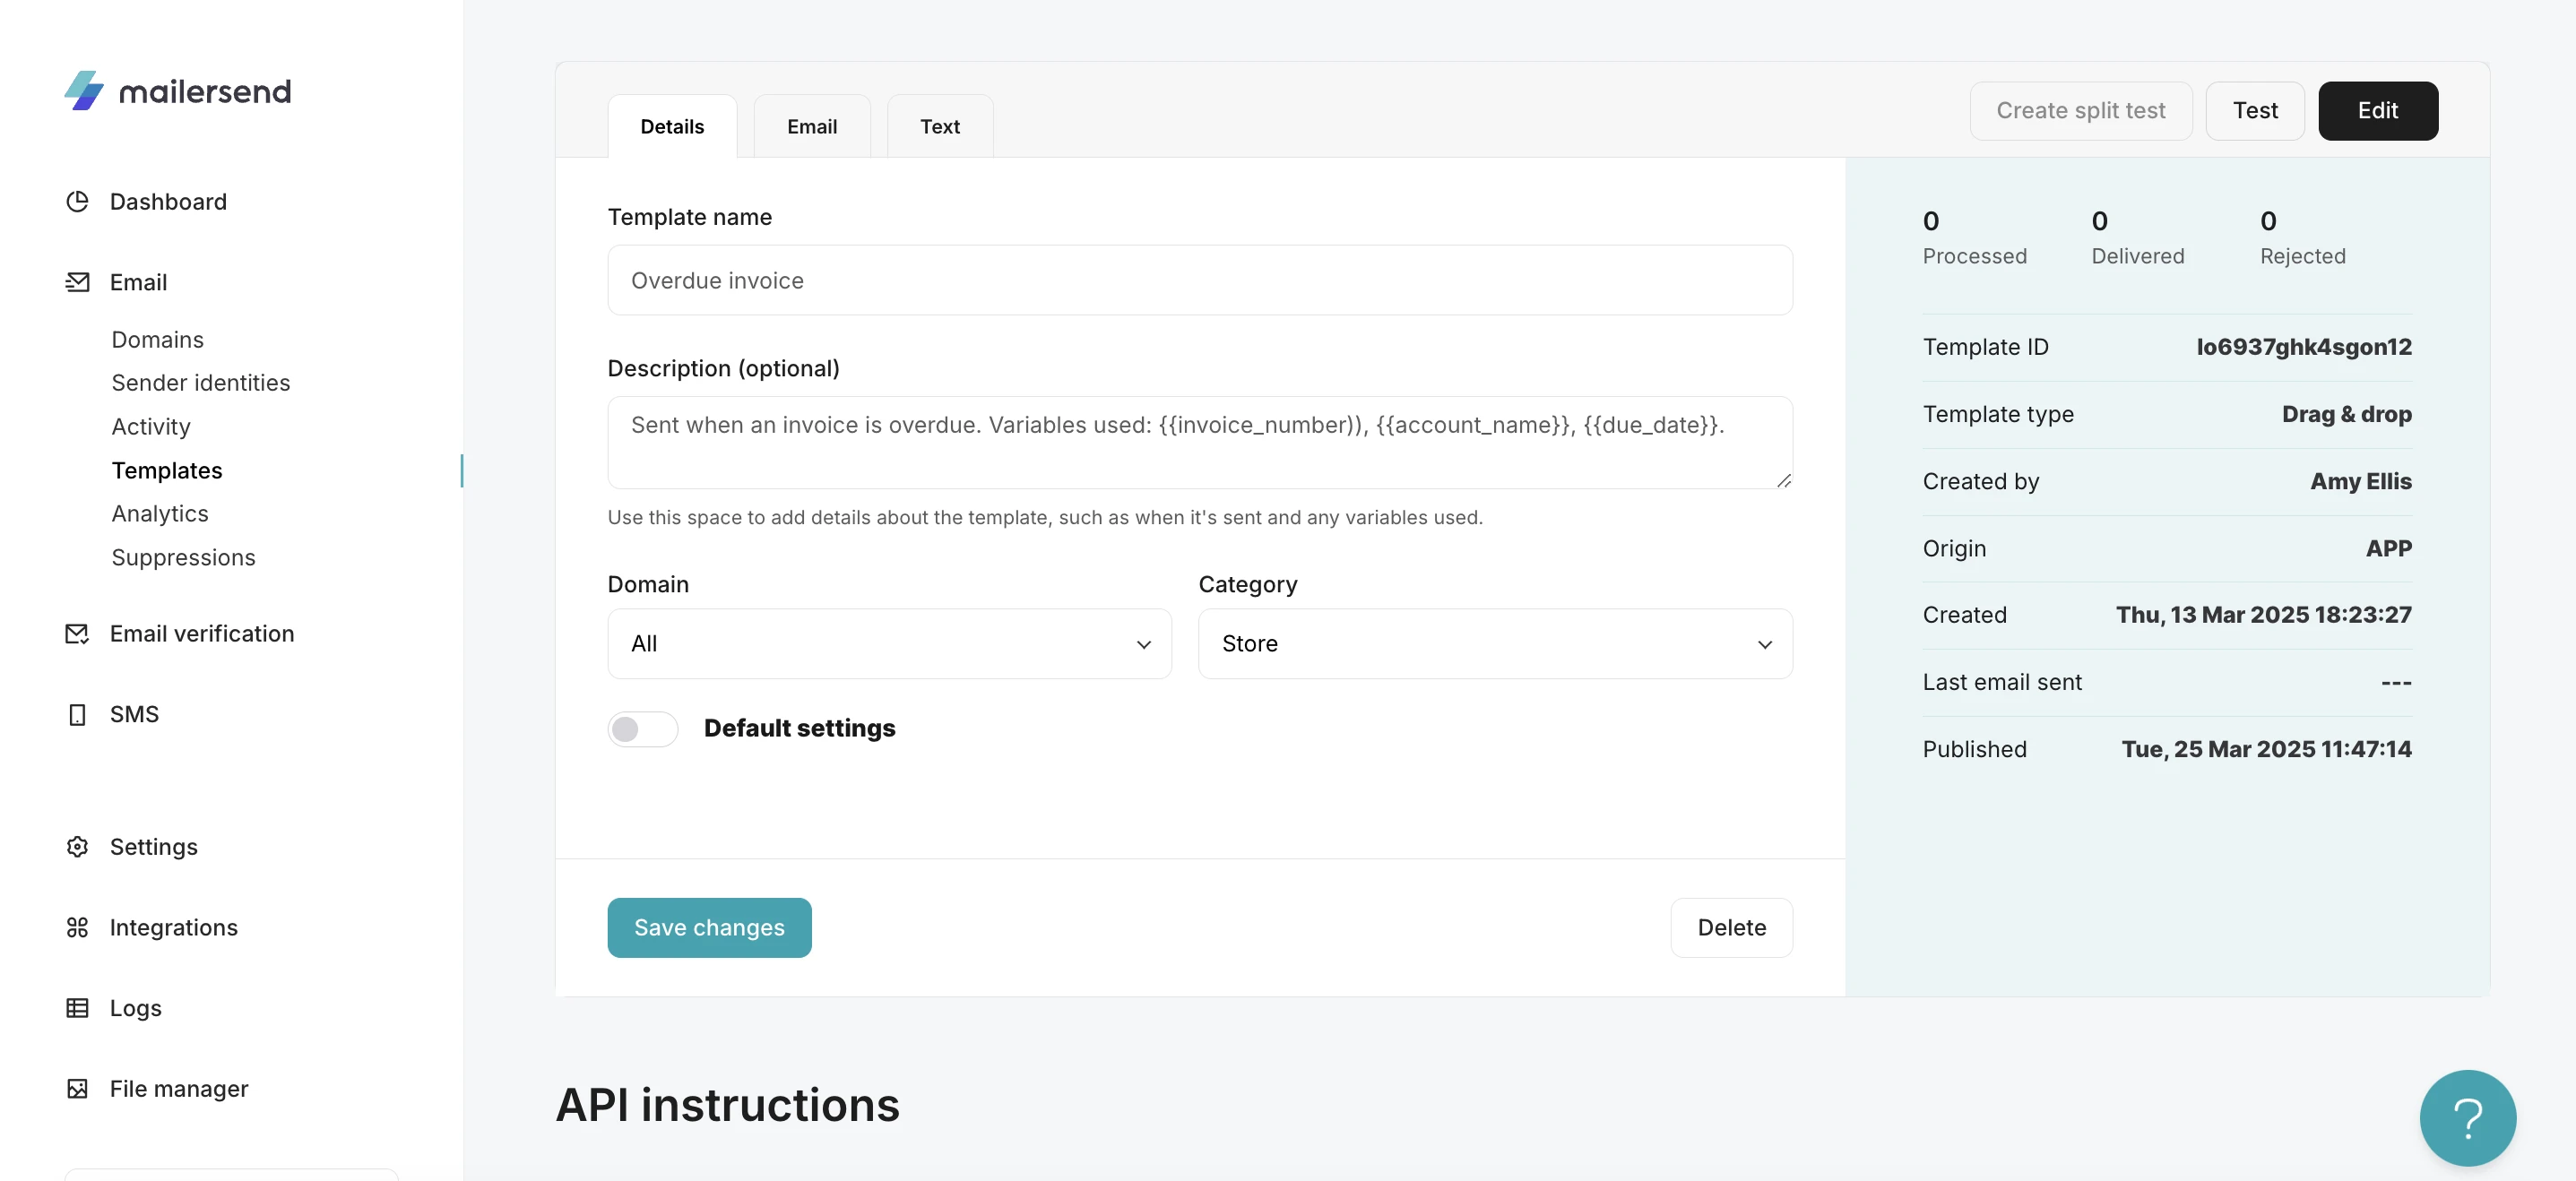
Default settings
If you enable Default settings for a template, any existing subject line, sender name and email address, and reply-to name and email address will be replaced by the values that you enter.
Additionally, you can add tags to your templates to easily find them on the Activity and Analytics pages.
How to use the drag & drop editor
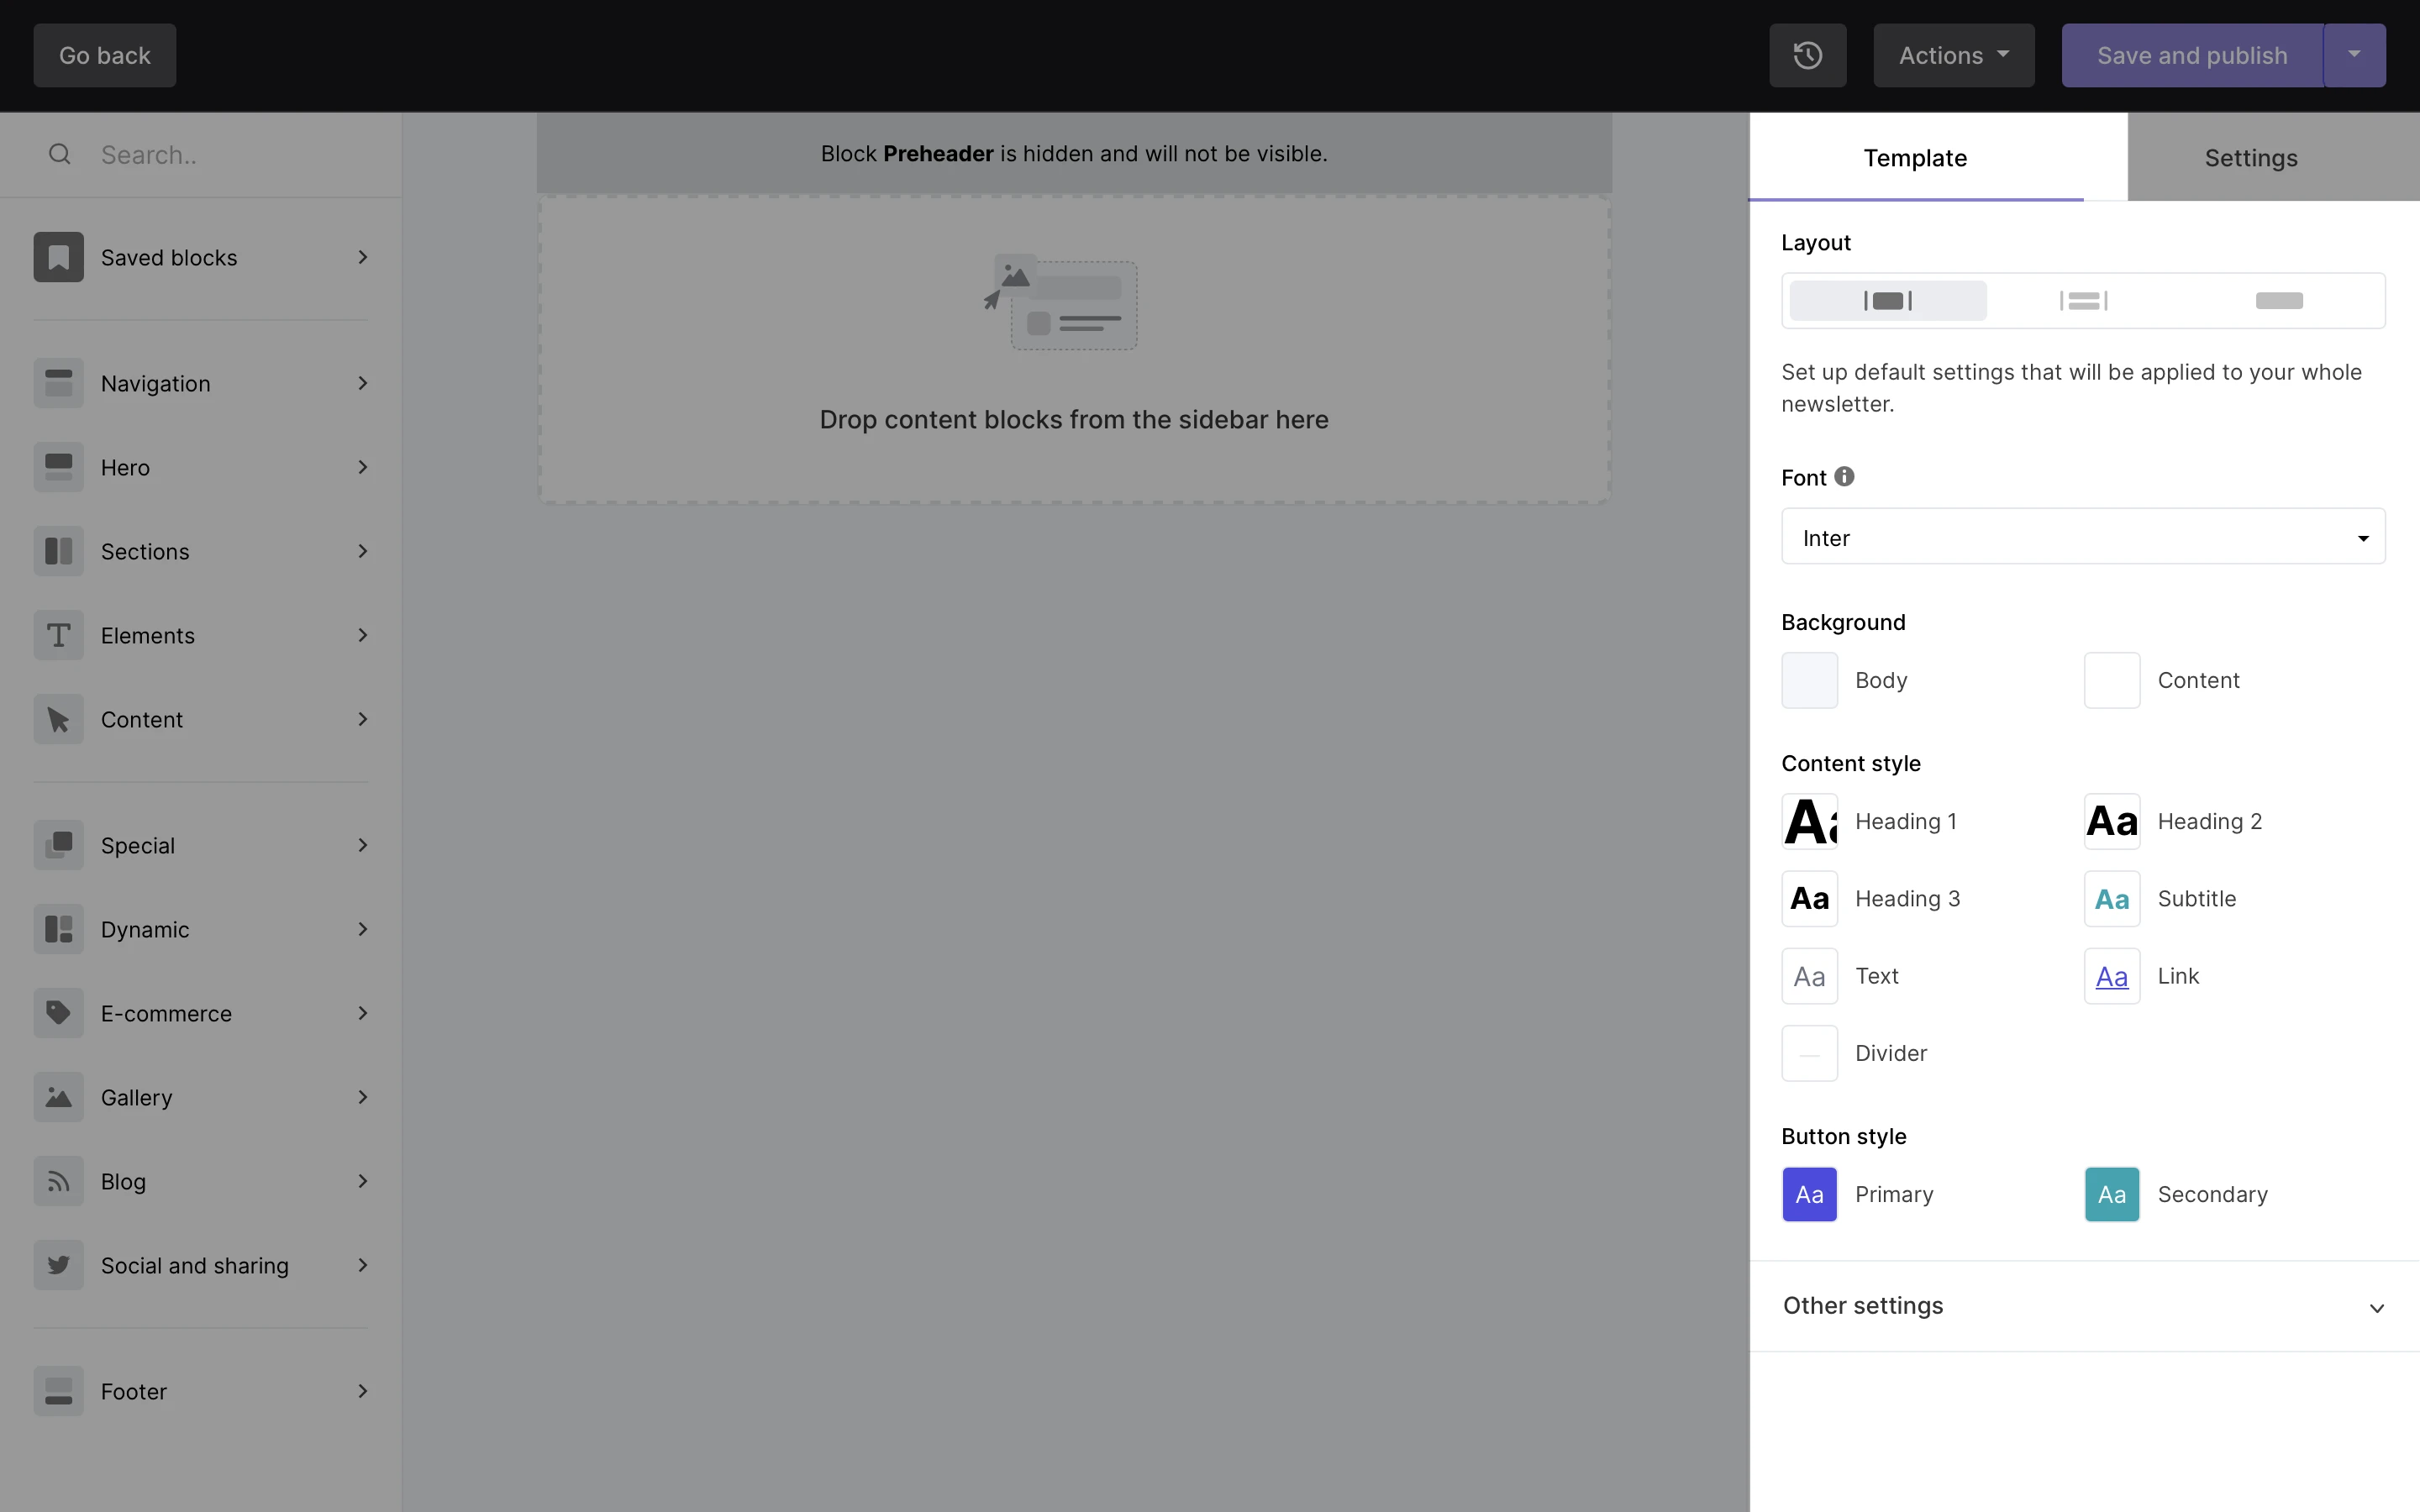
In the sidebar you will see two tabs: Template and Settings. Here, you can edit the general settings for the entire newsletter or each specific block when selected.
To edit the whole template elements, such as the font or background, make sure no block is selected.
Under Template settings you’ll find the following:
Blocks type - Choose whether you want your blocks to be displayed as a centered list or with the full width of the screen
Font - Select the font you wish to use for the entire template
Background & more - Click the design bubbles under Background & more to change the background color/image and apply font settings to your email preheader
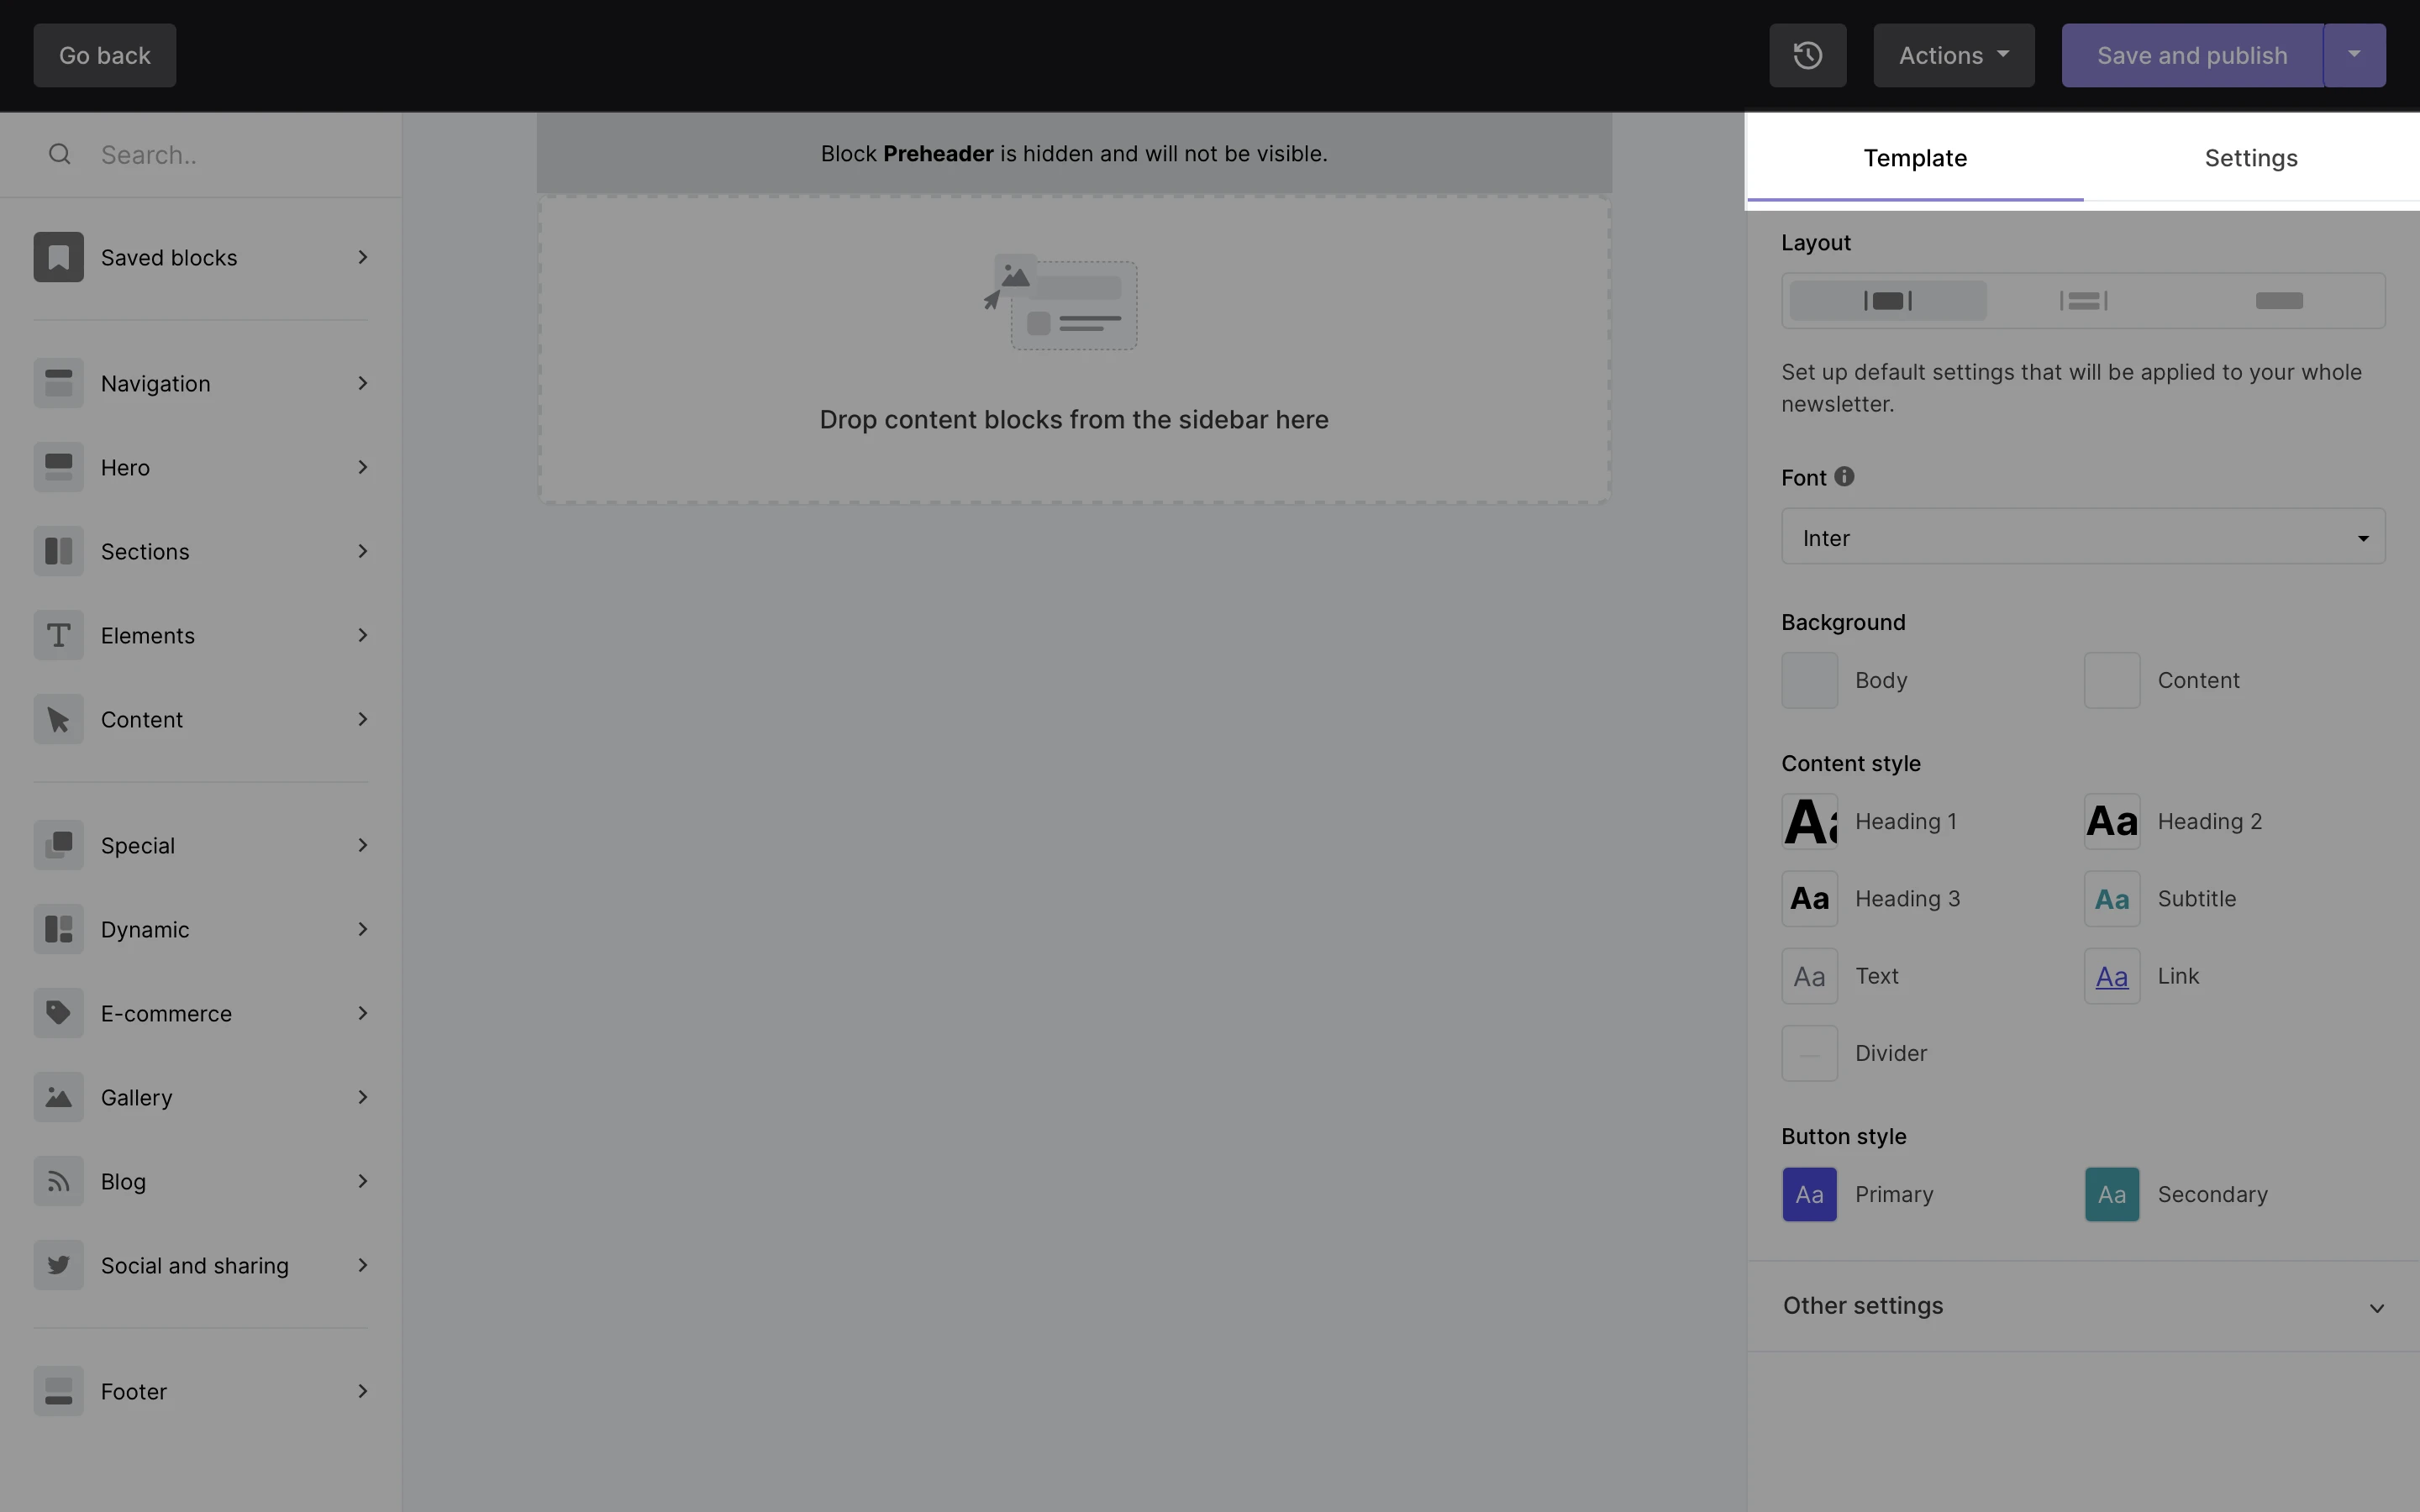
Under the Settings tab, you’ll find your Global brand settings. Here you can apply global settings according to your brand.
Blocks
On the left-hand sidebar, search for any block such as a header, a text box, an image, or a button. Or, use the categories to find any block elements.
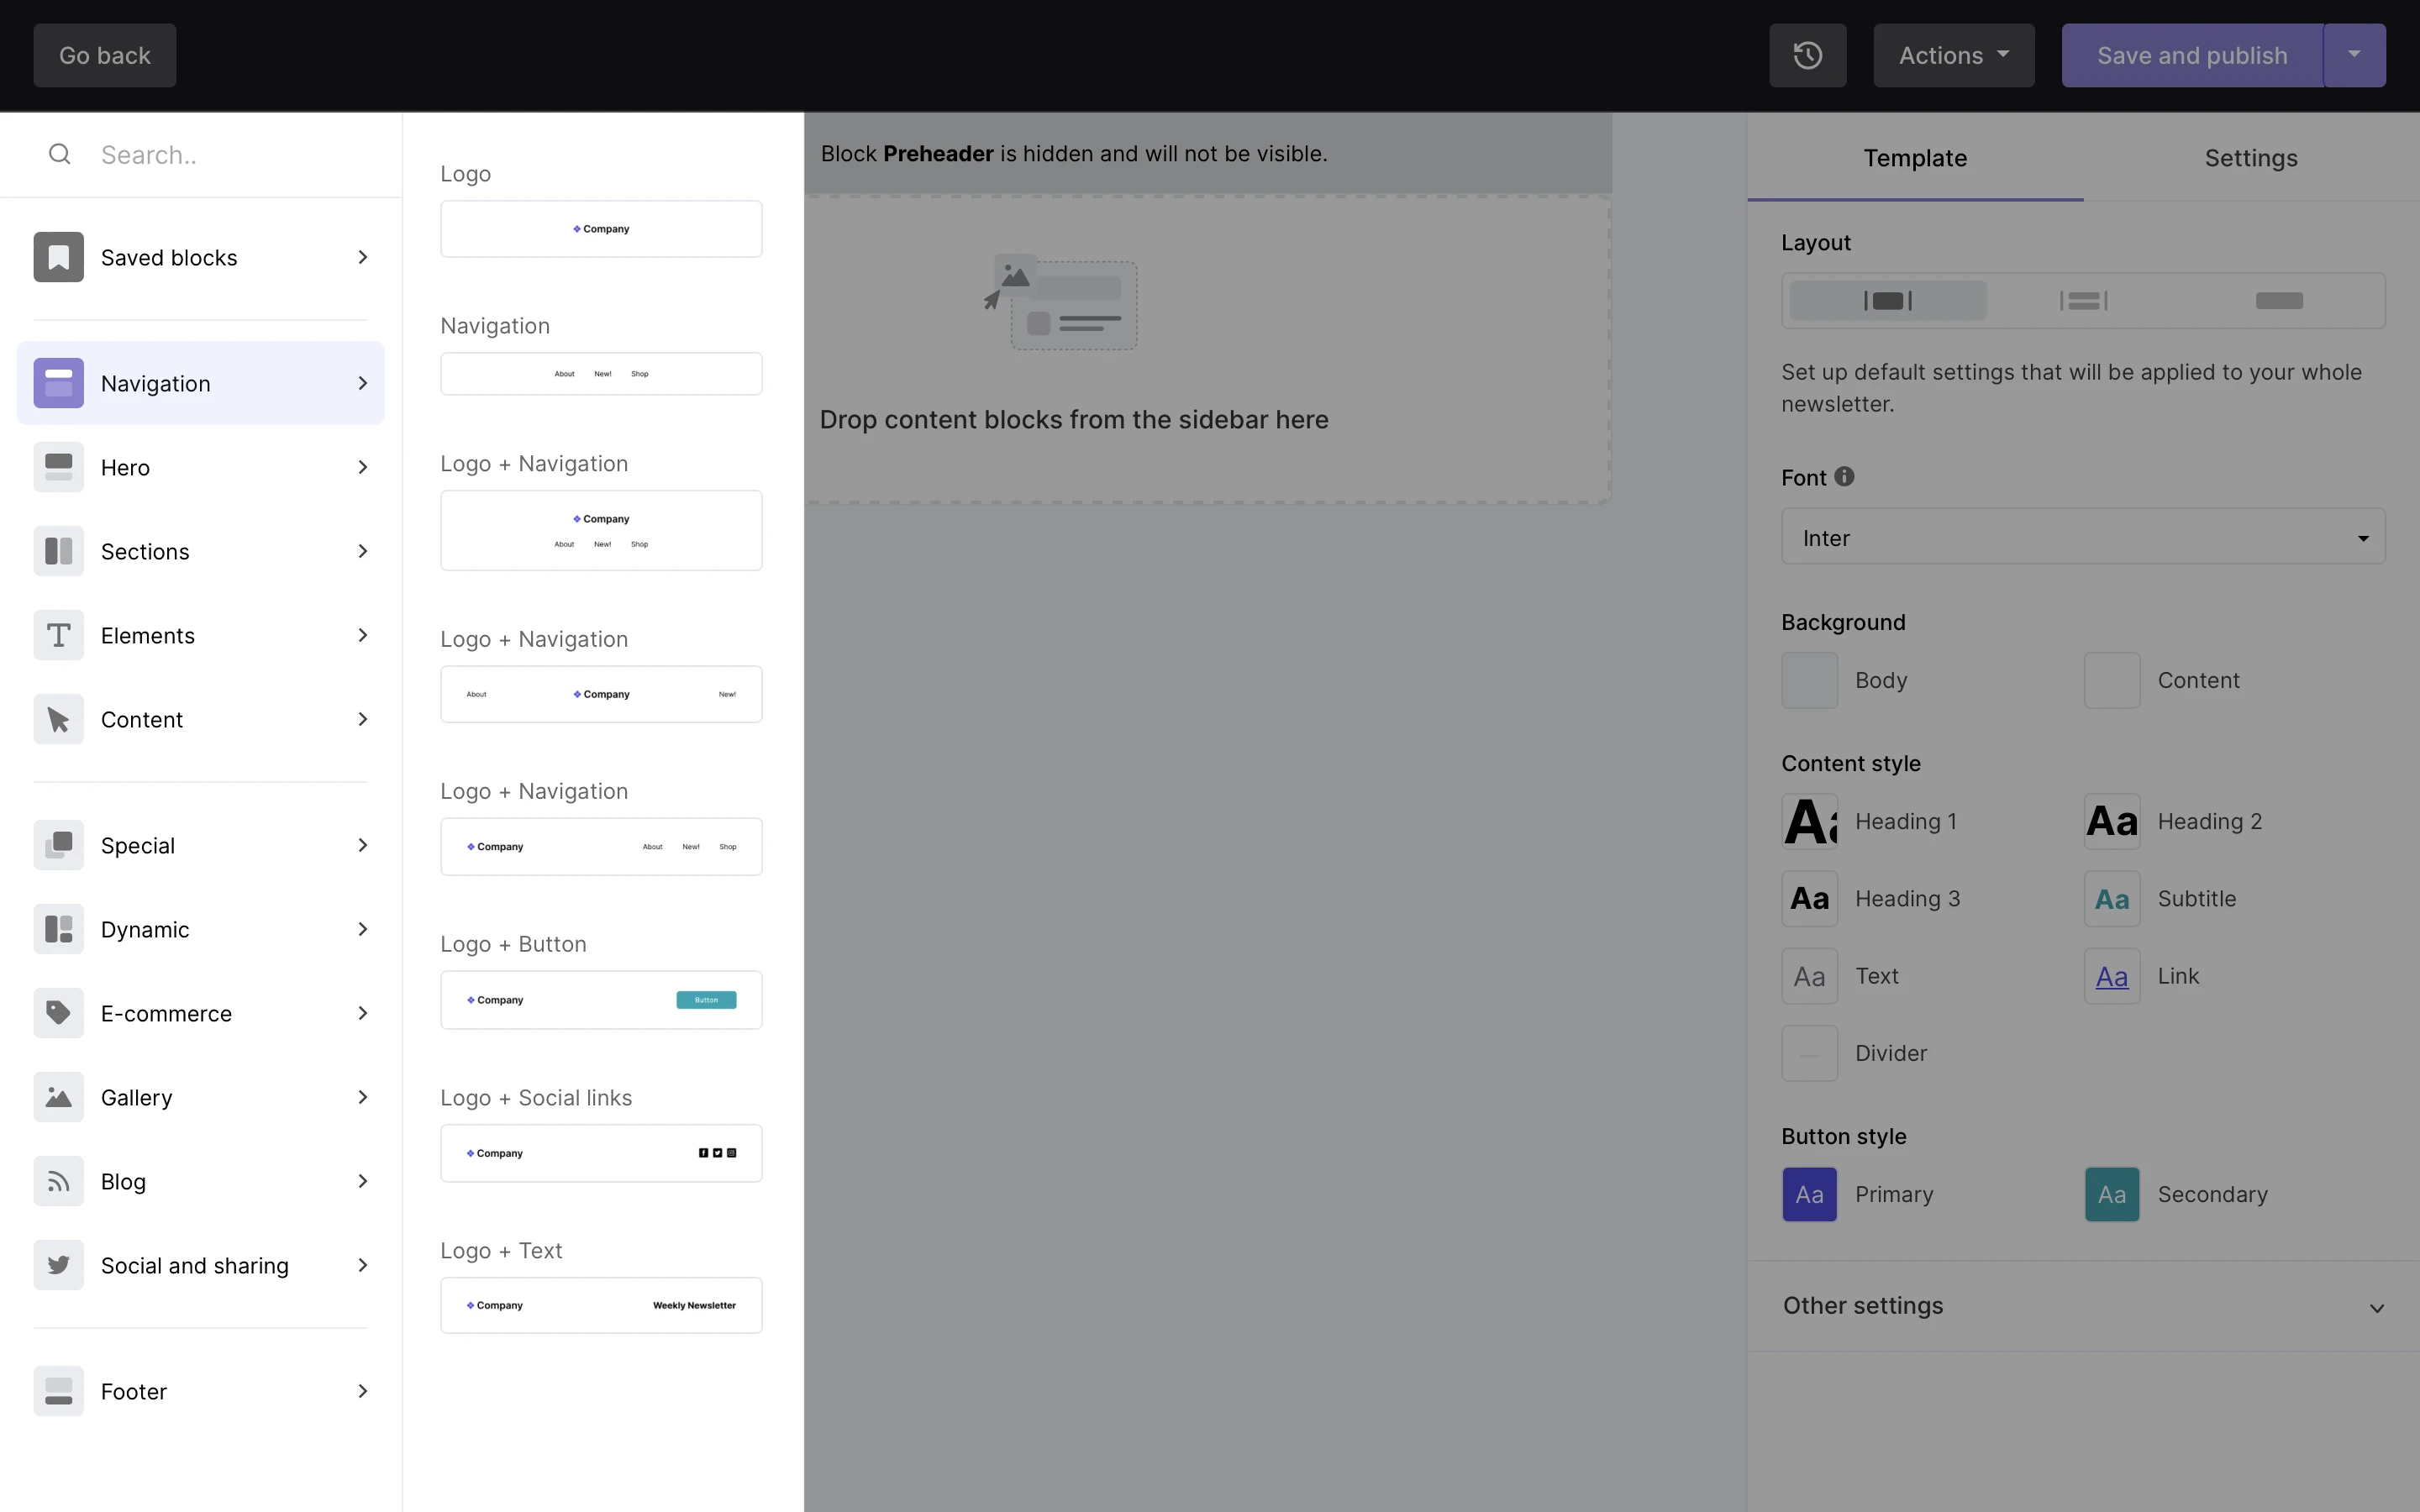
Simply drag and drop your chosen block into any place in your newsletter.
There are numerous blocks on the left-hand sidebar that you can drag and drop into your newsletter:
Navigation - Add a logo, navigation bar, links, or all in one block.
Hero - Main image and title.
Sections - Divide your newsletter into columns, and drag other elements into those sections.
Elements - Add blocks for titles, subtitles, images, videos, text boxes, links, and page dividers.
Content - These are pre-designed content blocks made up of images, text and buttons.
Special - For miscellaneous features.
Survey and quiz - Have your subscribers fill out a survey or complete a quiz. Their results can be viewed in the campaign’s report and in each subscriber’s profile.
Add a Signature block to show a personal side of yourself or your company.
Use the Accordion block to create an FAQ section.
Generate urgency with a Countdown timer
Use the Applications block to provide download links of your application in iOS and Android stores.
Announce an event or webinar with our Event block.
Feature highlights let you showcase your product or services’ main features.
Add a Code block to insert HTML. JavaScript and codes such as embed, frame, iframe, form, input, object, and textarea are not allowed.
E-commerce - If you have an online shop, you can include products in the newsletter.
Gallery - Add images in your newsletter in an orderly fashion.
Blog - Show the latest posts from your blog.
Social and sharing - Link your social media pages, enable subscribers to share your newsletter to their social media pages, or share any post from your Facebook, Twitter, or Instagram account. See How to embed social posts and events to learn more.
Footer - Every campaign has a footer block by default. You can choose from four different designs. Scroll down to the Footer section below to learn what should be included here.
To edit specific block settings:
Hover over the block until you see gray icons.
Click on the pencil icon to open the block’s settings in the sidebar.
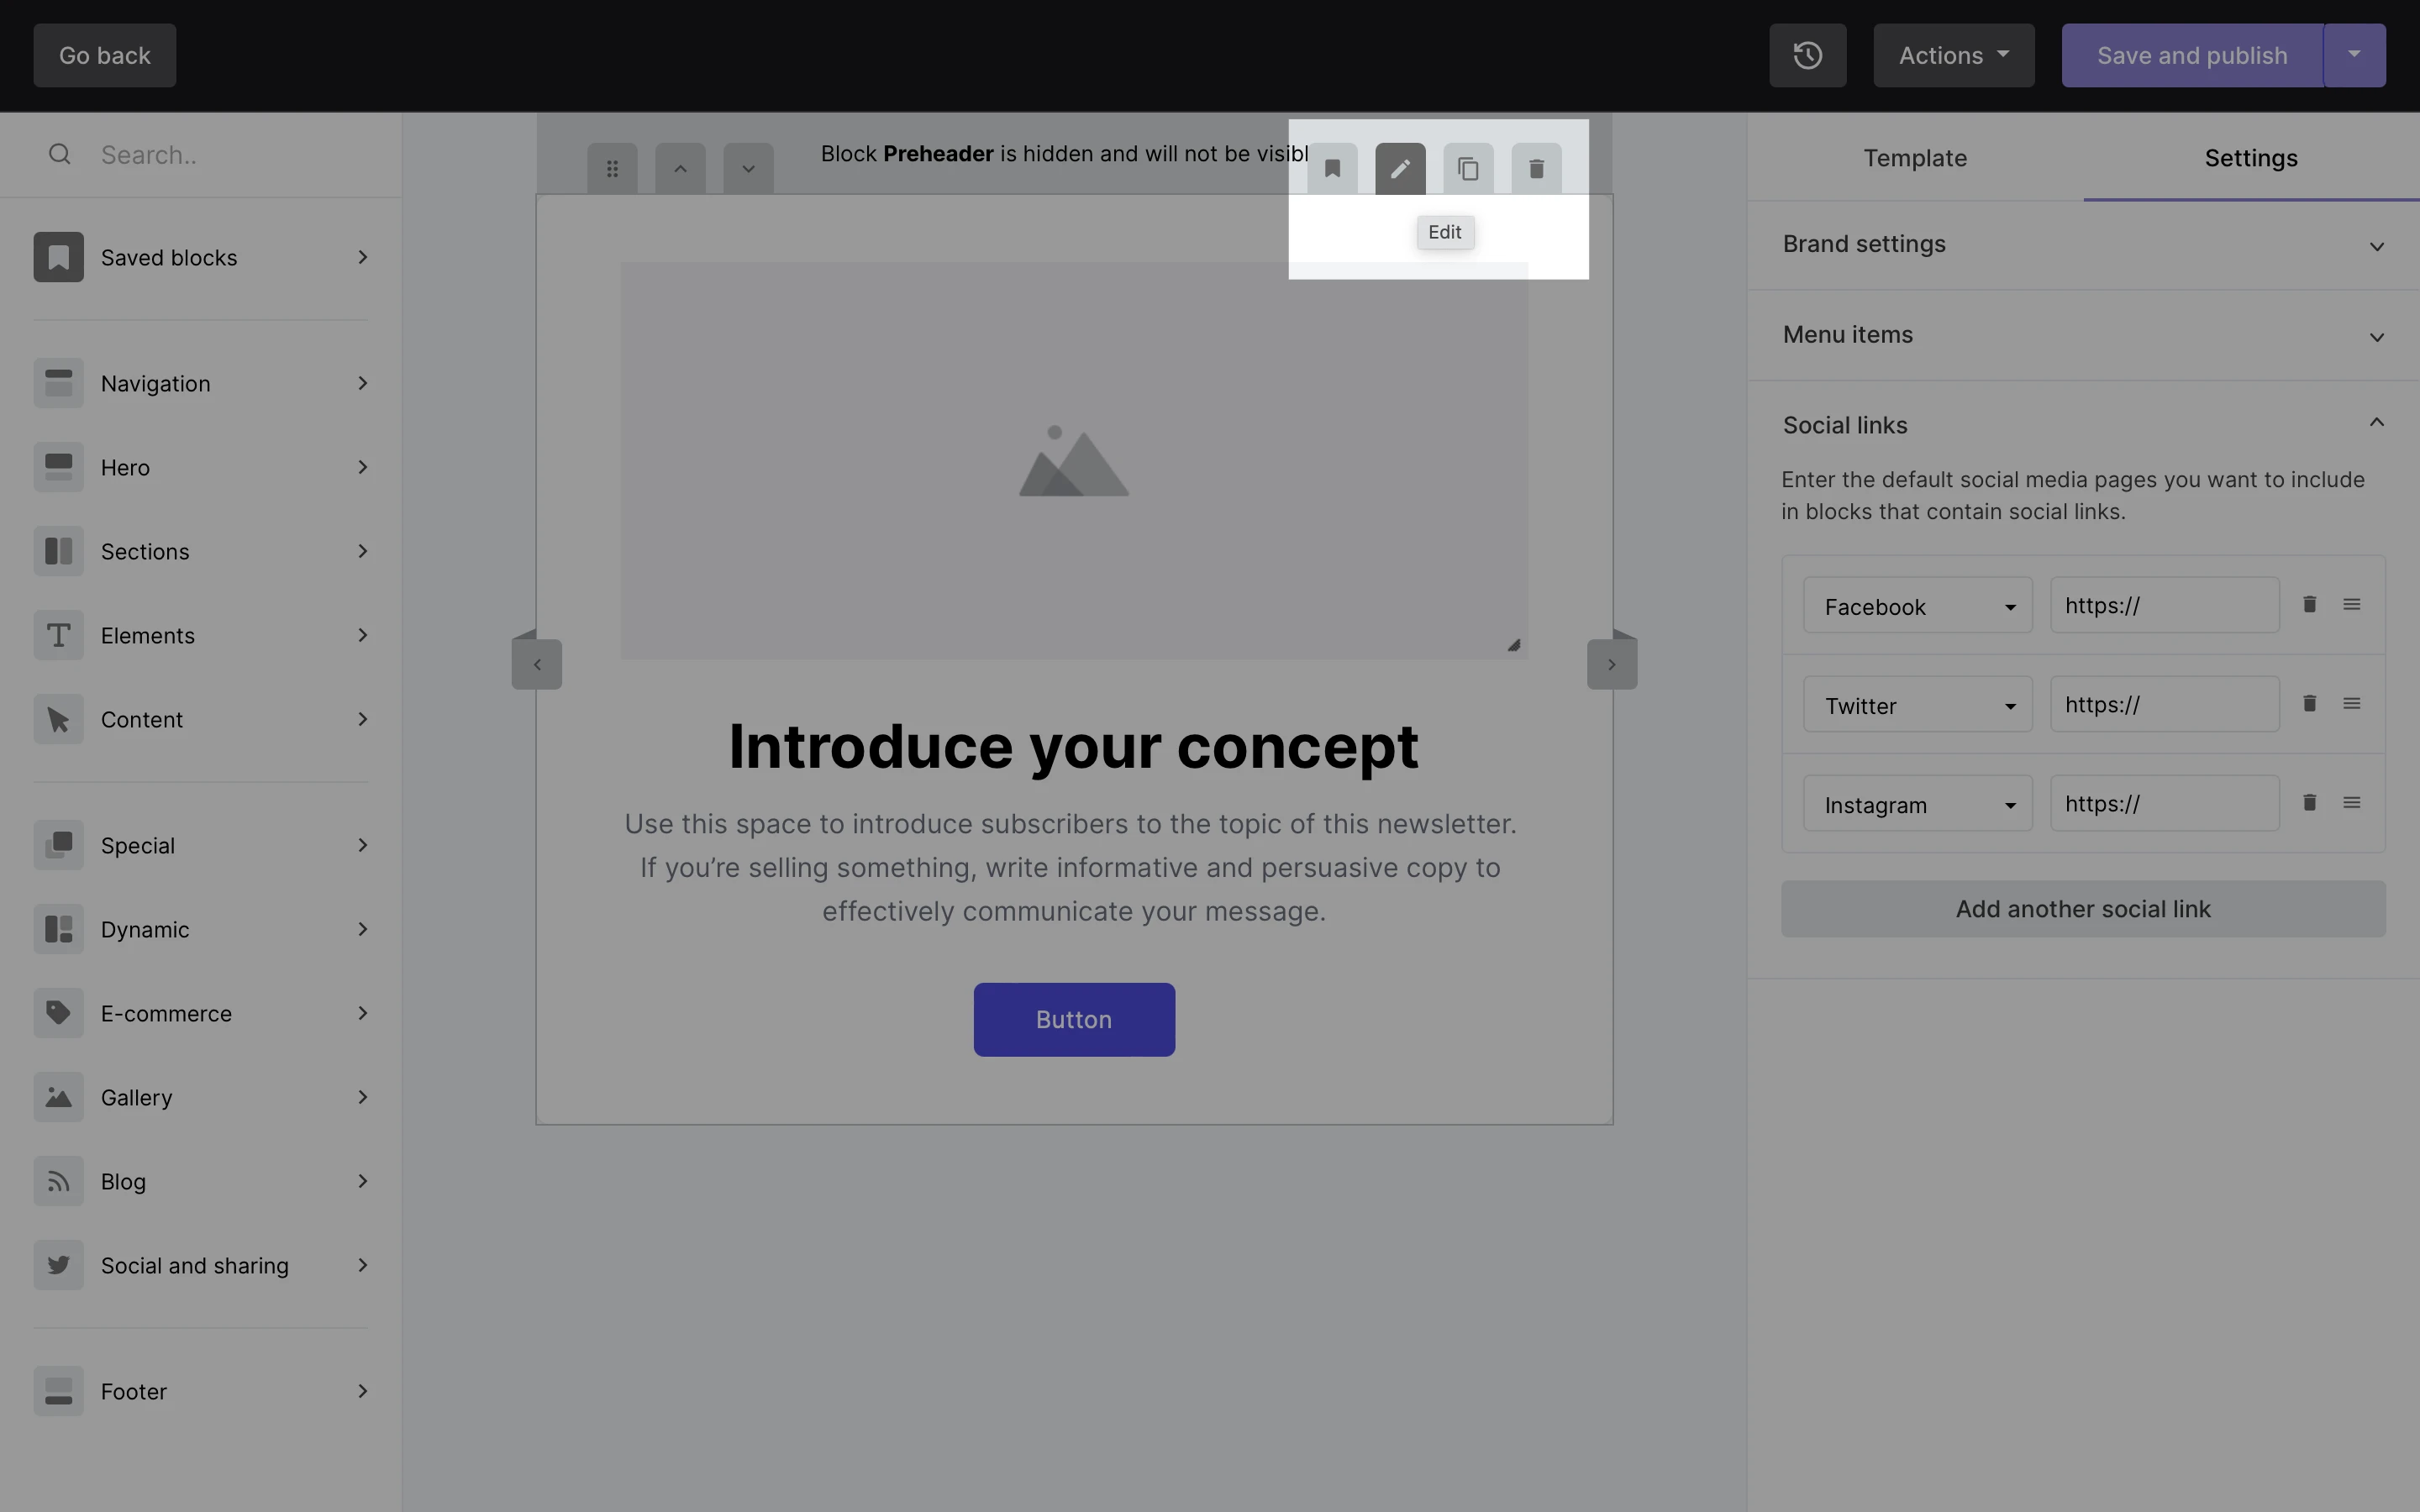
You’ll see the editing tab of the block, where you can include all of the information for the content block—including texts, URLs, and images. The sidebar can be different for every block, depending on the block’s functionalities.
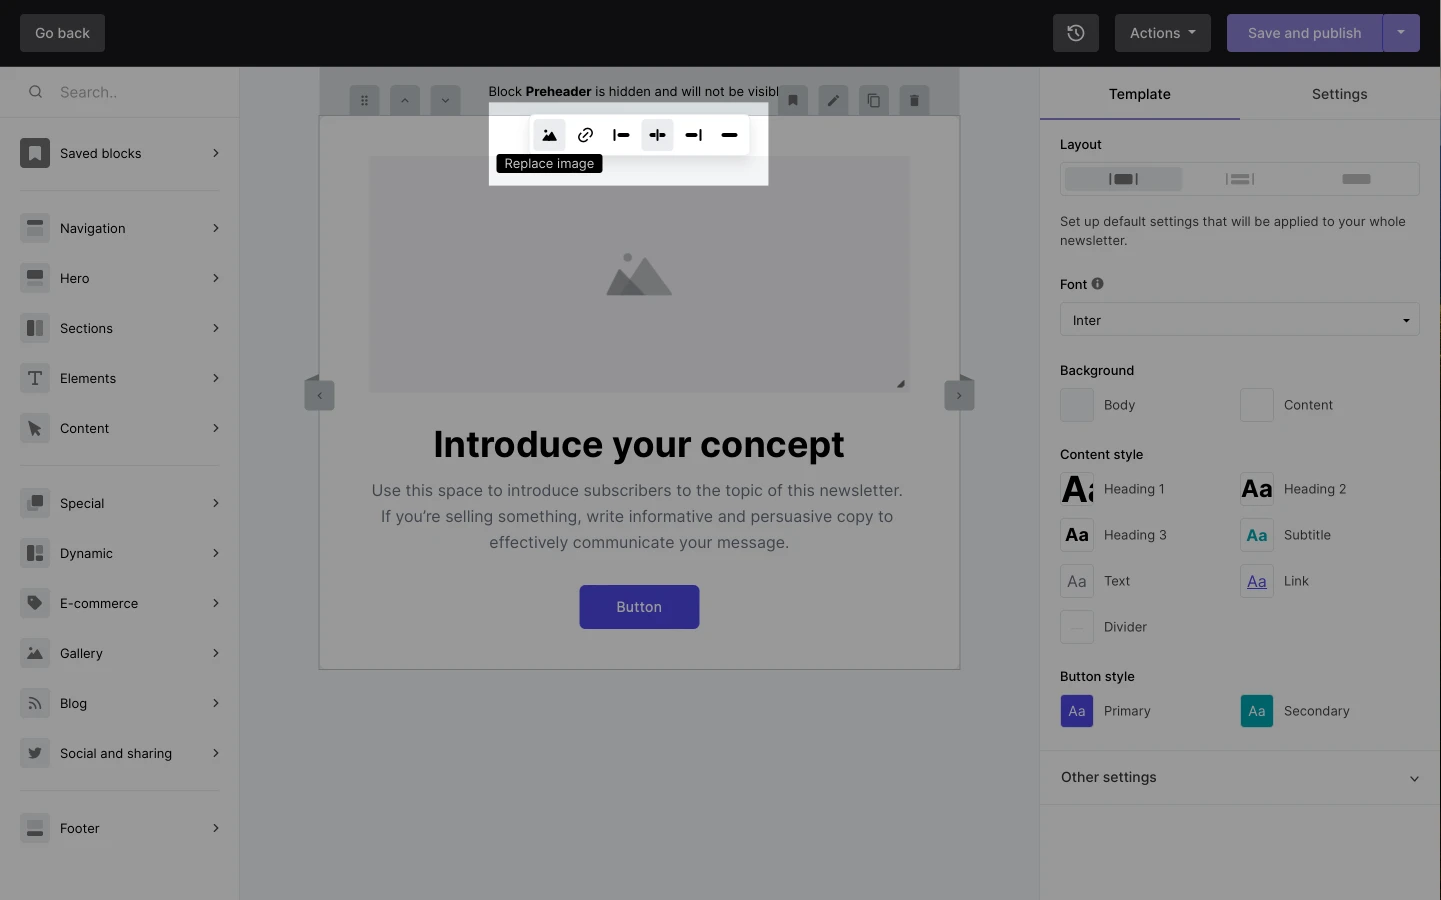
To add a new image to an Image block:
Hover over the block until you see gray icons. Click the Image icon.
Choose your image and it’ll be added to your newsletter.
There are many ways you can design your blocks using the right-hand sidebar’s settings. Feel free to explore and play around with the settings and features.
How to duplicate a block
Hover over a block and click on the two-paper-sheets icon to duplicate it.

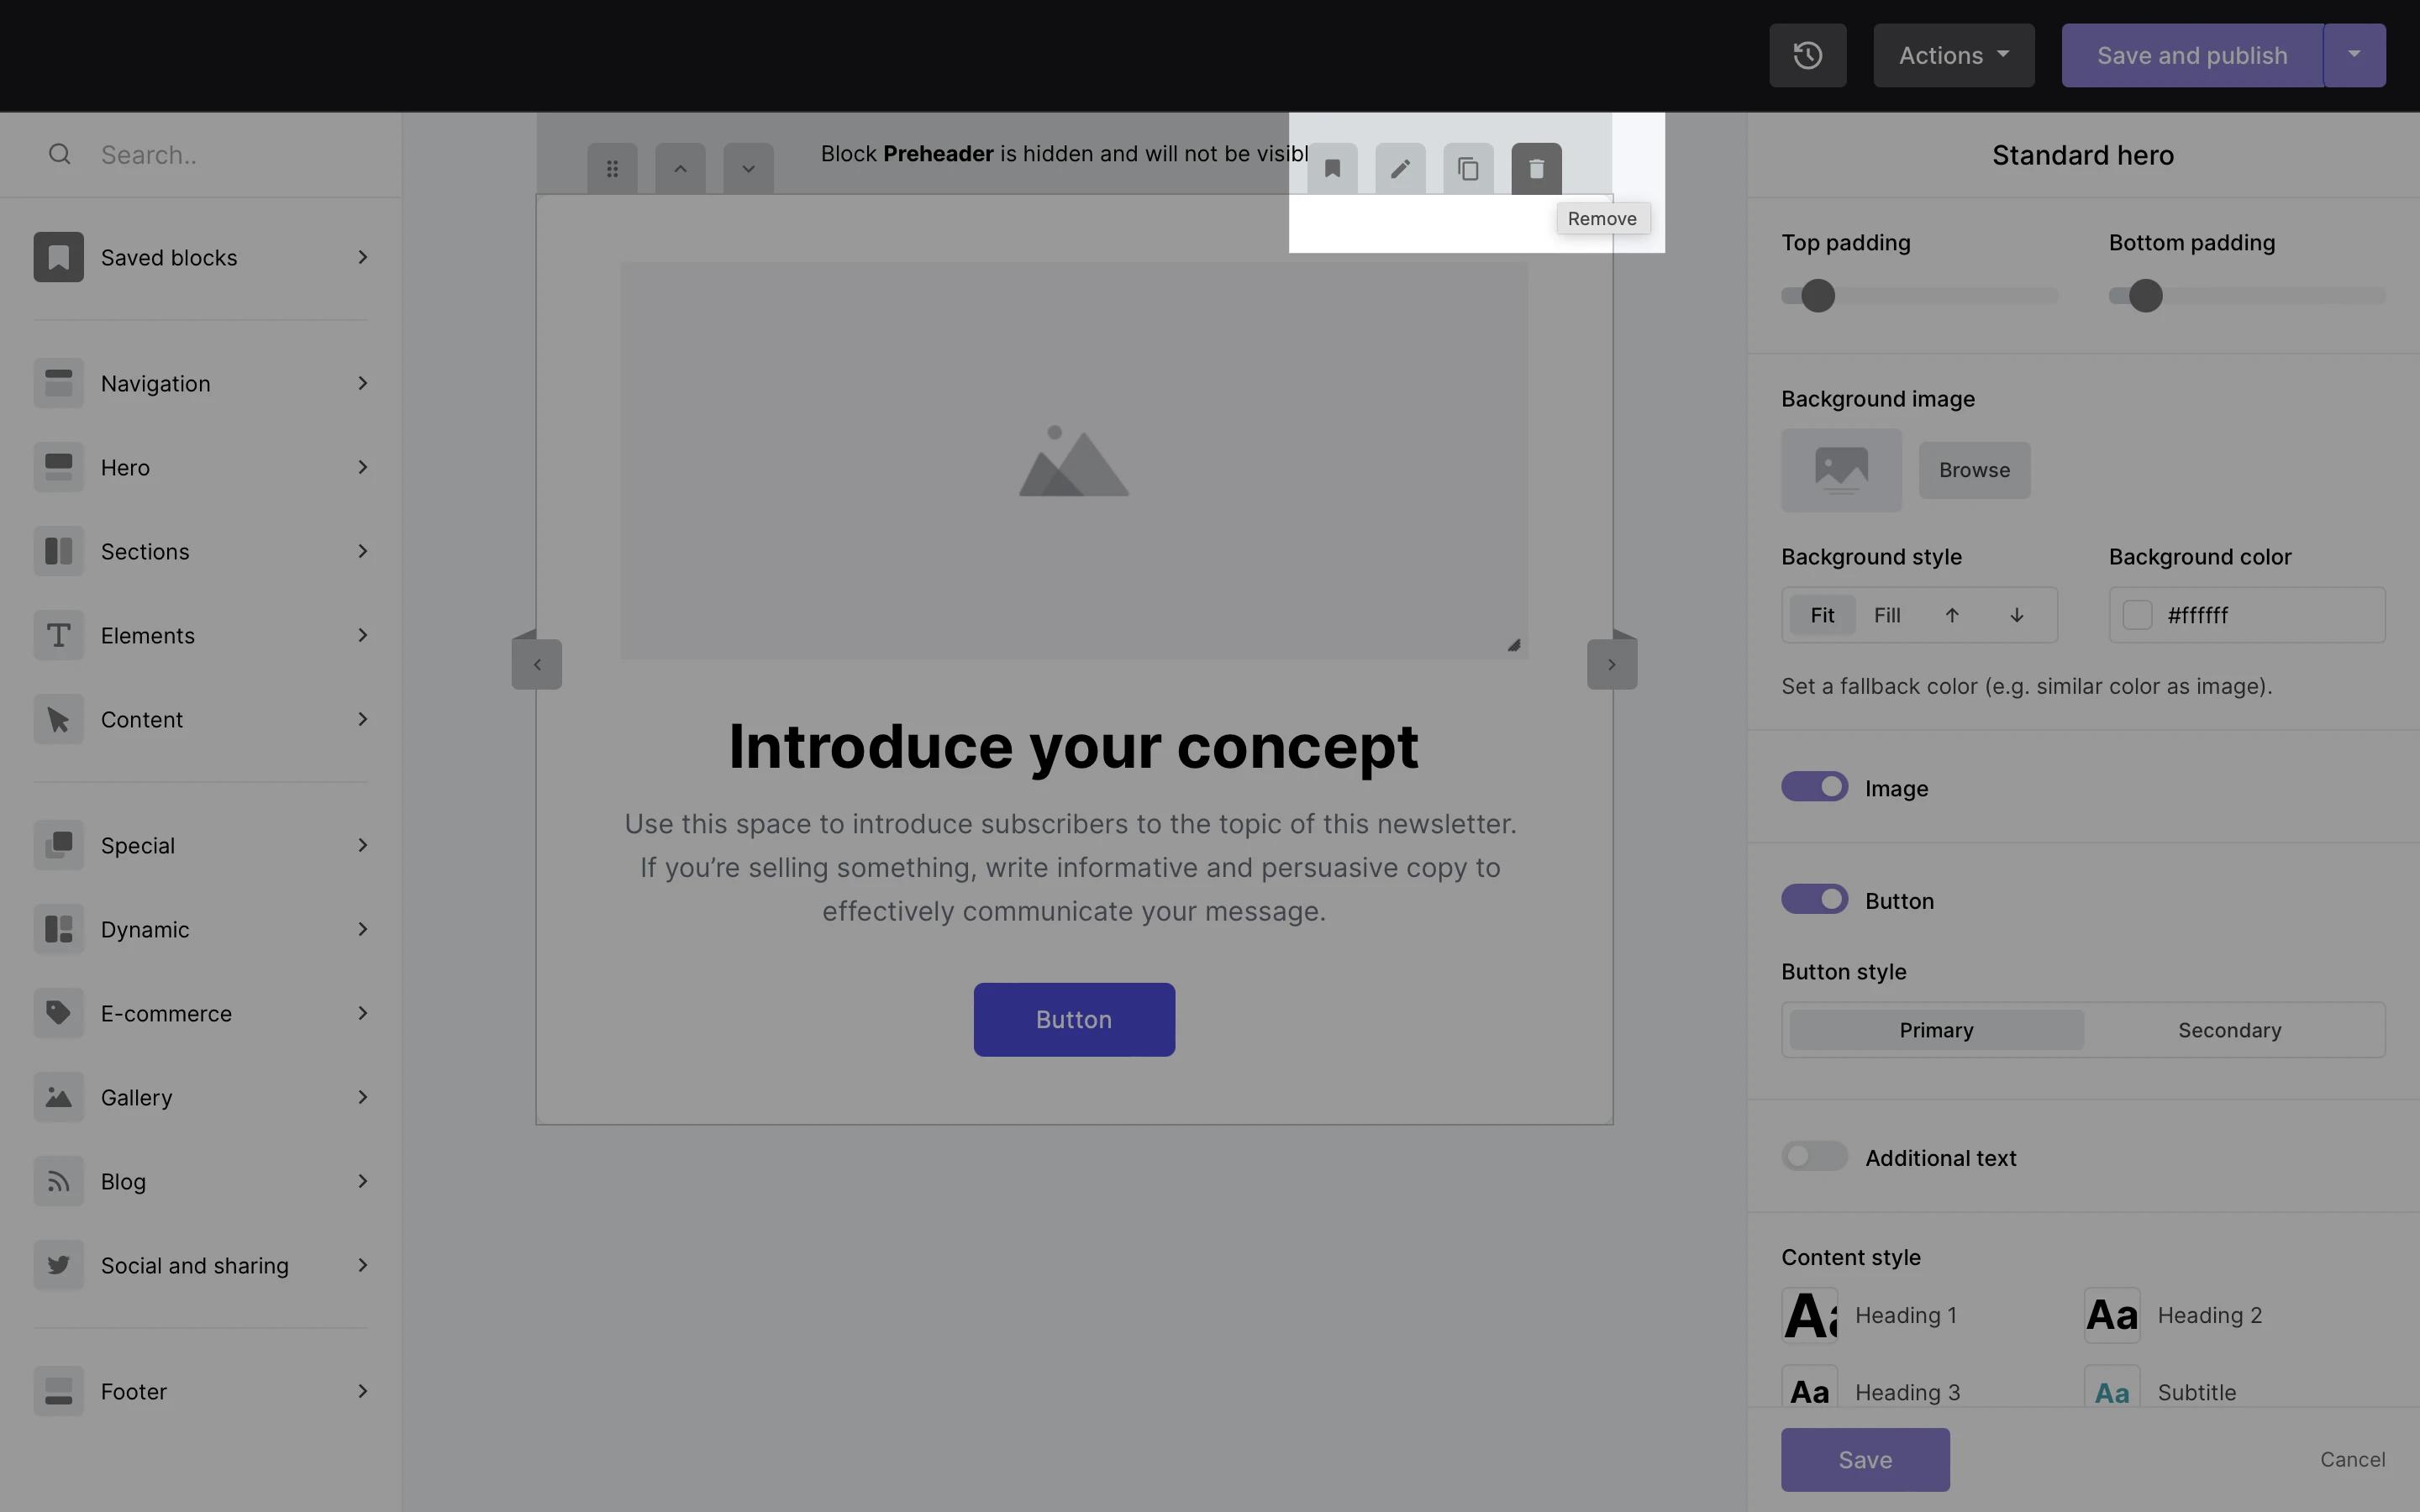
How to remove a block
Hover over a block and click on the trash icon to remove it from your newsletter.
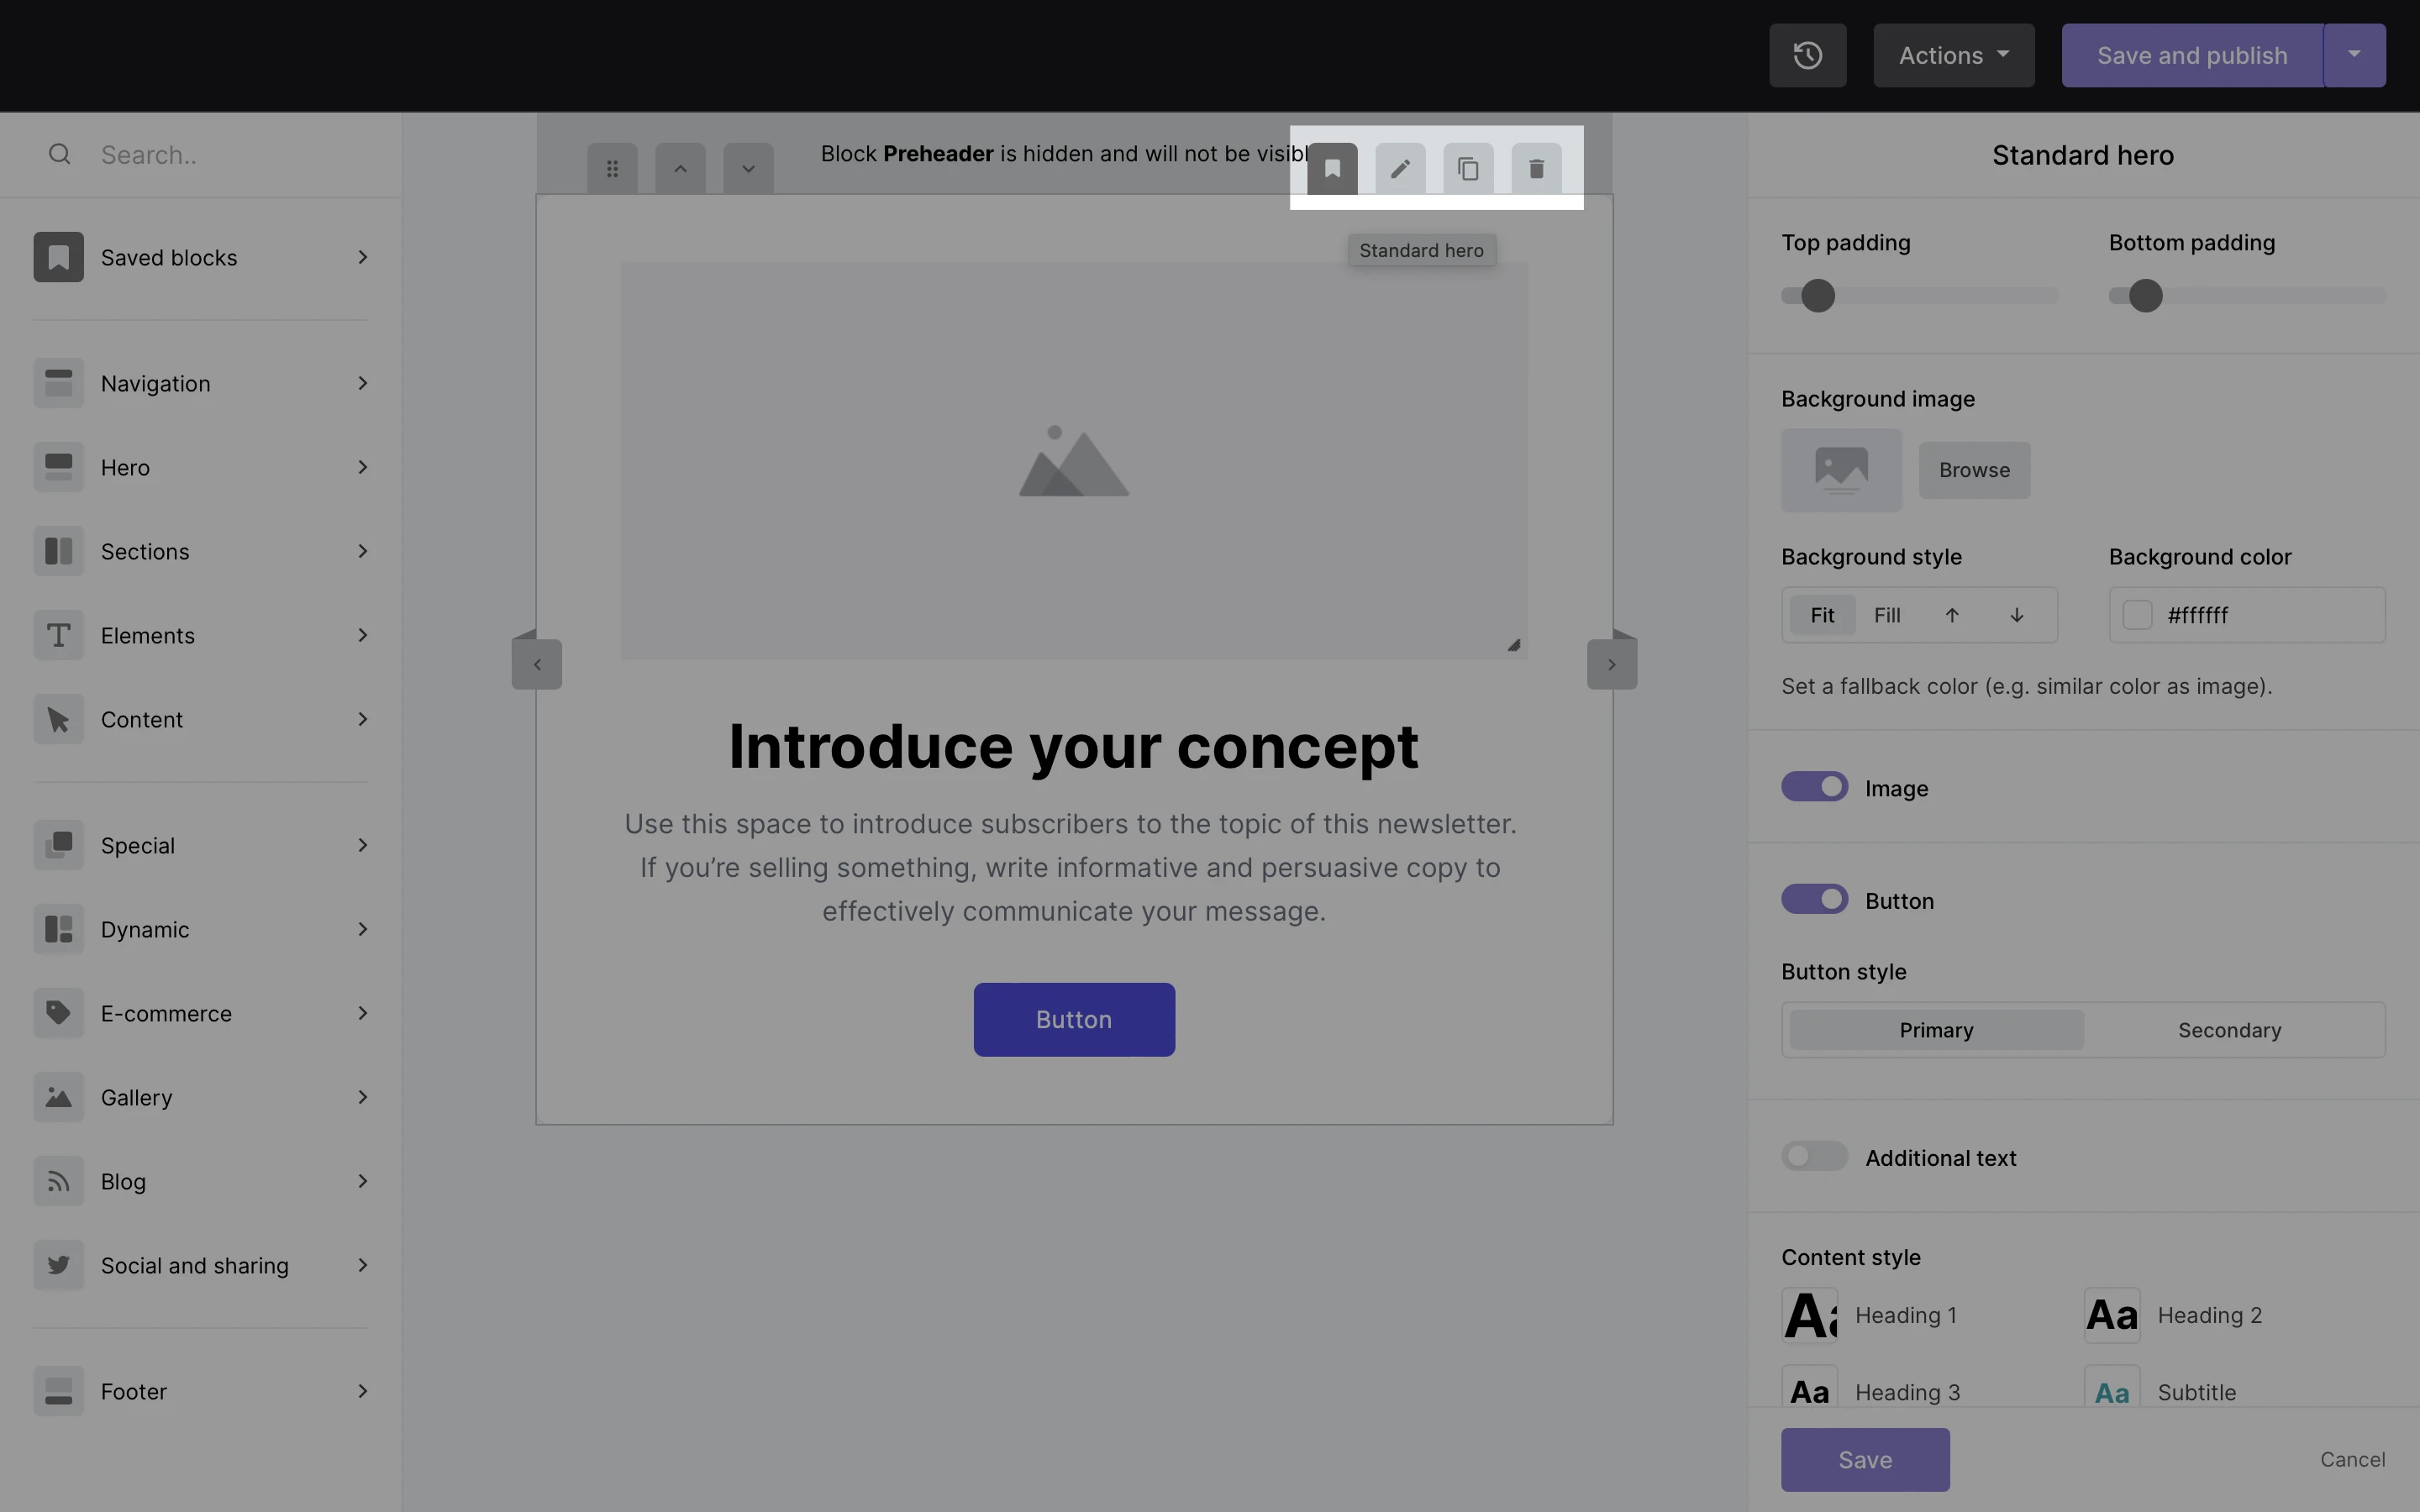
How to save a custom block for later
You can now save your custom block templates directly in your editor. This is great for cutting down newsletter build time and maintaining consistent branding.
To save a custom block template:
Hover over your desired block.
Click the Save icon.
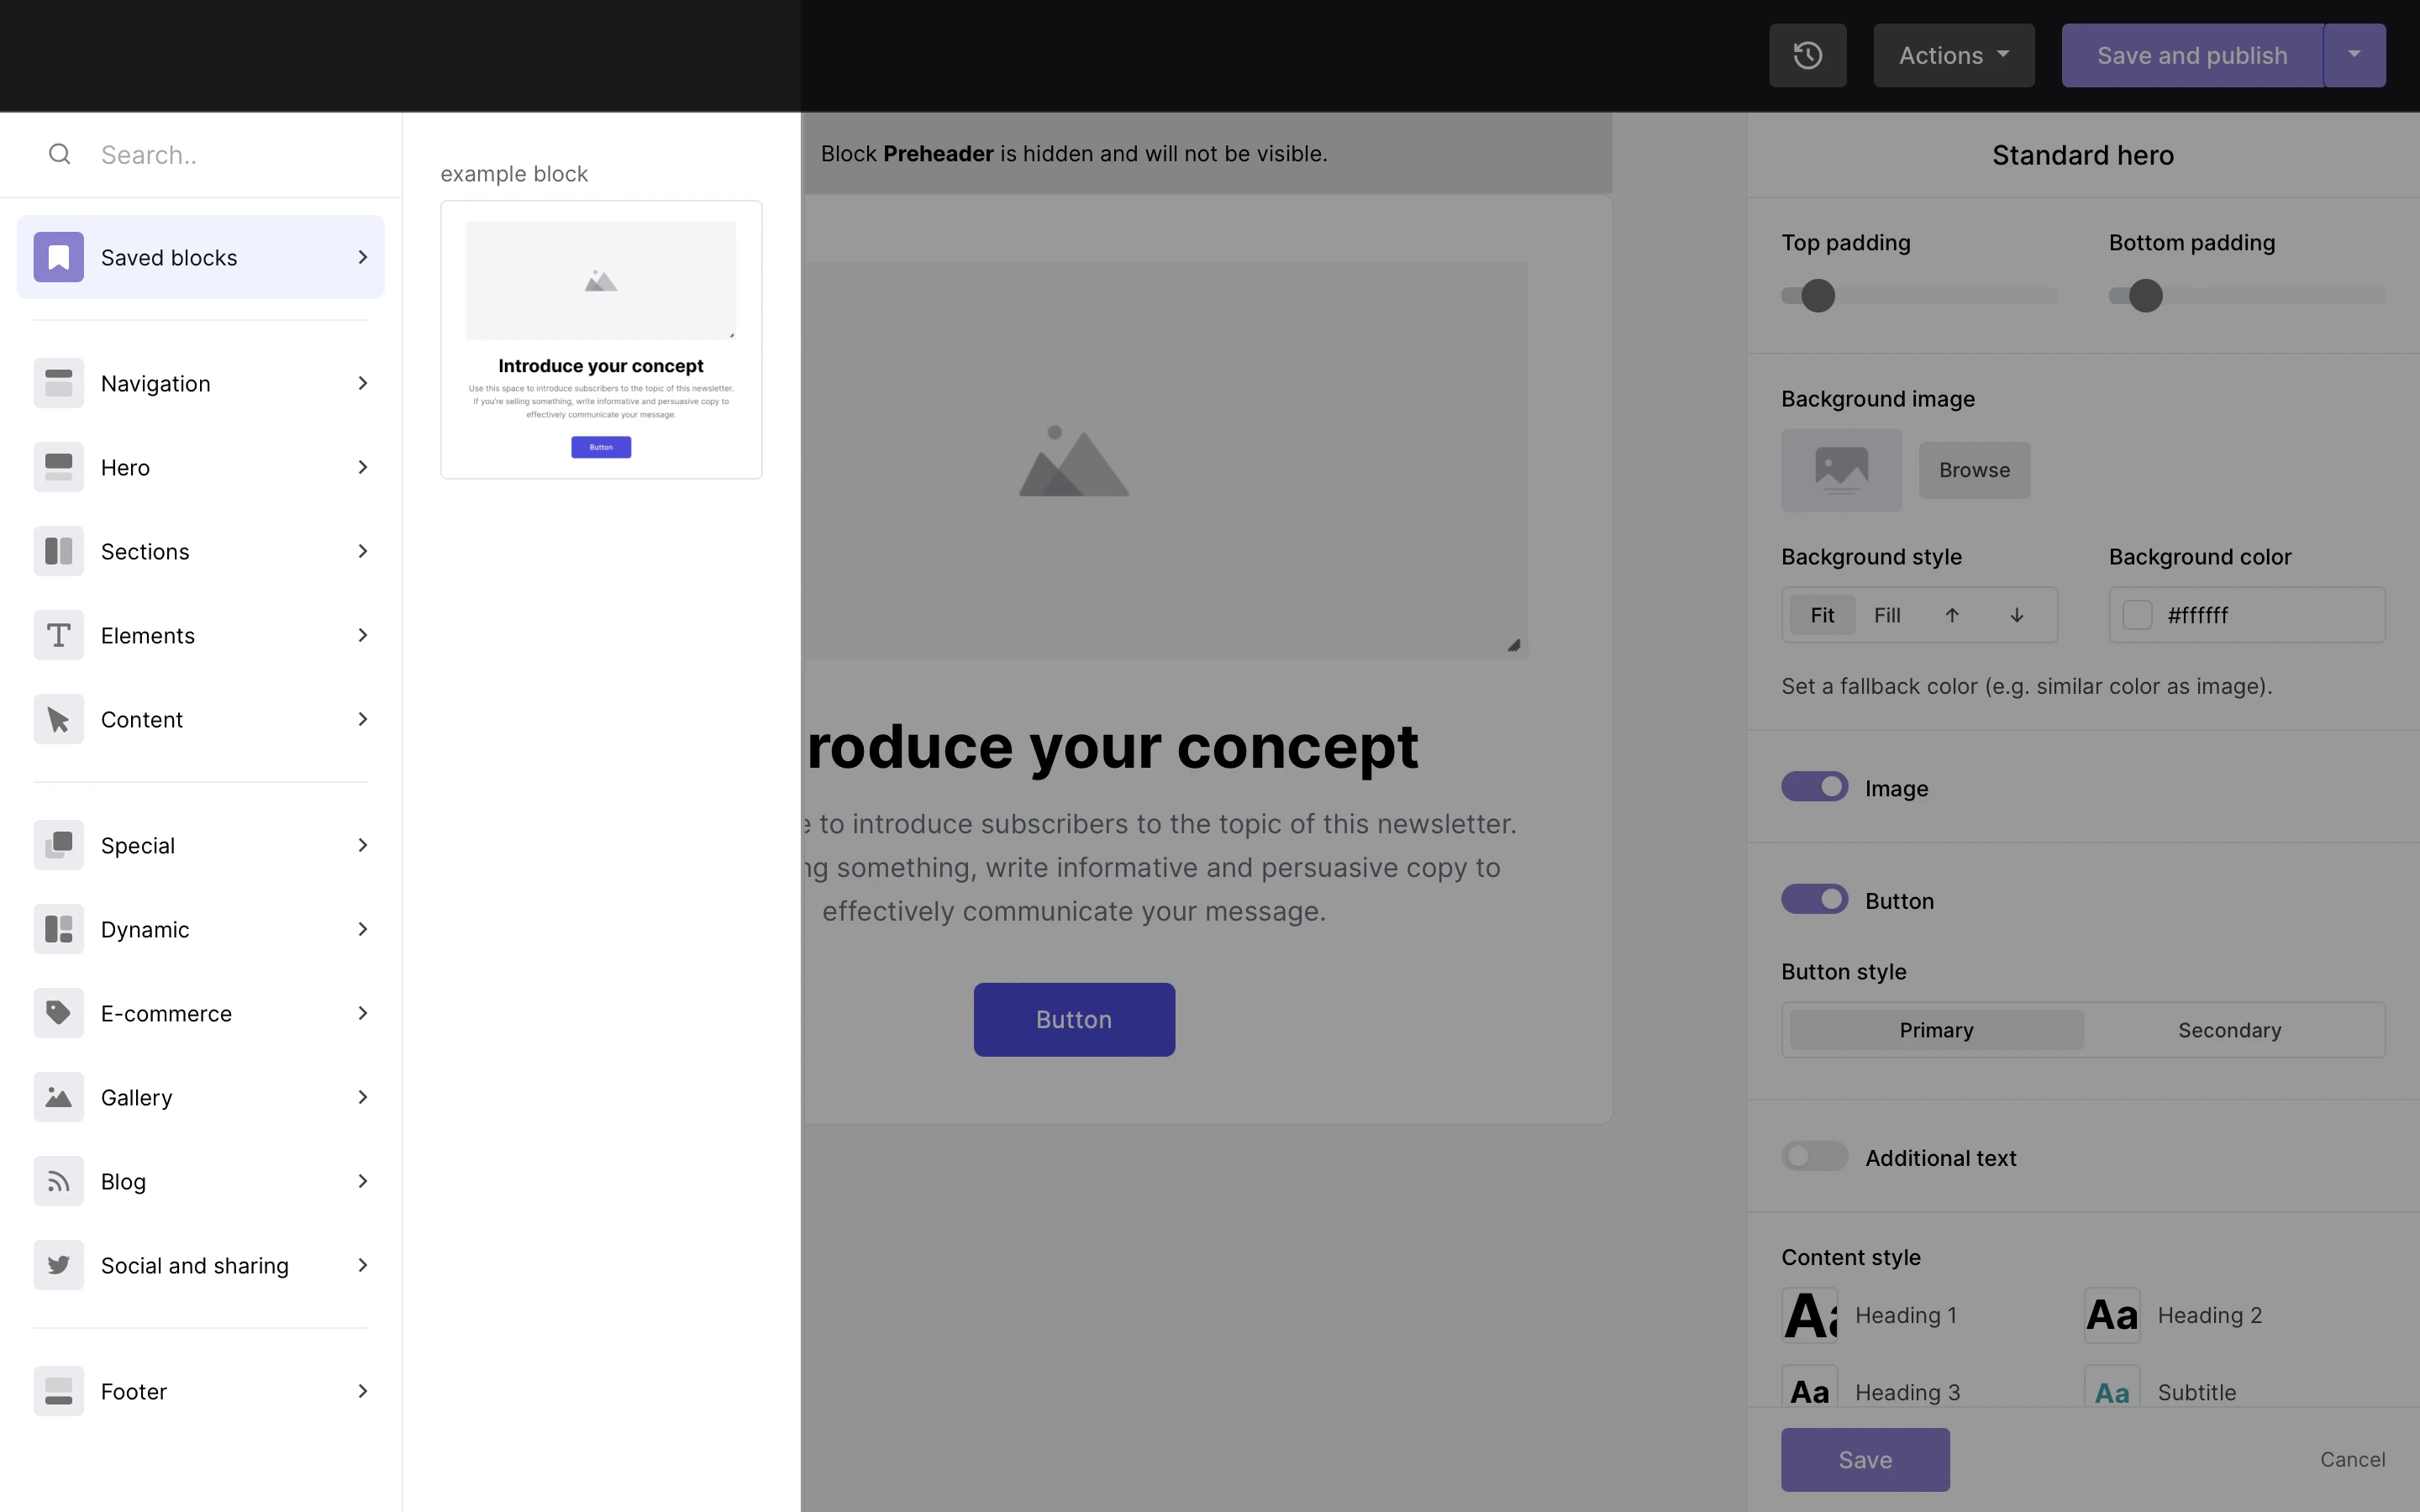
You can find all your saved block templates in the left-hand sidebar under Saved blocks.
How to edit the content within the footer block
If you wish to display a logo, additional company information or any disclaimers in your email template, the footer is the place to do it.
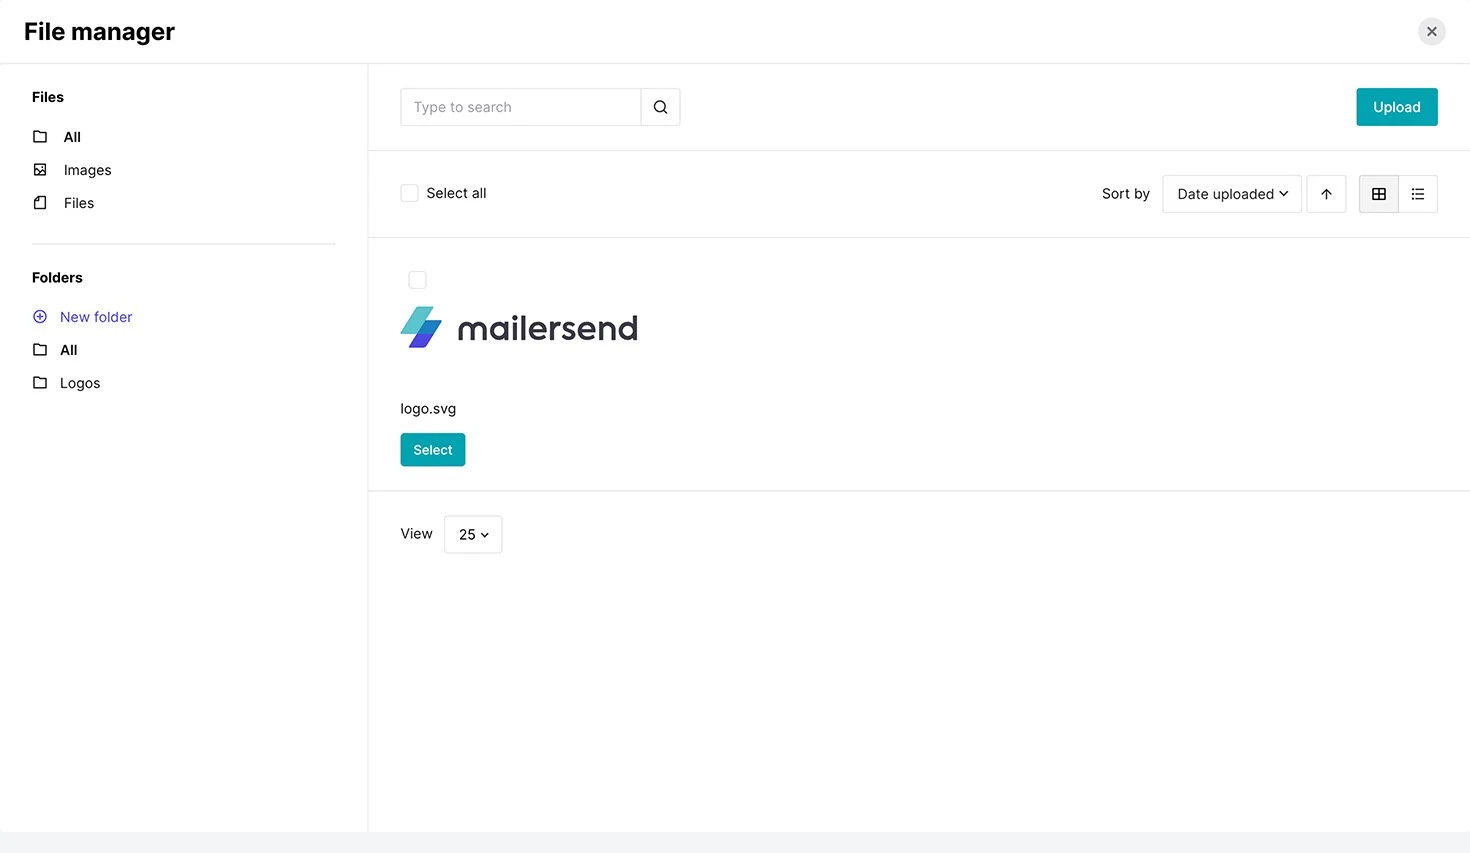
To add your logo to your footer:
1. Hover over the footer block and click the pencil icon.
2. In the sidebar, click the Content tab.
3. Click the image icon to open your File manager.
4. Upload or select an image from your file manager.
To add additional information to your footer:
1. Hover over the footer block and click the pencil icon.
2. In the sidebar, click the Settings tab.
3. Under Footer, use the dropdown menu to select what information you want to display in your footer.
![]() How to use personalization variables
How to use personalization variables
Personalization enables the inclusion of complex data within your email templates, extending functionality to the subject line, HTML, and plain text fields of your emails. This technique leverages variables that can be enhanced with filters for dynamic content customization, providing a more tailored experience for your recipients.
Understanding filters for variable modification
Filters play a crucial role in the personalization process, allowing for the modification of variables according to specific rules:
Filters are applied to variables using a pipe symbol ('|') to separate the variable name from the filter.
Filters can accept optional arguments enclosed in parentheses to fine-tune their behavior.
It is possible to chain multiple filters together, where the output of one filter serves as the input for the next, enabling a sequence of transformations on the variable data.
Using Twig filters for personalization
A common use case for filters within personalization is the implementation of the Twig default filter. This filter is particularly useful for setting fallback values for variables that might not be defined or contain a value in a given context.
For instance, consider an email greeting that aims to personalize the message with the recipient's name. If the name variable might not always be populated, the default filter ensures that the template gracefully defaults to a generic greeting, such as "Hi there," when the name value is absent. The syntax for this would be {{name|default('Hi there')}}, effectively replacing a missing name with a friendly placeholder.
This personalization technique, particularly through the use of filters like default, empowers email marketers to create more engaging and responsive email content. By leveraging these capabilities, you can ensure that your emails remain relevant and personalized, even when certain data points are missing or undefined.
Here's a hypothetical example of how such a POST request might look that includes the {{name|default('Hi there')}} filter usage:
{
  "subject": "Personalized Greeting",
  "to": "recipient@example.com",
  "template": {
    "html": "<p>{{name|default('Hi there')}}, thank you for subscribing to our newsletter!</p>",
    "text": "{{name|default('Hi there')}}, thank you for subscribing to our newsletter!"
  },
  "variables": {
    "name": ""  // Intentionally left empty to demonstrate the default filter.
  }
}
How to parse variables in a dynamic table
When you insert a dynamic table, it is automatically populated with {{ elements.name }} where elements is the name of the table object (for example, “items”) and name is the column, or key (for example, “product”, “quantity”, “price” and "image").
To create an order summary email, for example, insert a dynamic table and create the following columns for Product, Quantity, Price and Image.
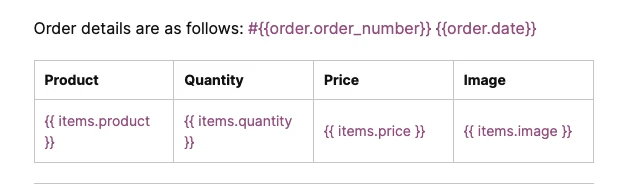
Next, populate the table with variables using personalization like the following example. There will be as many rows as there are arrays in your request.
"personalization": [{
"email": "recipient@email.com",
"data": {
"items": [
{
"product": "Scented candle",
"quantity": "10",
"price": "4.95",
"image": "www.scented-candle.com/scented-candle.jpg"
},
{
"product": "Bath bomb",
"quantity": "3",
"price": "7.95",
"image": "www.scented-candle.com/bath-bomb.jpg"
}
]
}
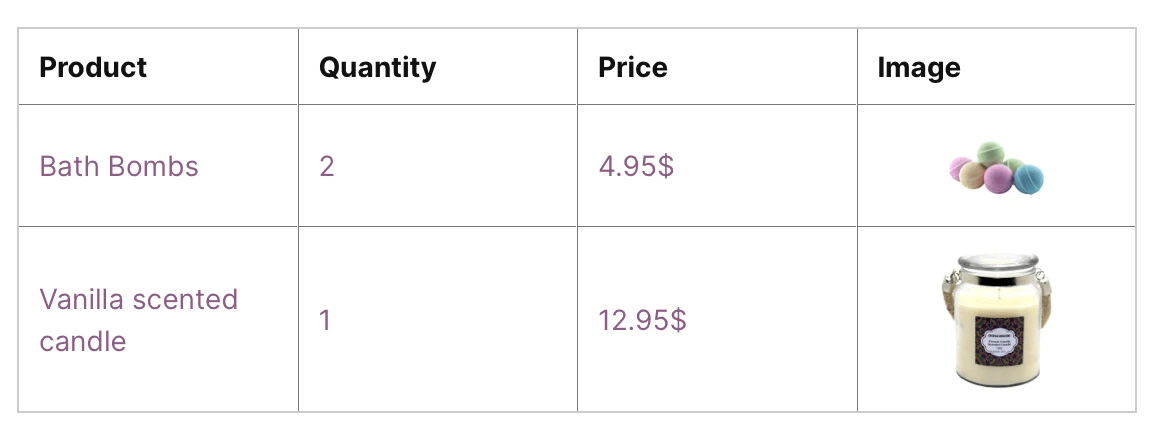
}]The recipient then receives an order summary email populated by the variables.
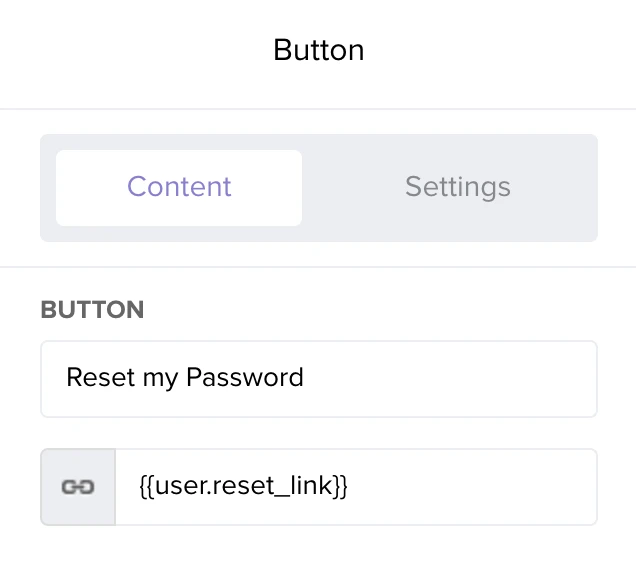
How to parse a variable inside a button
Edit the button in the drag & drop editor and enter the variable in the URL field. The following example shows a password reset link variable being inserted.
How to use the rich-text editor
Create emails with only the most essential content blocks and seamless inline editing.
Rich-text template blocks
To add new blocks to your rich-text template:
1. Hover over the line or block under which you want to add a new block.
2. Click the Add icon on the left-hand side.
3. Select the block you wish to add to your template.
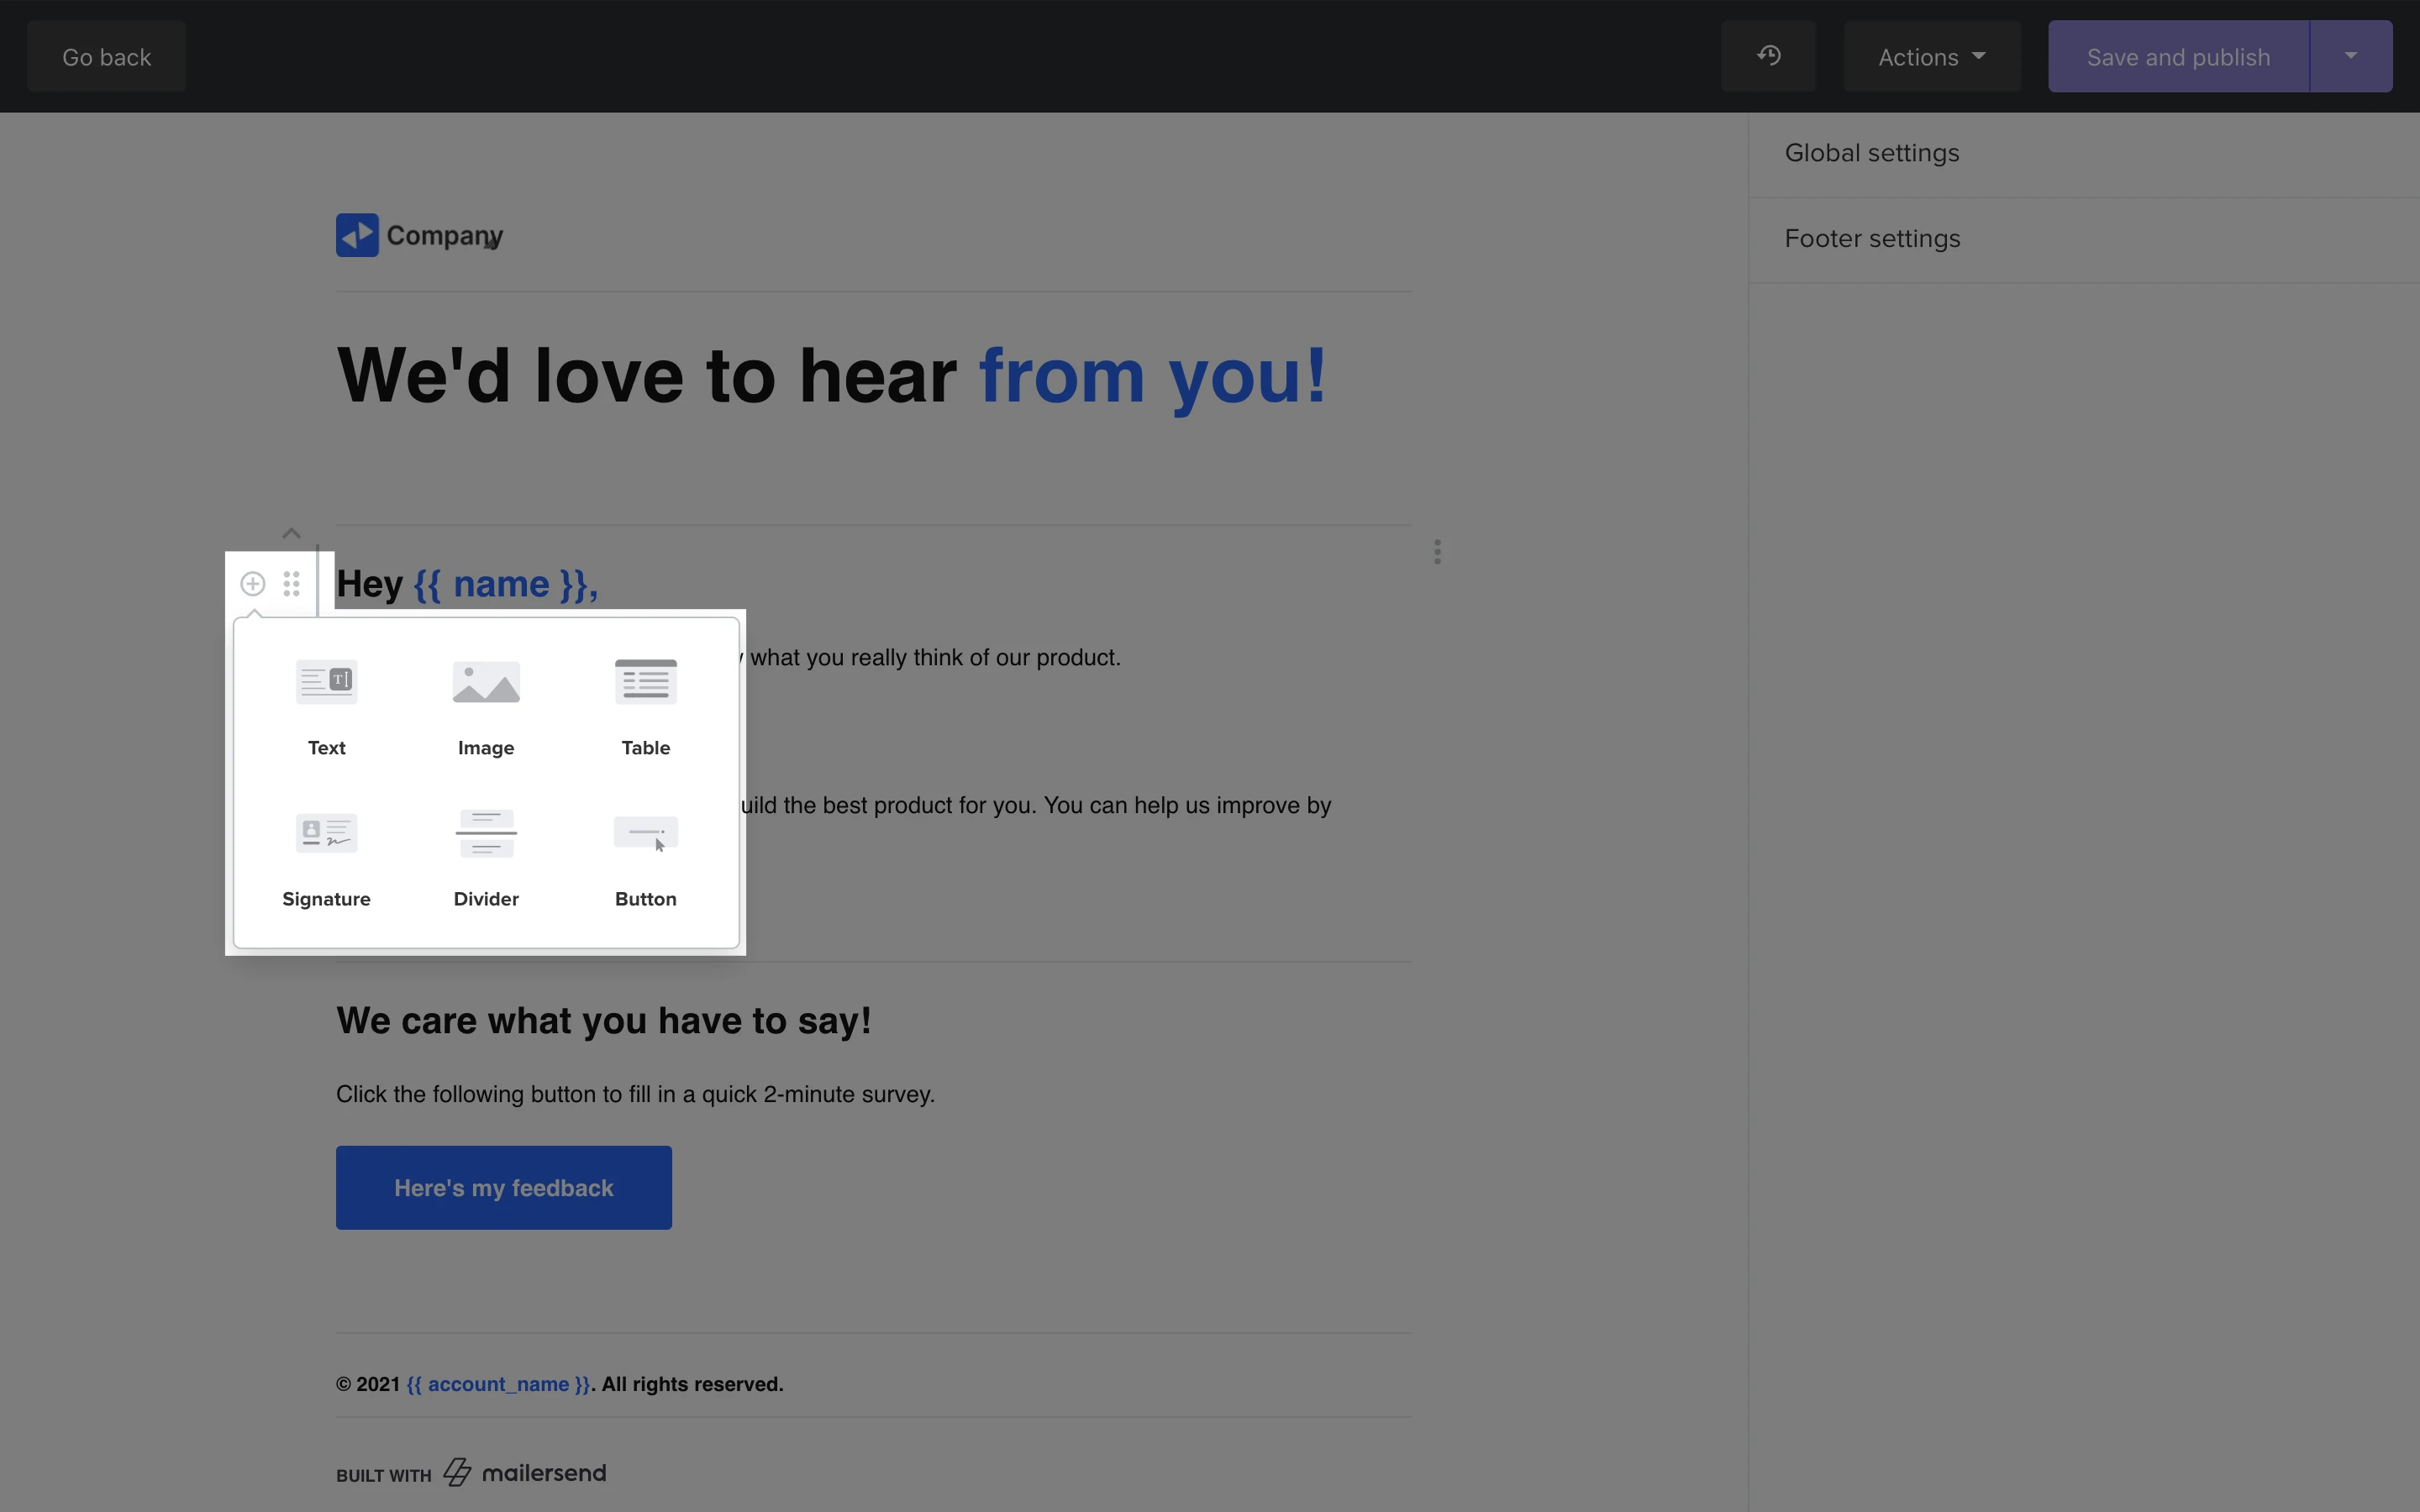
You can choose from the following 6 blocks:
Text - Add any text to your email including headings and subheadings
Image - Add an image, such as your logo, to your template
Table - Embed a table in your template
Signature - Add a personalized signature and profile picture to your template
Divider - Separate your email into sections by adding a small line between blocks
Button - Redirect recipients to an external link using a button
To move a block up or down, hover over the selected block and click the Move up or Move down icons. Alternatively, you can click and hold the Move icon and drag the block to your desired position.
To duplicate or delete a block:
1. Hover over the selected block.
2. Click the More icon on the right-hand side.
3. Click the Copy icon or Delete icon.
Rich-text template settings
In the sidebar, you will find 2 different settings tabs: Global settings and Footer Settings.
Global settings
Global settings apply to the template as a whole, rather than an individual block or section.
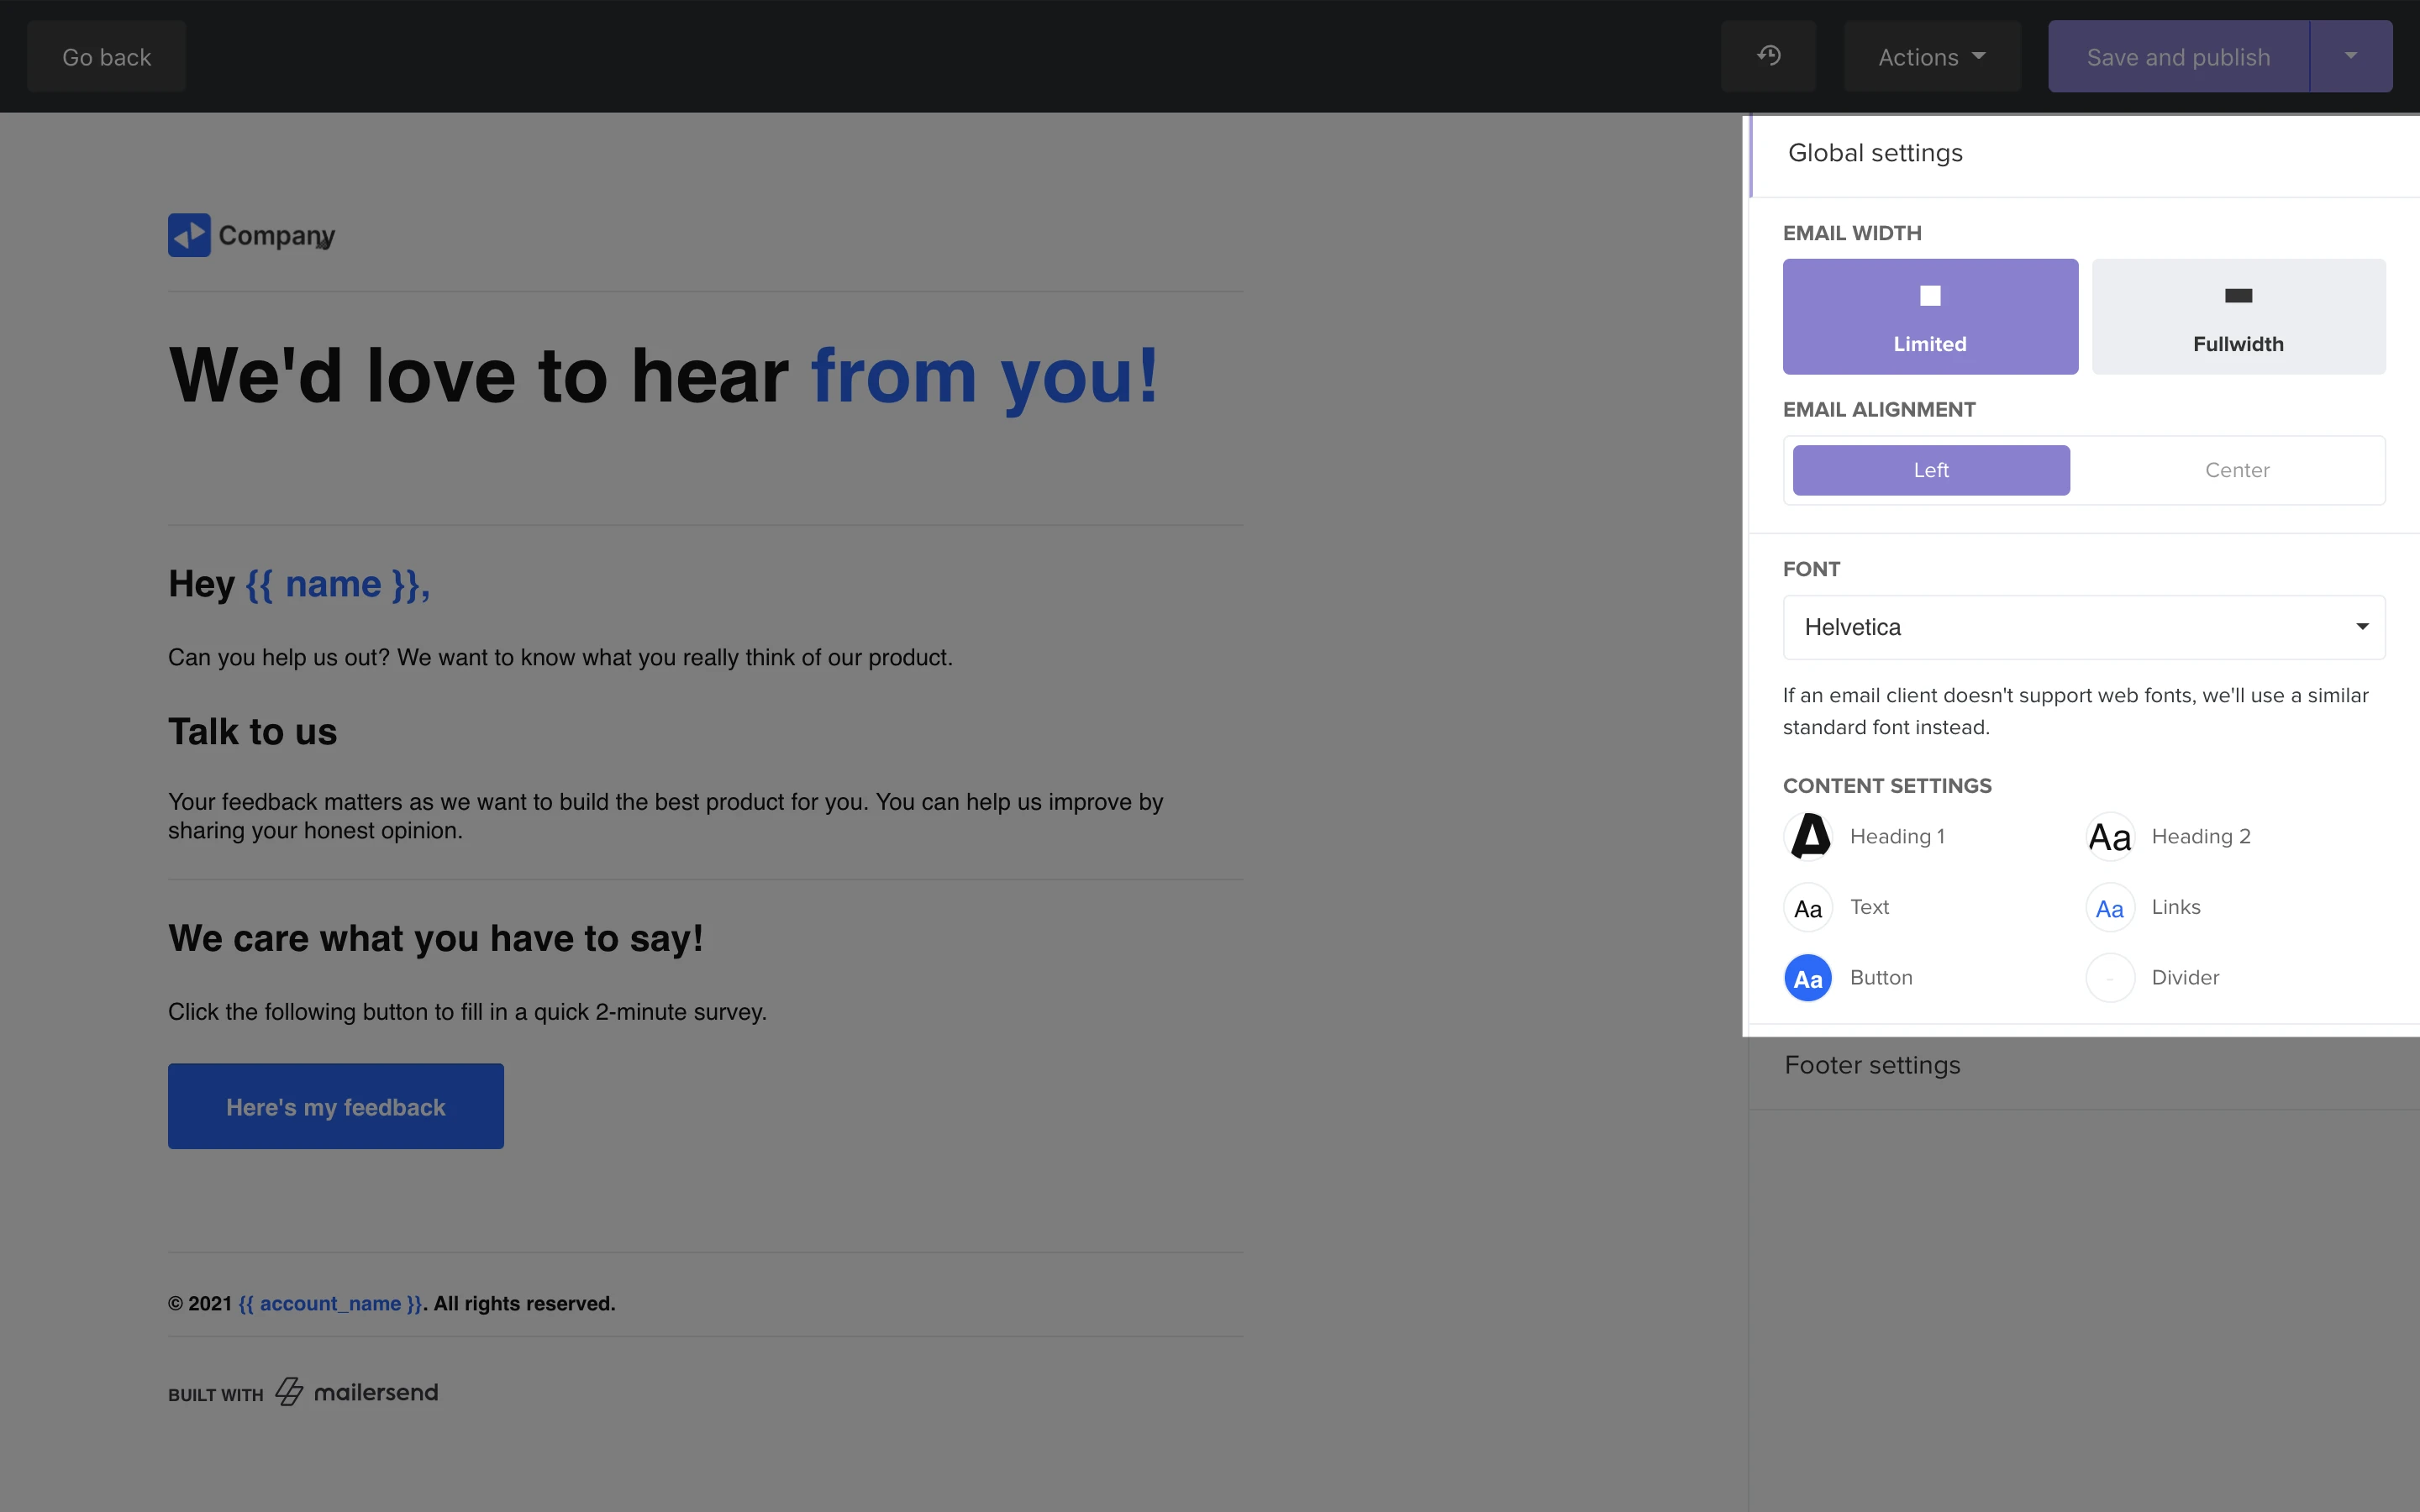
There are 4 elements in your global settings: Email width, Email alignment, Font and Content settings.
1. Email width
Email width determines how your email is displayed in the recipient’s inbox. You can choose from the following options:
Limited - Limits the width of your email, you can then select whether you want to align your email to the Left or Center
Full width - Stretches your email to the full width of the screen, much like a traditional email.
2. Email alignment
Here you can choose to align the content of your email to the left or center.
3. Font
This is where you can choose the font for your email. If the web font you select isn’t supported by a particular email client, a similar standard font will be used instead.
4. Content settings
Under Content settings, you set the default design settings for the following elements of your email:
Heading 1 and Heading 2 - Apply global settings to all H1 and H2 text, such as font, font size, color and more
Text - Apply global settings to all other text such as font size, color, line height and font style
Links - Set the global link color and link font style
Button - Apply design settings to all buttons included in your email
Divider - Apply global settings to all email dividers including color, size, width and style
Footer settings
Under Footer settings you can apply different design settings to your footer text and links.
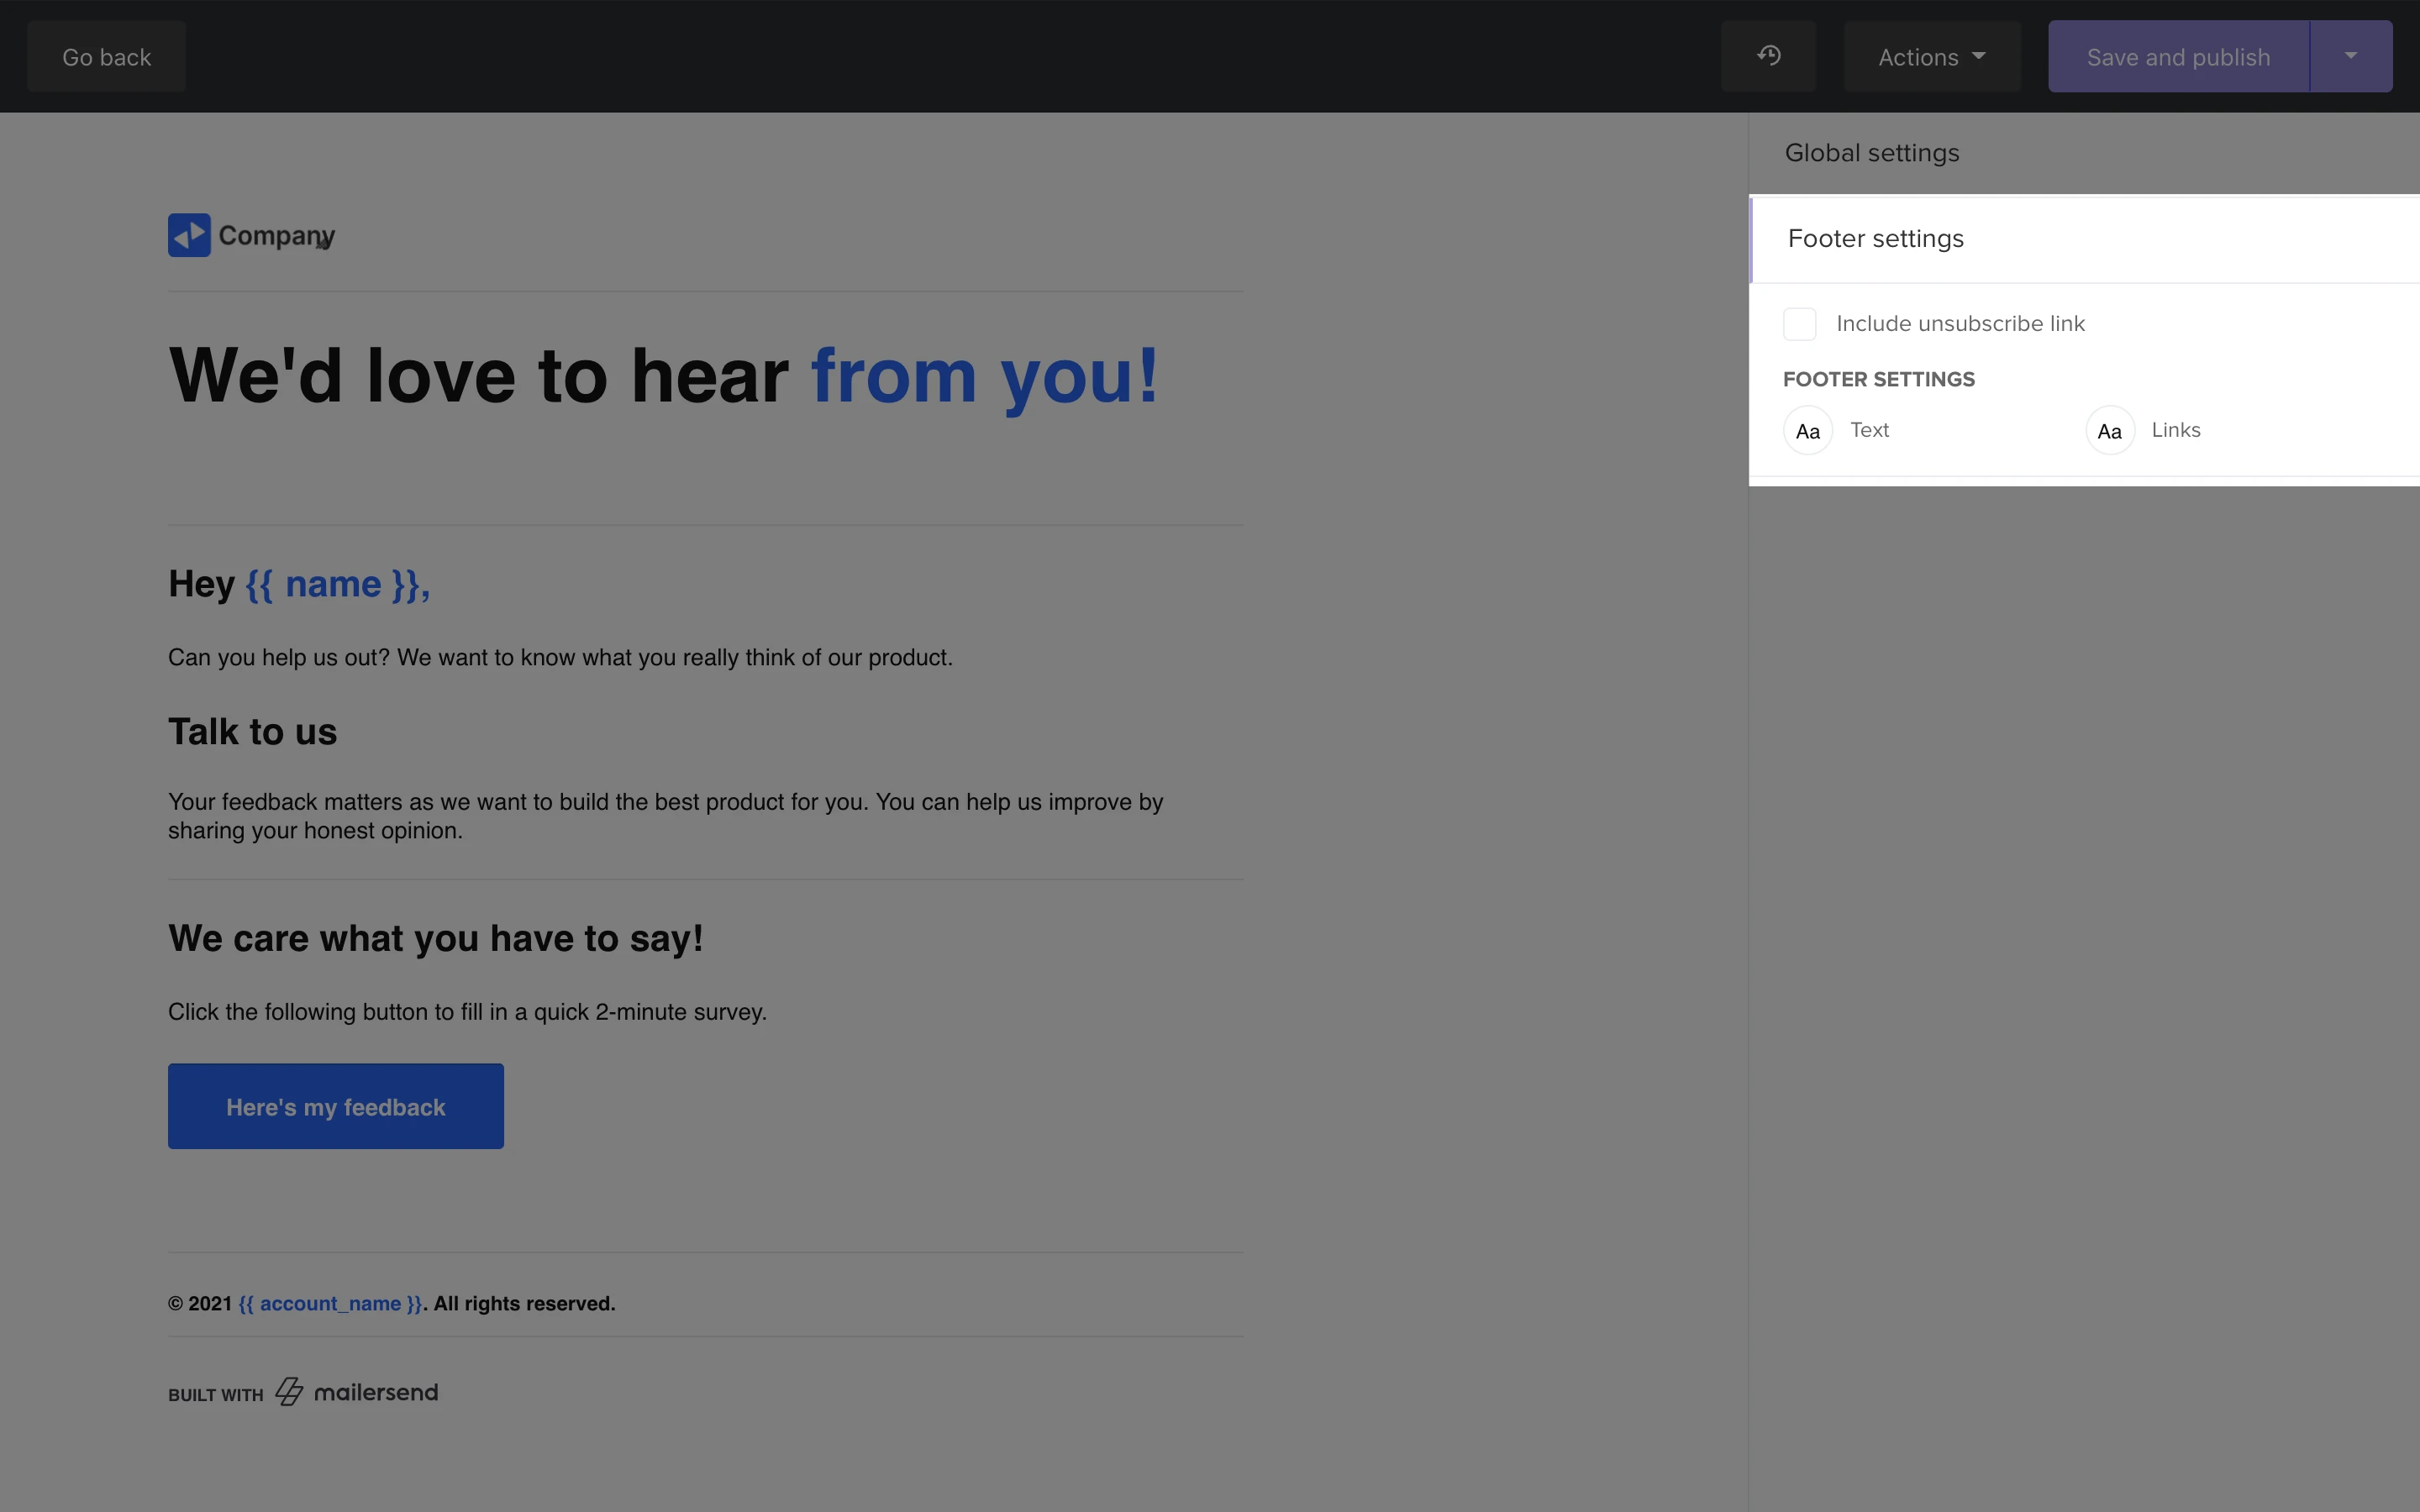
You can also select whether or not to include an unsubscribe link in your email with the Include unsubscribe link checkbox.
How to organize templates into categories
Keep track of your templates by organizing them into categories.
To create a new template category:
1. Navigate to the Templates page.
2. On the left-hand side under Category, click New category.
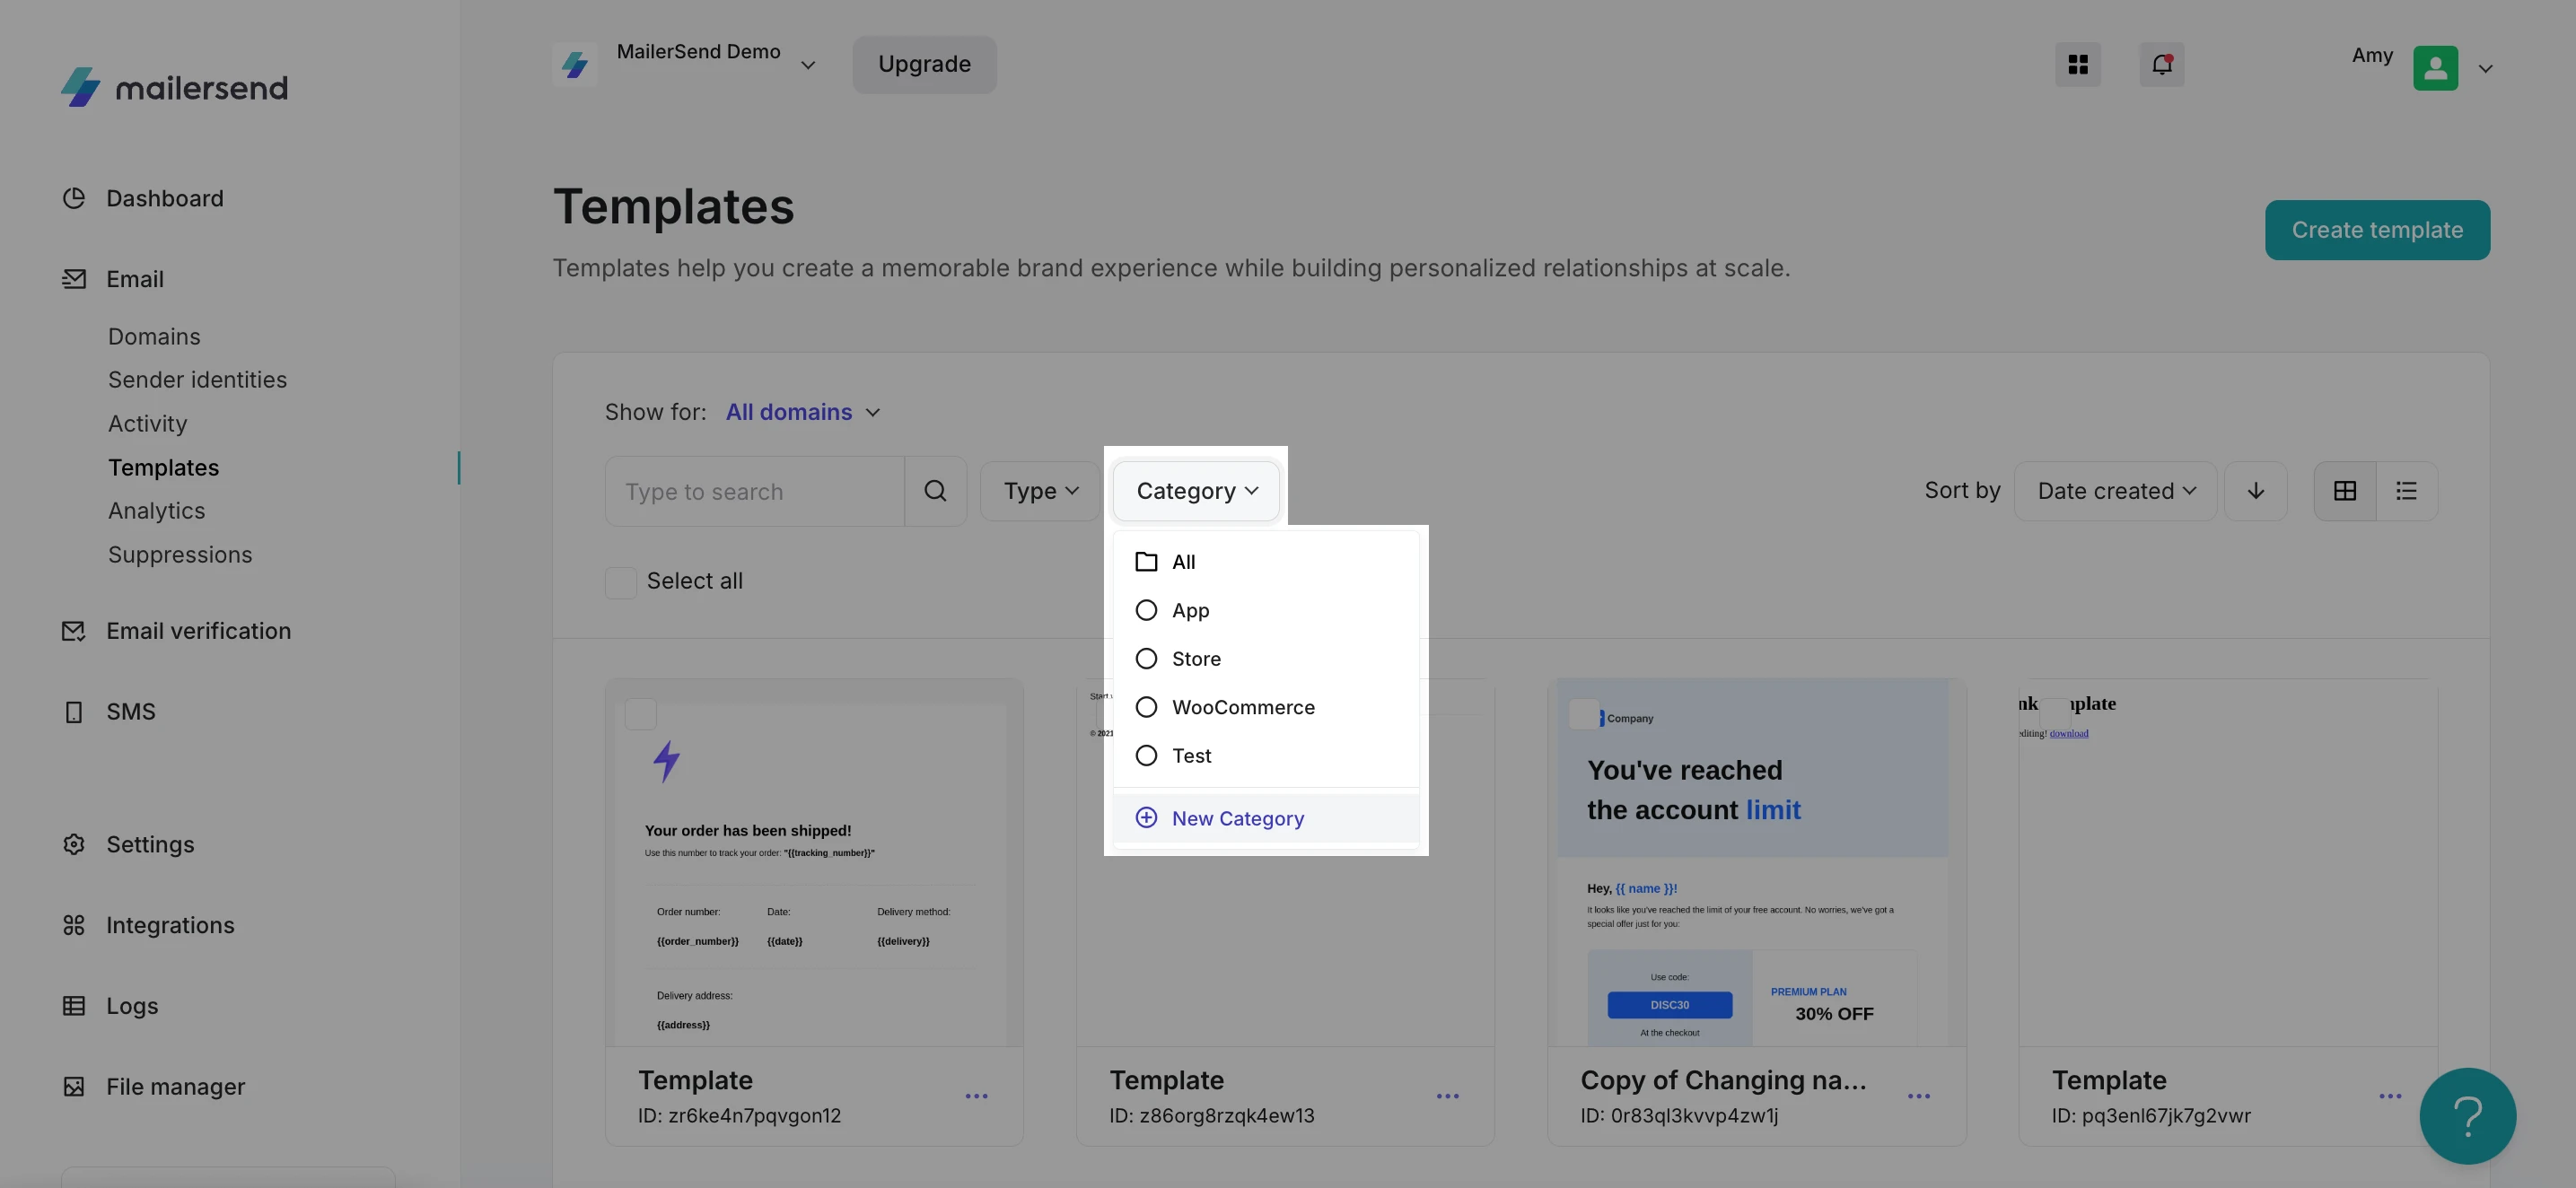
3. Enter a name for your new category.
4. Click Create.
To add a template to a category:
1. Hover over the template you wish to add and click Manage. You'll be taken to the Template settings page.
2. In the Details tab, choose a category from the Category drop-down and save your changes.
Need more info?
Feel free to reach out to support@mailersend.com. A member of our support team will gladly assist you.