Sender identities
Starter plans and above can send emails on behalf of clients, without the need to verify their domain, by creating a sender identity. This involves verifying an email address of your client and then using that Email Address (and the specified name) to send emails from.
This is a great solution for sending email on behalf of your clients, as you will be able to send emails from their domain without the need to have them update their DNS records.
How to create a sender identity
There are 2 ways to create a sender identity: from the dashboard and via the API. First, here are the steps for creating a sender identity from the dashboard.
Add a sender identity from the dashboard
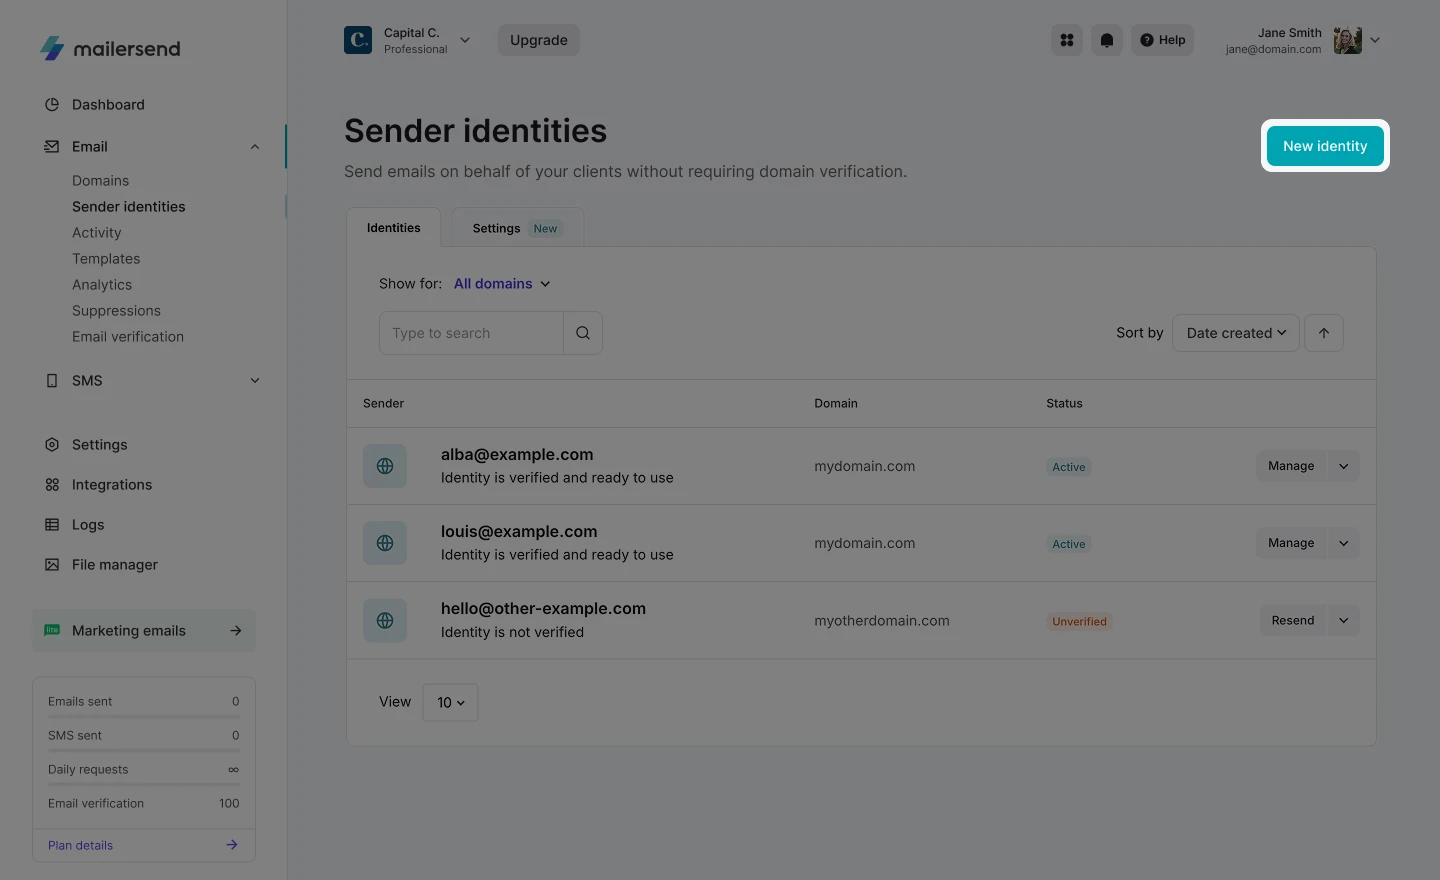
1. From the left-hand navigation menu on the dashboard, click Email and select Sender identities. Then, in the Identities tab, click New identity.
2. In the sender identity builder, select the domain to which you want to add the sender identity and enter the email address and name (optional) of the sender.
Optional settings:
Customize the confirmation link: You can do this by adding a CNAME record to your DNS zone.
To do this, click Customize. You'll be directed to the settings page for the domain you've chosen for your sender identity
Click the DNS records button in the top right, scroll down to Custom DNS records for tracking and make sure this option is enabled
Create a CNAME record in your domain's DNS settings using the values from Customize link names
Use a different reply-to address: Enter the email address and name (optional) that you would like to set as the reply-to address for the sender identity
Add a note to include in the confirmation email: This is an optional message you can add to the email that will be sent to the owner of the email address you are adding as a sender identity. We recommend you add a short message to explain the purpose of the email and why you need them to confirm
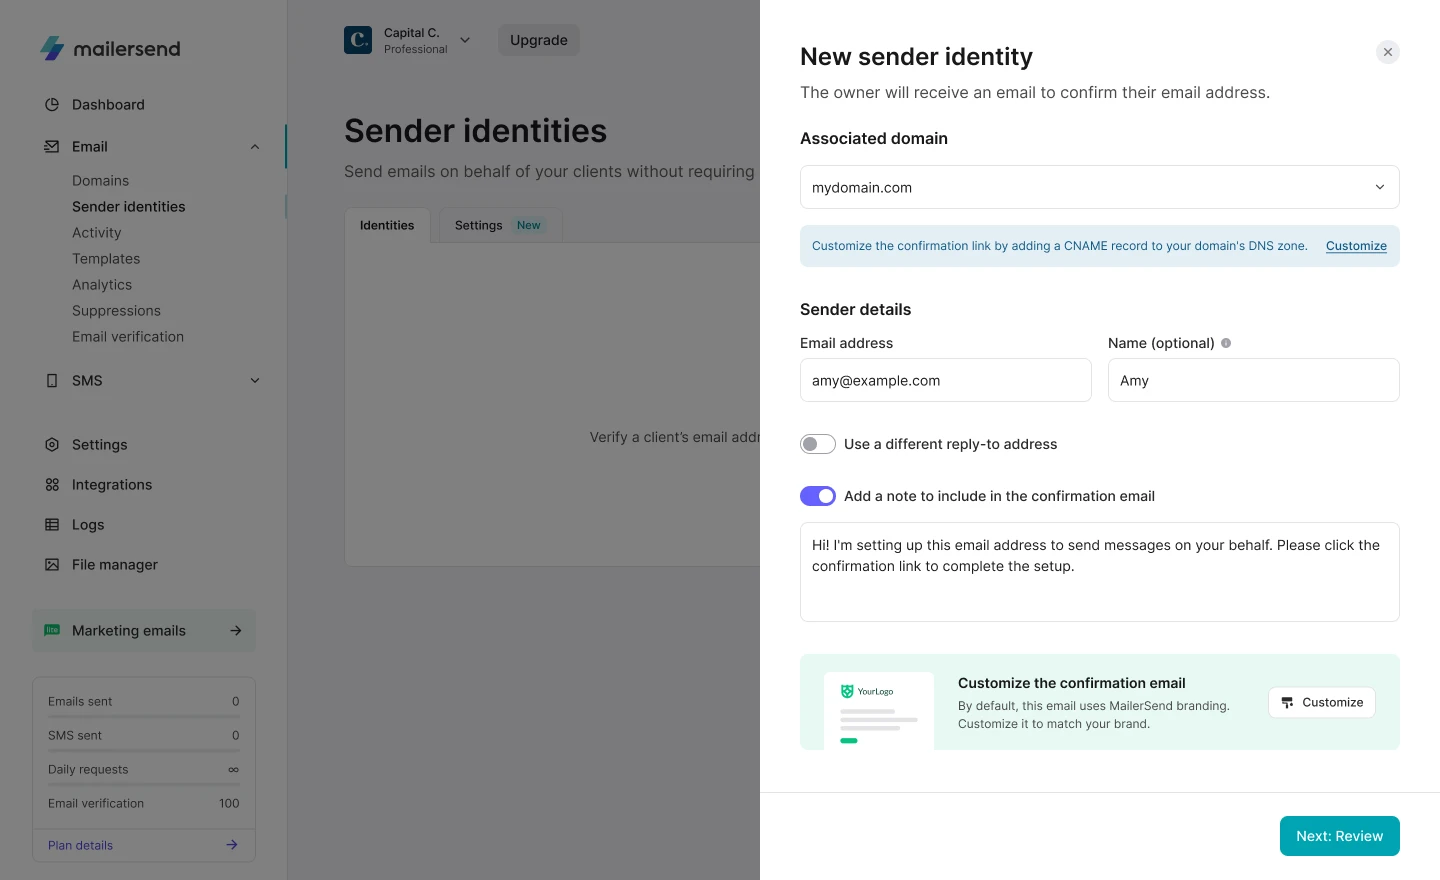
2. Click Next: Review and review the details you've entered for the sender identity.
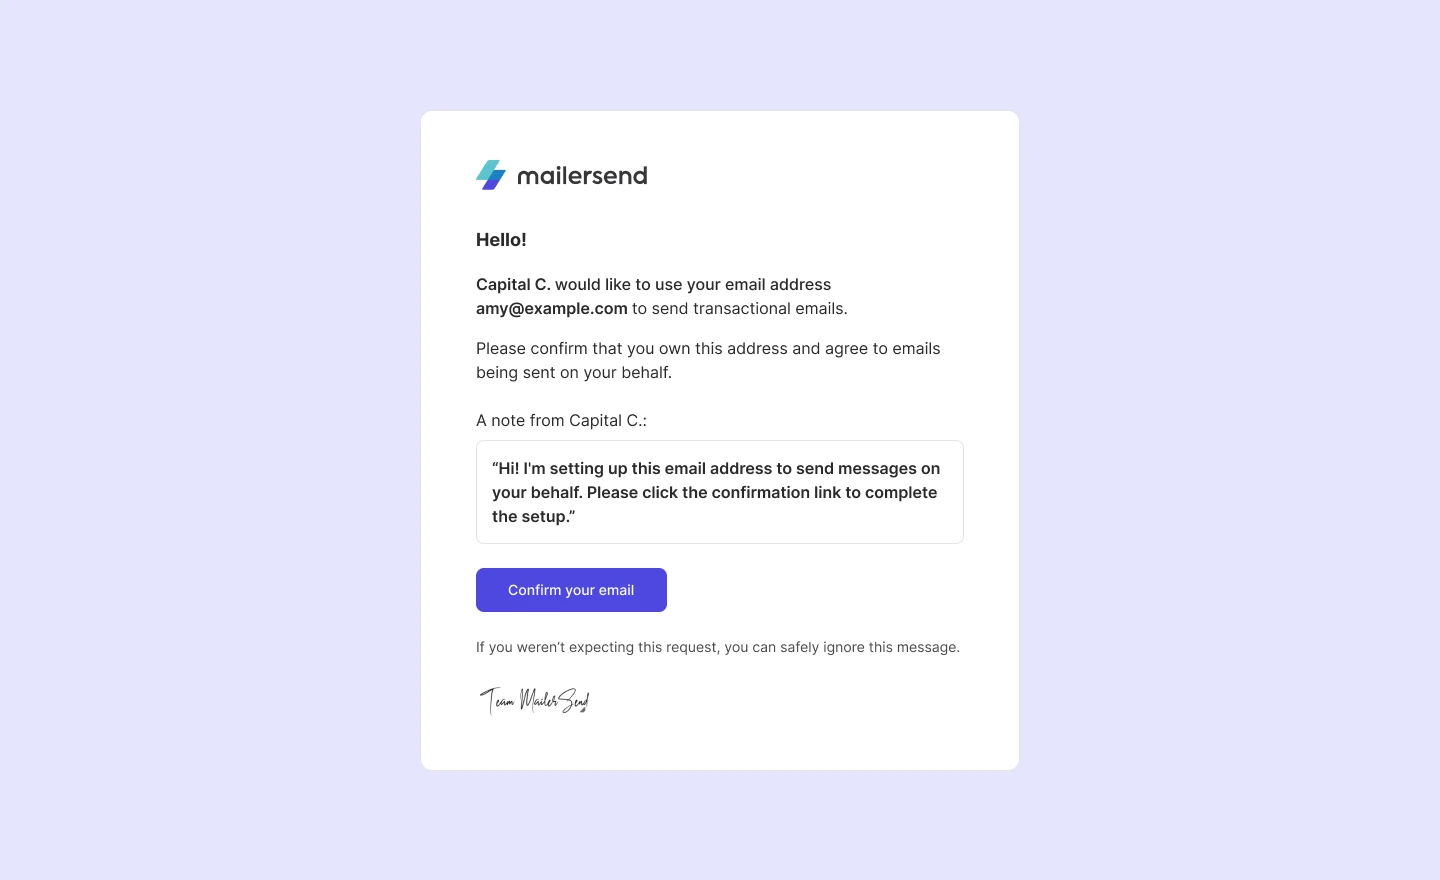
3. If all the details are correct, click Create sender identity. A confirmation email will be sent to the email address you created the identity for so they can verify that they give you permission to send on their behalf. The sender identity will be activated once they verify.
Add a sender identity via the API
You can use the identities endpoint to add and manage sender identities.
POST https://api.mailersend.com/v1/identities{
"domain_id": "7nxe3yjmeq28vp0k",
"email": "pedro@test.com",
"name": "Pedro Doe",
"personal_note": "Hi Pedro, please confirm this email by clicking on the link below.",
"reply_to_name": "Test Doe",
"reply_to_email": "test@test.com",
"add_note": true
}Check out our SDKs for code examples:
Get notified when an email address is verified
You can set up a webhook to be notified when an email address is verified. In this case, the event is sender_identity.verified
To set up a webhook for your domain, see our instructions on adding webhooks.
Limitations
The sender identity must be added to a verified domain
The sender identity must be verified to enable email sending
The sender identity’s domain must be a custom domain and cannot originate from a free email provider
If the sender identity's domain has a DMARC policy set to p=reject, your emails may not be delivered. We recommend adjusting the DMARC policy to p=none or p=quarantine. The latter directs emails to the recipient's junk/spam folder, allowing emails to be accepted by Internet Service Providers (ISPs) but with altered deliverability.
Sender identity settings
In the Settings tab of the Sender identities page, you can edit your confirmation link, email template (Professional plans and above), and sender settings.
Confirmation link
You can customize the confirmation link that will be sent to the owners of the email address you're creating the sender identity for.
From the Settings tab:
1. Click Go to domain and select your domain.
2. Click the DNS records button in the top right, scroll down to Custom DNS records for tracking and make sure this option is enabled.
3. Create a CNAME record in your domain's DNS settings using the values from Customize link names.
Confirmation email
By default, a standard email template is used for the confirmation email sent to the email address owner. Professional plan users and above can customize the template with their own design and message to match their other templates and branding.
Click Customize email and you'll be directed to the template builder. From here, you can adjust:
Logos
Fonts
Background colors
Content styles and colors
Button settings and styles
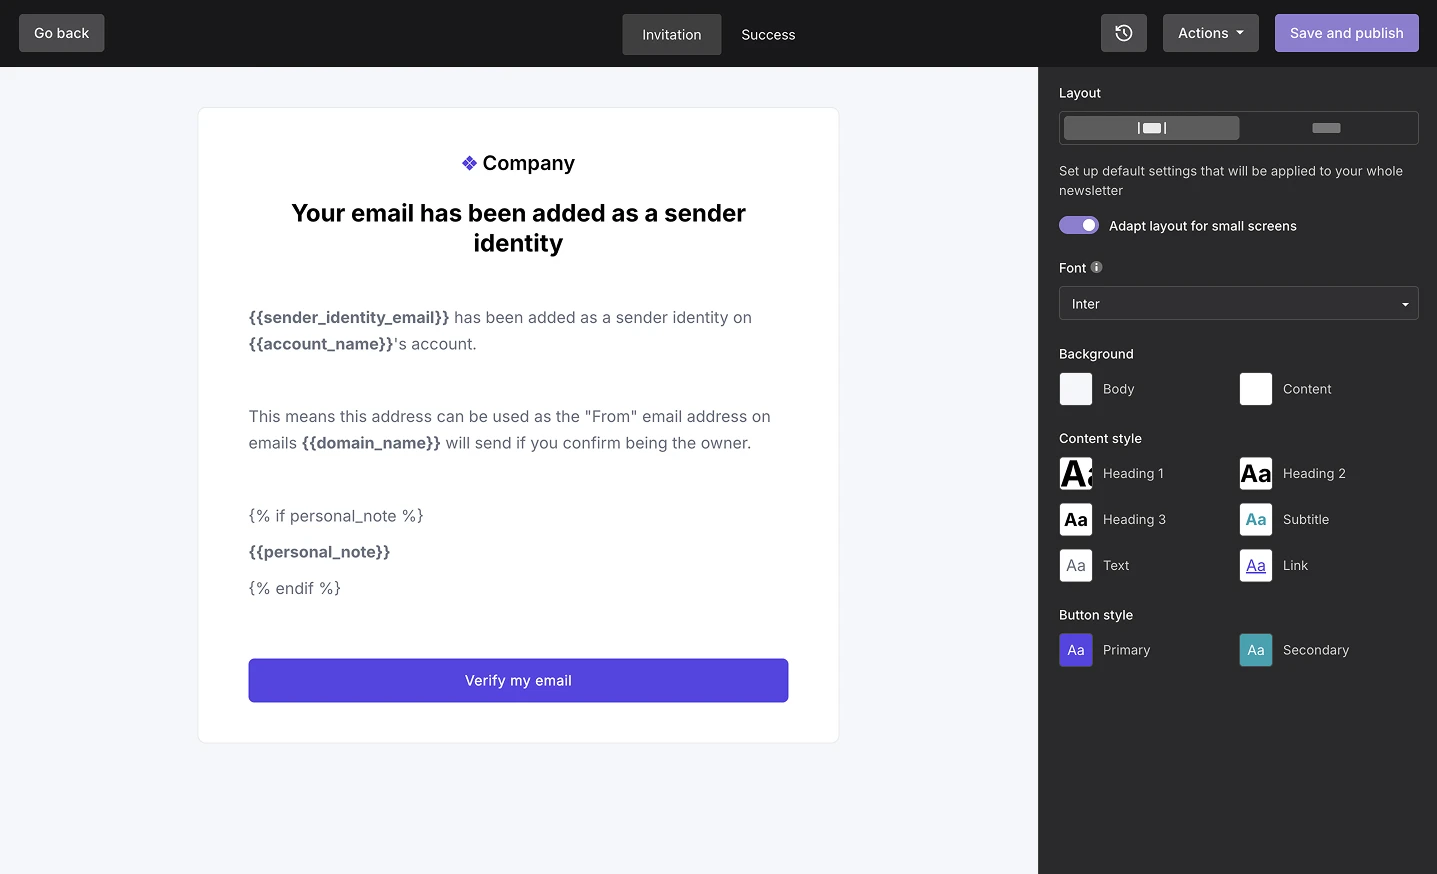
You can also customize the success message that's shown when a sender identity owner confirms their email address.
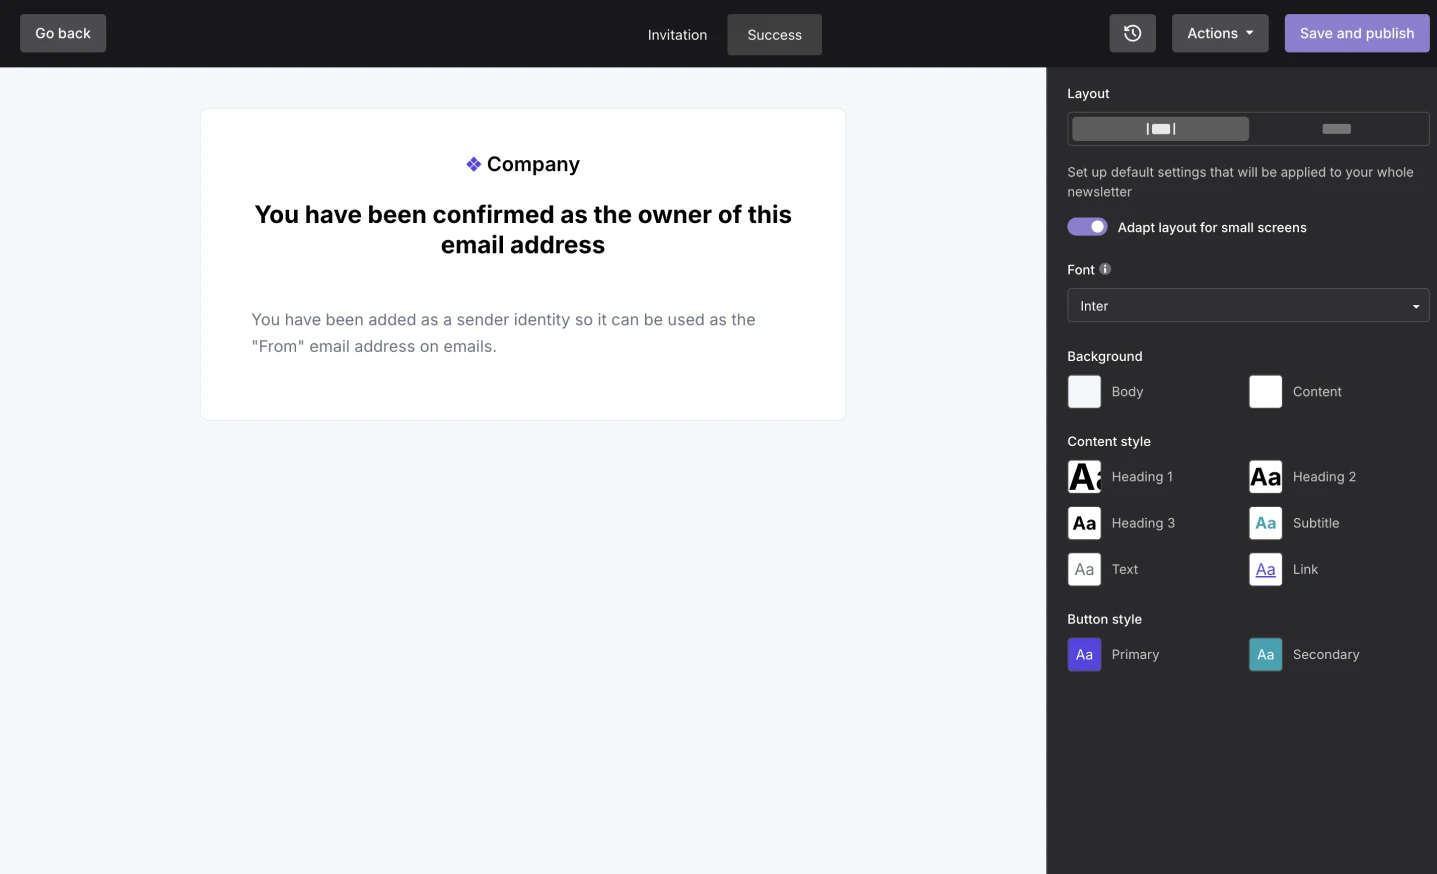
Once you've finished customizing your template, click Save and publish.
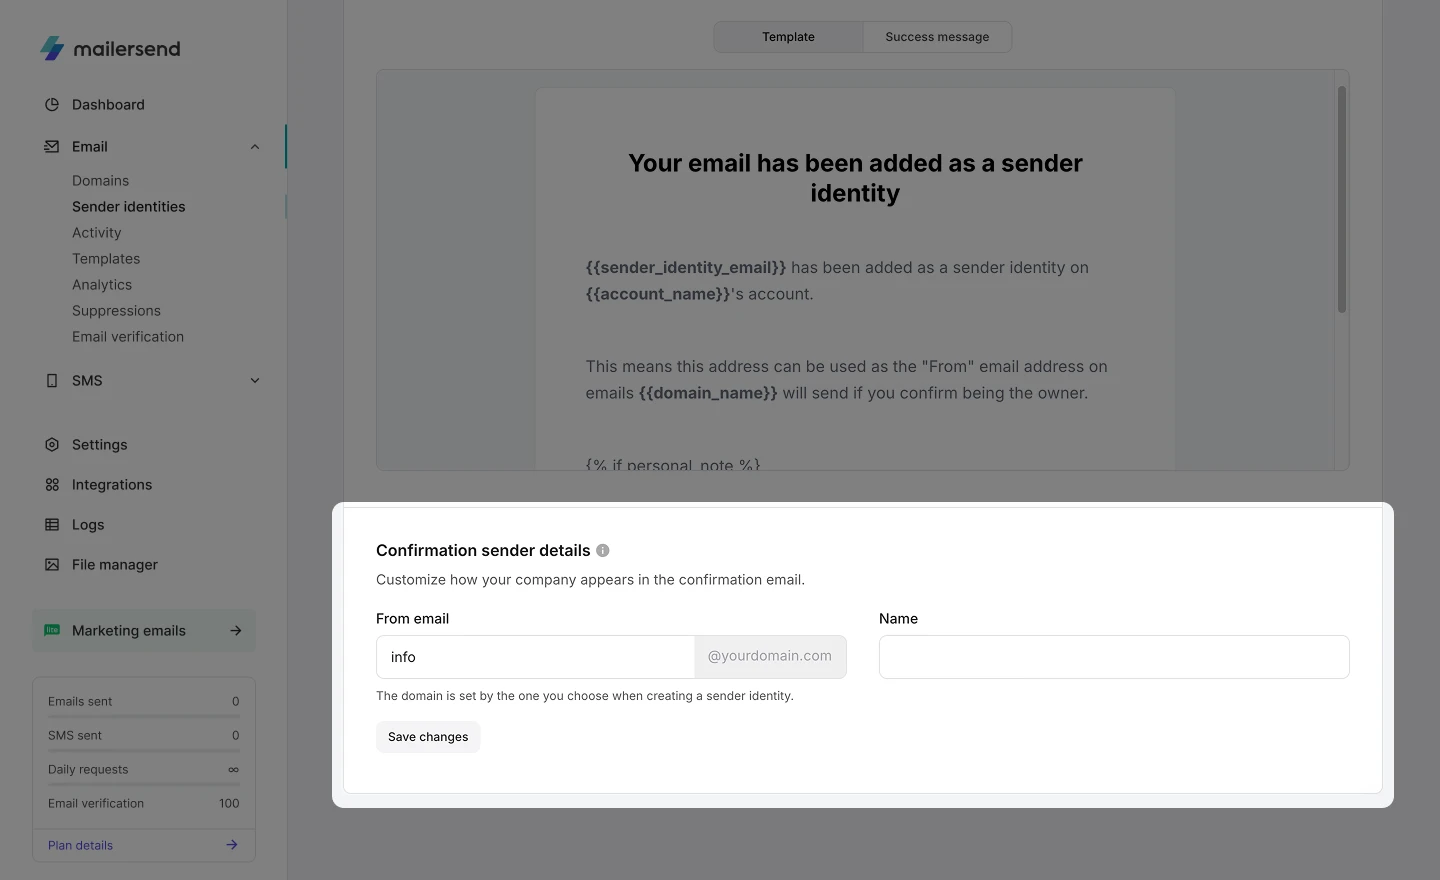
Confirmation sender details
Here you can customize the sender details that appear in the inbox when you send a confirmation email to a sender identity owner.
Simply enter the from email and name you'd like to use and click Save changes.
How to add a sender identity to an email
Once you’ve successfully added a sender identity, you will be able to add it to an API call to send an email. You'll use a POST request to the email endpoint, entering the sender identity email address instead of your domain’s usual from address.
For example, instead of using this call:
{
   "from":{
      "email":"admin@web-agency.com",
      "name":"Amy from Book Shelf"
   },
   "reply_to":{
      "email":"support@web-agency.com",
      "name":"Book Shelf Support"
   },
   "to":[
      {
         "email":"jane.doe@gmail.com"
      }
   ],
   "subject":"Hello from The Book Shelf!",
   "template_id":"pq3enl6zrm42vwrz"
}
You'll use this call:
{
   "from":{
      "email":"amy@bookshelf.com",
      "name":"Amy from Book Shelf"
   },
   "reply_to":{
      "email":"support@bookshelf.com",
      "name":"Book Shelf Support"
   },
   "to":[
      {
         "email":"john@mailersend.com"
      }
   ],
   "subject":"Hello from The Book Shelf!",
   "template_id":"pq3enl6zrm42vwrz"
}
All messages, activity, recipients and statistics will be shown under the web-agency.com reports. For example, if you GET a list of activities with the verified domain ID as a parameter, emails sent with that sender identity will be shown.
Need more info?
Feel free to reach out to support@mailersend.com. A member of our support team will gladly assist you.