Sending domains
At MailerSend, you can send transactional emails using your own domain name. A sending domain is your unique identifier in the MailerSend application.
To start sending emails from your main, you need to add and verify it. You can find instructions in our help article How to add and verify your sending domain.
Once your domain is verified, you can start sending emails! Your domain name is unique to your account, and there can only be one account using the same domain name.
You can have multiple domains under your account, and each domain can have different settings. For example, you can set one domain to track opens and unsubscribes, while another domain uses different settings.
How to manage domains
All domains that belong to your account are listed under the Domains page. You can access this page from the left-hand navigation menu. Once you’re there, select the domain you want to see or change settings for by clicking Manage.
Statistics
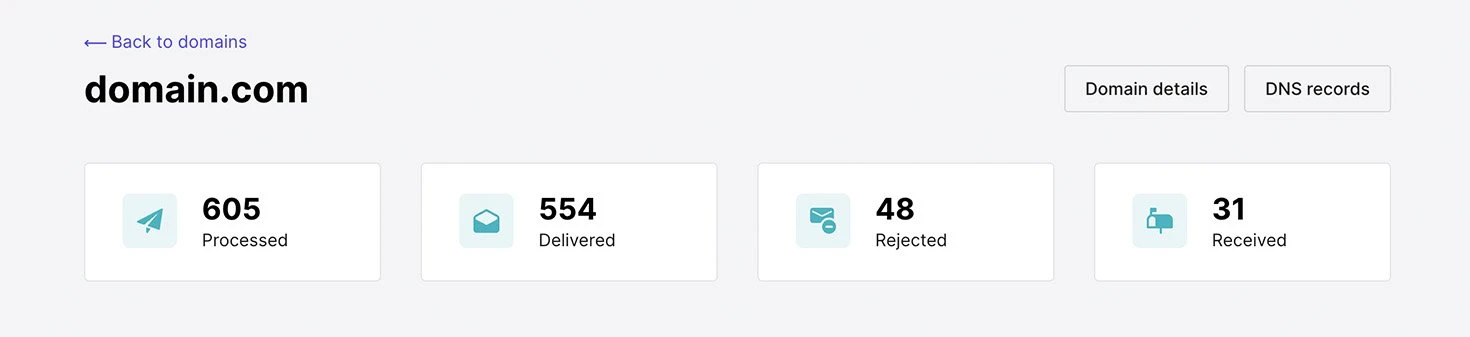
When you select a domain, the first section you see is the basic statistics. Here you can check how many emails have been processed, how many were successfully delivered, how many were rejected and how many have been received.
Processed defines the number of emails that you tried to send through the MailerSend email API endpoint.
Delivered defines the number of emails that went through the MailerSend email API endpoint and have been successfully delivered to the provided recipients.
Rejected defines the number of emails that didn’t go through. Usually, these are bounces or suppressed email addresses. Please read more about suppressed email addresses in this article.
Received defines the number of emails received if an inbound route has been added.
API tokens
API tokens are used for authentication when sending emails or accessing server-specific endpoints. They’re the preferred alternative to using a username and password, as you can revoke an API token at any time and use different permissions.
Tokens are generated under your domains, but you can access other domains using the same token belonging to your account too.
Read more about API tokens in this article.
SMTP
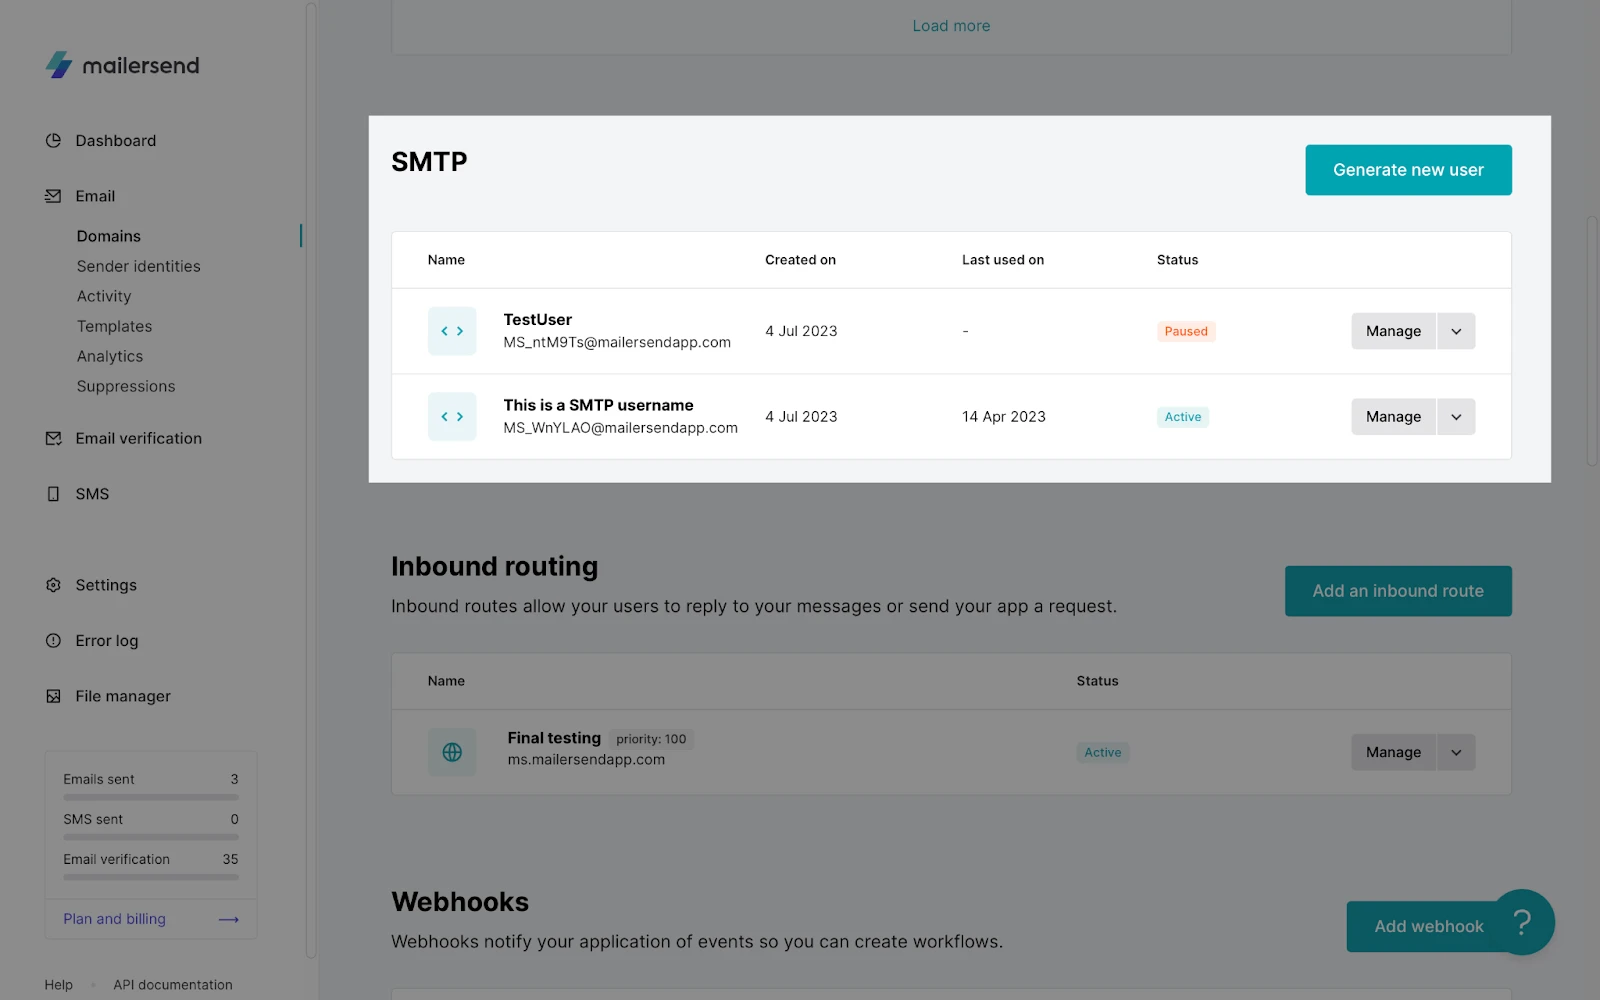
An SMTP user is a unique identifier that you use to log in to an SMTP server and authenticate yourself when you send an email. The SMTP server uses your username and password to verify that you are authorized to send emails from your domain.
To create a new user:
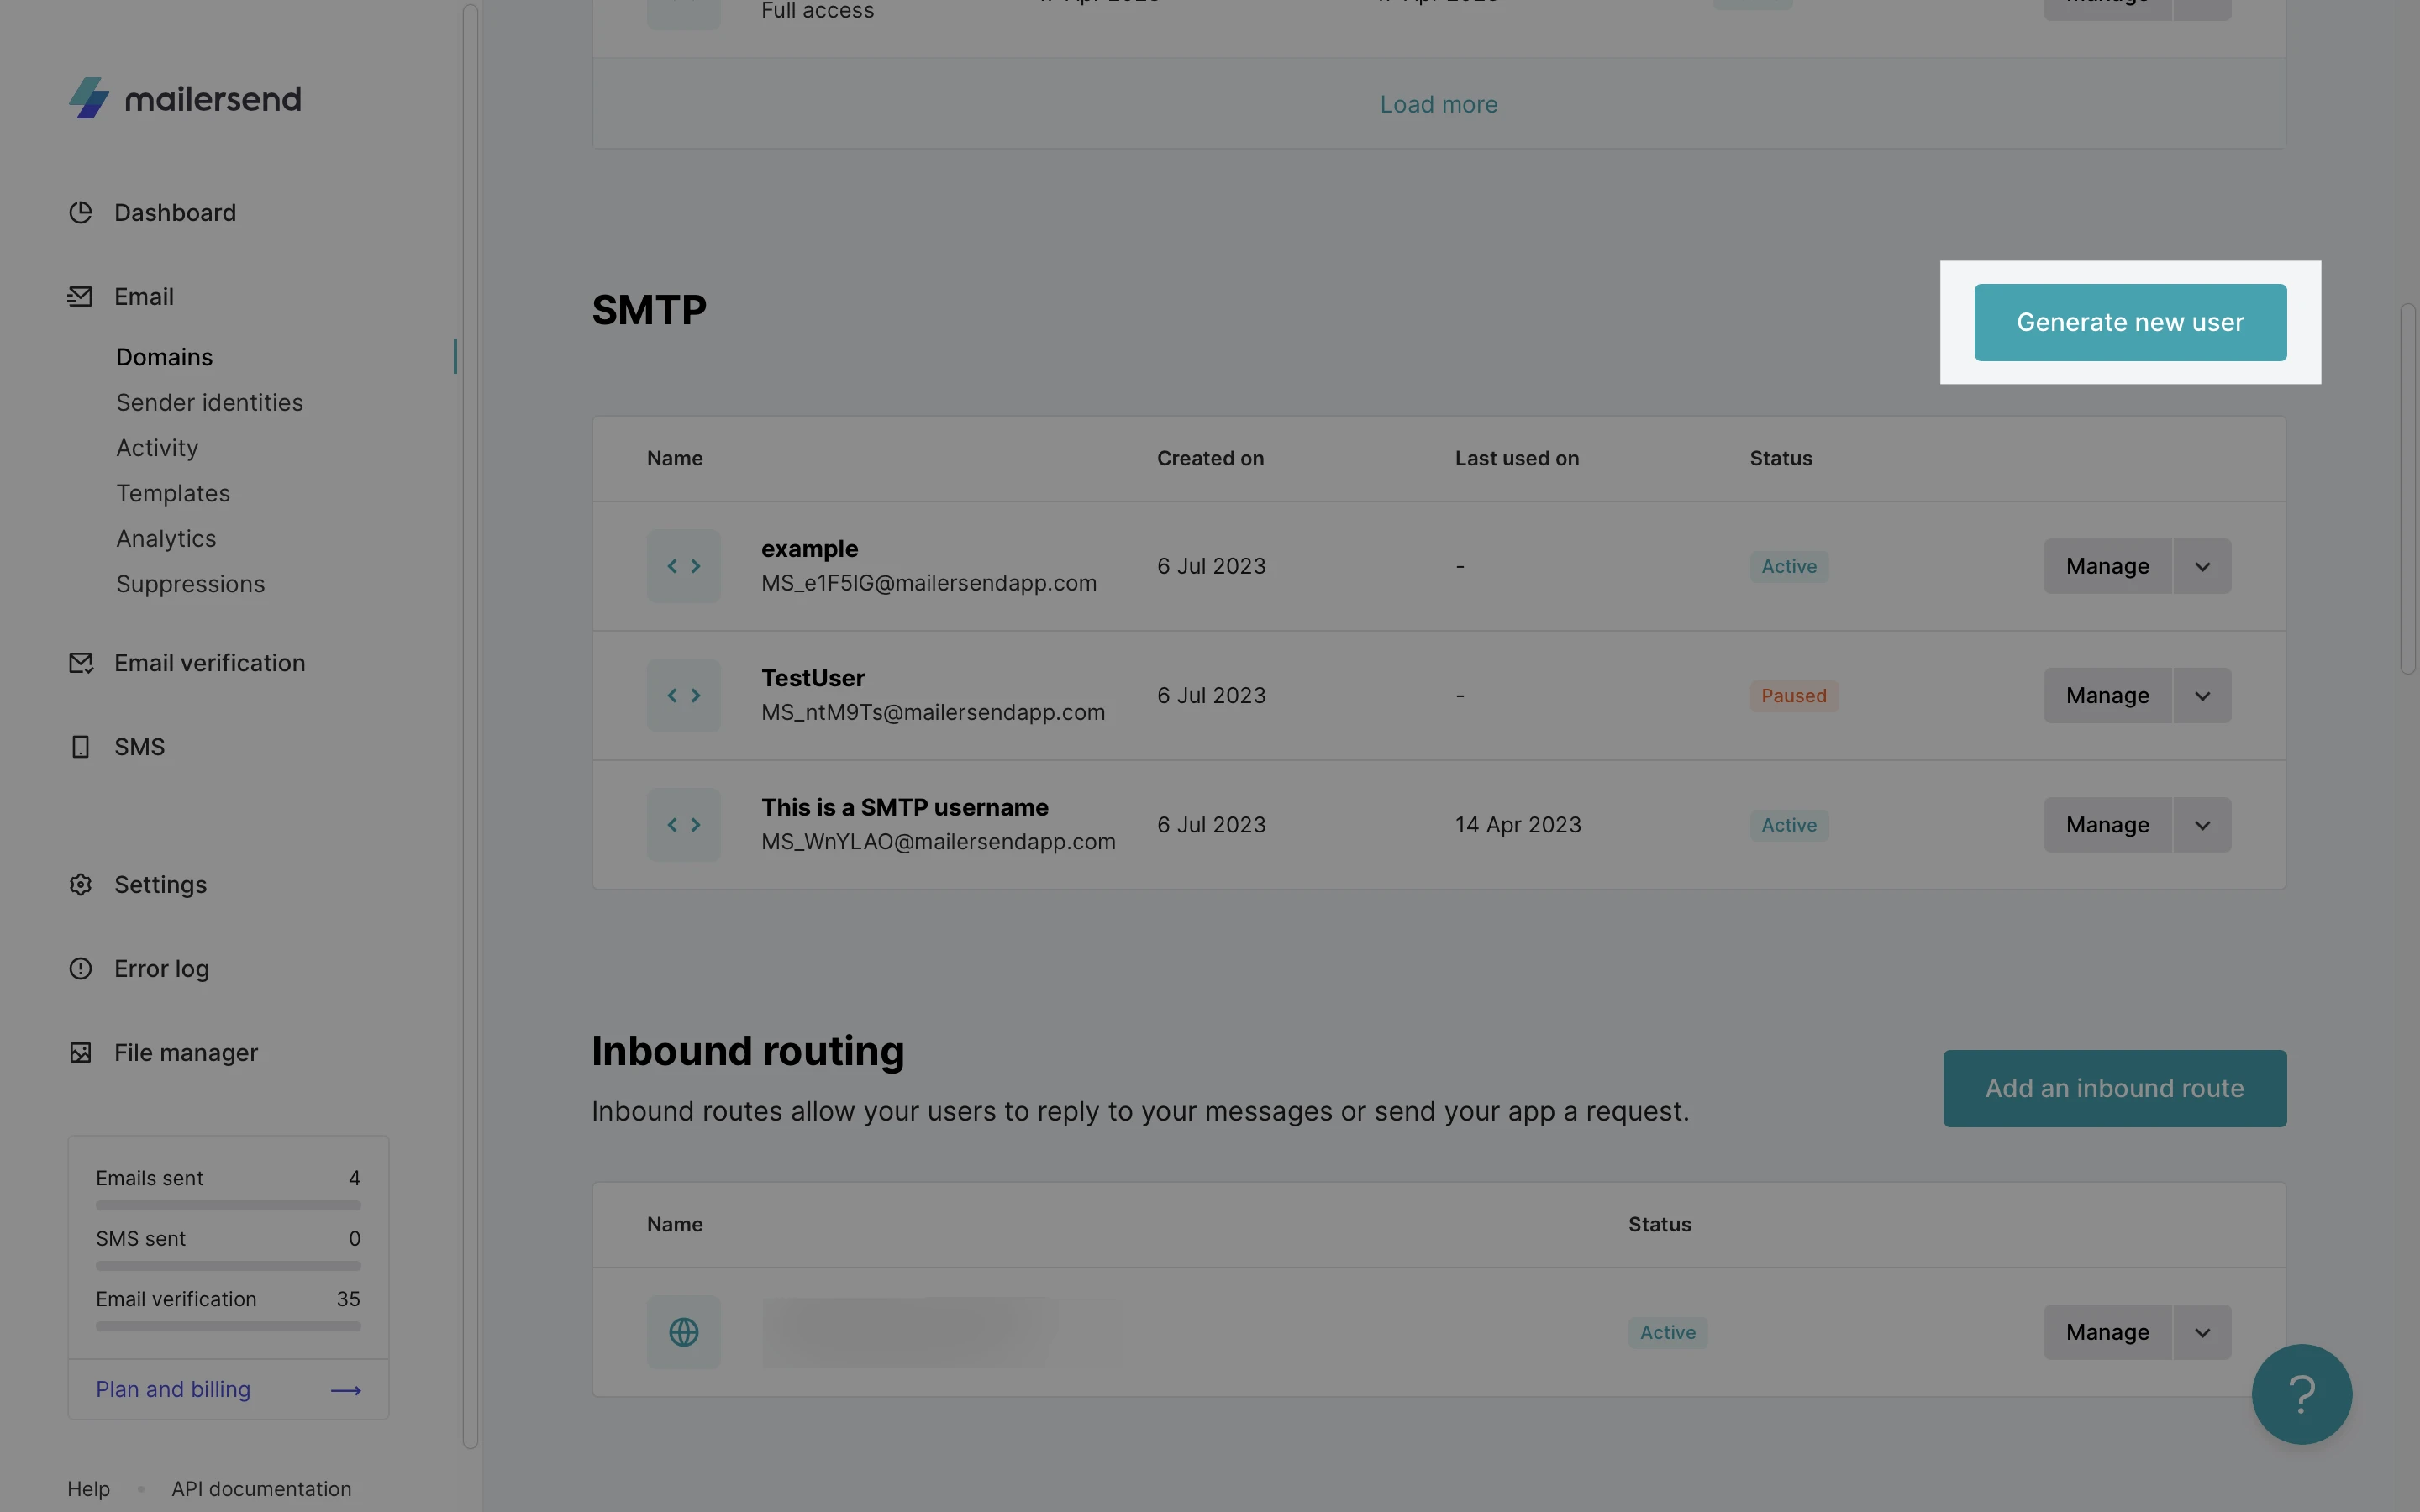
Click Generate new user.
Enter the SMTP name.
Click Save user.
By enabling SMTP, the following information will be automatically generated:
Server (SMTP host)
Port
Username
Password
Click the arrow next to Manage to Pause or Delete a user.

Pausing the user will prevent the SMTP credentials from being able to send emails. This is a temporary action that can be used to prevent unwanted emails from being sent.
Deleting a user will remove the SMTP credentials from your account and they will no longer be able to be used to send emails. This is a permanent action that should only be used if you no longer need the user.
Tracking details
When sending emails with MailerSend, you can enable tracking for a specific domain. This feature is helpful when you want to know how your recipients interact with your emails.
You can choose between open, click, unsubscribe and content tracking.
Read more about domain tracking options in this article.
Sending instructions
On this page you can find details on how to start sending emails from your domain. We’ve included the most important examples to give you an idea.
If you want to know more about how to start sending emails through MailerSend, please read this article.
Sending emails from a subdomain
You can send emails from any subdomain associated with a verified domain, without having to verify the subdomain. To do this, simply enter the email address belonging to the subdomain in the From field of the email.
Emails sent from a subdomain will be signed with the associated top-level domain (TLD), meaning that all analytics will fall under that TLD. If you would like dedicated statistics for a specific subdomain, you will need to add the subdomain and verify it.
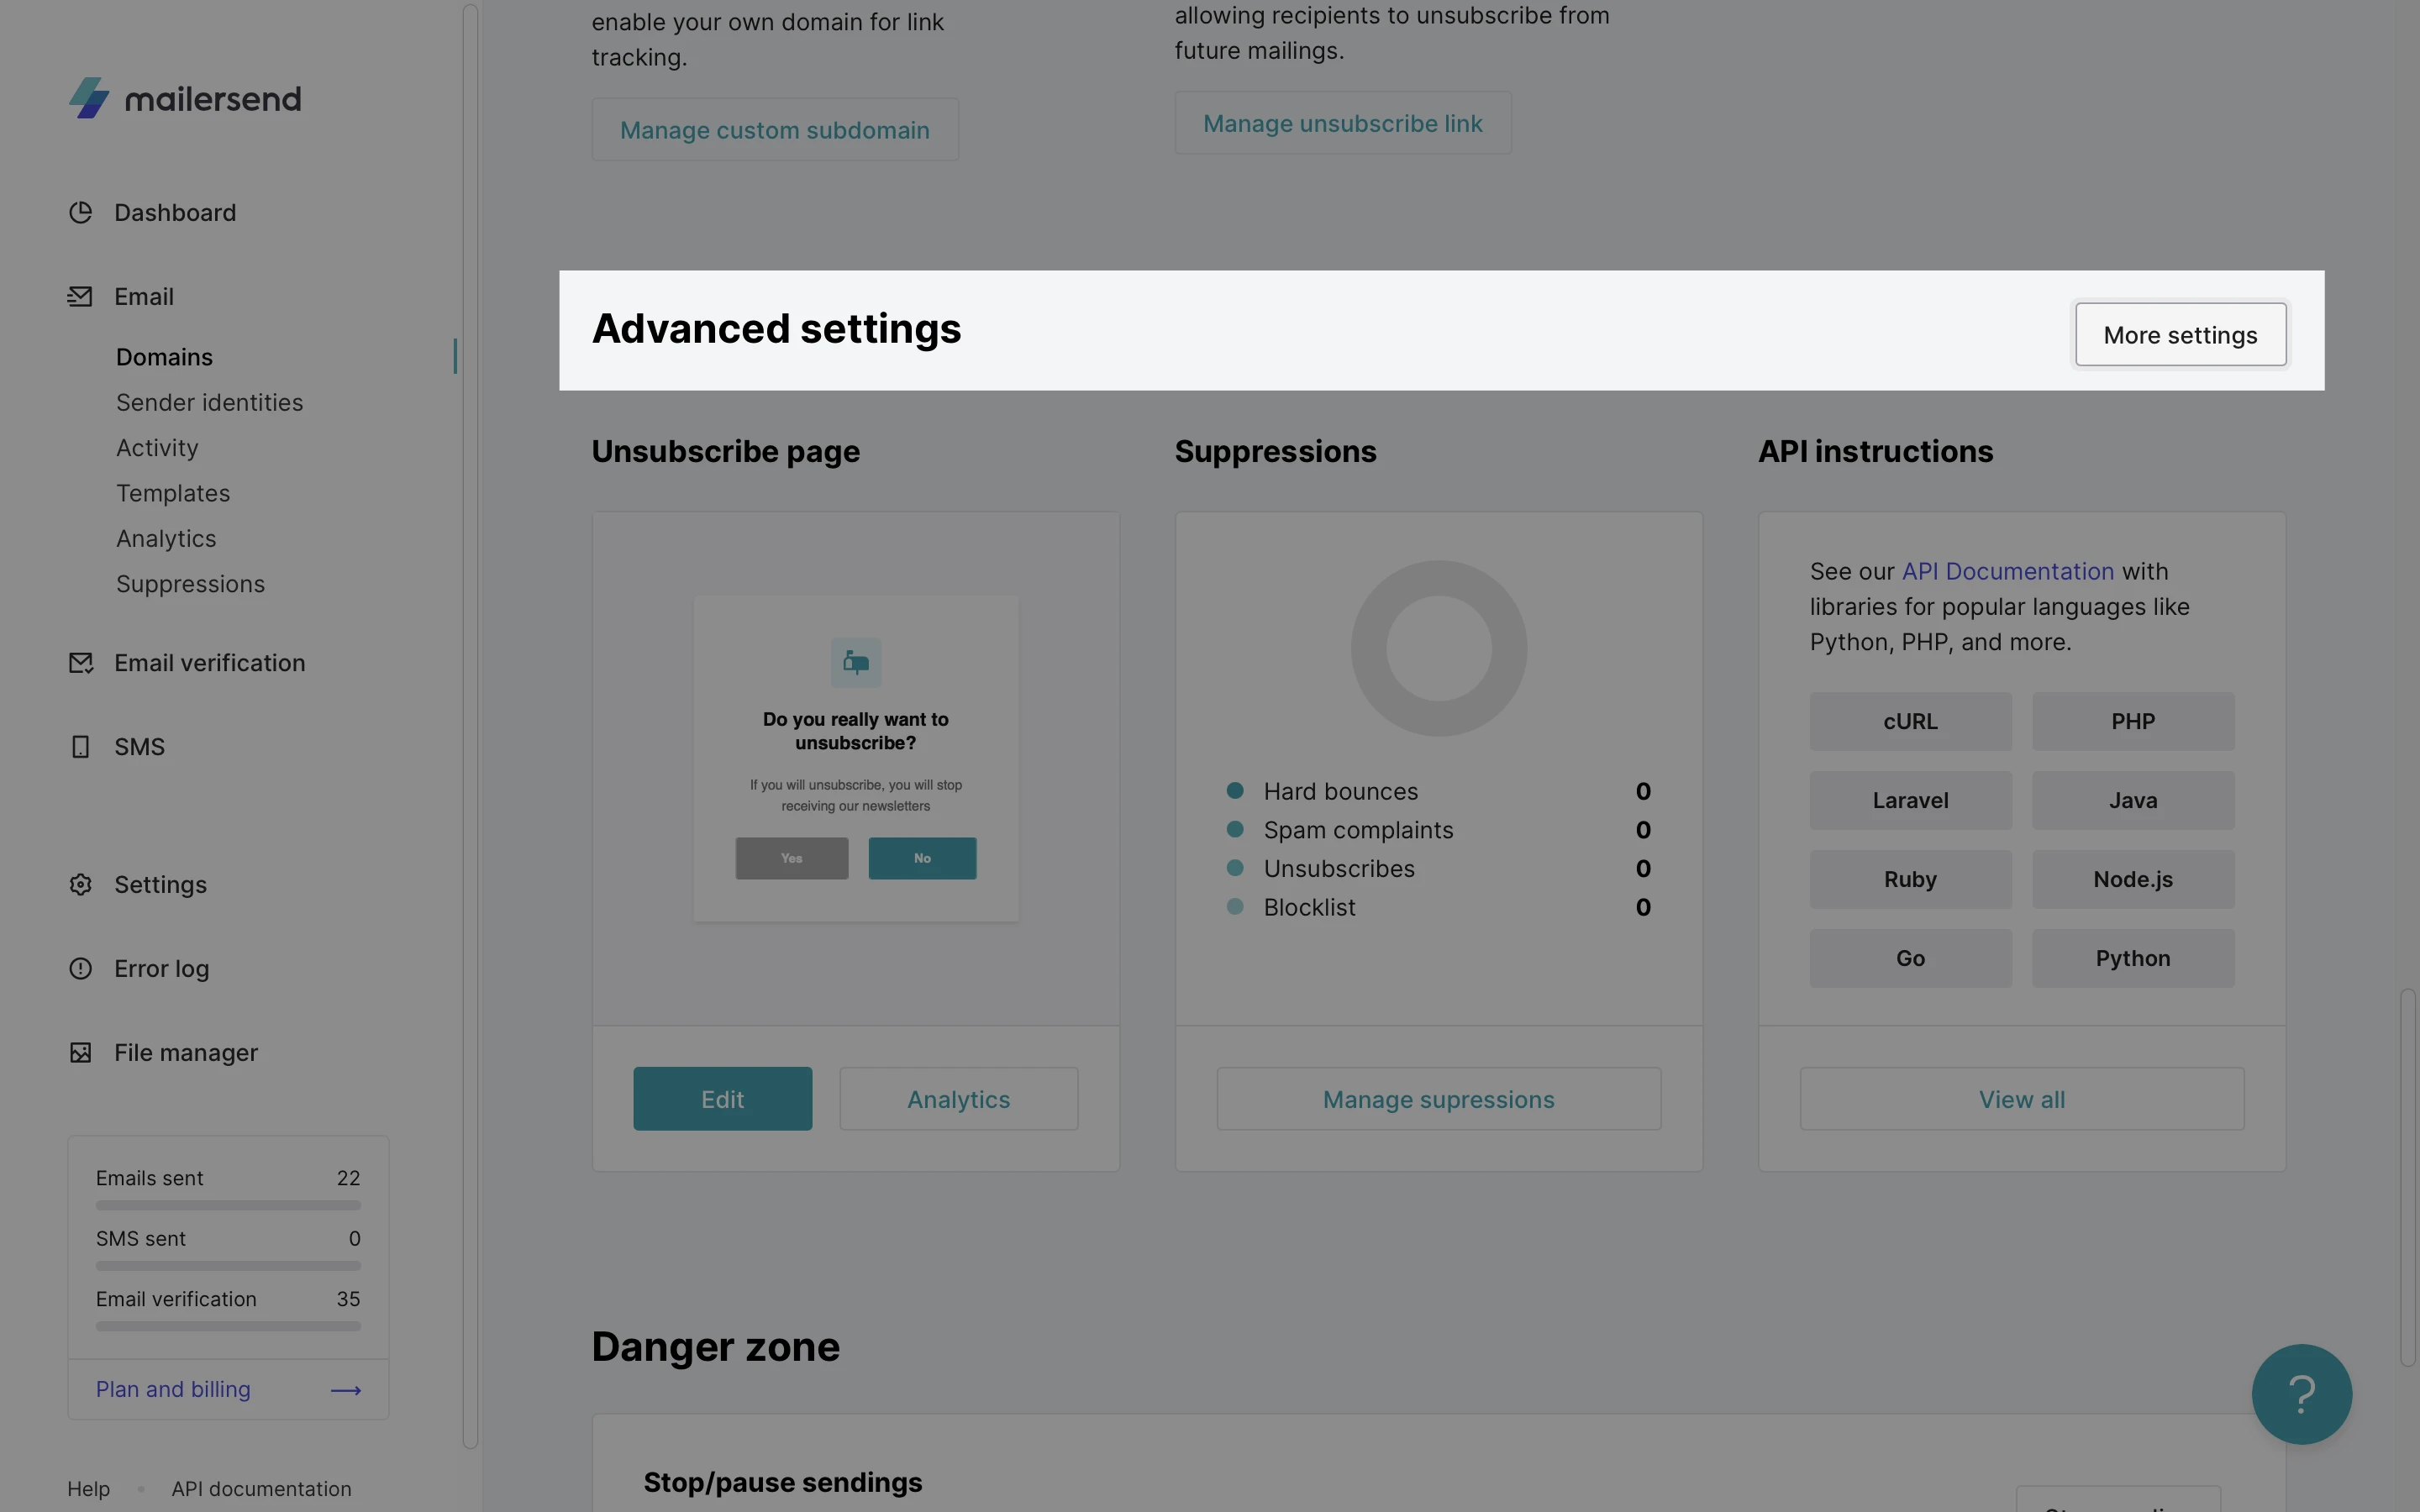
Advanced settings
Under the advanced settings you can see all additional things that you can do with your domain, such as manage the unsubscribe page and suppressions.
Unsubscribe page
When using MailerSend, you can enable unsubscribe tracking for your domain. Please refer to this article to read more about tracking details (including unsubscribe tracking).
When unsubscribe tracking is enabled, you might want to control how the unsubscribe page looks and works. In this section, you can edit the design of your unsubscribe page.
Suppressions
Suppressions is the list of email addresses that will be rejected during the sending process. In this section, you can see how many emails have been rejected during your sendings.
Read more about suppressions here.
More advanced settings
To discover additional settings, click More settings.
Add precedence bulk header
Starter users can enable the “Precedence: Bulk” header for any of their domains. Doing so will insert a header into all emails sent via the API and the SMTP relay to inform Gmail that you intended to send a bulk email. This ensures that your email avoids the spam folder, and Gmail doesn’t return any auto-responder messages to your inbox.
To enable the “Precedence: Bulk” header via the UI, toggle Add precedence bulk header ON.
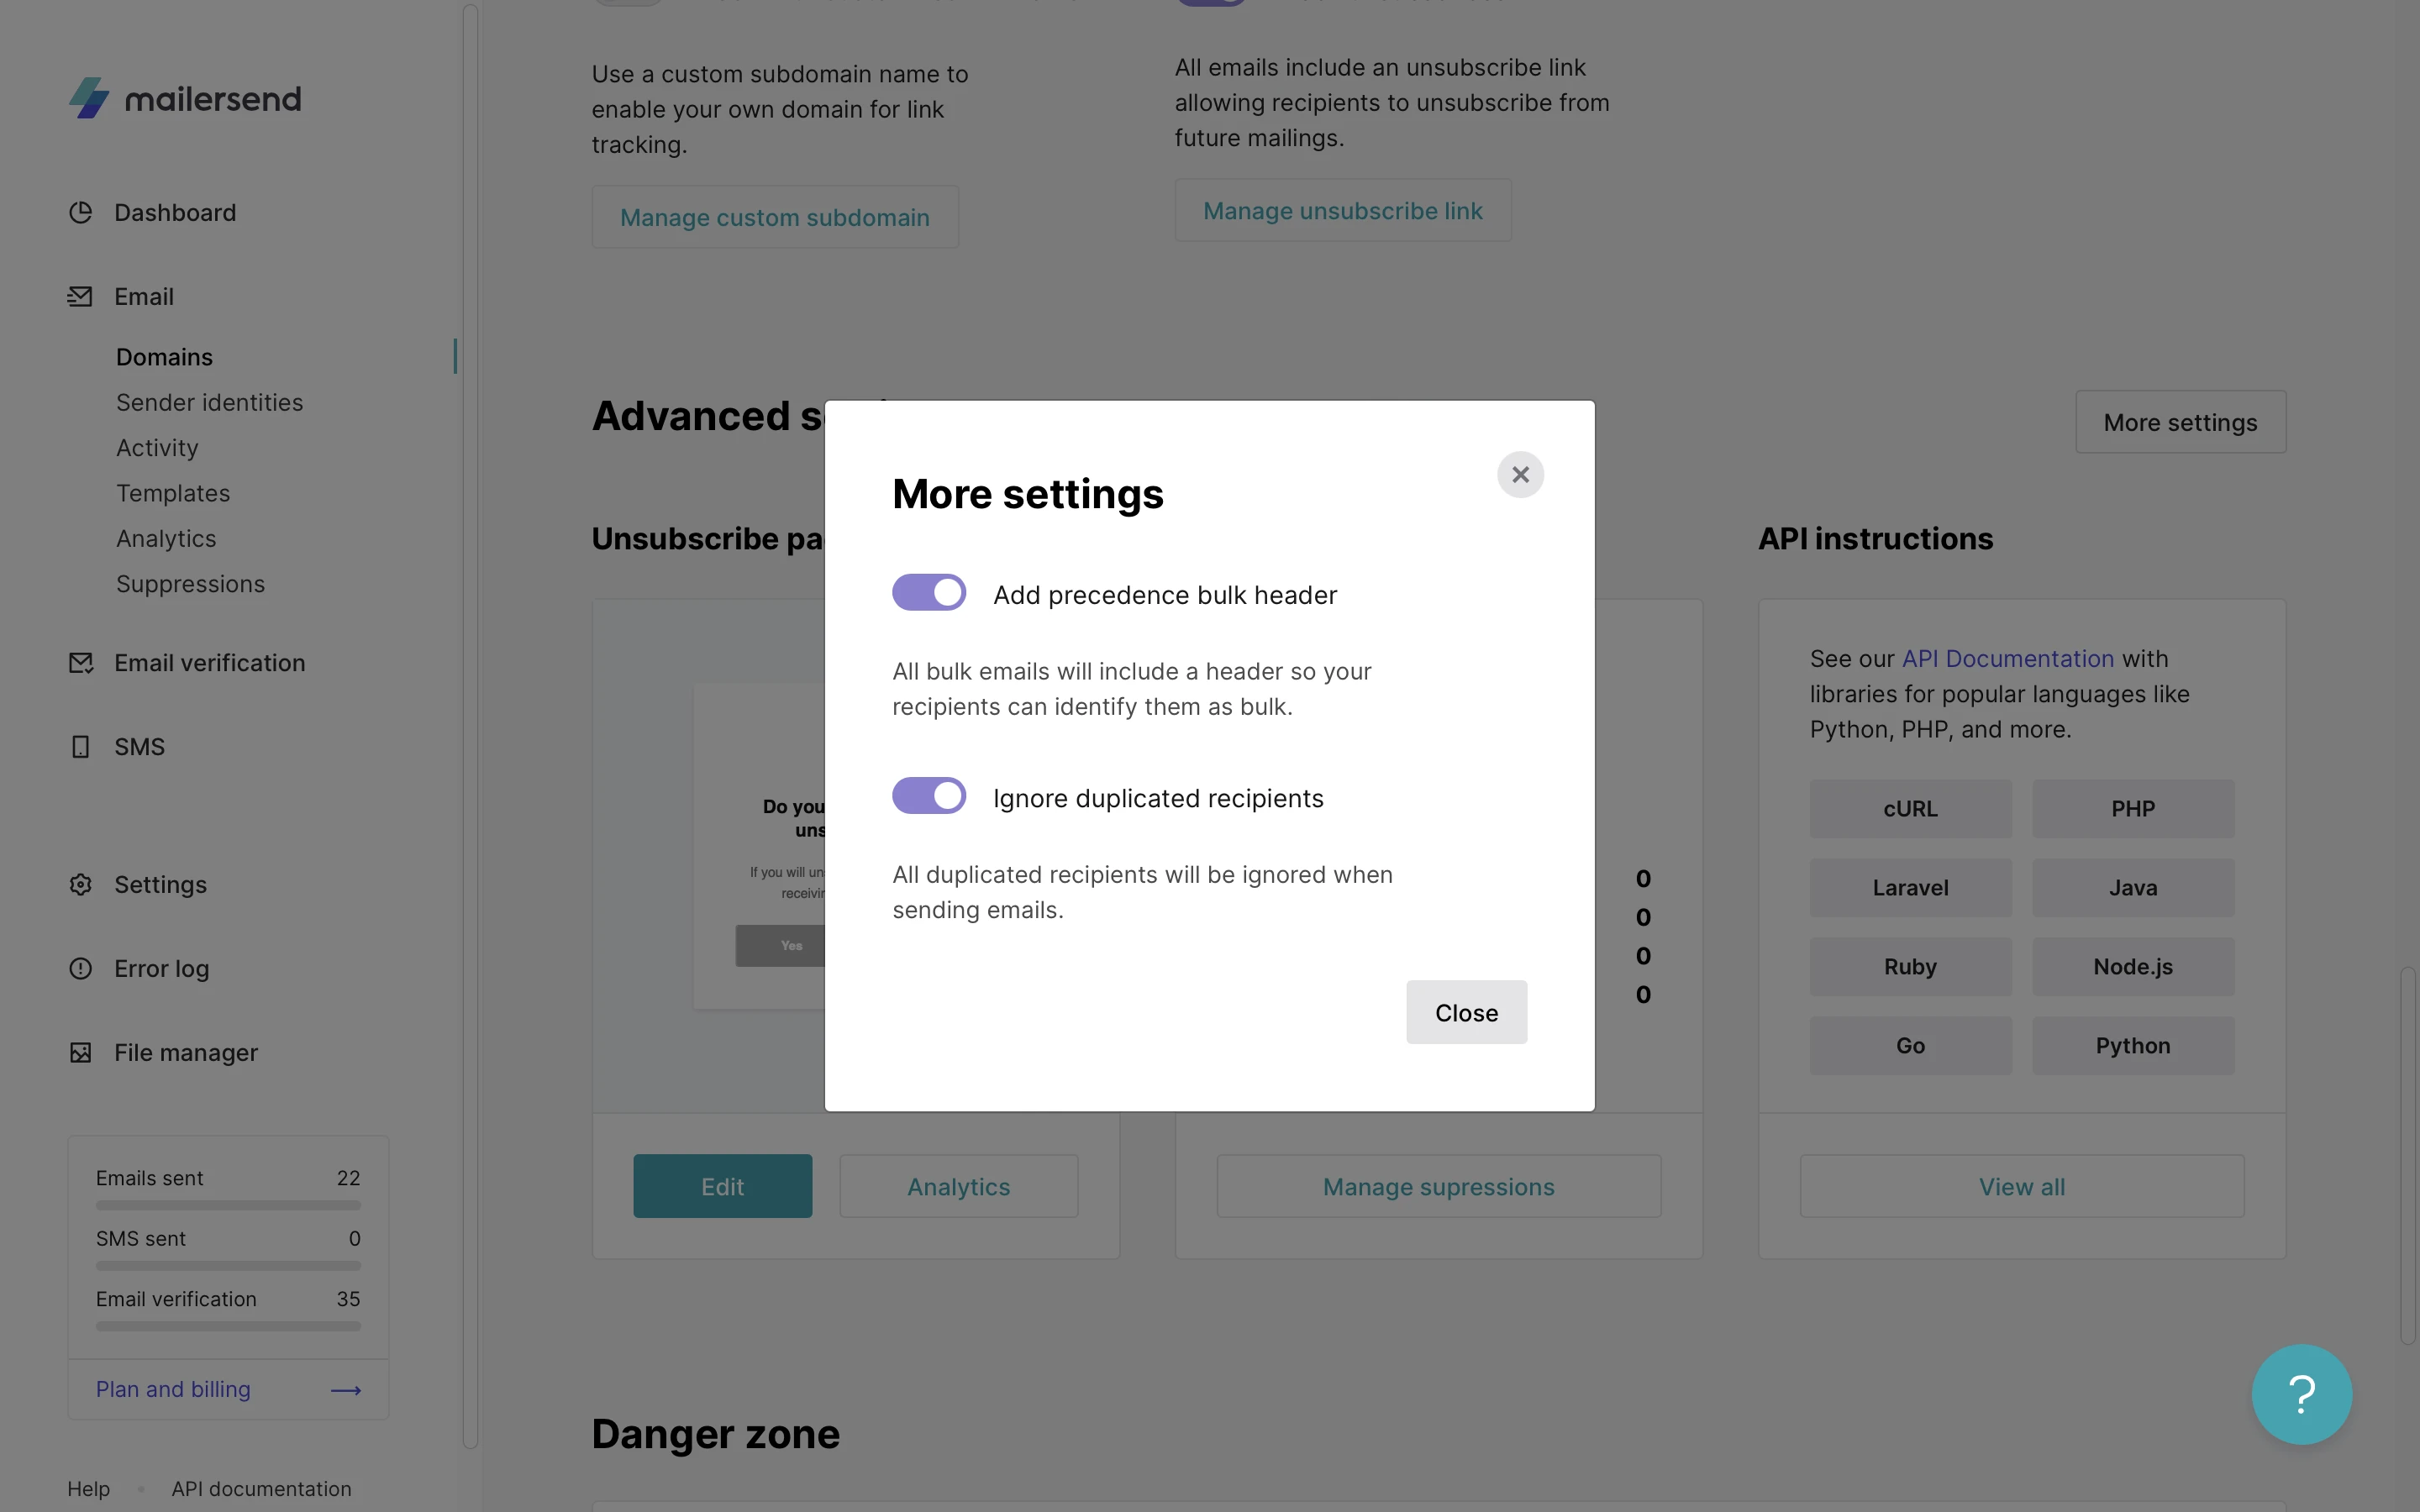
Ignore duplicated recipients
Available to all plan levels, this setting will prevent the system from sending emails to the same email address multiple times for a single email send request. By default, this setting will be turned off.
You can also enable the header via the “Update domain settings” endpoint.
To do so, use the following PUT request:
PUT https://api.mailersend.com/v1/domains/{domain_id}/settingsAnd use the “precedence_bulk” parameter to enable the header.
Read more about the domain settings endpoint.
Danger zone
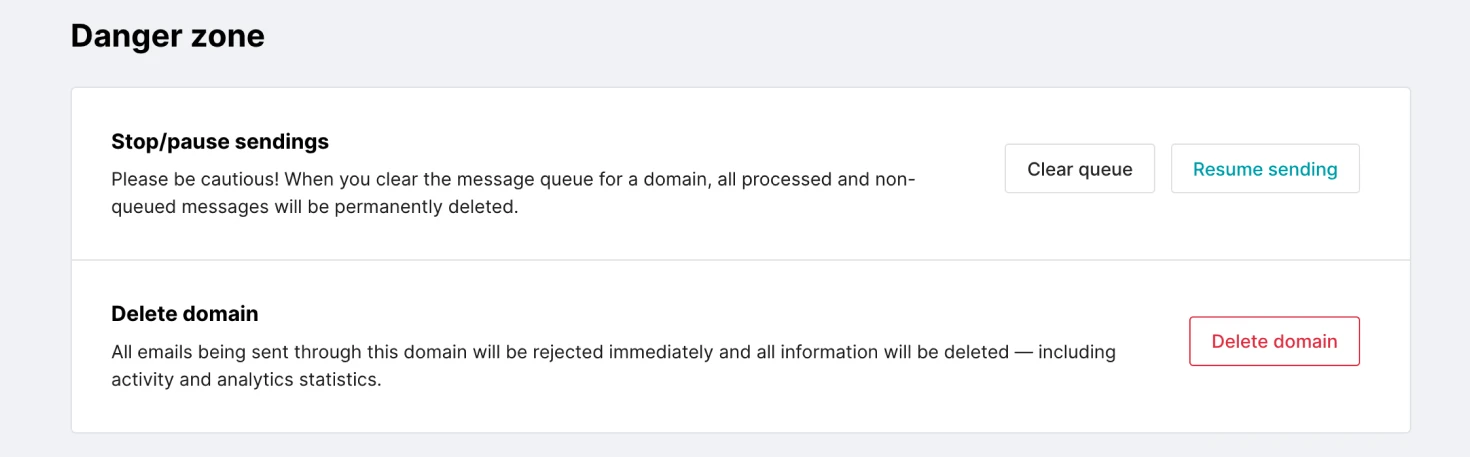
We call this section a danger zone for a reason, so be careful. In this section, you can stop sendings and delete domains. These actions can directly affect your sendings.
How to stop sendings
You can pause sendings at any time. In order to do that, you need to click on the Stop sending button. Once stopped, our servers will accept your API requests but none of the emails will be delivered.
Once sendings are paused, MailerSend accepts all API requests and stores them into a queue. While requests are stored, two buttons are available: Resume sending and Clear queue.
If you choose to Resume sending, all API requests that are stored will be processed. This means that MailerSend will send all the emails that didn’t go out while sendings were stopped. The queue cannot be longer than 7 days, so any email added to the queue older than 7 days will be deleted.
If there is a need to not send emails stored in the queue, you need to click on the Clear queue button and then click on the Resume sending button. This will clear all emails that were collected while sendings were stopped.
How to delete a domain
If you decide to delete a domain, you can do this here. After selecting the domain to delete, a confirmation message will appear where you need to agree to the deletion. This action cannot be undone!
All emails that are sent through the domain will be rejected immediately and all information will be deleted, including activity and analytics.
Need more info?
Please feel free to contact us at support@mailersend.com and a member of our support team will gladly assist you.