Managing API tokens
API tokens are used for authentication when sending emails or accessing server-specific endpoints. They’re the preferred alternative to using a username and password, as you can revoke an API token at any time and use different permissions.
MailerSend API tokens are not restricted to specific domains and can be used across all or multiple domains. You can view and manage all API tokens from the API tokens page, which is accessible from the Integrations page.
Creating API tokens
To generate an API token:
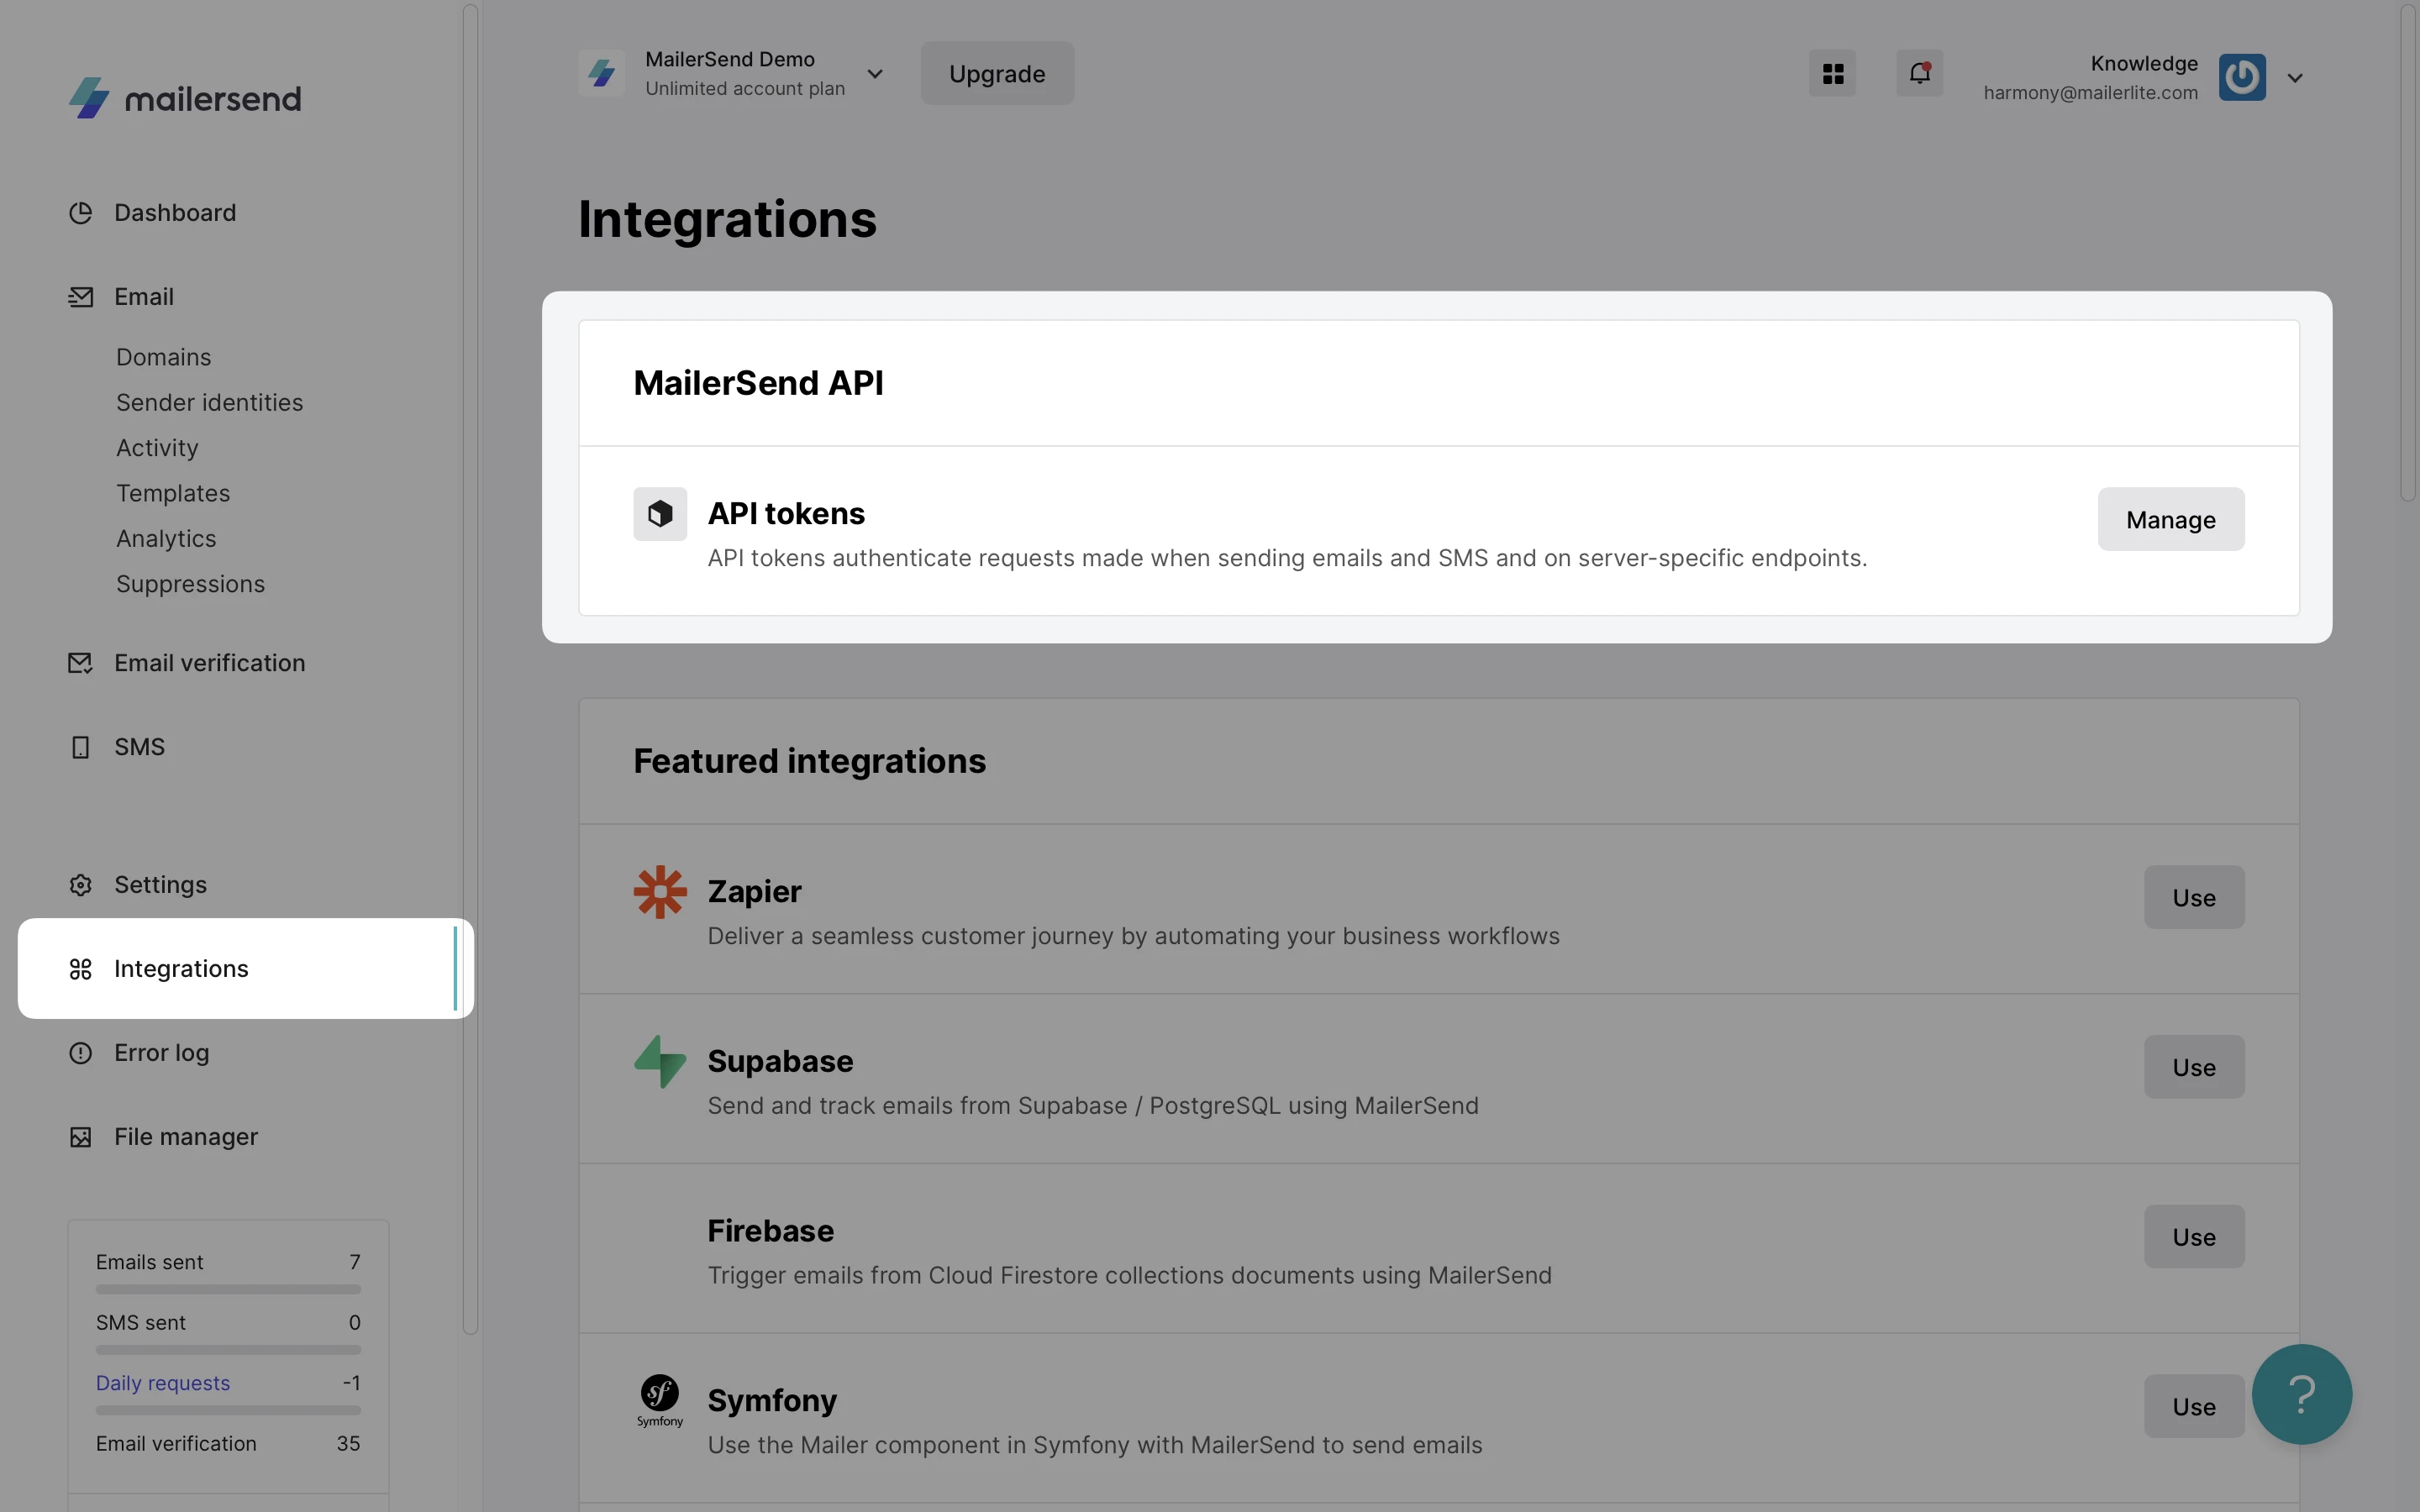
Go to Integrations.
Locate MailerSend API and click Manage.

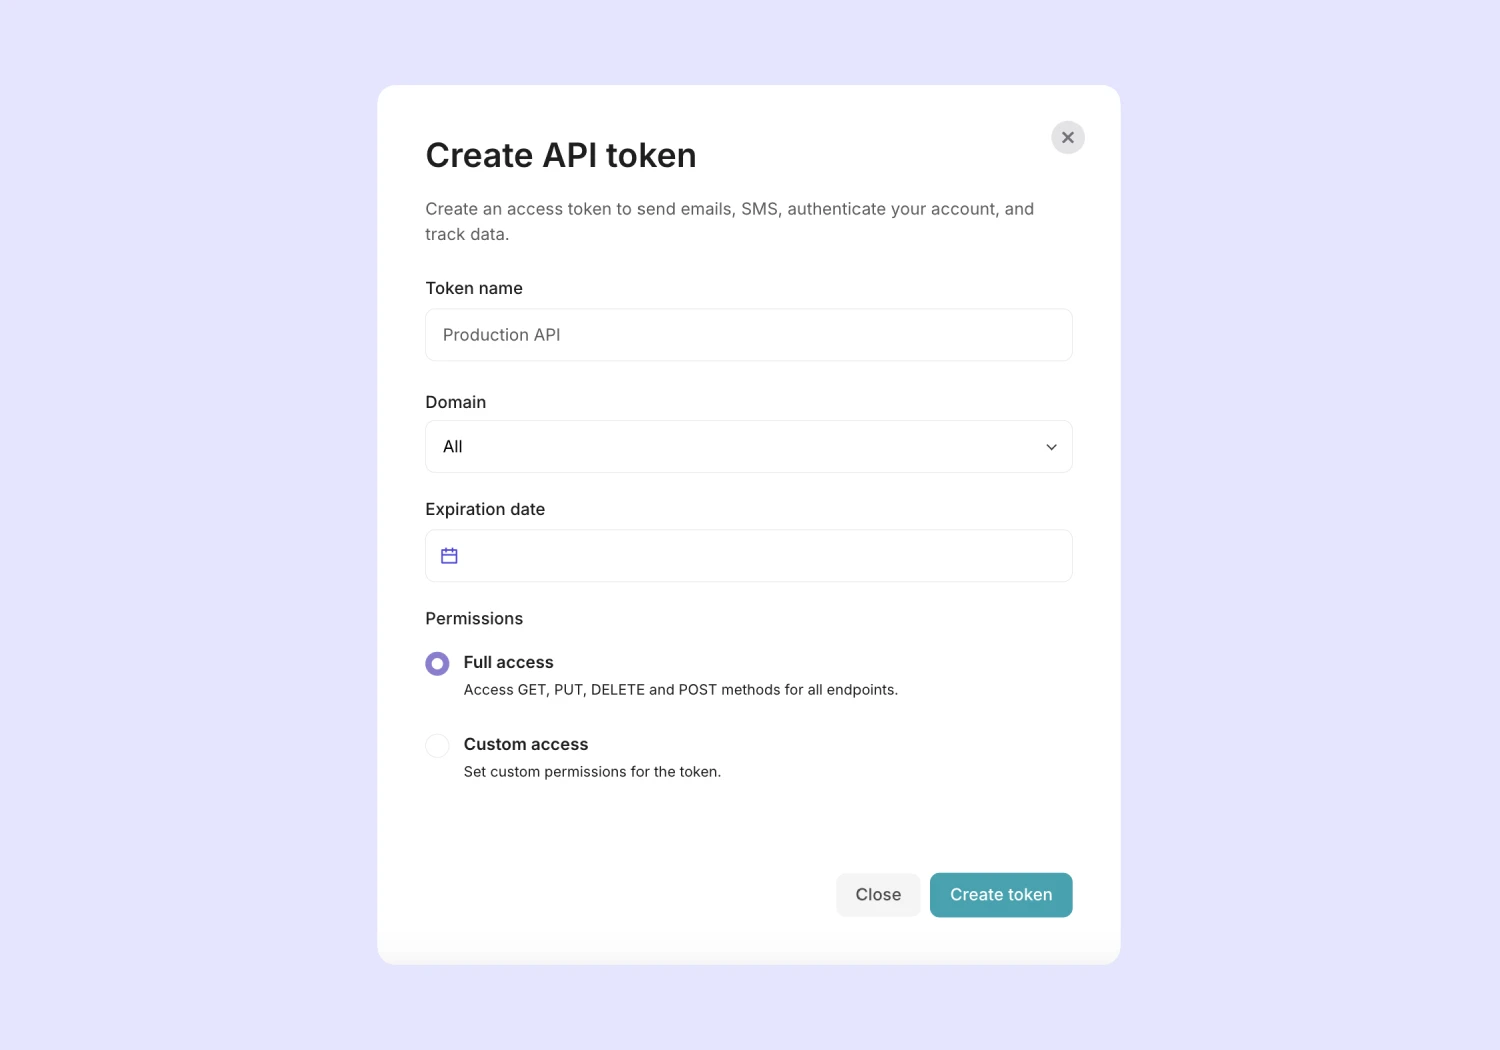
3. Click Create new token. In the pop-up window, you can create your API token.

Set a name your token. You're free to use any name you want, as long as it’s clear to you
Select the domain you want to use the API token for
If you want, you can set an expiration date for your API token to improve your API token management and security
Choose the permissions for your token
API tokens can have different permissions. At MailerSend, you can choose between Full access and Custom access permissions.
Full access allows the API token to access GET, PUT, DELETE and POST endpoints for all parts of your account. It's the most powerful access option, so use it carefully.
Custom access allows you to choose which access to provide for the token.
Endpoint | Available access permissions |
|---|---|
Email | No access, Full access |
You can access all domains that belong to your account. | No access, Read only, Full access |
Obtain activity logs of your domain. | No access, Read only, Full access |
Analytics | No access, Read only, Full access |
API tokens | No access, Full access |
Create and manage webhooks for listening to events and triggering actions. | No access, Full access |
Fetch and delete templates created on MailerSend. | No access, Full access |
Manage recipients on a suppressions list. | No access, Read only, Full access |
Send text messages through MailerSend | No access, Read only, Full access |
Verify an email address or a list of email addresses | No access, Read only, Full access |
View and manage inbound routes | No access, Full access |
View and manage recipients | No access, Read only, Full access |
View and manage sender identities | No access, Read only, Full access |
View and manage SMTP users | No access, Read only, Full access |
View and manage users, roles, permissions, and invitations | No access, Read only, Full access |
Once you have set the permissions, click on the Create token button.
For security reasons, you will only be shown your API token one time, so please copy or download it and save it somewhere safe.
Managing API tokens
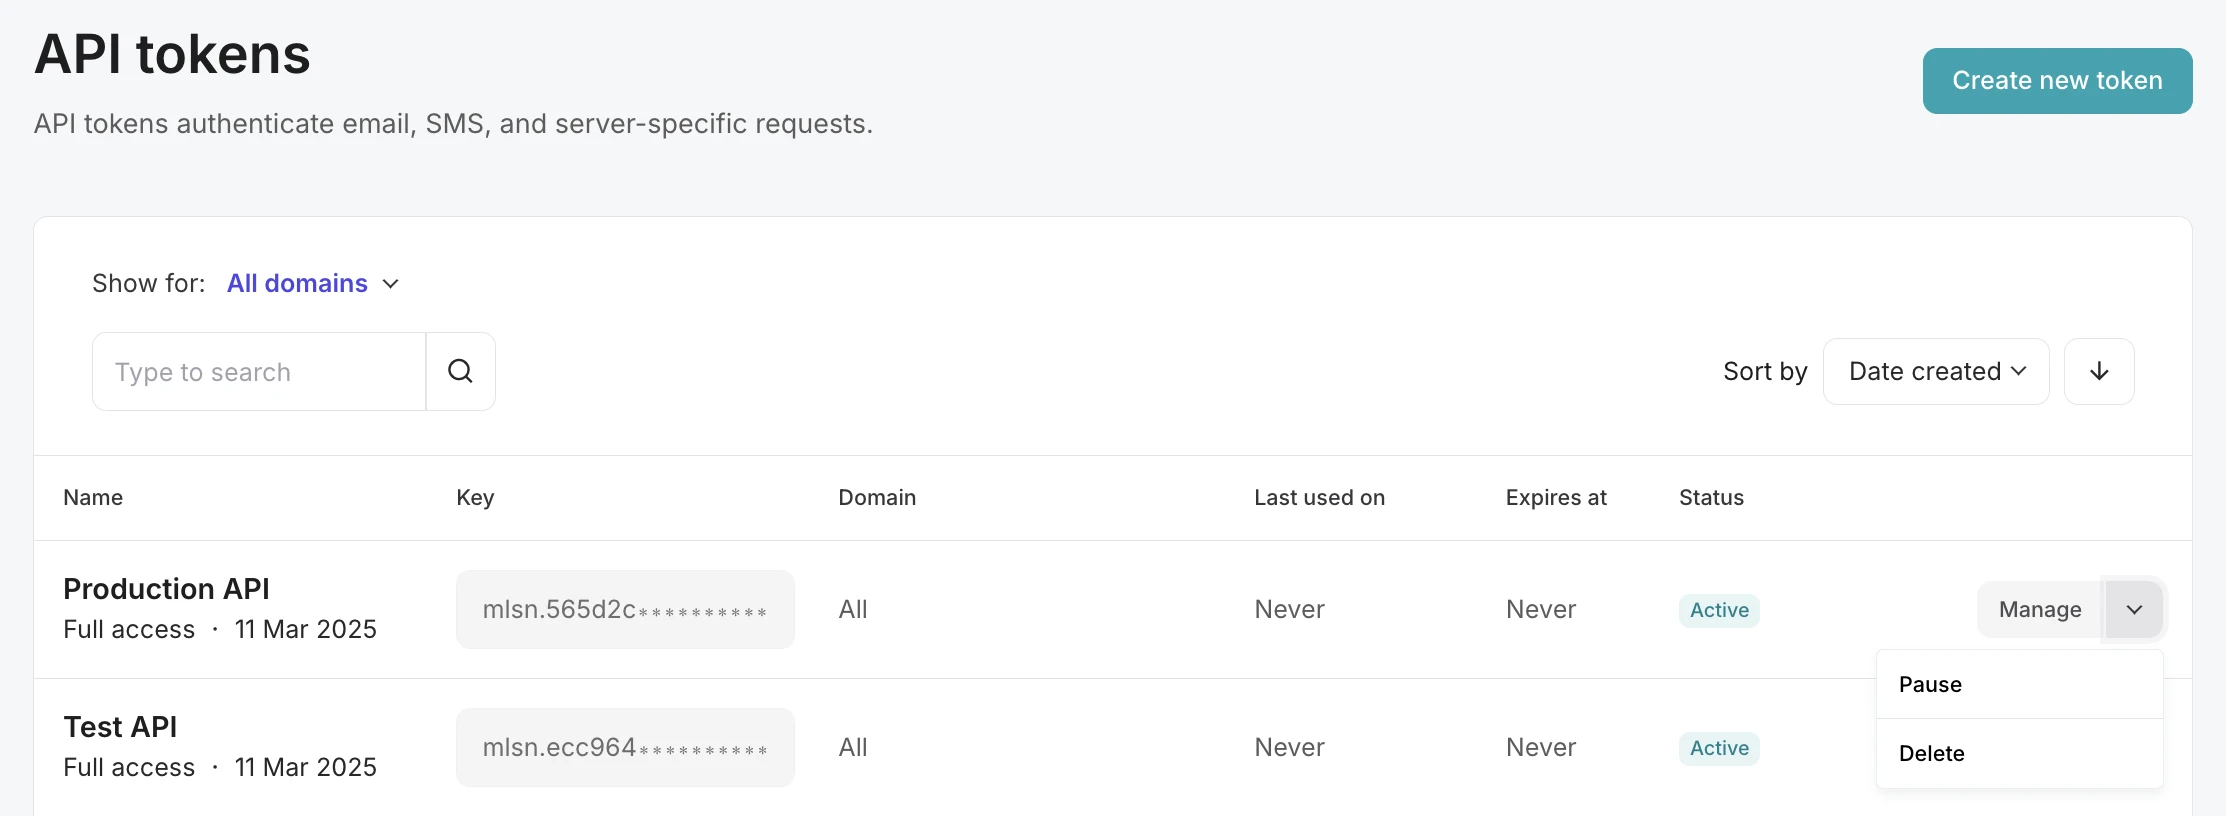
Once you have created your token you can manage it from the API tokens section.

There are a few available options to manage your token:
Manage. You can rename the token if you need to at any point. Click Manage to open the pop-up, enter the new name and click Save. In the same pop-up, you can also see what permissions are given for this token. If you want to change the permissions, you need to delete the existing token and create a new one.
Pause. If you want to pause the token, click the drop-down arrow next to Manage and click Pause. This action pauses your access token immediately—all of the applications or users won't be able to use it (access your account) until you resume it by clicking the Resume button.
Delete. In order to delete the token, click the drop-down arrow next to Manage and choose Delete. Before deleting the token you need to confirm it in the pop-up window.
Need more info?
Please feel free to contact us at support@mailersend.com and a member of our support team will gladly assist you.
- Getting started
-
FAQ
- How transactional emails work
- How to test email sending in MailerSend
- How to create automations
- How to add a custom unsubscribe header
- How to merge multiple SPF records
- How to verify an email list
- How to whitelist IPs
- How to add a domain space to your account
- How to add a survey to your emails
- How to use the MailerSend iOS app
- How to request a dedicated IP
- SMS: How to handle opt-in and opt-out
- How will the Hobby plan update affect my account?
-
Features
- Activity
- Analytics
- API & SMTP request logs
- Custom headers
- DMARC monitoring
- Domain tracking options
- Email tagging
- Ensuring secure SMS communication: Verification and usage limits
- File manager
- How to enable Google Email Actions & Highlights
- Inbound routing
- Managing API tokens
- REST API response codes
- Schedule bulk emails
- Sender identities
- Sending domains
- SMTP relay
- Split Testing
- Templates
- Webhooks
- Upcoming changes to TLS Protocol support
- Deliverability
- Account settings
- Billing
- Integrations
