How to integrate MailerSend with Zapier
What is Zapier?
Zapier is a web-based application that lets you connect apps with thousands of other web services, such as WooCommerce, Help Scout, and HubSpot. You don’t have to be an expert or know any coding to start building automated connections between applications called Zaps.
All Zaps have a trigger, which is an event that occurs in another application that initiates the Zap. This Trigger sets off an action, which is the event that completes the Zap in the other application.
If you need inspiration, see everything that’s possible with MailerSend and Zapier.
If you have any questions about Zapier, you can reach out to contact@zapier.com.
How to connect Zapier with MailerSend
To locate the integration:
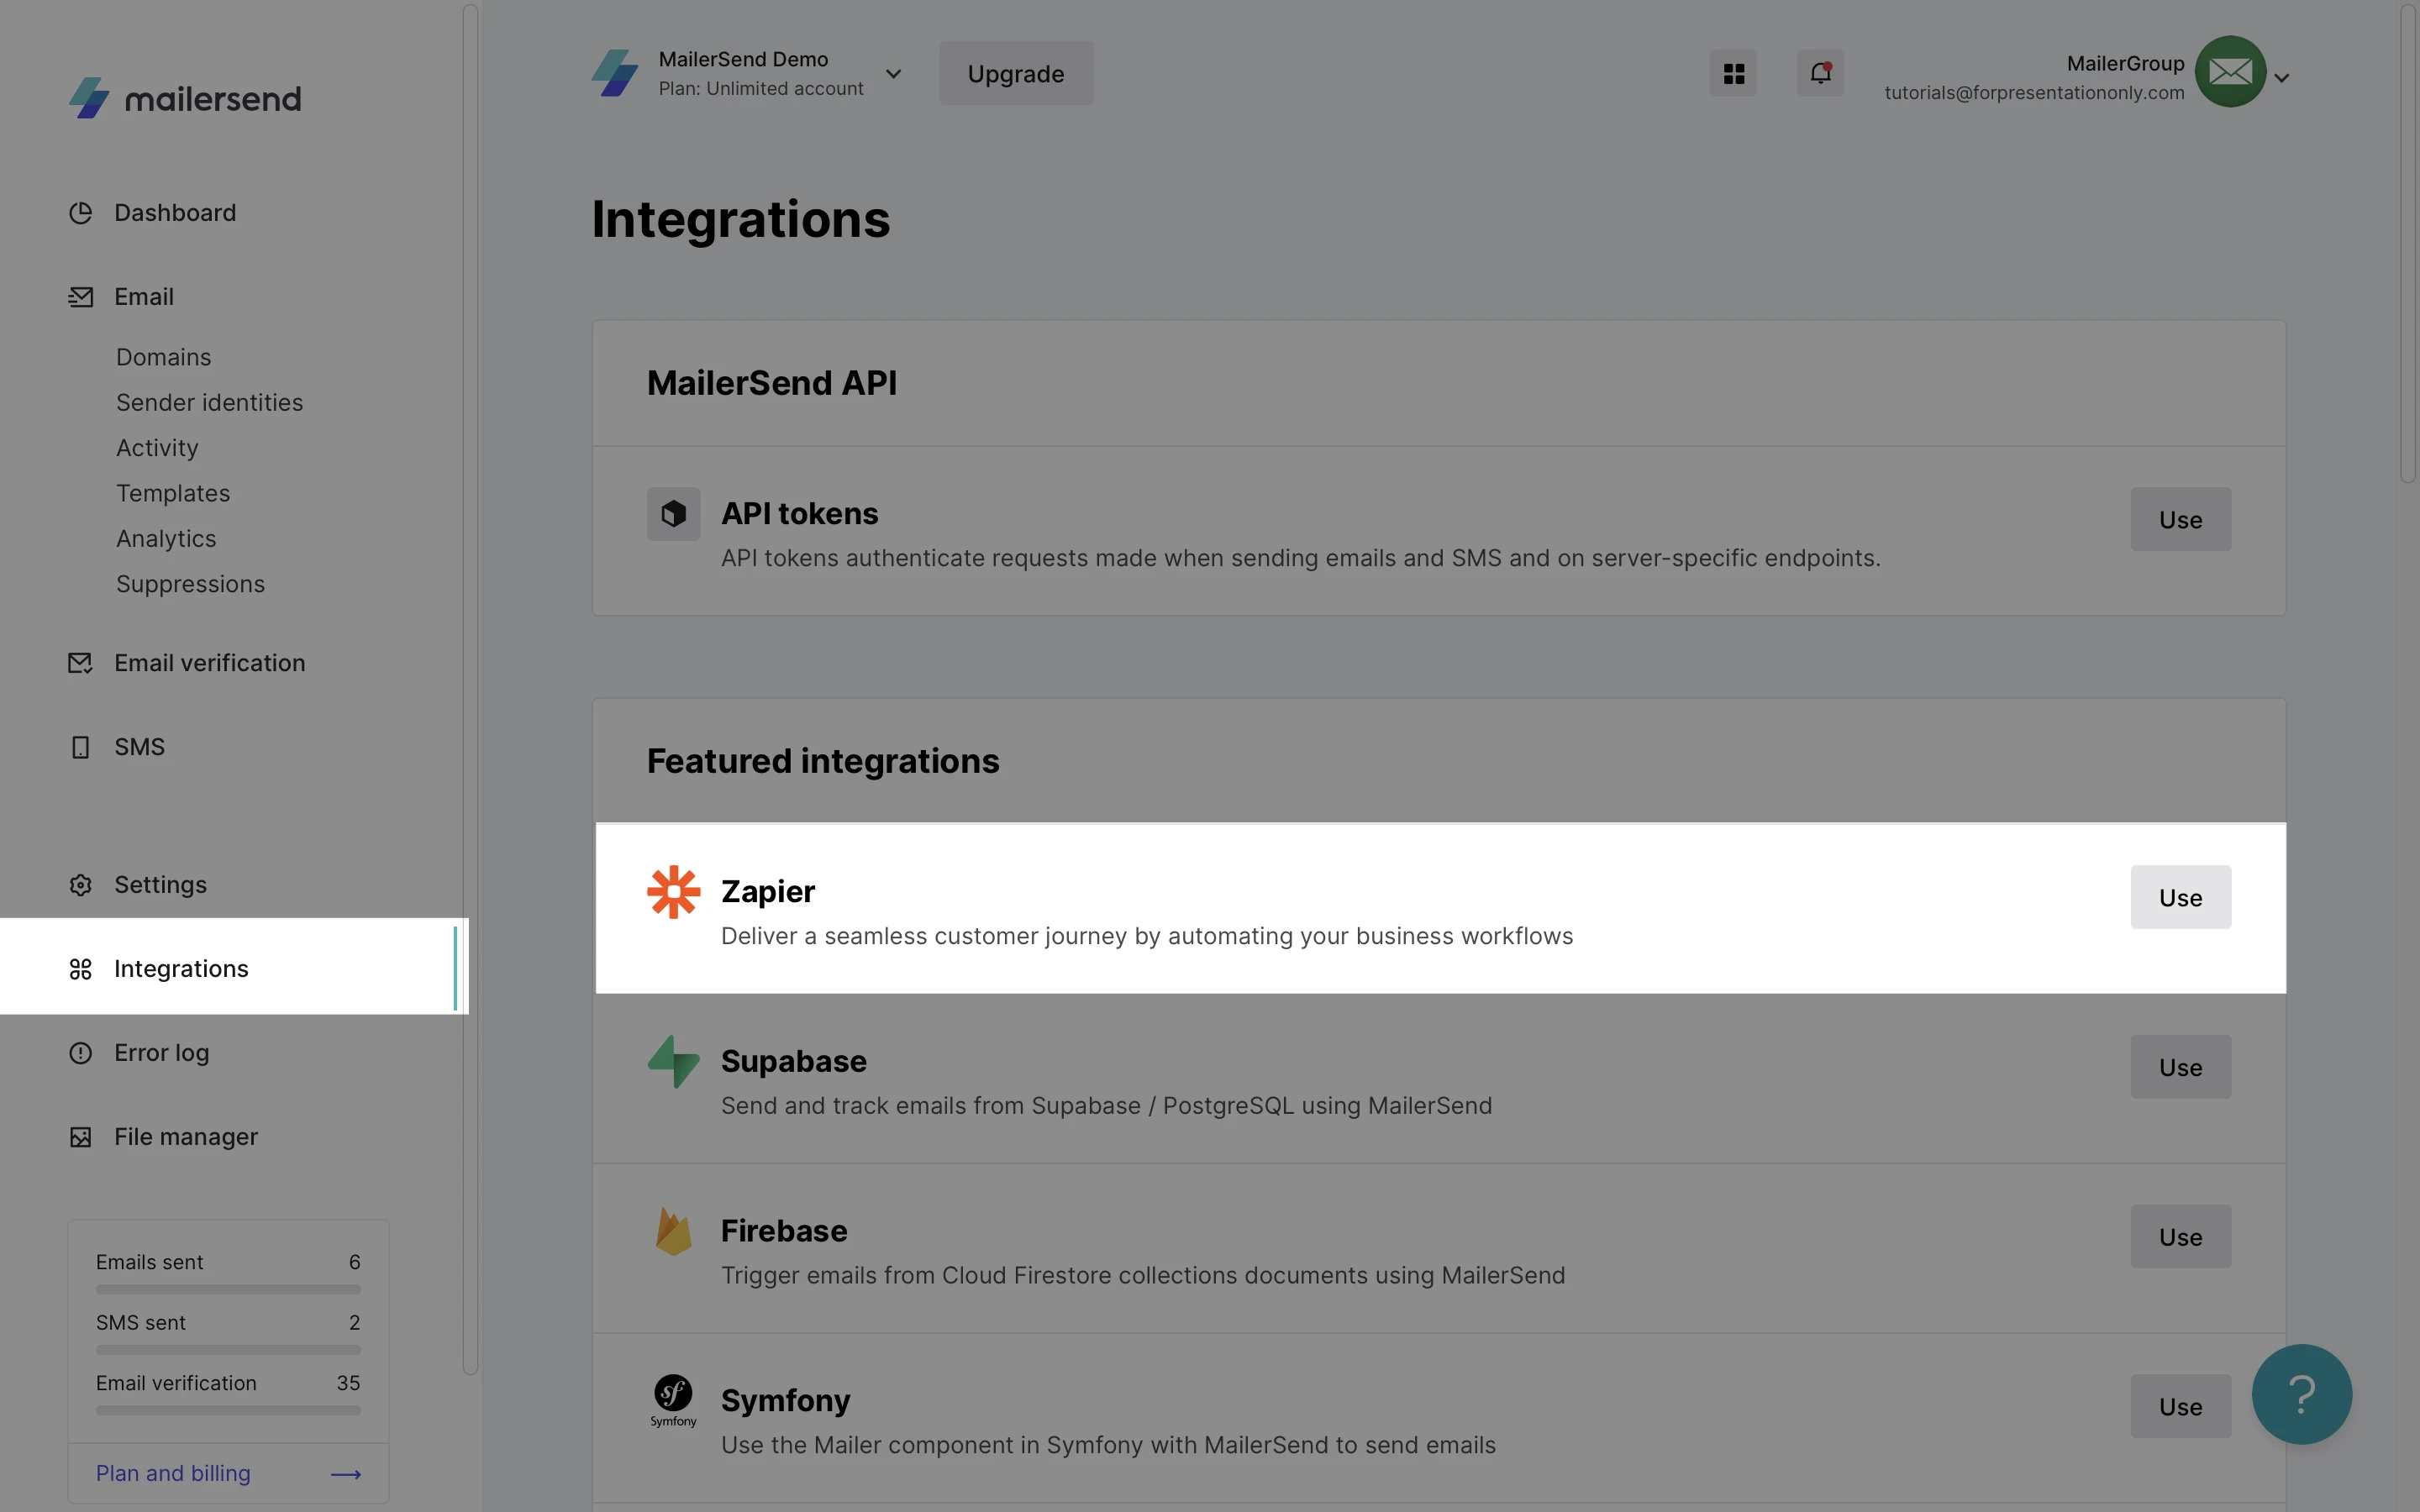
Navigate to the Integrations page and locate Zapier.
Click Use.
Log in to your Zapier account or create a new account.
Your Dashboard will be shown on the screen.
To create your own workflow, select MailerSend and the other application you wish to connect then select what you would like to happen in your workflow. You can choose whether MailerSend is the trigger or action of the Zap, depending on your needs.
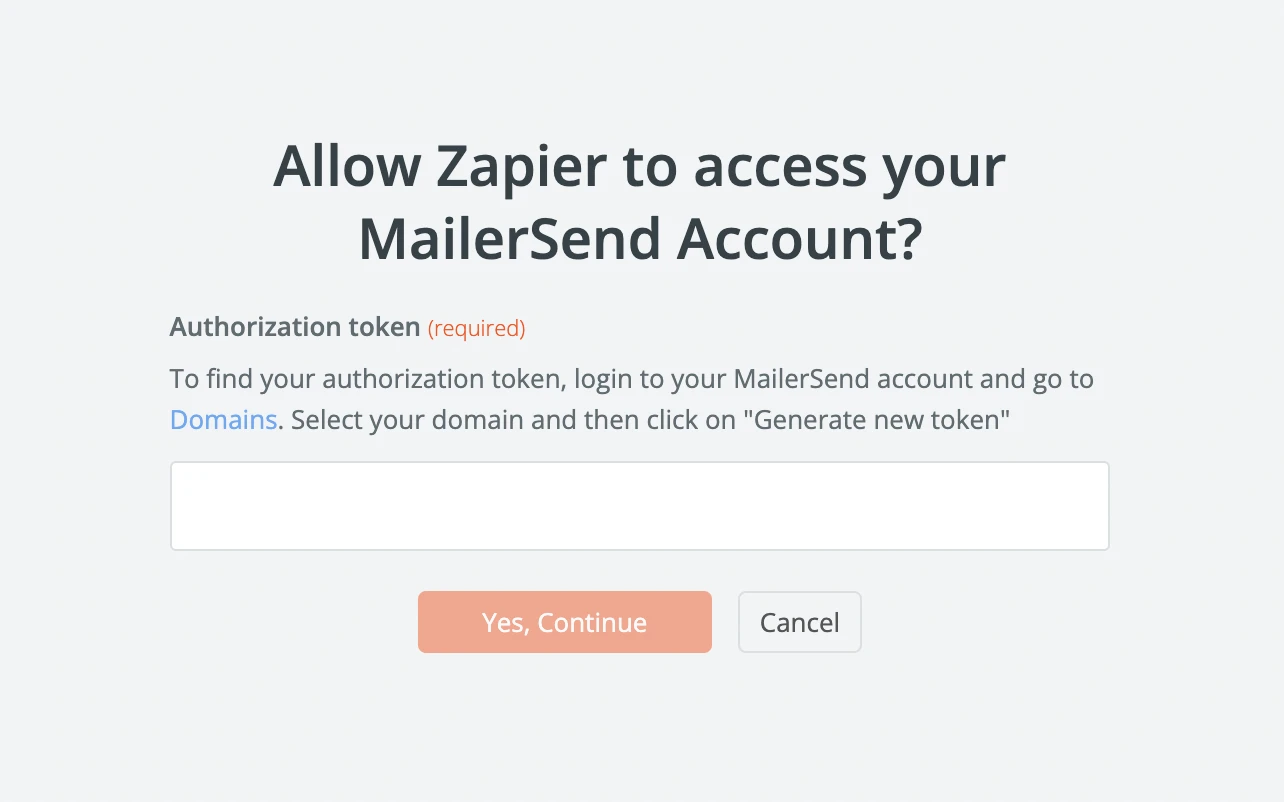
Connect to your MailerSend account by entering your API key, which can be found on the Domains page of the domain you wish to integrate. See Managing API tokens if you haven’t yet created one.
Paste the API key on your Zapier account and sign in.
Follow the steps on-screen to finish setting up the Zap. Zapier will test the trigger to see if it works correctly.
Now you’ll see your MailerSend account connected to Zapier. This allows you to easily send customer activity from your apps to your MailerSend account or vice versa.
Popular Zap templates
Actions and triggers
A Zap is an automated task that consists of a trigger and an action. When a specific trigger occurs, a specific action takes place. These triggers are connected to your customers.
As soon as you create your Zap, Zapier automatically checks if there have been any new triggers every few minutes. If Zapier detects a trigger, it automatically performs its respective action.
With MailerSend, you can find 8 triggers:
Email is sent: your email has been sent to your recipient
Email is delivered: your email has been delivered to your recipient’s inbox
Email is opened: your email has been opened by your recipient
Email is clicked through: your recipient has clicked on a link in your email
Email is soft bounced: your email was not delivered because it soft bounced. A soft bounce is a temporary rejection by a receiving recipient’s server. This may happen because the recipient's inbox is full.
Email is hard bounced: your message was not delivered. The message was returned to our servers because the recipient's address is invalid. A hard bounce may occur because the domain name does not exist or because the recipient is unknown.
Email is reported as spam: your email was reported as spam by a recipient. The recipient is automatically added to your spam complaints suppression list by MailerSend. Receiving a large number of spam complaints can be detrimental to your sender's reputation.
Recipient has unsubscribed: your recipient has clicked on the “Unsubscribe” link of your email and won’t receive any more emails from your domain.
You can also find 2 actions:
Send an email: send a custom email that’s written in HTML or text, with attachments and variables
Send an email based on a template: send an email that’s based on a MailerSend template, in HTML or text, by simply adding the template’s ID number, along with attachments and variables.
How to use personalization in Zapier
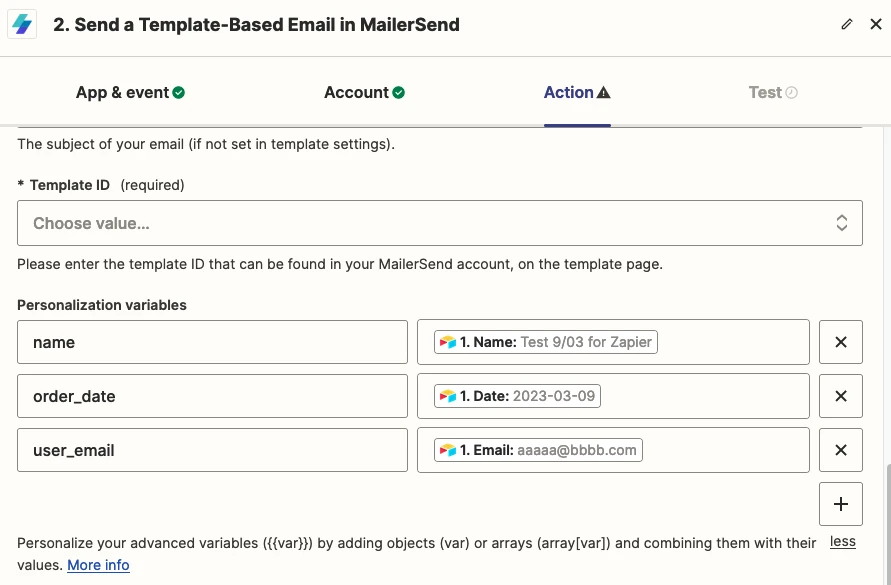
To use variables on your templates with Zapier, indicate in the "Personalization variables" field the variables' names and values. You can use dot notation to add objects or arrays.
Objects
Personalize your objects with data fetched from Zapier by adding personalization variables on the Zap. Indicate each object, its keys, and values so it populates your template.
In your email template, the personalization fields are indicated by a {{variable}} syntax. Their values will be populated by data fetched by Zapier from your triggering app. On your Zap, add your variable's name without brackets or curly braces and their fetched value on the other field. Values can be fetched by Zapier, but keys have to be indicated so they're displayed properly.
Arrays
Show information inside dynamic tables using arrays. Add arrays and their objects in the left column and their values in the right column. This property supports dynamic lines so it fits perfectly for your invoices: for each value found in your trigger's data, a new row is created in your template's dynamic table (or column if the dynamic table is vertical).
Arrays are indicated by an array[object] syntax on Zapier. Indicate the values of each array's object by selecting the data fetched from Zapier in the right-hand column. Zapier supports concatenation of values, so you can add a "$" symbol or any additional text or other value you wish to add.
Personalization variables | |
|---|---|
purchase[product] | {{Zapier_purchase_product}} |
purchase[quantity] | {{Zapier_purchase_quantity}} |
purchase[price] | {{Zapier_purchase_price}} |