How to verify an email list
All plan upgrades will receive a limited number of free email verification credits. These credits can be used to verify a list of email addresses by clicking on Email verification in the left-hand menu.
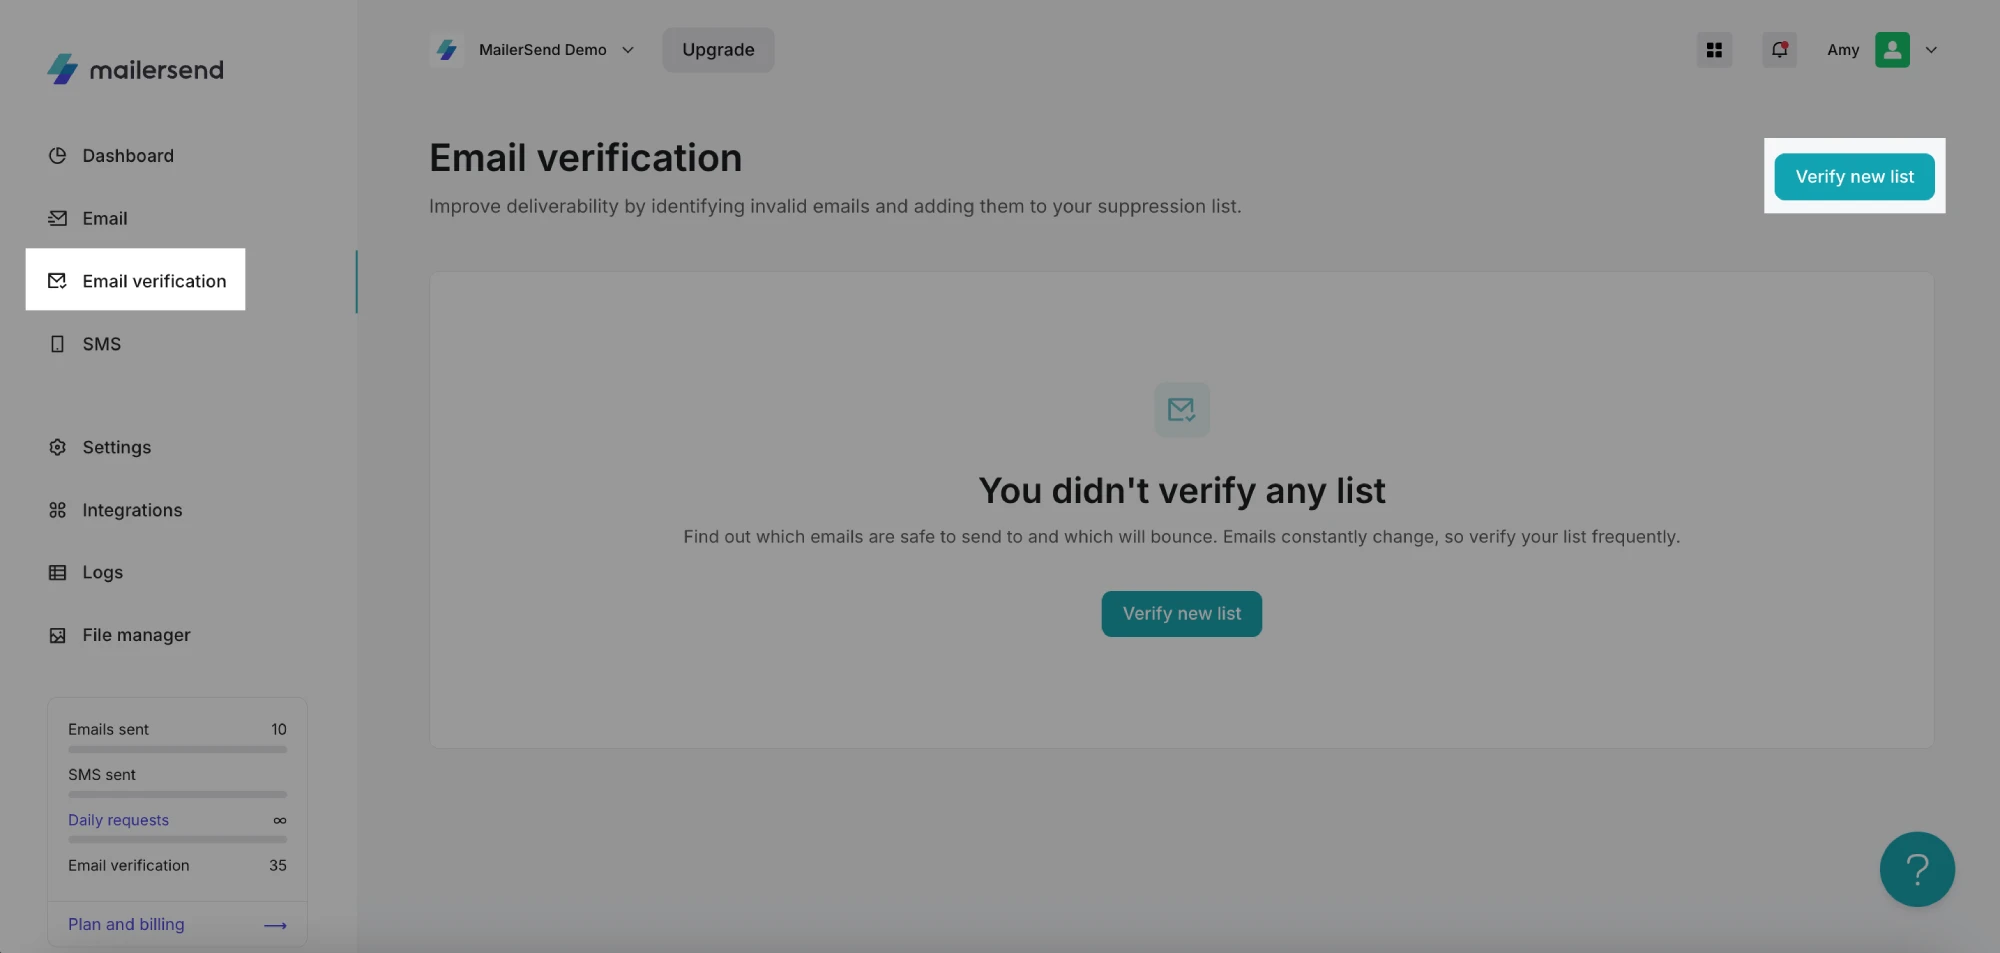
Verify a new list
To verify a new list, click the Verify new list button and upload a CSV file. Excel files are not supported and will need to be converted to CSV. If the file has more than one column, you’ll be asked to choose which column of emails you want to verify.
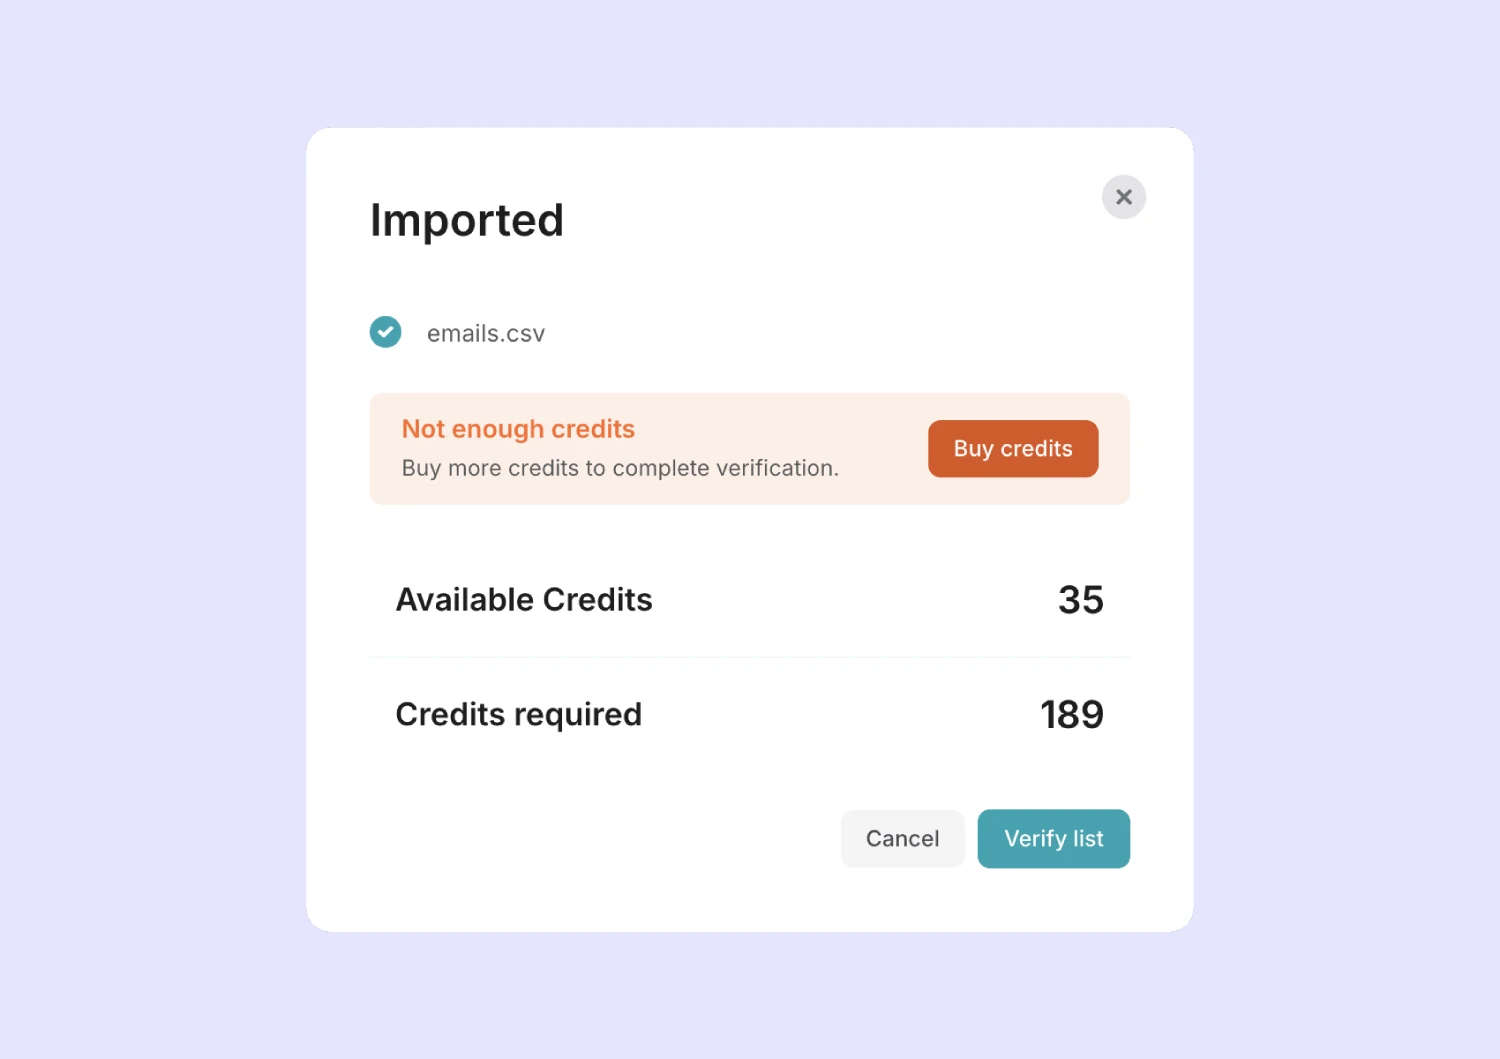
Once the file is imported, you’ll be shown the number of credits the list verification will require. If you have sufficient credits, you can click on Verify list. If not, you can purchase additional credits on the Plan & Billing page.
After selecting Verify list, the verification will happen in the background, so you’re free to navigate to other pages or grab a coffee.
Reviewing the email verification results
Verifying your emails is just the first part of cleaning your email list. The real value comes when you understand how your emails are categorized and adjust your email lists according to our recommendations.
To see the details of your verified list, click on Manage next to the relevant list on the Email verification page.
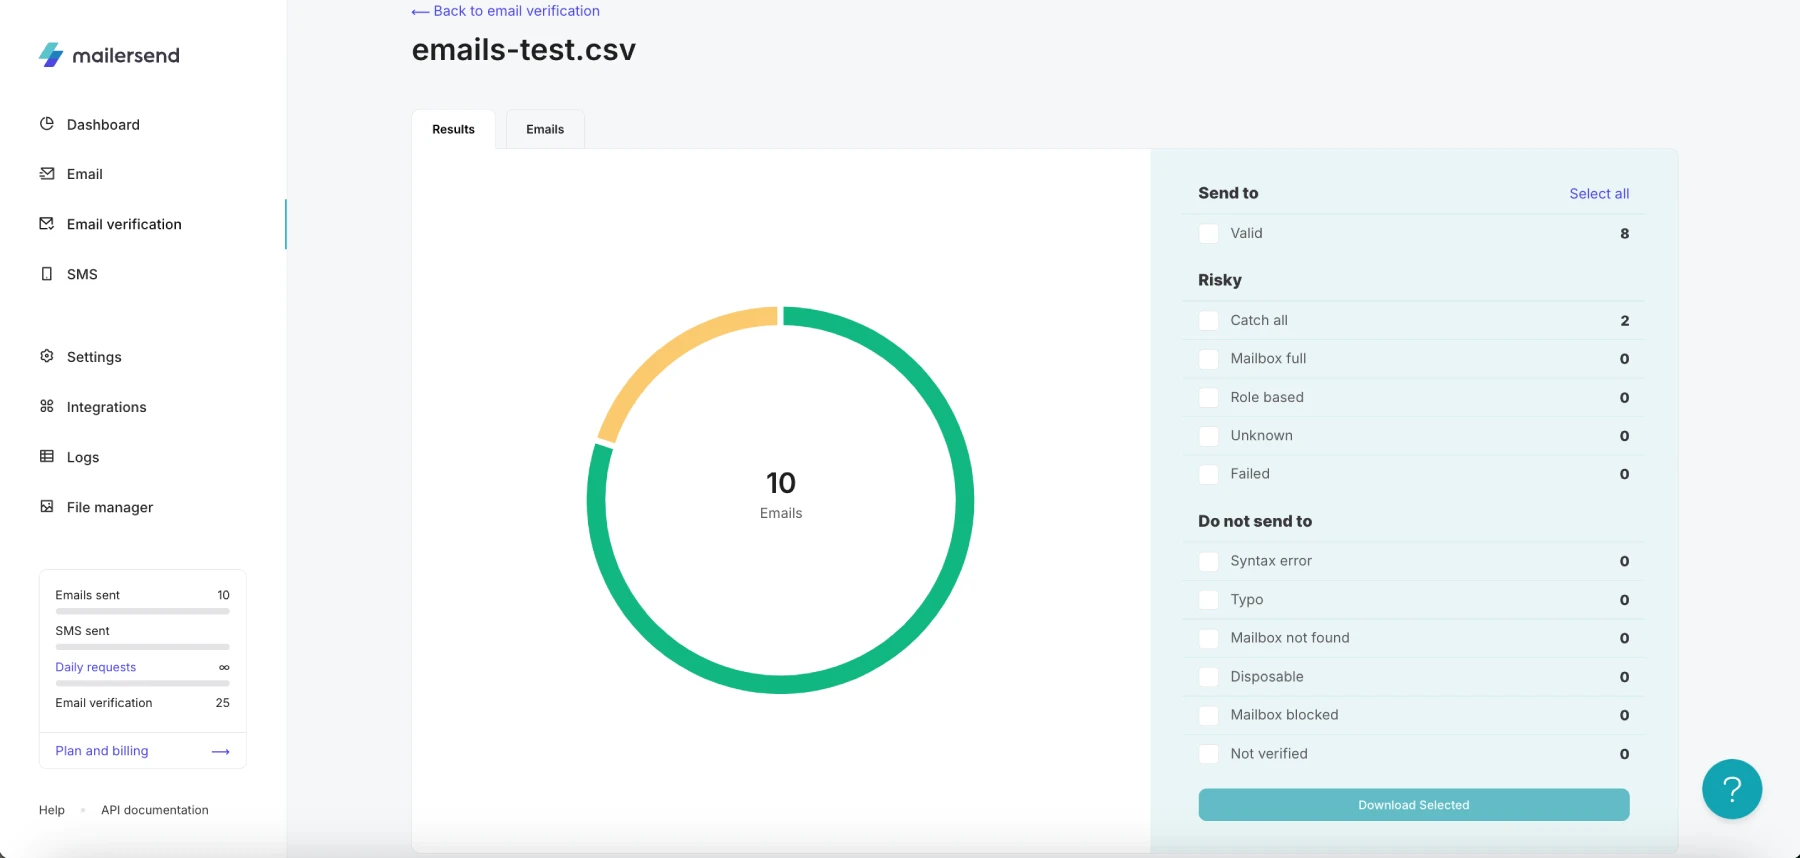
In the email list verification results, you can see all verified emails and their statuses. The pie chart visualizes the email statuses found in your list during the verification process. The number in the center is the total number of emails that were verified on your list.
The right side of the page displays individual statuses, along with the number of emails that each status has been assigned to.
To download a CSV file detailing the results for a specific status or to download all results, simply select the attributes you want to include, or click Select all, and click the Download Selected button.
Adding invalid emails to your suppressions
You can add invalid email addresses directly to your suppressions list in MailerSend. To do this:
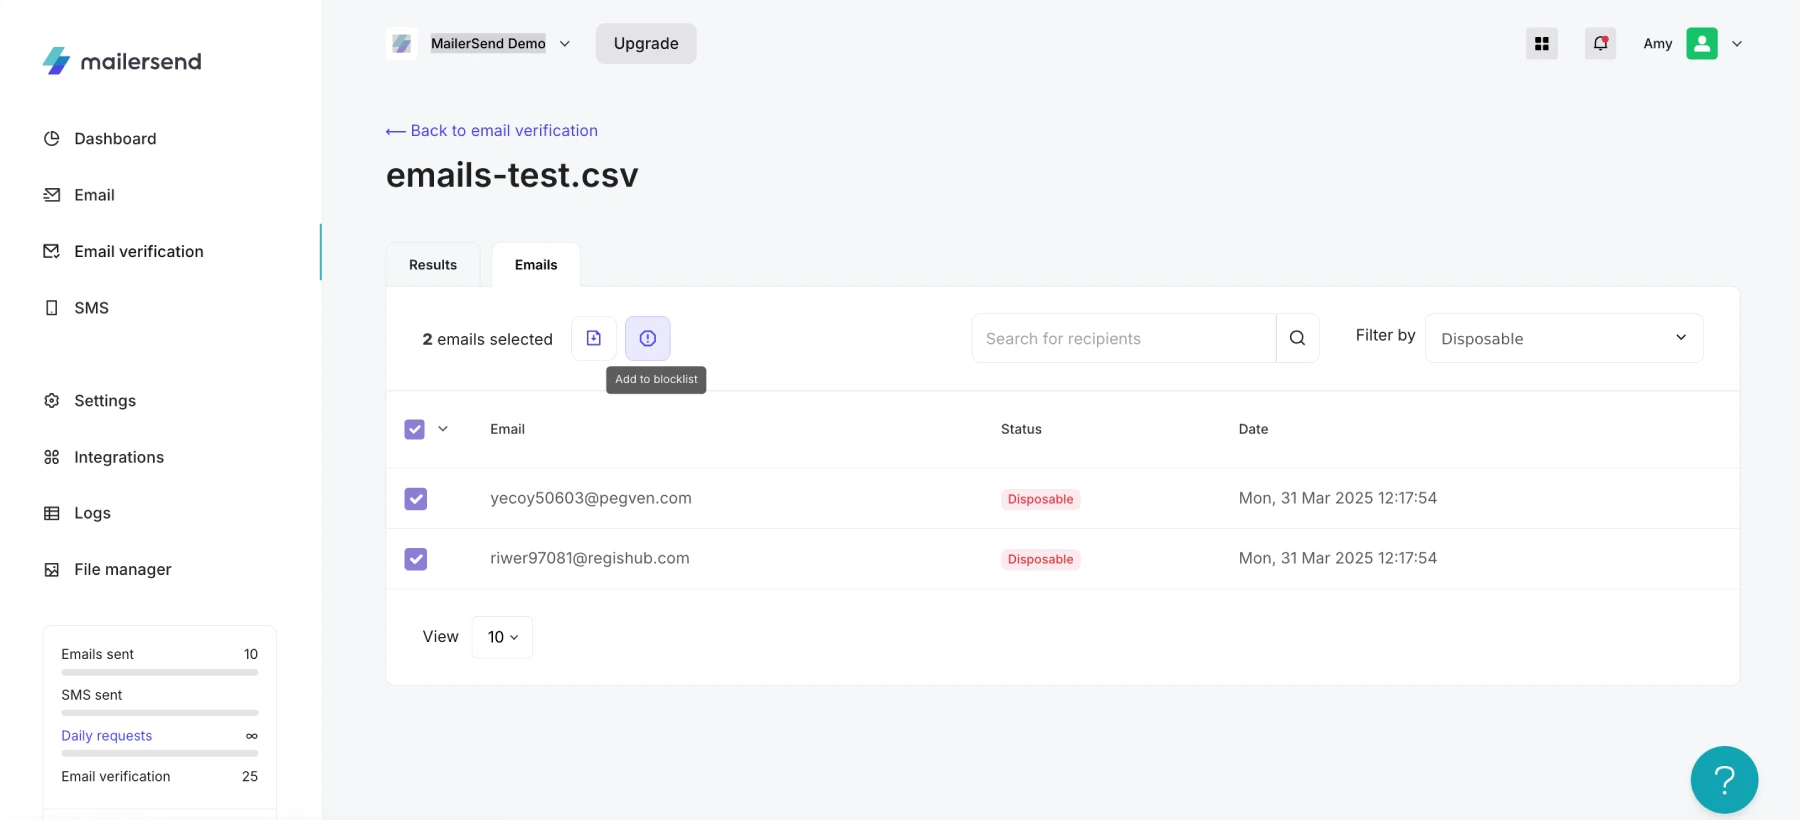
1. Click the Emails tab on the results page.
2. Filter the emails by status.
3. Select all and click the Add to blocklist button.
What do the statuses mean?
Send to | Valid | Email is safe to send. |
Risky | Catch-all | Recipient's mail server will accept emails to this address but we cannot guarantee this email address belongs to a person. |
Mailbox full | Recipient’s inbox is full and may not be able to receive new emails. | |
Role-based | Email is role-based and may not be associated with a single, specific person but a group of people. | |
Past delivery issues | We have detected past delivery issues while sending to this email address. | |
Unknown | We are unable to determine if the email is valid. | |
Do not send to | Syntax error | The email address is not valid. |
Typo | The email address has a typo. Correct the email address and retest. | |
Mailbox not found | Recipient’s inbox does not exist. | |
Disposable | The email address leads to a temporary inbox and should be removed from your lists. | |
Mailbox blocked | The email address’ mailbox is blocked by its service provider due to poor sending practices. |
Purchasing verification credits
To purchase more credits to use for email verification:
1. Click on Upgrade.
2. Navigate to the Add-ons tab.
3. Locate Email verification credits and enter the number of credits you would like to purchase.
Autopay
To enable autopay, toggle the option ON to Set up autopay.
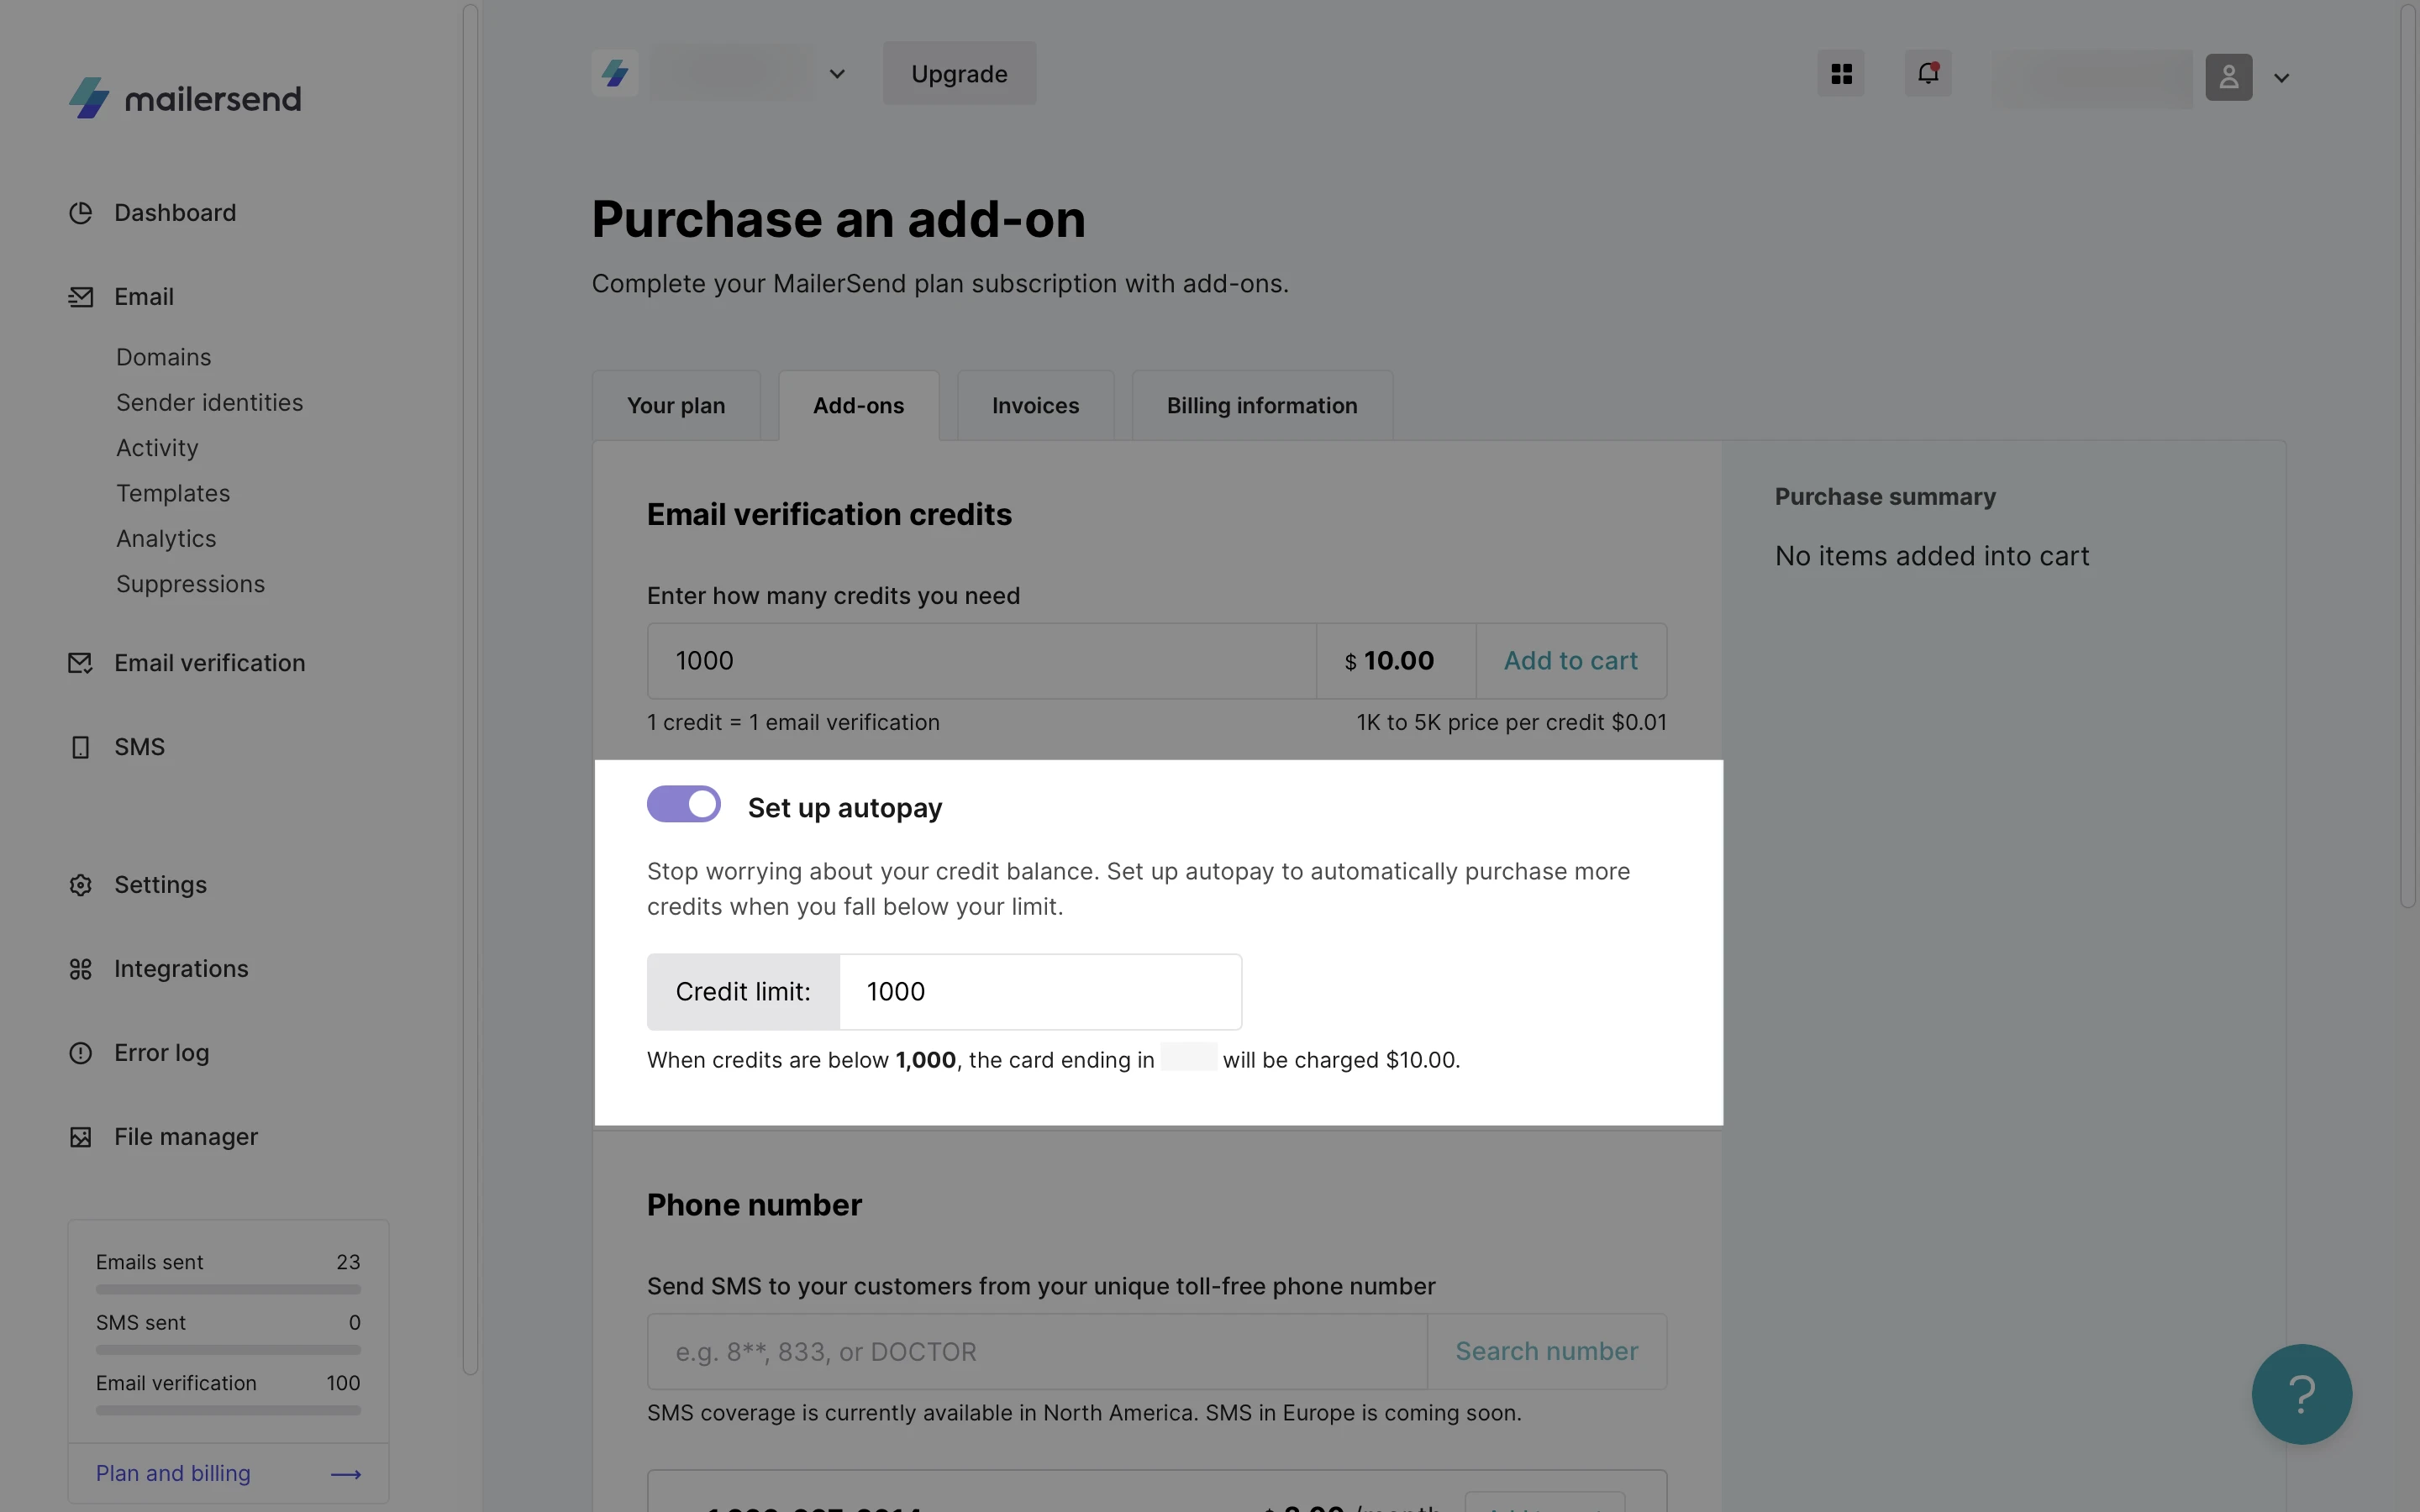
Decide on a credit limit, and your credits will automatically be renewed once this limit is reached. The top-up amount will be the same as the amount of credits that are purchased when you first set up autopay.
This way, your account is ready for email verification when you need it!