How to send emails with Laravel using MailerSend

Laravel is an open-source PHP framework that enables you to quickly and easily develop enterprise web apps and websites.
When paired with the popular LAMP (Linux, Apache, MySQL, and PHP) stack, Laravel delivers a flexible, scalable, and rapid application development environment. Plus, its modular architecture means that you have several ways to send emails from your apps.
However, some sending methods are not optimized for deliverability and you may find your emails going to spam instead of the recipient’s main inbox! Read on to learn how you can use MailerSend's official Laravel mail driver to quickly integrate transactional emails into your apps.
What is Laravel?
Laravel is a free and open-source web application framework that manages templating, routing, and authentication. Closely following MVC (Model-View-Controller) architecture, its built-in features save you time compared to manually writing features in PHP.
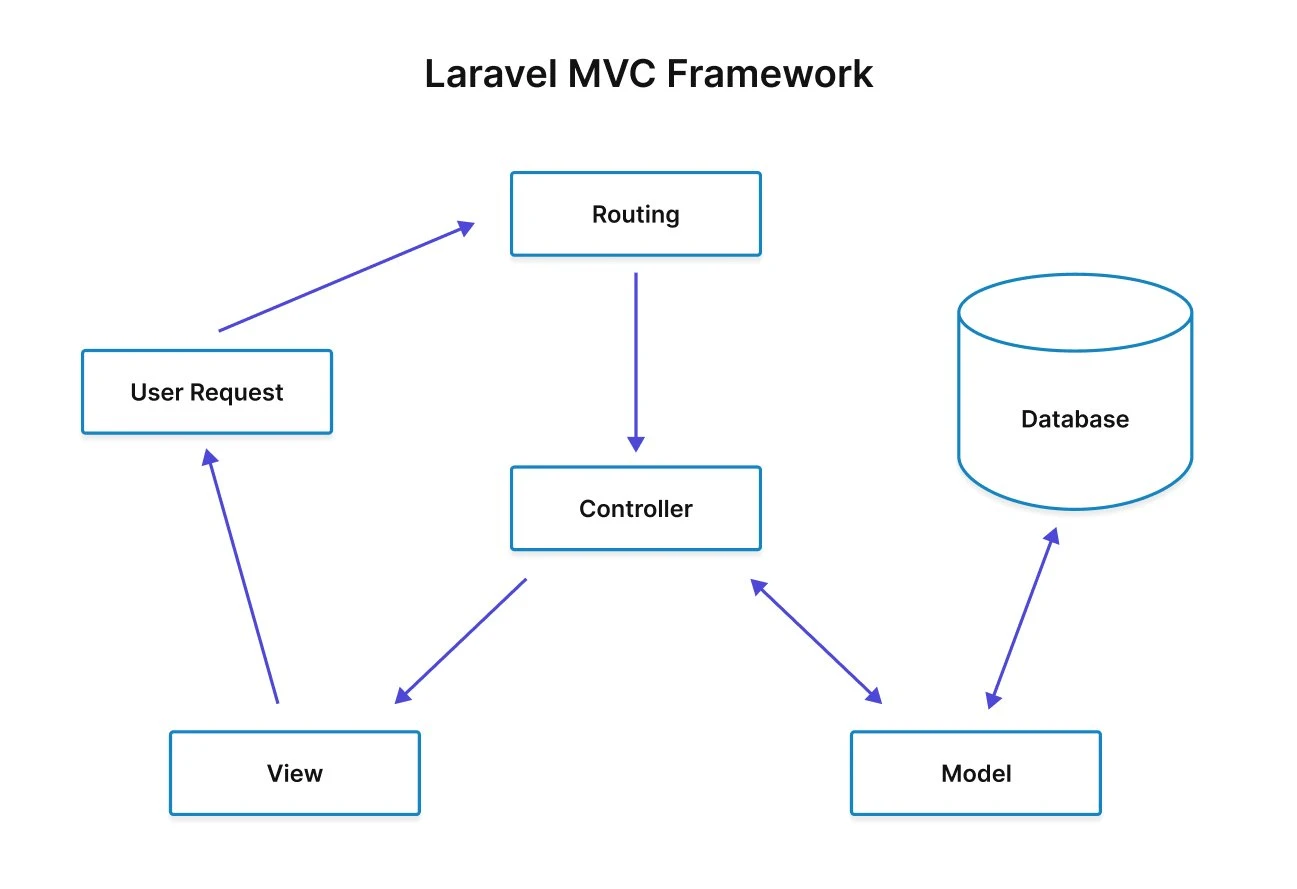
Laravel uses the Blade template engine to allow HTML to be deconstructed into smaller pieces that are then managed by a controller. Blade template files use the blade.php file extension and are found in the resources/views directory.
The initial starting point is Routes, which is managed in routes/web.php. Routes manage HTTP requests so that when a specific location or resource is requested, web.php determines which function is executed in response.
Not all requests simply point to a function. Laravel also supports middleware, which can be executed before a request is handled. This configuration is useful for authentication and security where HTTP requests are filtered before they are passed to the web app.
Laravel and emails
Laravel’s framework is ideal for quickly building prototypes or creating fully functional enterprise web apps. The framework takes a lot of the work out of creating basic app features like login forms, complex data tables, and email sending.
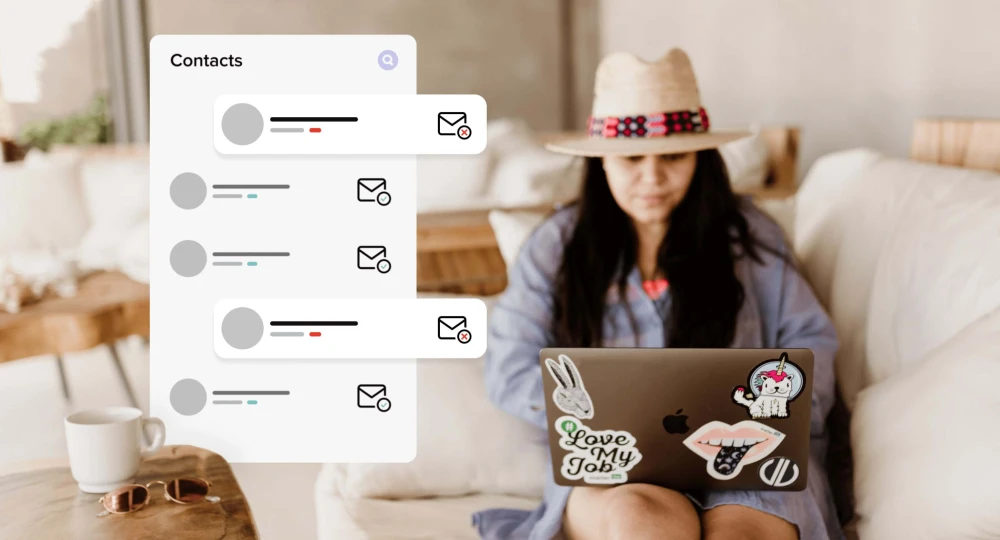
By integrating email into your web app, you are enabling two-way conversations with customers. This contributes to a better brand experience—and happier users are more likely to stay around longer! Here are some examples of transactional emails that you can send:
Discount alerts
Order confirmations
Shipping updates
Feedback requests
Support tickets
Benefits of using Laravel
There are many reasons why you might want to use Laravel to send emails instead of PHP’s built-in mail() function. Let’s go through each of them.
Better email security
Laravel's mail sending options are more secure. Using PHP's function can leave websites open to a variety of attacks, even potentially allowing a malicious actor to execute arbitrary PHP code on the server!
Pre-built packages
You can use MailerSend’s official Laravel driver to access all the features of the email API. There's no need to reinvent the wheel as the library handles everything from authentication to routing and list management. All you need to do is supply the email template and addresses.
Easily design templates
Choosing MailerSend means that you can use an intuitively-designed drag & drop builder for email templates. Start with pre-built designs and customize them to match your brand. Or design templates to your exact specifications with the HTML and rich-text email editors.
Email queuing supported
Laravel makes it easy to send emails in a controlled and reliable manner, improving your email deliverability. It supports queuing of mails, which can help reduce the risk of your mail server ending up on anti-spam lists, especially if you’re sending to a high-volume list.
Extensive email options
Laravel also offers support for email attachments, formatting, and localization. You can use these features to send out coupons, HTML emails, newsletters, and other types of custom messages.
Getting started with Laravel
Getting started with Laravel is easy. Once you have a server with the LAMP stack configured on it, all you need to do is install Composer, then use Composer to install Laravel by running:
composer global require laravel/installerOnce the Laravel installer is on your server, you can create a new instance for your Laravel project by entering:
laravel new webappRemember to change webapp to a descriptive name for your project!
Running the above command will create a folder called 'webapp' (or your project name) that includes everything needed for Laravel, along with a .htaccess file. You can then point Apache to that folder using the standard Apache configuration file
Alternatively, you can use the PHP Artisan server to test that your new, bare-bones app works by executing:
php artisan serveThe Artisan server is useful for testing and troubleshooting but is not recommended for a production environment.
At the time of writing, Laravel 10 is the most recent version. It's a good idea to check you're using the framework's most recent version so that you can take advantage of any recent improvements in functionality and security.
How to send emails in Laravel
Now that you've got a simple project up and running, the next step is to get email working. You can use Artisan to get a list of the commands available in Laravel, including the Laravel mail commands, by running:
php artisan listThe most basic option for sending mail is the mail command, which you can add to your Laravel application by using:
php artisan make:mail NewMemberNotifyThis will generate a class in a PHP file, located in app/mail/NewMemberNotify.php that uses the build() function to create email messages.
Once you have created email messages, you'll need to add functionality to send the emails, either using an email API or an SMTP relay service.
Using Laravel’s MailerSend Driver
Use Laravel’s MailerSend driver with the email API when you want to access all the features of MailerSend from your web app. Take advantage of advanced personalization, suppression list management, and sender authentication using SPF, DKIM and DMARC security protocols. Laravel recommends using a mail driver whenever possible, as it is often more efficient than sending mail via SMTP servers.
In Laravel, each email you want to send via your web app is known as a mailable. You can write a mailable class to define that email, using the php artisan make:mail command mentioned earlier.
First, install the official MailerSend Laravel Driver with the following command:
composer require mailersend/laravel-driverThen add your MailerSend API key and additional variables to the .env file for your app:
MAILERSEND_API_KEY=

MAIL_MAILER=mailersend
MAIL_FROM_ADDRESS=fromaddress@mailersend.com
MAIL_FROM_NAME="Your App Name Here"
Next, configure Laravel email services by adding MailerSend as the transport agent in config/mail.php:
'mailersend' => [
    'transport' => 'mailersend',
],The mailable itself can accept text, attachments, and other information. If you want to send bulk emails, the information can be supplied in JSON format, making it easy to use the mail function to send emails to a large number of addresses in one go.
Before you send emails to all of your recipients, be sure to send test emails to your own internal addresses to ensure the formatting is correct and the server connection details are properly configured.
To help you get started, here’s an example mailable that you can use to send an email:
app/Mail/TestEmail.phpnamespace App\Mail;
use Illuminate\Bus\Queueable;
use Illuminate\Mail\Mailable;
use Illuminate\Queue\SerializesModels;
use Illuminate\Support\Arr;
use MailerSend\Helpers\Builder\Variable;
use MailerSend\Helpers\Builder\Personalization;
use MailerSend\LaravelDriver\MailerSendTrait;
class TestEmail extends Mailable
{
use Queueable, SerializesModels, MailerSendTrait;
public function build()
{
$to = Arr::get($this->to, '0.address');
return $this->view('emails.test_html')
->text('emails.test_text')
->attachFromStorageDisk('public', 'example.png')
->mailersend(
null,
[
new Variable($to, ['name' => 'Your Name'])
],
['tag'],
[
new Personalization($to, [
'var' => 'variable',
'number' => 123,
'object' => [
'key' => 'object-value'
],
'objectCollection' => [
[
'name' => 'MailerSend'
],
[
'name' => 'Guru'
]
],
])
]
);
}
}The MailerSend Laravel driver also offers a MailerSentTrait method. This allows you to use additional features such as templates, tags, and variables that are available through the MailerSend email API. After creating the mailable, you can send it using:
use App\Mail\TestEmail;
use Illuminate\Support\Facades\Mail;

Mail::to('recipient@domain.com')
    ->cc('cc@domain.com')
    ->bcc('bcc@domain.com')
->send(new TestEmail());Using the SMTP server
You can also send emails from your Laravel web app using MailerSend’s SMTP relay service. Use SMTP mail when you want to quickly send emails without coding and when you want to avoid sending rate limits and poor email deliverability of generic mail servers.
The basic mail command is used to build an email template, including the from, to, CC, BCC and content. Once you have created an email, the mailer needs configuring. For a standard SSL/TLS server, your configuration may look something like this:
MAIL_MAILER=smtp
MAIL_HOST=smtp.mailersend.net
MAIL_PORT=465
MAIL_USERNAME=fromaddress@mailersend.com
MAIL_PASSWORD=your_smtp_password
MAIL_ENCRYPTION=tls
In addition, unlike SMTP servers from popular ISPs like Gmail and Outlook, MailerSend’s SMTP relay service includes a real-time view of your email activity. You can see bounces, clicks and unsubscribes—and filter your messages further by subject, recipient and tags.
Send emails in Laravel now
Unlike the fantasy world of Narnia that inspired Laravel, better email deliverability and advanced sending features are within your reach. Pick MailerSend over sendmail and mail(), then choose from an advanced email API or reliable SMTP server to send your emails!
How are you sending emails in Laravel? Share in the comments below.