How to safeguard brand trust with email authentication

“A brand for a company is like a reputation for a person.” – Jeff Bezos.
Imagine what would happen to your reputation if someone stole your identity and started opening bank accounts to commit fraud? 🤔
Identity theft is a problem in the real world and it happens to businesses every day with emails! Your brand is at risk when spammers spoof your email address to send fake messages that appear to come from you.
The good news is that you can stop scammers in their tracks and prevent them from harming your brand. Learn how to use email authentication methods to safeguard your brand and keep spoofed emails out of the inbox.
What is email authentication?
Email authentication is about proving that a message is sent by a person who appears to be sending it. It uses email validation standards to check that the sender address isn’t forged and that the email contents have not been modified after sending it.
Jeff Bezos, for example, keeps a public email address at jeff@amazon.com for customer feedback! Thanks to authentication, you can be assured that it is Jeff and his team behind the email, and that messages received from his email are the real deal.
Importance of email authentication
Having a way of verifying email senders will stop spammers from impersonating your brand with fake emails. Better still, it helps to prevent phishing attacks that use spoofed emails to trick recipients into giving up confidential data like logins and passwords. 😭
1. Safeguards your brand
Adding an email authentication layer means that people can be confident about the brand they are interacting with. Also, it avoids negative publicity about losses suffered by victims of malware or phishing scams that were sent with emails using your brand.
2. Protects your reputation
Email authentication records tell email providers—like Gmail, Yahoo, Outlook and others—that you are a genuine sender. These records are also tied to your sending domain, giving your sending reputation a boost for ISPs that look closely at domain reputation.
3. Ensures email deliverability
Your ability to land in the inbox suffers when bad actors continue to send fraudulent emails using your brand. When enough people start to mark these emails as spam, your genuine emails will go straight into the spam folder—or not be delivered at all.
How email authentication works
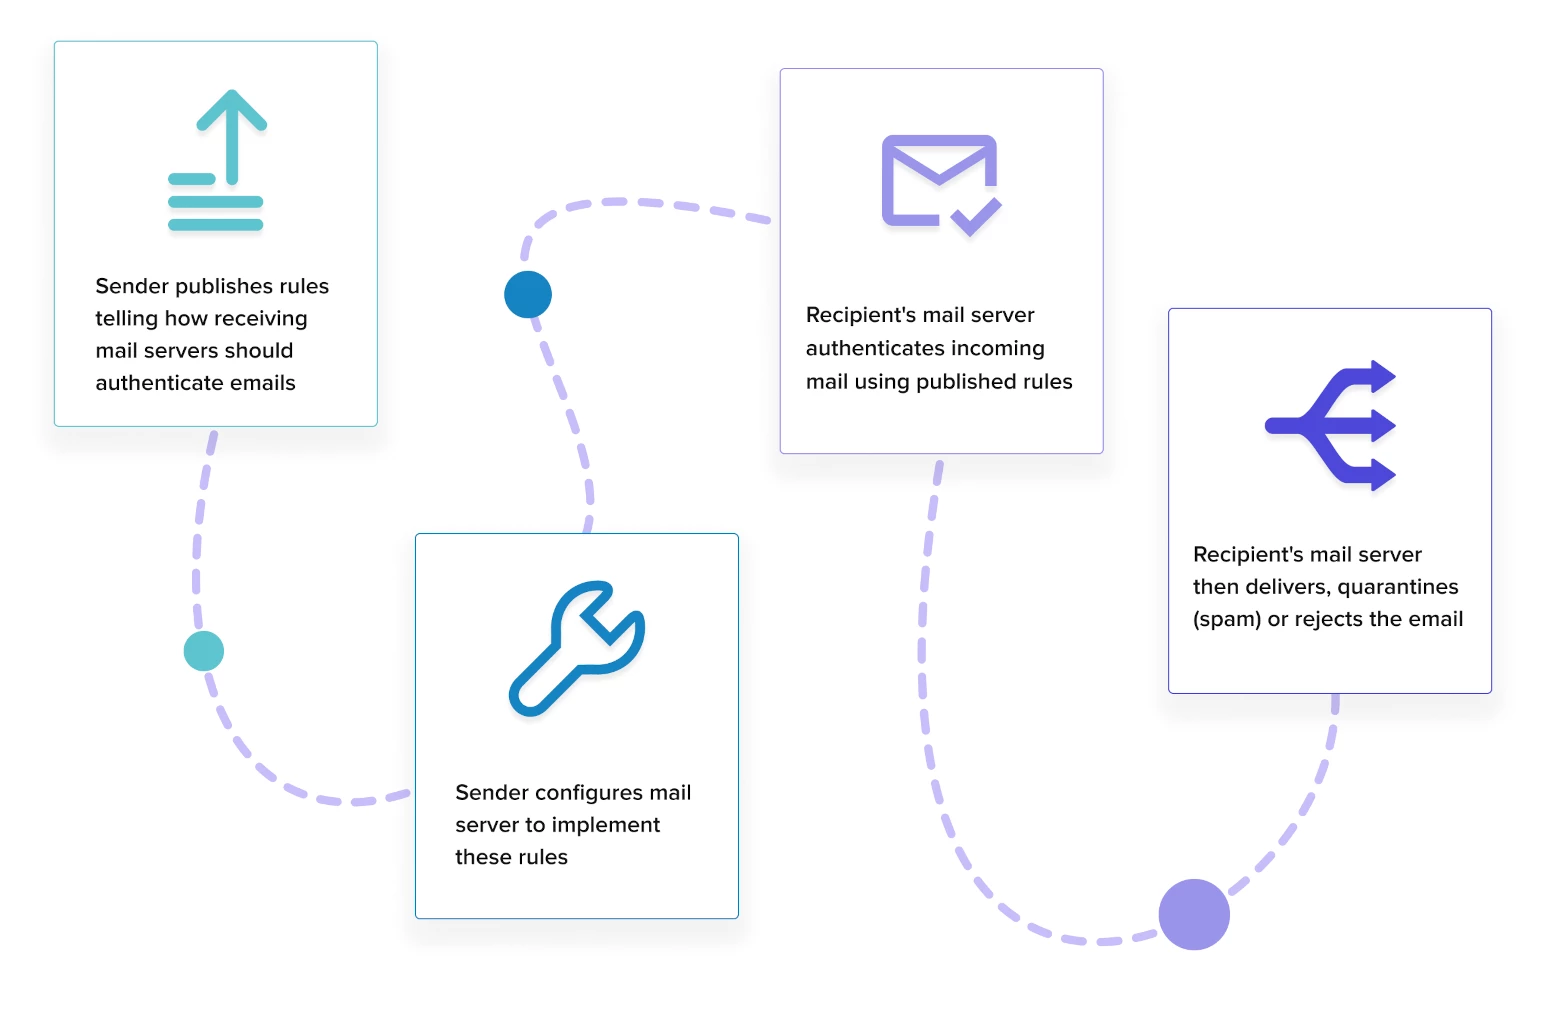
Today, three standards are used to filter spoofed email messages before they reach the inbox: SPF, DKIM and DMARC. How these acronyms work will be covered in more detail later, but they follow a general path to verify the identity of email senders:
You publish rules on how to authenticate emails sent from your domain.
Your mail servers are configured to implement and follow these rules.
The receiving mail server checks your mail against the rules that you published.
Your email is then delivered, quarantined in the spam folder, or rejected.
Types of email authentication methods
1. Sender Policy Framework (SPF)
SPF fixes a vulnerability in SMTP where messages can be sent claiming to be from any IP address. To prevent email spoofing, an SPF record is created in your DNS that lists all the mail servers authorized to send email for your domain.
When an email is received, the receiving mail server compares the sending domain with the servers listed in your SPF record. If there’s a match, the message is genuine. Here’s an example of a TXT record for SPF that is used by MailerSend:
v=spf1 include:_spf.mailersend.net ~allAnd here it is translated into human language:
“MailerSend, a third-party email service provider, is allowed to send transactional emails on my behalf. For other emails not sent from MailerSend, you can mark them as spam.”
2. DomainKeys Identified Mail (DKIM)
DKIM authentication was developed in response to person-in-the-middle (PITM) attacks where hackers change the contents of emails in transit. Public key cryptography is used to verify that the contents of your email have not been altered after sending it.
Email spoofing is prevented by adding a public key to your DNS. An encrypted signature is then added to your message headers using a private key known only to you. When an email is received, the header is decrypted and compared to validate the email.
Here’s an example of a TXT record for DKIM used by MailerSend:
v=DKIM1;t=s;p=MIGfMA0GCSqGSIb3DQEBAQUAA4GNADCBiQKBgQDZzA9t8fUpEuV+E2R/jxTncUJIzUH1W9mFKztbAIKhl8cG0FjXqhZq0JOA1ycxnbDTJXjJ6/zFGFPrSPK/k2oTdhGbnvD9EFhj8JZEPdIuZVG2SZHr1B/p2EDO6KCkA9ehayx222sDUGWZ+R+DL75XRL3/+Ew4SaYiSY9CeYnjGwIDAQABHuman translation: “Please decrypt all my email headers using this public key. By the way, subdomains are not allowed to send emails on my behalf, so you can reject them immediately.”
3. Domain Message Authentication Reporting and Conformance (DMARC)
DMARC is an authentication framework that unites SPF and DKIM together with a consistent set of security rules. Along with policies to manage emails that fail authentication, you can also get reports about authentication issues and email activity.
First, an identifier alignment test compares the email’s “From” header with the sending domain using SPF and DKIM methods. Depending on how closely they need to match—which you set with the security rules—the email passes or fails the check.
Next, DMARC policies tell the receiving mail server what to do with unauthenticated emails. They can be delivered (for testing purposes), quarantined by putting them in the spam folder, or rejected by sending a bounce message to the sender.
Here’s an example of a TXT record for DMARC:
v=DMARC1; p=none; rua=mailto:aggregate@justanothercompanyname.com; ruf=mailto:forensic@justanothercompanyname.com; fo=1; pct=100; rf=afrfAnd translated into human language:
“Don’t take any action on emails that have failed SPF or DKIM authentication. I want to collect data on them for analysis and troubleshooting. You can send reports on email activity and failed authentications to me at these email addresses.”
10 email authentication best practices
Use these best practices to safeguard your brand and give recipients the confidence to interact with your emails. Mix and match them to suit your needs: for example, you may not need DMARC now, but you’ll definitely need SPF and DKIM for a start.
1. Audit your mail servers
As your sending needs grow in complexity with your business, you might not know which machines are sending messages on your behalf! Get clarity by creating a spreadsheet of all your mail servers along with their IP addresses and domains. Some of these can include:
Web servers
Mail servers
Internal email servers
Email service providers, such as MailerLite and MailerSend
2. Secure your sending domains
Your domains are brand assets that are critical to your business. Secure your assets by enforcing SPF and DKIM for top-level domains (.com and .net names, for example), parked domains, and other sub-domains that are publicly visible.
If there are attempts to change your DNS records or transfer ownership of your domain, you will need to unlock it first with a one-time password sent by the domain provider.
3. Review your DNS records
For SPF records, check that you have no more than 10 DNS lookups. Exceed this number and you will fail email authentication. This limit was imposed to prevent denial-of-service (DoS) attacks and to conserve the resources of email servers.
Next, test your authentication records by publishing them in test mode. Both SPF and DKIM have testing tags that will help you identify missing mail servers in your audit. Once done, turn off test mode to start protecting yourself from spammers!
Finally, publish your SPF and DKIM records to your DNS so that mailbox providers can look them up. Remember, it can take up to 48 hours for DNS changes to be reflected globally. The sooner you publish them, the better it is for your email deliverability.
4. Implement DMARC gradually
When using DMARC for the first time, start it in “monitor” mode so that you can observe and tweak it as you go along. Once you’re satisfied that genuine emails are not getting filtered, you can move to “enforcement” mode to start rejecting and quarantining emails.
5. Secure your networks
Now that you have SPF, DKIM and DMARC implemented, make sure that they are enabled across all the networks used by your business. You will be protected from malicious emails and phishing attacks, thus preventing malware and information theft.
6. Analyze email authentication reports
Look for suspicious activity using two types of DMARC reports: an aggregate report (RUA) and a forensic report (RUF). RUA provides an overview of email traffic while RUF contains details about emails that failed authentication, including their content.
7. Encrypt traffic between your servers
Another vulnerability of SMTP is that emails are sent in plain text format while in transit between email clients. This means that determined hackers can snoop and monitor your messages while they make their way to the recipient!
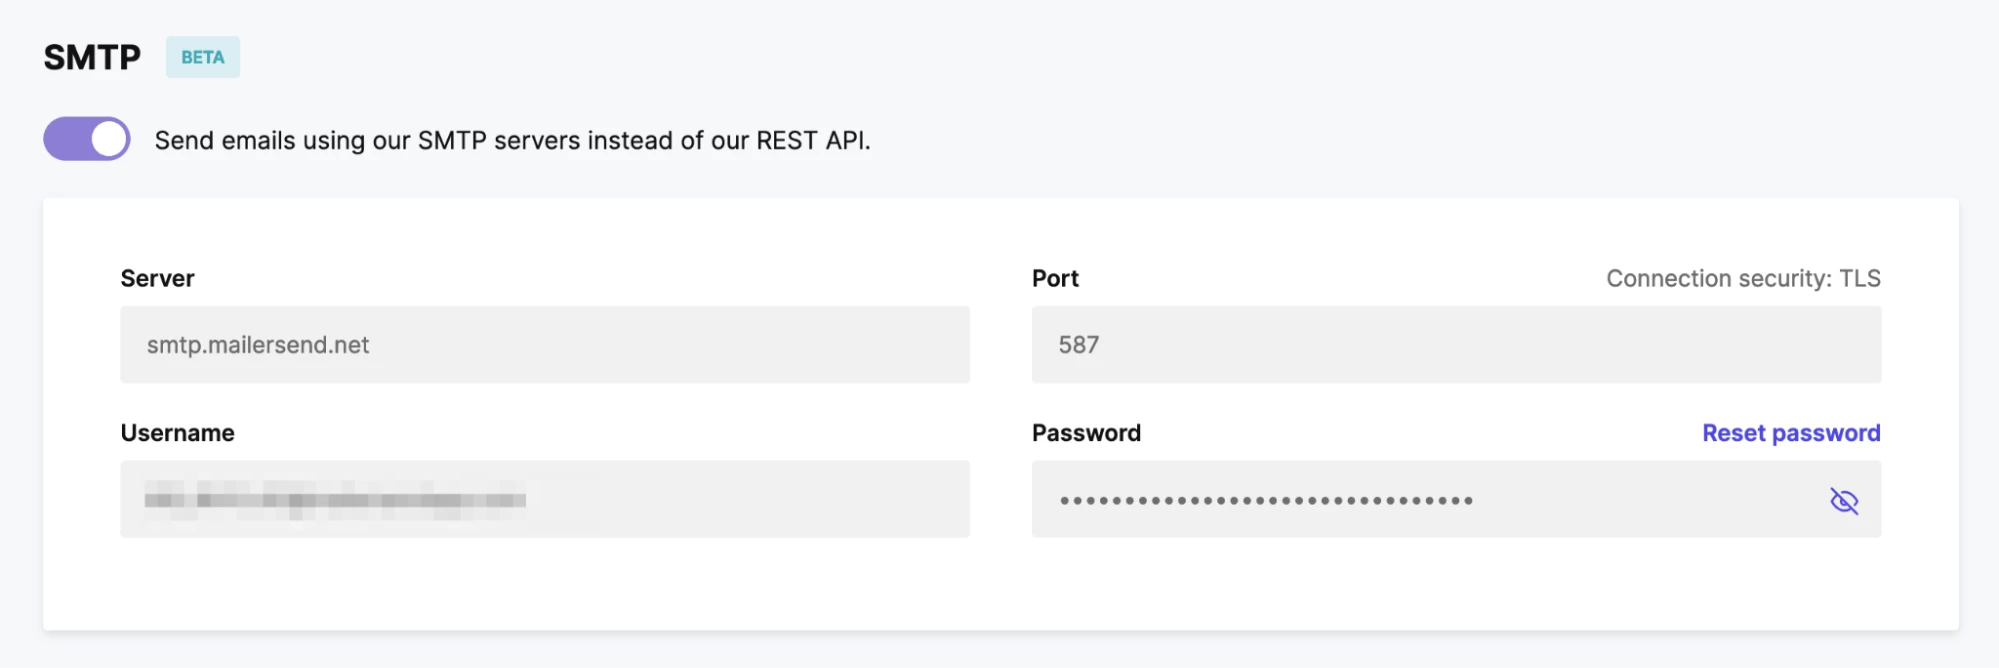
You can prevent email eavesdropping by turning on Transport Layer Security (TLS), a protocol that encrypts Internet traffic. The good news is that MailerSend enables TLS by default when you use SMTP for outgoing emails.
8. Secure your DNS
The Domain Name System (DNS) is the phonebook of the Internet. It matches human-readable domain names with IP addresses. Like SMTP, the creators of DNS did not prioritize security as the Internet was mainly used by institutions of higher learning.
DNS is still vulnerable to security attacks where hackers forge DNS records and redirect email traffic to a server they control. You can avoid this by implementing Domain Name System Security Extensions (DNSSEC) that help you protect your DNS infrastructure.
9. Monitor your IP addresses
An IP address is a numerical address that identifies a device on the Internet. For email, each mail server will have a unique address assigned to it. Use IP monitoring tools to keep track of the status and availability of your servers as well as suspicious activity.
10. Turn on 2FA for accounts
Human error is the weakest link in any security infrastructure. Turn on two-factor authentication (2FA) for every account, meaning hackers are unable to proceed without a code from an authenticator app or a one-time password sent to your phone.
How to authenticate your emails
Now it’s time to apply these best practices! To start sending mail from your own domain, you need to verify and authenticate it. Don’t worry, it’s easy and takes only a few minutes.
First, you need to have a MailerSend account as well as access to your domain’s DNS records at your domain or hosting provider.
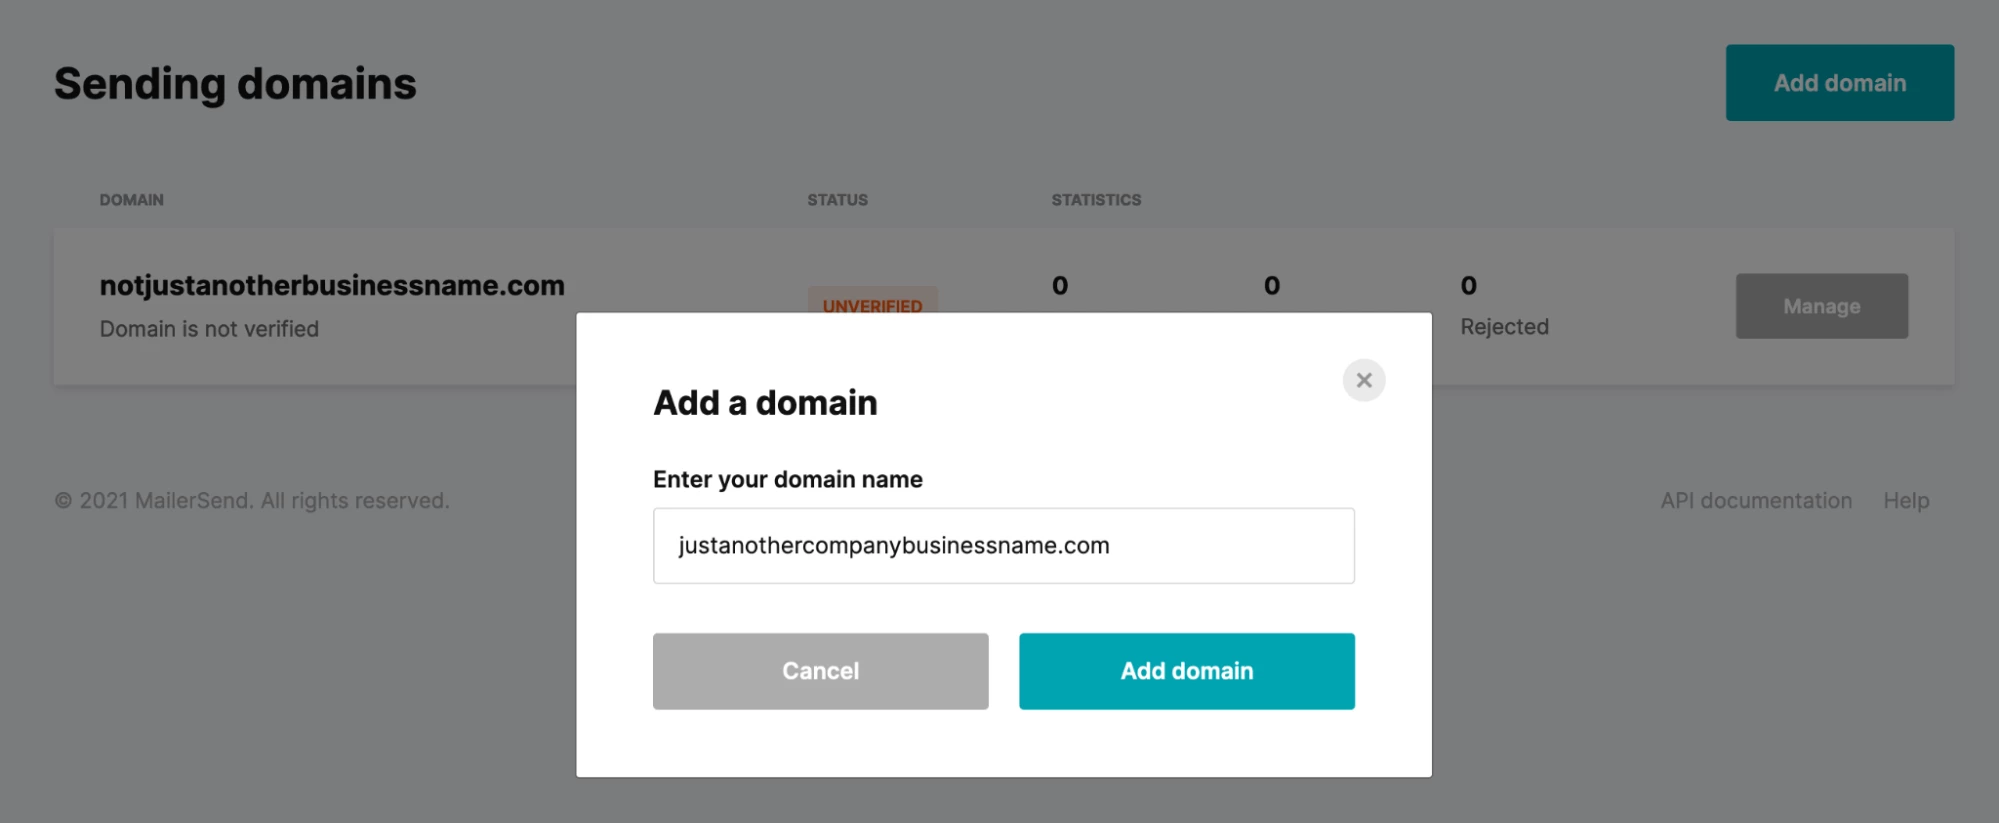
1. Navigate to Domains at the main dashboard.
2. If this is your first domain in MailerSend, enter your domain name and click Add domain and continue to step 3.

If you have existing sending domains, like in the example below, click on Add domain.
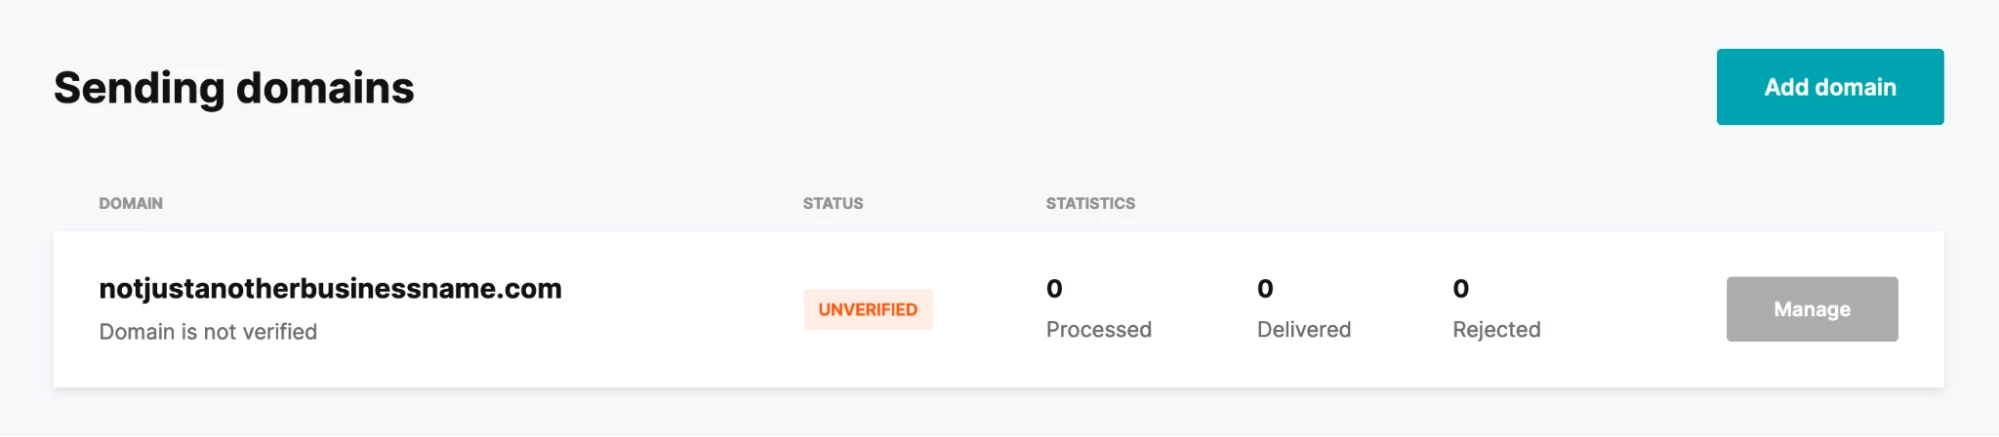
Then enter your new domain name and click Add domain again.
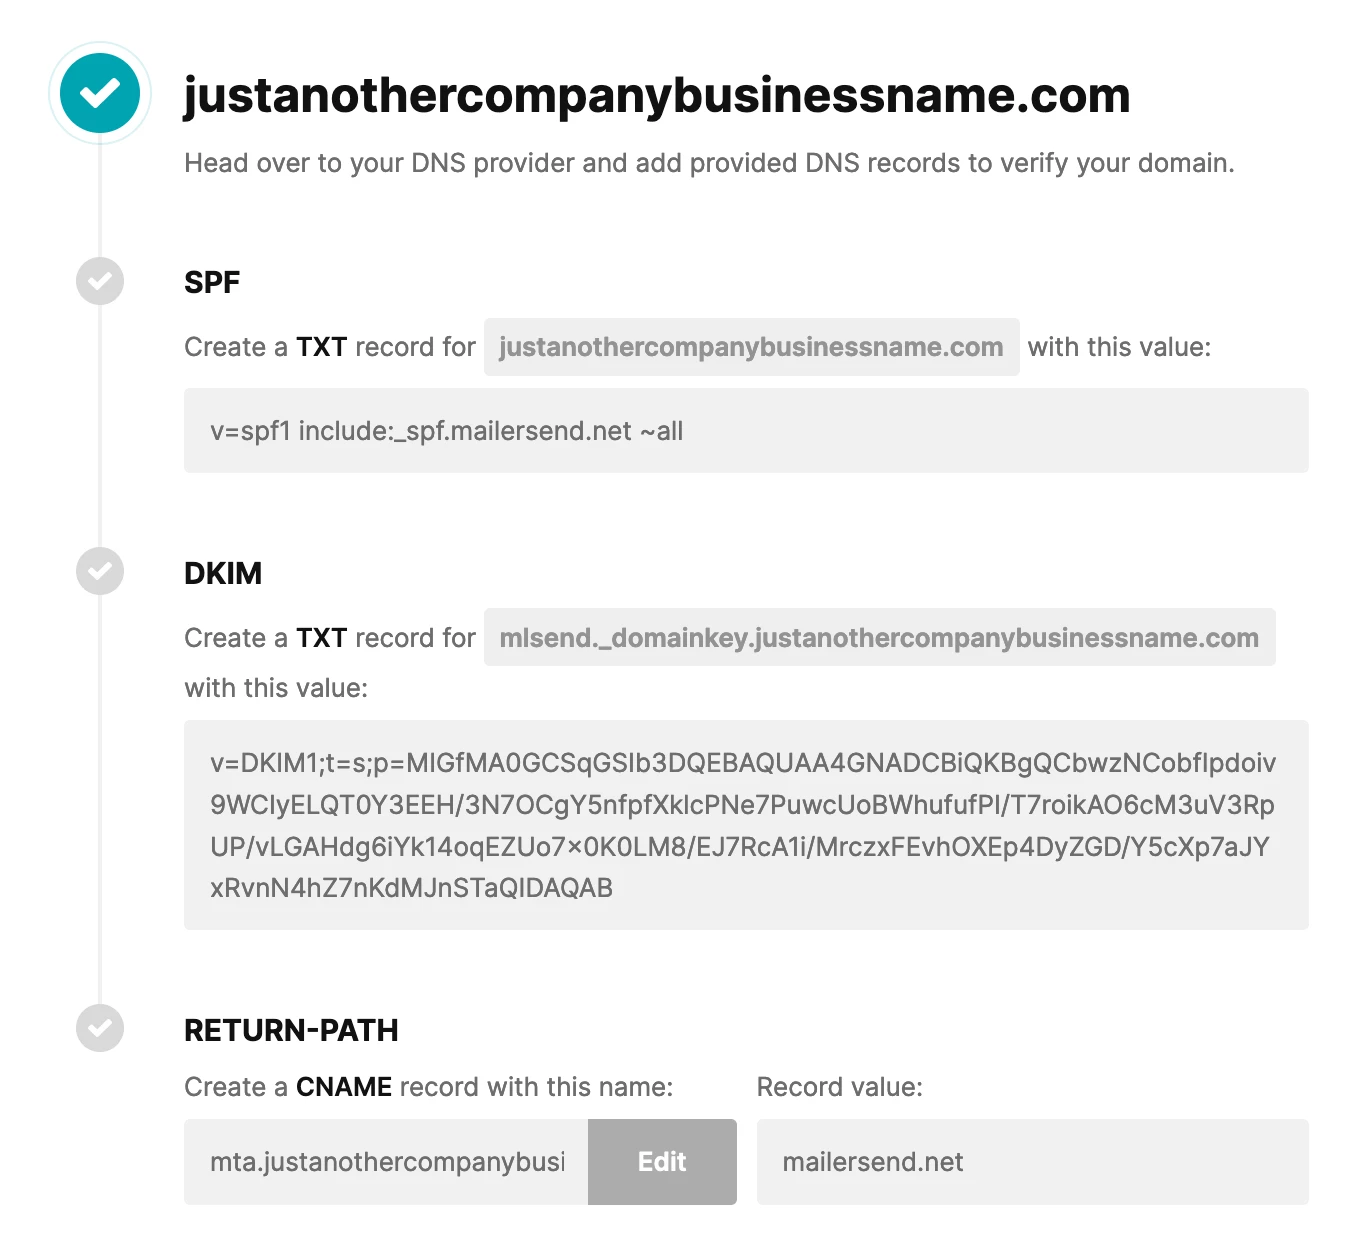
3. Next, you will see the three DNS records you should add to the domain’s DNS settings:
SPF: Verifies the sender from a list of IP addresses
DKIM: Uses cryptographic methods to validate an email
CNAME for Return-Path: Receives bounces and other email feedback
For convenience, you can click on each field value to automatically copy it.
5. Go to the domain’s DNS page at your provider’s site and add the TXT and CNAME records.
6. After adding the records, jump back to MailerSend to toggle the I have added DNS records option and click Verify domain.
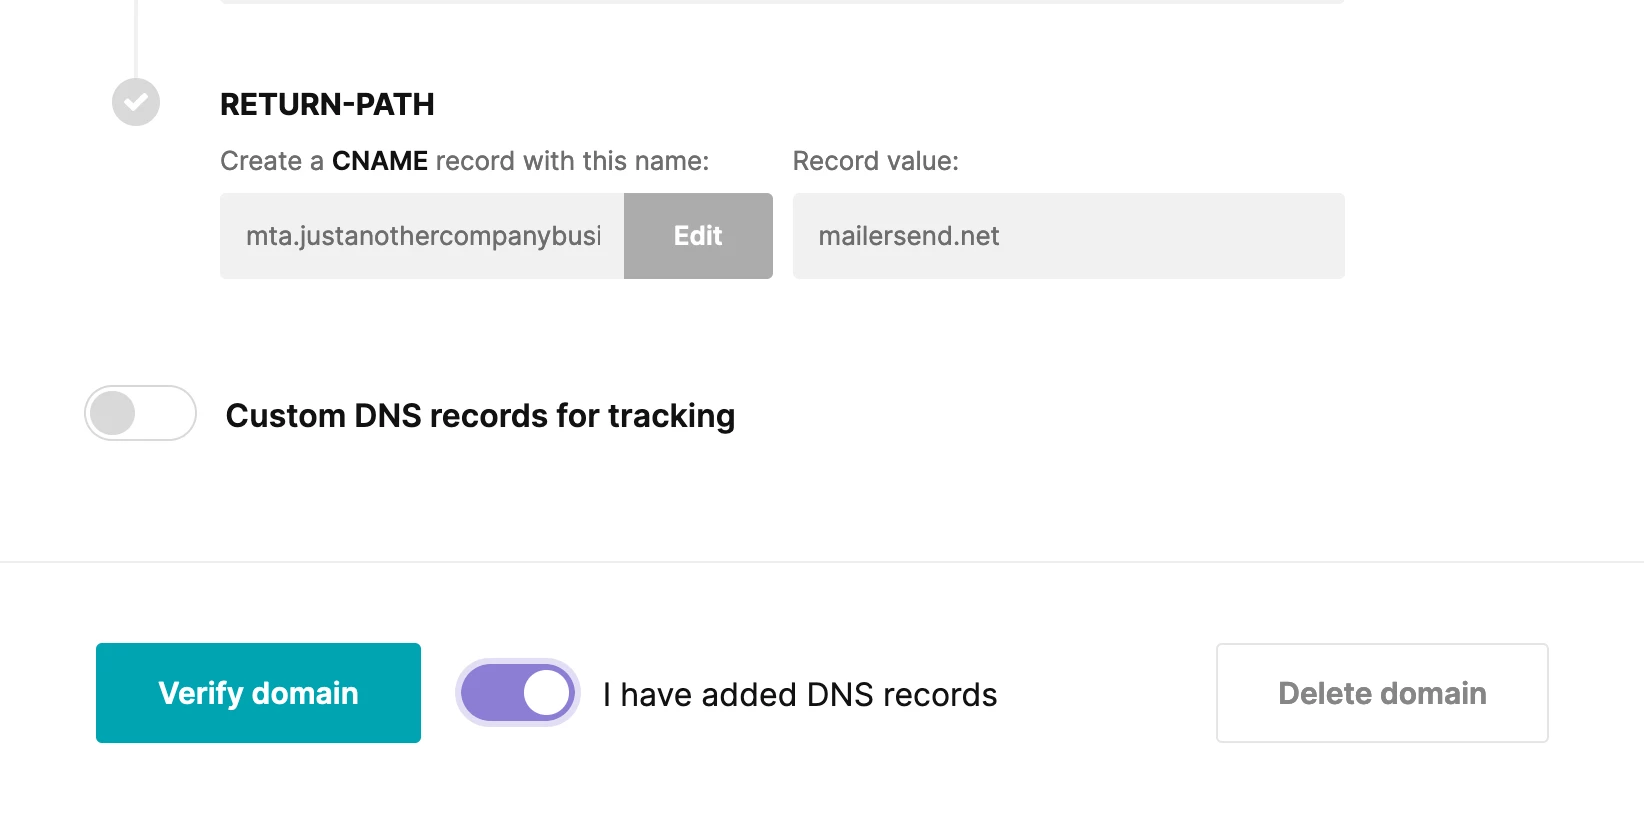
Once the records have been propagated throughout the global DNS servers, your domain will be verified and ready to use! 🎉
Congratulations on adding and verifying a new domain! 👏 The next step is to send emails using MailerSend. Check out our comprehensive how-to guide to start sending.
Start protecting your brand now!
Now that you have the basics of email authentication, start protecting your brand’s reputation from scammers and give customers the confidence of engaging with your emails. Choose a transactional email provider like MailerSend that has email authentication best practices built-in for peace of mind!
Do you use SPF, DKIM, DMARC, or a combination of these email authentication methods? Share in the comments below. 👇